
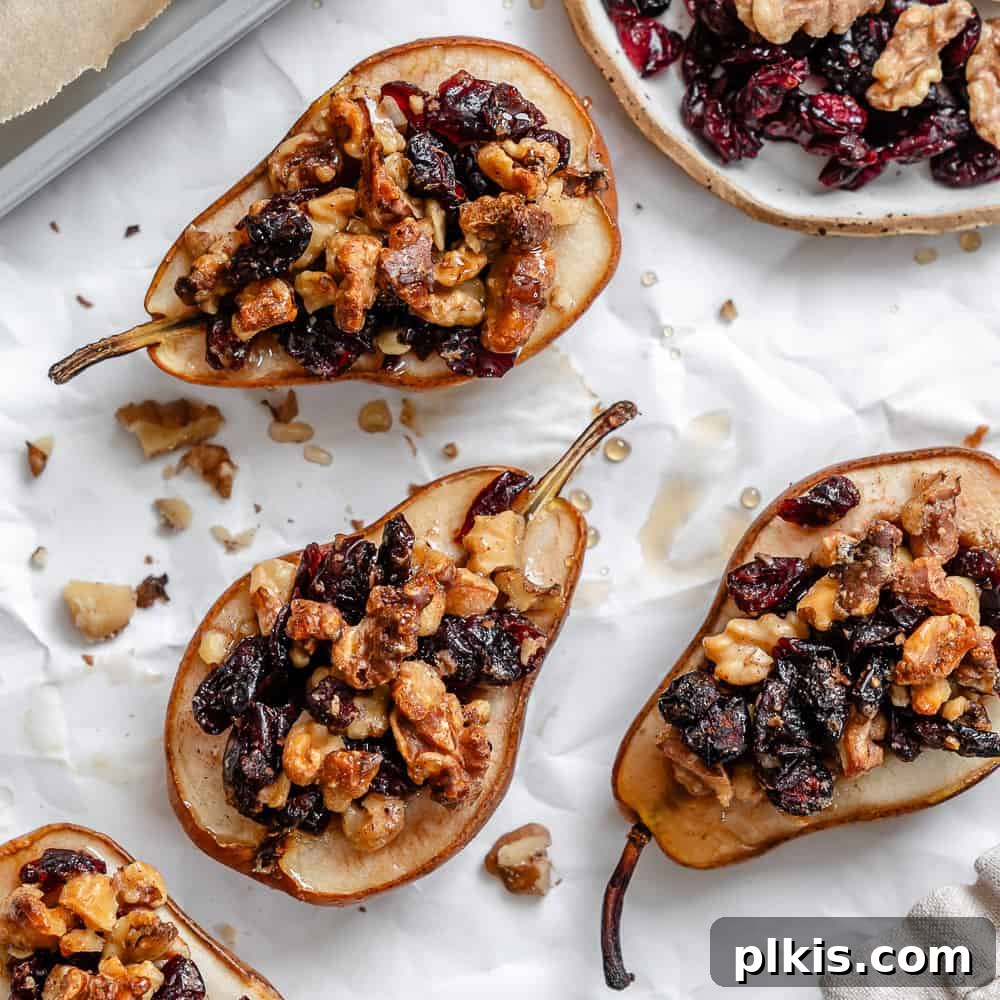
Indulge in these delightful 5-ingredient baked pears, beautifully stuffed with a harmonious blend of crunchy nuts, chewy dried fruit, and a luscious maple syrup glaze. This recipe offers an effortlessly elegant solution for a quick breakfast, a sophisticated brunch, or a memorable dessert. Best of all, it’s naturally gluten-free, dairy-free, and entirely vegan, catering to a wide range of dietary needs without compromising on flavor or appeal.
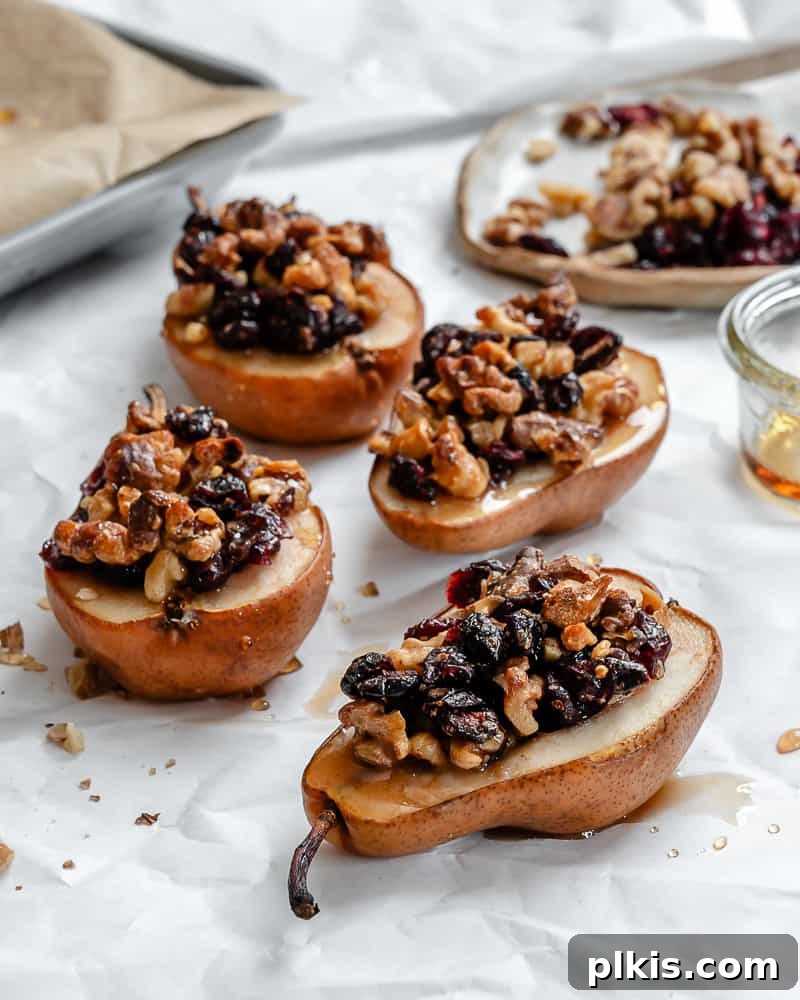
Quick & Easy Fruit and Nut Stuffed Baked Pears: Your Next Favorite Healthy Dessert
As autumn leaves begin to fall and the holiday season approaches, it’s the perfect time to embrace the comforting flavors of baked goods. While pumpkin and apple recipes often take center stage, we invite you to discover the understated charm of baked pears. This easy baked pears recipe offers a refreshing alternative to traditional fall desserts like pumpkin pie, apple crisps, or even baked apples. Once you try these tender, spiced, and fruit-filled pears, you’ll wonder why they haven’t been a staple in your kitchen all along.
At the heart of this recipe are fresh, ripe pears, transformed through a simple baking process. Each pear is carefully cored and generously filled with a delightful mixture of textured nuts, sweet dried fruits, and a hint of natural sweetener. As they bake, the pears soften beautifully, developing an almost ‘buttery’, melt-in-your-mouth texture. The natural sugars within the fruit caramelize, intensifying their sweetness and creating a warm, inviting aroma that fills your home. The stuffing provides a wonderful contrast with its satisfying crunch and chew, making every bite a complex sensory experience.
Much like beloved fruit crisps, crumbles, and cobblers, these baked stuffed pears are incredibly sweet, cozy, and utterly delicious. Despite their impressive appearance, they are remarkably simple to prepare, requiring minimal effort for maximum impact. They are a fantastic way to elevate any meal, adding a touch of rustic elegance to your breakfast spread, a sophisticated finish to your dinner, or a healthy snack. Enjoy them warm straight from the oven, or chilled as a refreshing treat, either on their own or with a delightful array of toppings.
Table of Contents
- Quick & Easy Fruit and Nut Stuffed Baked Pears
- Selecting the Perfect Ingredients for Baked Pears
- Creative Additions to Your Stuffed Pears
- Step-by-Step Guide: How to Make Baked Pears
- Frequently Asked Questions About Baked Pears
- Expert Tips for Flawless Baked Pears
- Irresistible Serving Suggestions
- Storage and Reheating Tips
- More Delicious Vegan Pear Recipes
- Easy Baked Pears [Stuffed with Nuts and Fruit] Recipe
Selecting the Perfect Ingredients for Baked Pears
Crafting this simple yet elegant baked pear recipe requires just five fundamental and budget-friendly pantry staples. The beauty of this dessert lies in its simplicity, allowing the natural flavors of the fruit and fillings to truly shine.
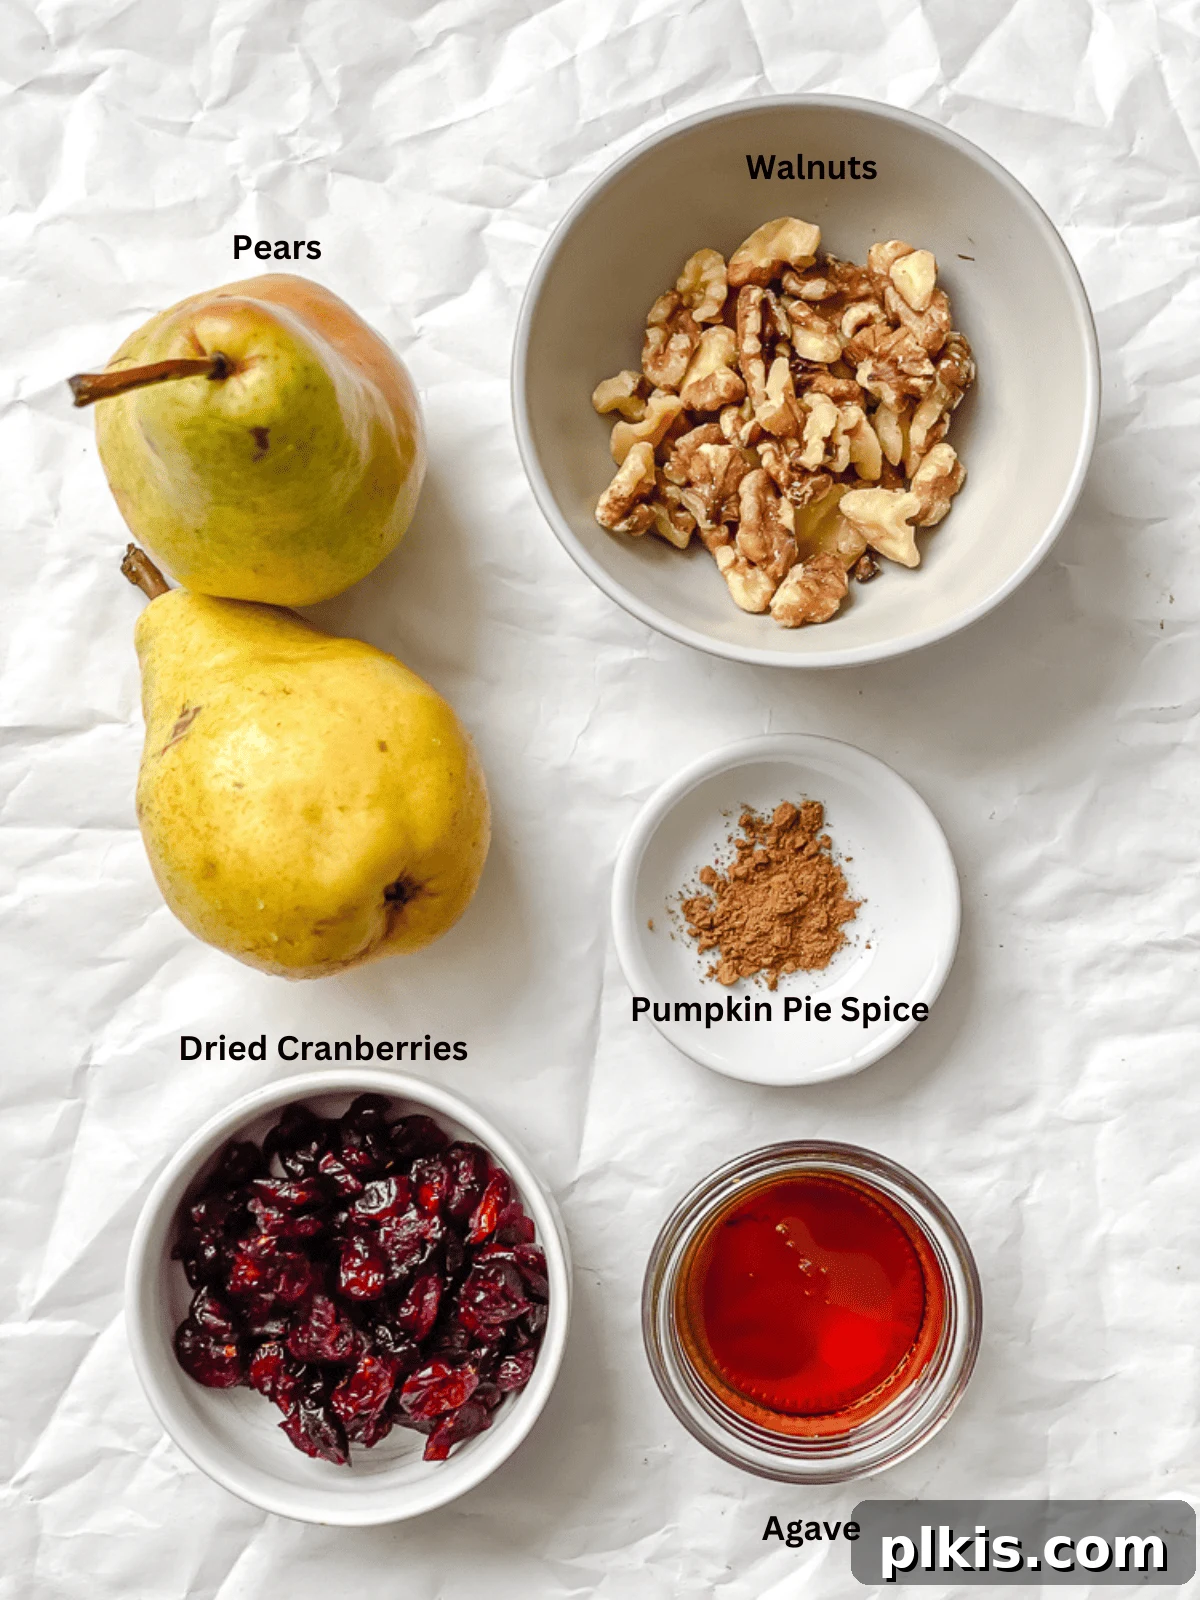
- Pears: The foundation of our dessert! For optimal results, we highly recommend Bosc or Anjou pears. Look for pears that are firm to the touch but yield slightly when gently squeezed, indicating ripeness. Avoid overly ripe pears, as they tend to become mushy during baking. Their firm texture helps them hold their shape beautifully while baking, resulting in a tender yet intact final product. Other suitable varieties include Concorde and Bartlett (if firm), but avoid softer varieties like Comice.
- Dried Fruit: Adds a delightful chewiness and concentrated sweetness to the stuffing. You can use classic raisins, tangy dried cranberries, or a delightful combination of both. For an adventurous twist, consider finely chopped dried apricots, sweet currants, tart dried cherries, or even a few diced dates. Choose unsweetened varieties when possible to control the overall sweetness of the dish.
- Nuts: Provides a crucial crunchy texture and nutty flavor that complements the soft pears. Raw or lightly toasted walnuts and pecans are our top choices, offering rich, earthy notes. For an alternative, slivered or finely chopped almonds would also work wonderfully. Lightly toasting the nuts beforehand can enhance their flavor and aroma significantly.
- Spices: A warm spice blend elevates the entire dish. To keep things simple and seasonal, we used pumpkin pie spice, which typically includes cinnamon, nutmeg, ginger, and cloves. Alternatively, you can create delicious cinnamon-baked pears by using ground cinnamon, with an optional pinch of nutmeg and/or ground ginger for added depth. These spices infuse the pears with a comforting, aromatic warmth.
- Sweetener: To enhance the pears’ natural sweetness and bind the filling, we prefer unrefined maple syrup or agave nectar, or a blend of both. These liquid sweeteners offer a subtle caramel note and a glossy finish. If you prefer a granulated sweetener, coconut sugar or brown sugar can be used, providing a deeper, molasses-like flavor. A sugar-free brown sugar alternative also works well for those managing sugar intake.
Creative Additions to Your Stuffed Pears: Elevating Flavor and Texture
This baked pear recipe serves as a versatile culinary canvas, allowing for countless variations in flavor, color, and texture. Feel free to experiment with these exciting additions to personalize your fruit and nut stuffed pears:
- Vegan Butter: For an even more luxurious and ‘buttery’ pear, brush the cored halves with a little melted dairy-free butter before adding the filling and baking. This helps create a slightly juicier interior and a richer overall flavor.
- A Pinch of Salt: A tiny dash of sea salt stirred into the filling can work wonders. It subtly balances the sweetness of the fruit and syrup, enhancing all the other flavors without making the dish taste salty.
- Vanilla Extract: Natural vanilla extract adds a beautiful, aromatic depth to the filling. Just a splash can transform the flavor profile, making the dessert feel more decadent and complex.
- Orange Zest: For a bright, refreshing, and zesty note, grate a little fresh orange zest into your nut and fruit mixture. This citrusy aroma pairs wonderfully with pears and warm spices.
- Rolled Oats: Incorporating a tablespoon or two of rolled oats into the stuffing creates a heartier recipe for cooked pears, offering more substance and a delightful textural contrast. This is especially great if serving for breakfast or a more filling snack.
- Candied Ginger: A teaspoon of finely diced candied or crystallized ginger will add a vibrant, zingy depth and a touch of warm spice. This is an excellent addition, particularly if you’re preparing these Christmas pears for the festive season.
- Culinary Lavender: For a truly unique and sophisticated flavor, add a minuscule amount of culinary lavender (ensure it’s food-grade). It imparts a delicate floral and aromatic essence to the baked pear dessert, making it feel incredibly gourmet.
Step-by-Step Guide: How to Make Baked Pears
Creating these elegant baked pears is a straightforward process. Follow these simple steps for a perfect outcome every time:
- First, begin by preheating your oven to 350°F (180°C). While the oven heats up, prepare a baking sheet by lining it with parchment paper or a silicone mat. This crucial step prevents sticking and makes cleanup a breeze.
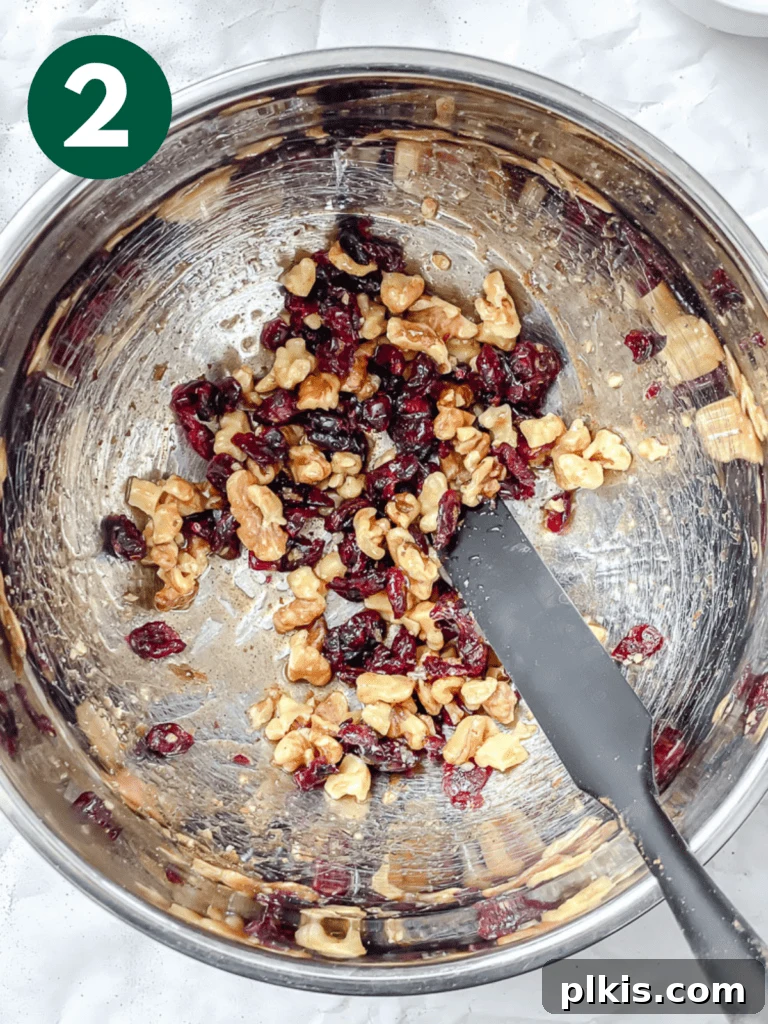
- Next, prepare the flavorful stuffing for your pears. In a medium-sized bowl, combine your chosen nuts, dried fruit, spices, and sweetener. Stir everything thoroughly until all the ingredients are well-coated and evenly distributed. This ensures every bite of your baked pear is bursting with flavor and texture.
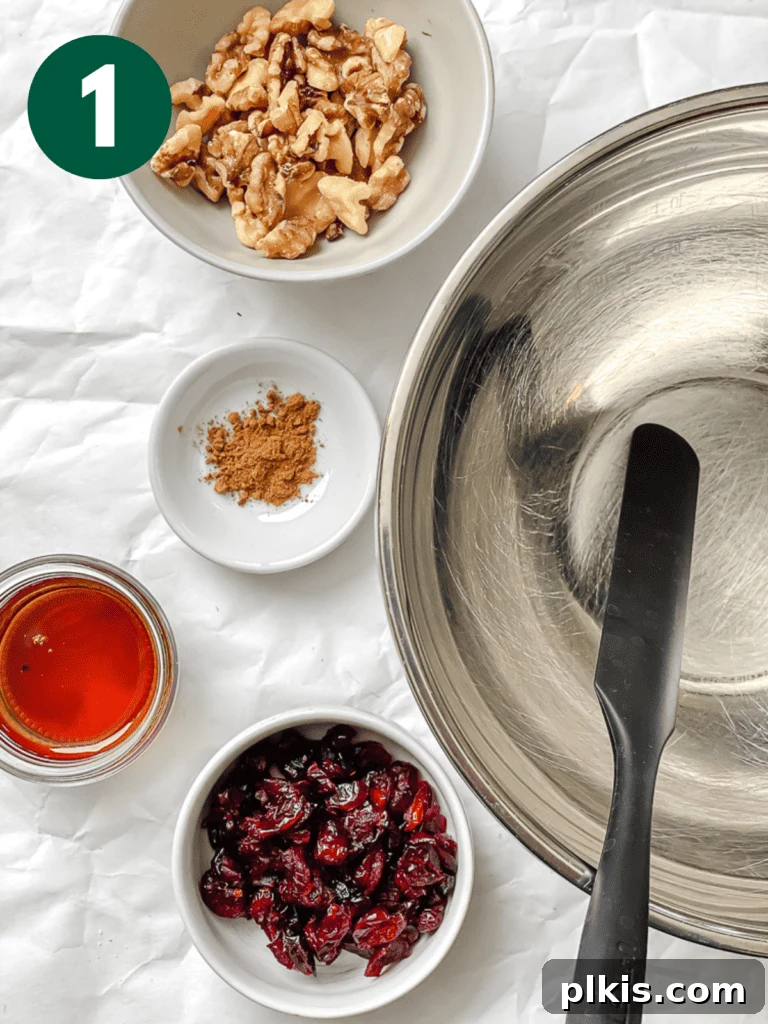
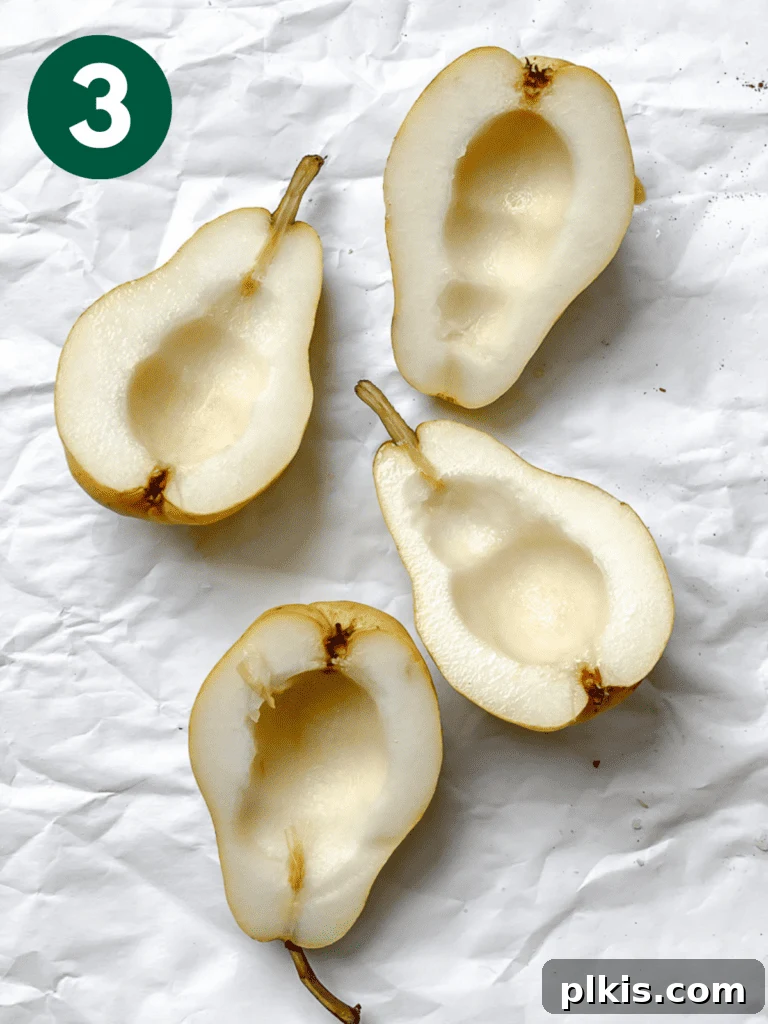
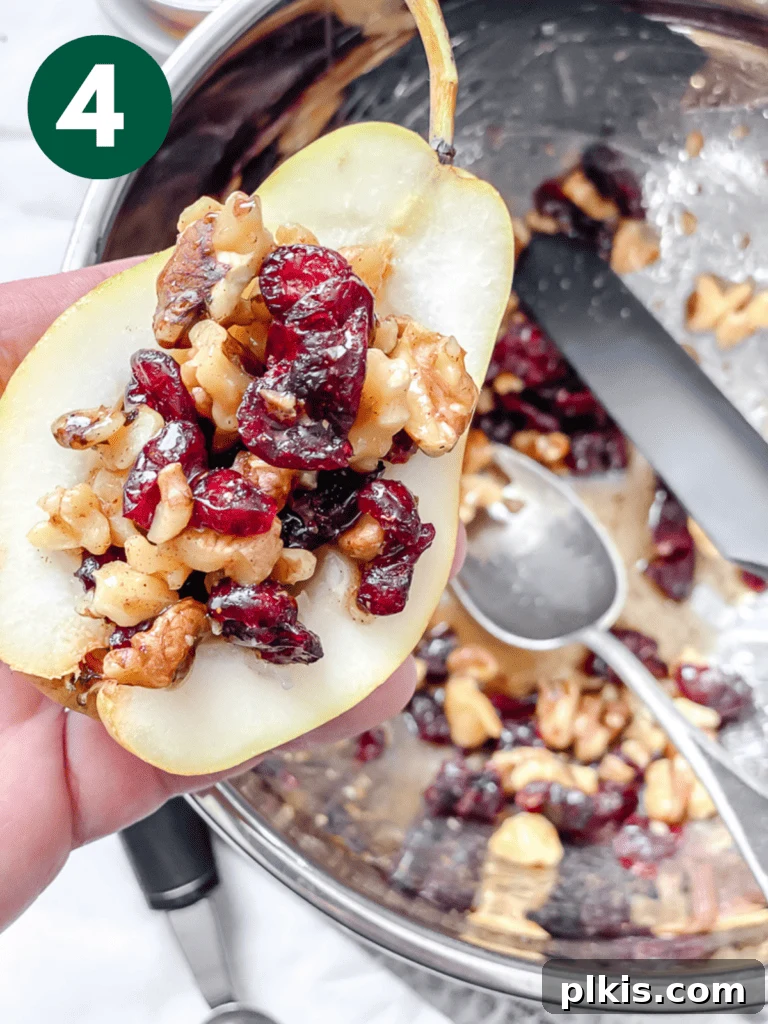
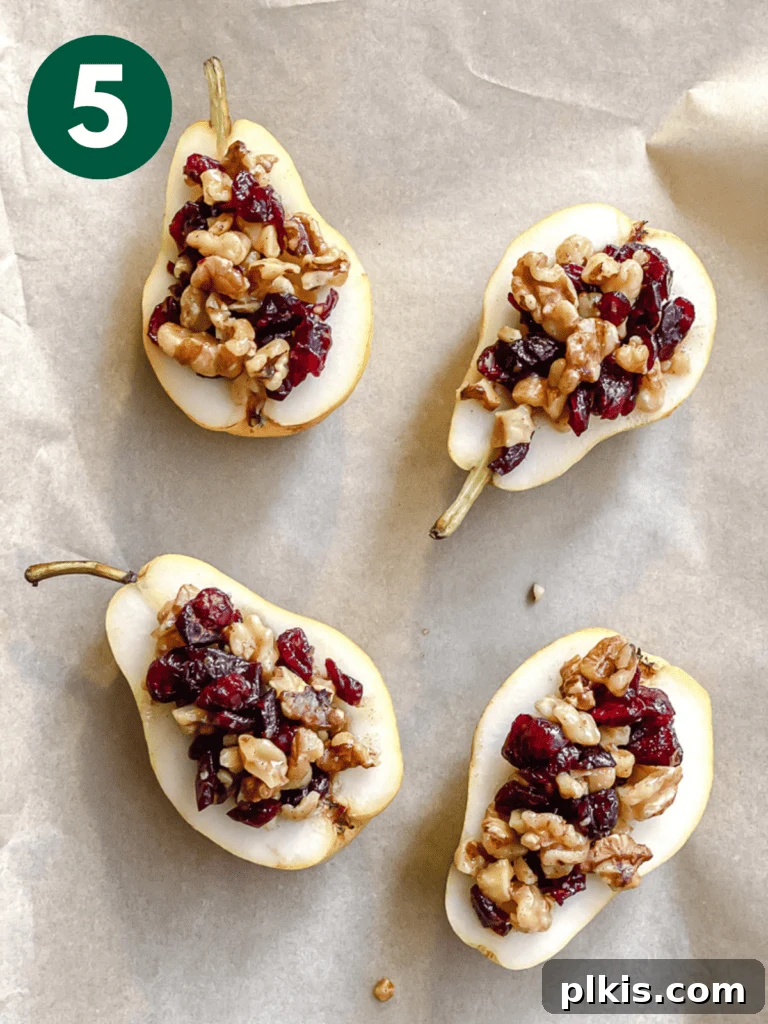
- Now, it’s time to prepare the pears themselves. Carefully slice each pear in half lengthwise, from stem to base. Using a melon baller or a small spoon, gently scoop out the fibrous core and seeds, creating a hollow cavity in each pear half. Be careful not to scoop out too much flesh. Then, generously divide the fruit-nut mixture among the hollowed pear halves, mounding it slightly if desired. For an extra touch, you can optionally sprinkle a little more sweetener or a dash of spice over the top of the filling.
- Carefully transfer the stuffed pears to the prepared baking sheet, ensuring they are spaced at least 2 inches apart to allow for even baking and browning. Bake for approximately 25-30 minutes, or until the pears are fork-tender and the filling is lightly caramelized. The exact baking time may vary depending on the size and ripeness of your pears.
- Finally, once baked to perfection, remove the cooked pears from the oven and allow them to cool for a few minutes on the baking sheet. This brief cooling period not only makes them easier to handle but also allows the wonderful flavors of the fruit and stuffing to meld together even more beautifully. Then, serve warm and enjoy!
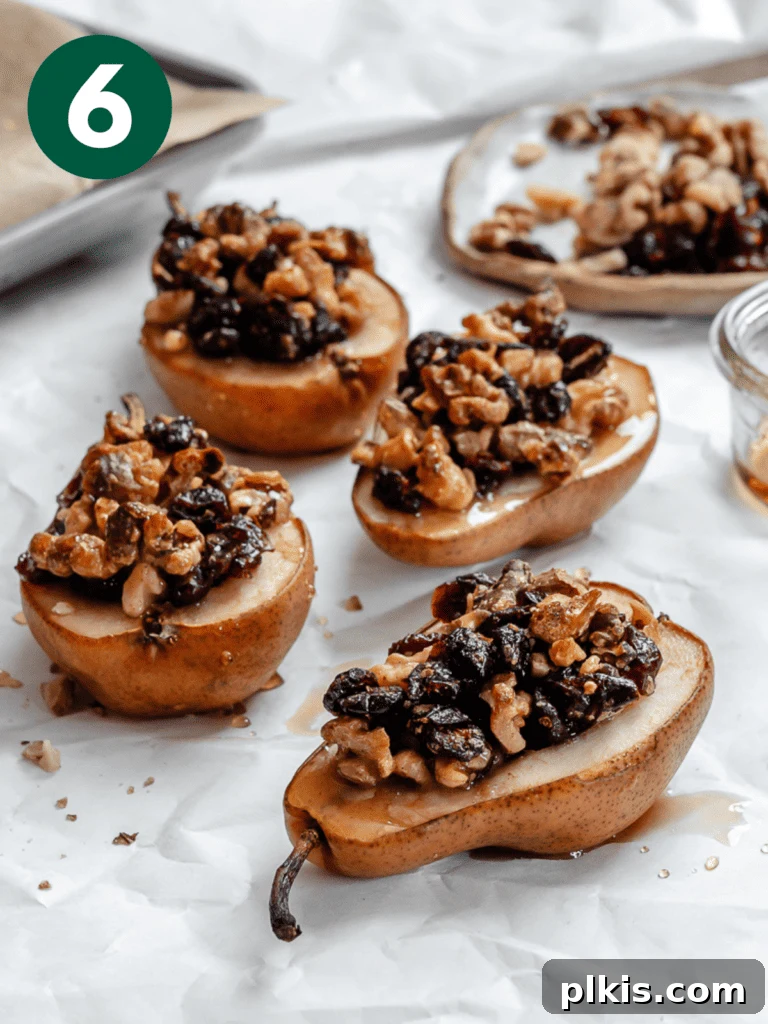
Air Fryer Baked Pears: A Speedy Alternative
For a quicker preparation, you can also make these delectable baked pears in an air fryer. Follow steps 1-3 as outlined above, then transfer the stuffed pear halves to your air fryer basket, ensuring there’s ample space between each one for even air circulation. Air fry for just 12-15 minutes at 350°F (180°C), or until the pears are tender and slightly golden. This method delivers beautifully cooked pears with a slightly crispier exterior in less time!
Frequently Asked Questions About Baked Pears
Absolutely! To prepare these delicious baked pears in advance, simply brush the hollowed pear halves with a little lemon juice. This simple trick helps to prevent browning and keeps them looking fresh. Once brushed, you can stuff them with the nut and fruit mixture and keep them covered tightly with plastic wrap in the refrigerator for up to 12 hours. When you’re ready to bake, allow them to come back to room temperature for about 15 minutes before placing them in the oven. This ensures even baking and a perfect texture.
Pears can sometimes be a bit wobbly due to their natural shape. If you find any pears tipping over on the baking sheet, you have a couple of easy solutions. First, you can use a small paring knife to carefully slice a very thin sliver from the rounded bottom of each pear half. This creates a flatter, more stable base. Alternatively, you can loosely scrunch up small pieces of aluminum foil and place them around the pears to wedge them upright, providing support as they bake.
Several pear varieties are particularly well-suited for baking, as they maintain their structure and develop a lovely tender texture without turning to mush. Our top recommendations for this baked pear recipe include:
1. Bosc pears or Concorde pears: These varieties are known for their dense, firm flesh, which holds up exceptionally well to coring and baking. They offer a slightly gritty texture that becomes wonderfully smooth and tender when cooked.
2. Anjou/D’anjou pears: Moist, tender, and fairly juicy, Anjou pears are a fantastic choice as they maintain their elegant shape throughout the baking process, offering a delicate sweetness.
3. Bartlett pears: While softer than Bosc or Anjou, Bartlett pears will also work beautifully if they are firm when you start. They become incredibly fragrant and tender when baked. We do not recommend Comice pears for baking, as their very soft flesh makes them more prone to falling apart and becoming overly mushy.
No, it is generally recommended to leave the skin on the pears when baking them for this recipe. The pear skin actually plays a crucial role in maintaining the fruit’s shape and integrity as it softens in the oven. It creates a natural structural support that helps prevent the pear halves from collapsing. Plus, the skin adds a lovely rustic appearance and a touch of extra fiber!
Absolutely! Pears are a wonderfully tasty, naturally sweet, and relatively low-calorie fruit. They are packed with essential nutrients, including significant amounts of dietary fiber, which promotes digestive health and keeps you feeling full and satisfied. Pears are also a good source of antioxidants, which play a vital role in reducing the risk of chronic diseases such as certain cancers, diabetes, heart disease, and cognitive decline. Choosing natural sweeteners like maple syrup and incorporating healthy fats from nuts further enhances the nutritional profile of this wholesome dessert, making it a guilt-free indulgence.
Expert Tips for Flawless Baked Pears
Achieving perfectly tender and flavorful baked pears is easy with these insider tips:
- Don’t Over-Core the Pears: When scooping out the core, be mindful not to remove too much of the pear’s flesh. Over-coring can weaken the pear’s structure, making it more likely to collapse or become overly soft during the baking process. Aim to remove just the seeds and the fibrous core.
- Tweak the Flavors to Your Liking: This baked pear recipe is incredibly adaptable. Don’t hesitate to adjust the quantity of sweetener or spices according to your personal preference. You can easily swap out different elements in the fruit and nut filling, or add any of the extra flavors suggested earlier, to create a unique dessert every time.
- Always Line the Baking Pan: This simple step is a game-changer for cleanup. Using parchment paper or a silicone mat will prevent any sticky caramelization from adhering to your baking sheet, making the post-dessert tidy-up a breeze.
- Baking Time May Vary: Keep in mind that the ideal baking time can fluctuate based on several factors, including the size and ripeness of your pears, as well as the calibration of your oven. Smaller, riper pears will cook faster, while really large pears might require 35-40 minutes. The key is to bake them until they are tender when pierced with a fork, yet still retain their beautiful shape.
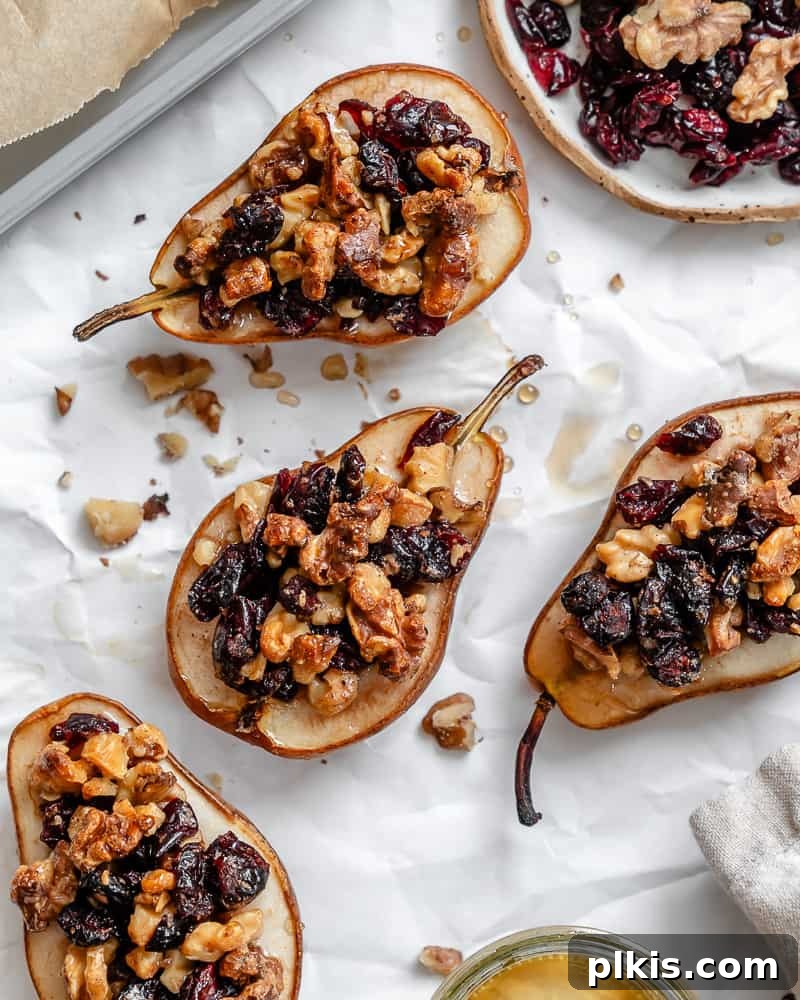
Irresistible Serving Suggestions
Enjoy these roasted pears simply on their own, or elevate them with these delectable toppings and garnishes for an added touch of elegance and extra deliciousness at breakfast, brunch, or dessert time.
- Fresh Herbs: A sprig of fresh mint or basil can add a surprising burst of freshness and a beautiful pop of color, perfectly contrasting the sweetness of the pears.
- Vegan Cheese: For a sophisticated sweet and savory contrast, consider crumbling a little vegan feta or blue cheese alternative over your warm baked pears. The salty notes will beautifully cut through the sweetness.
- Vegan Caramel Sauce or Nut Butter: Drizzle with a rich homemade vegan caramel sauce for ultimate indulgence, or opt for a dollop of creamy almond or cashew butter for added protein and healthy fats.
- Plant-Based Yogurt: A dollop of thick, creamy Greek-style plant-based yogurt (such as coconut or almond-based) adds a lovely tang and a refreshing coolness that balances the warmth of the pears.
- Coconut Whipped Cream: Light, airy, and delicately sweet, a cloud of coconut whipped cream is a classic pairing that elevates the dessert to pure bliss.
- Powdered Sugar: A light dusting of powdered sugar (confectioners’ sugar) provides a beautiful, snowy finish and a touch of extra sweetness, making your pears look even more appetizing.
- A Scoop of Vegan Vanilla Ice Cream: The classic pairing of warm fruit and cold ice cream is always a winner. A scoop of creamy vegan vanilla ice cream melting over the hot pears is pure heaven.
For an even more decadent treat, especially during the festive season, serve these Christmas pears alongside a rich, fudgy vegan brownie. The combination of warm fruit, spiced filling, and gooey chocolate is truly irresistible.
Storage and Reheating Tips for Baked Pears
These baked pears are wonderful fresh, but they also store and reheat beautifully, making them ideal for meal prep or enjoying leftovers.
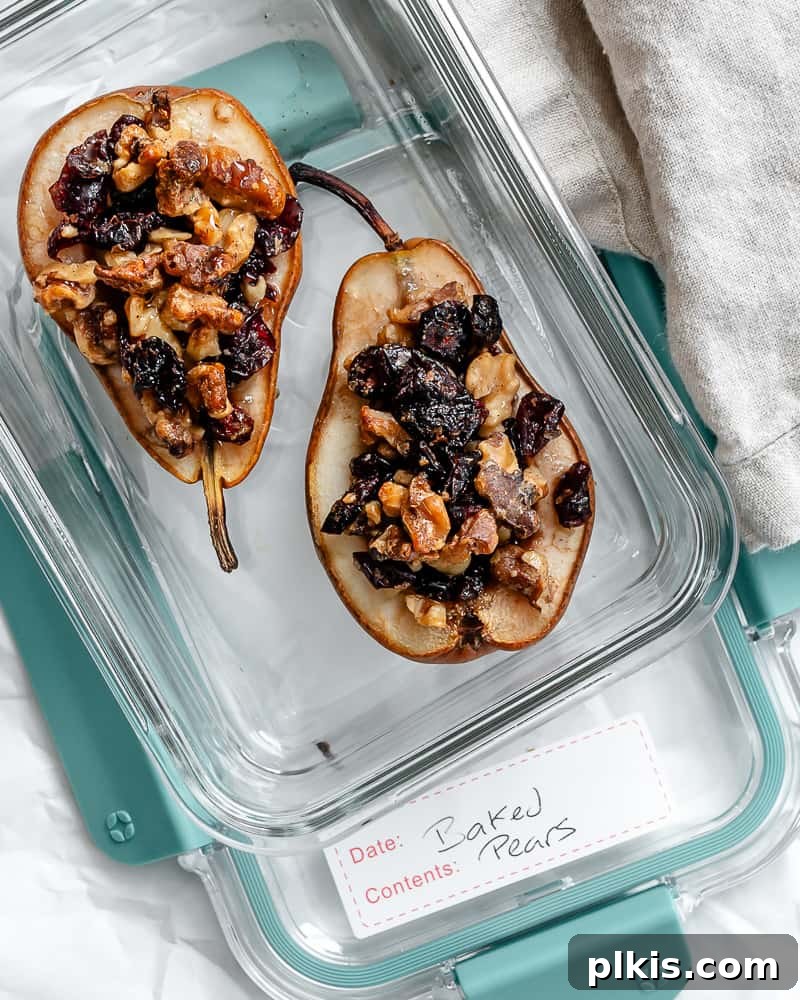
Allow the cooked pears to cool completely before storing any leftovers. Transfer them to an airtight container or a dish covered tightly with plastic wrap. They will keep fresh in the refrigerator for 4-5 days. Their flavors often deepen and meld further after a day or two, making them an excellent make-ahead option.
For longer storage, these baked pears freeze exceptionally well for up to 3-4 months. To freeze, first place the cooled pears on a tray or plate in a single layer and flash freeze them until solid. Once frozen, transfer them to a freezer-safe Ziploc bag or a reusable Stasher bag, ensuring as much air as possible is removed to prevent freezer burn. This method keeps them from sticking together.
To enjoy frozen pears, thaw them overnight in the refrigerator. You can then reheat them in various ways: warm them in the oven at 350°F (180°C) for 10-15 minutes until heated through, use an air fryer for 3-5 minutes for a quicker reheat, or gently warm them in the microwave in 20-second increments until desired temperature is reached.
More Delicious Vegan Pear Recipes
If you’ve fallen in love with the versatility of pears, explore more plant-based pear-centric delights from our collection:
- Easy Vegan Pear Cake
- Vegan Pear Crisp
- Harvest Apple Pear Pie
- Apple Pecan Salad (easily adapt by using fresh pear instead of apple!)
Photos by Alfonso Revilla
Easy Baked Pears [Stuffed with Nuts and Fruit]
Prep Time:
Cook Time:
Total Time:
Servings: 4 servings
These 5-ingredient baked pears, filled with nuts, dried fruit, and maple syrup, are incredibly simple to prepare yet present as an elegant breakfast or dessert! This recipe is naturally gluten-free, dairy-free, and vegan.
Video
Equipment
- Measuring Cups
- Measuring spoons
- My favorite knives
- Baking sheet
- Large bowl
Ingredients
- 2 ripe pears, halved
- ¼ cup of chopped walnuts or pecans (or a combo of both)
- 3 tablespoons of raisins or dried cranberries (or a combo of both)
- ½ teaspoon of pumpkin pie spice, more for garnish
- 3 tablespoons of agave or maple syrup (or a combo of both), more for drizzling
Instructions
- Preheat the oven to 350 degrees F (180°C) and line a baking sheet with parchment paper or a silicone mat.
- In a bowl, thoroughly mix together the nuts, dried fruit, pumpkin pie spice, and agave or maple syrup until well-combined.
- Carefully slice the pears in half lengthwise. Using a melon baller or a small spoon, scoop out the core and seeds from each pear half, creating a cavity.
- Generously fill each hollowed pear half with the fruit-nut mixture. If desired, drizzle with a little extra sweetener or sprinkle with more pumpkin pie spice for added flavor.
- Place the stuffed pears on the prepared baking sheet, ensuring they are adequately spaced. Bake in the preheated oven for 25-30 minutes, or until the pears are tender when pierced with a fork.
- Remove from the oven and allow to cool for a few minutes before serving. This lets the flavors meld beautifully.
Notes
- In a pinch, ground cinnamon can be used as a substitute for pumpkin pie spice.
- Don’t over-core the pears: Be careful not to remove too much pear flesh when coring, as this can cause the fruit to collapse during baking.
- Tweak the flavors: This recipe is highly customizable. Feel free to adjust the amounts of sweetener and spices, or swap out different ingredients in the filling to suit your taste.
- Line the pan: Always line your baking sheet with parchment paper or a silicone mat for easy cleanup.
- Baking time variation: Baking time may differ based on pear size and ripeness. Larger pears might require up to 35-40 minutes. Bake until tender but still holding their shape.
Nutrition
Carbohydrates: 35 g
Protein: 1 g
Fat: 5 g
Saturated Fat: 0.4 g
Polyunsaturated Fat: 1 g
Monounsaturated Fat: 3 g
Sodium: 5 mg
Potassium: 224 mg
Fiber: 4 g
Sugar: 20 g
Vitamin A: 26 IU
Vitamin C: 7 mg
Calcium: 17 mg
Iron: 1 mg
Additional Info
Author: Toni Okamoto
Course: Dessert
Cuisine: American
Method: Oven
Diet: Vegan
Tried this recipe?
Please tag us at @PlantBasedOnABudget! 🙂