
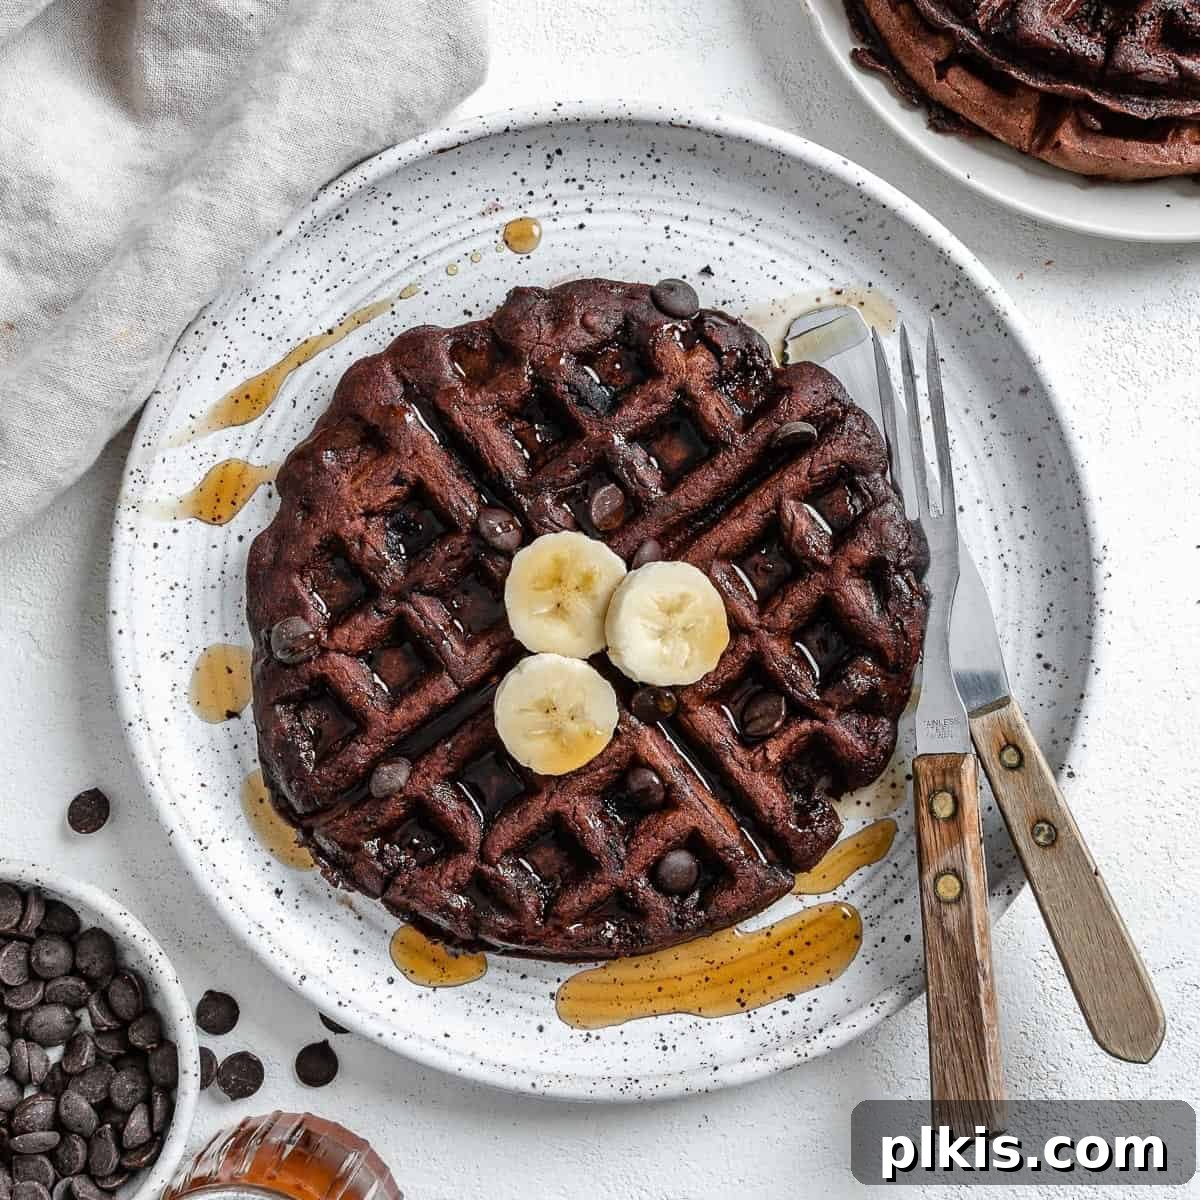
Welcome to the ultimate breakfast revolution! Prepare to indulge in these extraordinary healthy vegan chocolate waffles, a delightful culinary creation that proves nutritious can also be incredibly delicious. Forget the heavy, sugary, and often unhealthy traditional waffle recipes. These plant-based powerhouses are designed to kickstart your day with energy, flavor, and wholesome goodness. They require just a blender and a waffle iron, making them surprisingly simple to prepare, yet they deliver a significant boost of plant-based protein and essential nutrients, all without the need for any protein powders. Plus, they are completely oil-free and egg-free, crafted with wholesome ingredients like whole wheat flour and unrefined sugar for a guilt-free treat the entire family will adore.

This incredible chocolate waffles recipe was originally crafted by Ashley, the creative mind behind Plantiful Picnic, and adapted for you here!
Black Bean Chocolate Vegan Protein Waffles: A Game-Changer
Waffles and pancakes are timeless favorites, reigning supreme as quintessential breakfast delights, and even making appearances for lunch, brunch, or dessert. However, many classic recipes often fall short on nutritional value, frequently loaded with refined sugars and empty calories that leave you feeling sluggish rather than energized. This is where our innovative and healthy vegan chocolate waffles truly shine, redefining what a comforting meal can be.
Our recipe transforms the humble waffle into a nourishing powerhouse, meticulously packed with ingredients designed to fuel your body and keep you feeling satiated for hours. We swap out traditional components for wholesome alternatives like nutrient-rich whole wheat flour, naturally sweet unrefined maple syrup, ripe bananas, and a clever secret ingredient: black beans! Yes, you heard that right – a generous dose of hidden black beans elevates these waffles, boosting their fiber and protein content without compromising on the decadent chocolate flavor. The result? A perfectly balanced meal that not only tastes incredible but also supports your well-being.
If the idea of incorporating beans into your breakfast waffles sounds unconventional, we encourage you to give it a try! Black bean-based desserts have soared in popularity over recent years, and for excellent reasons. This unassuming, cost-effective legume is a nutritional superstar, boasting an impressive profile of fiber, plant-based protein, and a wealth of essential vitamins and minerals. When skillfully blended into sweet dishes, black beans magically disappear, imparting a subtle richness and an incredibly moist texture without any noticeable “beany” taste. Even the most discerning eaters, including children, are often surprised and delighted by these creations!
When it comes to texture, these vegan protein waffles strike a magnificent balance. They emerge from the waffle iron with a wonderfully crisp exterior that yields to a tender, slightly denser, and wonderfully cake-like interior – a truly satisfying experience. Best of all, this delightful texture is achieved entirely without eggs or dairy, making them a fantastic option for those with dietary restrictions or anyone looking to enjoy a lighter, plant-forward meal. Expect the entire family, vegans and non-vegans alike, to fall in love with these wholesome chocolate wonders.
Beyond their incredible taste and nutritional benefits, this vegan waffles recipe stands out for its remarkable simplicity. You only need seven common and budget-friendly pantry staples, a trusty blender, a spoon, and a waffle iron. For ultimate convenience, opt for canned black beans (just remember to drain and rinse them thoroughly), or if you prefer, cook your own from scratch. Once your batch of delectable chocolate whole wheat waffles is ready, serve them warm with a sprinkle of fresh berries, or load them up with your favorite toppings for an utterly decadent yet wholesome treat. These waffles offer a fantastic way to enjoy a classic comfort food while nourishing your body.
Pro Tip: We highly recommend preparing a double batch of these delightful waffles. The leftovers can be easily stored in the freezer, ready to be reheated for a quick and convenient breakfast or snack throughout the week. While you’re enjoying healthy morning treats, you might also appreciate our other nutritious breakfast recipes, such as fluffy oil-free banana muffins, rustic walnut oat scones, or versatile and customizable overnight oats!

Essential Ingredients for Perfect Vegan Chocolate Waffles
Crafting these easy and delicious vegan chocolate waffles requires just a handful of affordable and readily available pantry staples. Each ingredient plays a crucial role in achieving the perfect flavor, texture, and nutritional profile.
- Black Beans: The star of these chocolate black bean vegan waffles! You’ll need one 15-ounce can of black beans, thoroughly drained and rinsed to remove excess sodium and any canning liquid. Alternatively, use about 1.5 cups of black beans cooked from scratch. Black beans provide a fantastic boost of plant-based protein and fiber, contributing to the waffles’ satisfying density and rich color while remaining undetectable in flavor.
- Plant-Based Milk: Choose your favorite unsweetened variety to keep these waffles dairy-free. Almond milk, oat milk, cashew milk, or soy milk all work wonderfully. Each offers a slightly different nuance in creaminess and flavor, so feel free to experiment to find your preferred option.
- Maple Syrup: Our unrefined sweetener of choice, maple syrup adds a beautiful depth of flavor and natural sweetness. You can also use agave nectar for a similar result. For a different unrefined sugar option, coconut sugar can be used, though you might need to adjust the liquid slightly. If you’re managing sugar intake, a sugar-free liquid sweetener can be substituted; just adjust the quantity to achieve your desired level of sweetness.
- Cocoa Powder: Essential for that rich, indulgent chocolate flavor! Use unsweetened cocoa powder for the best results. For an even greater antioxidant boost and a slightly more intense, bitter chocolate note, you could opt for raw cacao powder. Remember, cacao is often more bitter, so a slight adjustment to the sweetener might be desired.
- Ripe Bananas: The riper the bananas, the better! Look for bananas with plenty of dark spots, as these are sweeter and mash more easily, contributing natural sweetness and a binding quality to the batter. They also add moisture and a subtle fruitiness. If you don’t have ripe bananas on hand, unsweetened applesauce or pumpkin puree can serve as a viable alternative, though the flavor profile will shift slightly.
- Whole Wheat Flour: We opt for whole wheat flour in these healthy vegan waffles to increase their fiber content and provide sustained energy. If you prefer a lighter texture, or if whole wheat flour isn’t available, regular all-purpose flour can be used as a direct substitute.
- Baking Powder: This leavening agent is critical for giving your plant-based chocolate protein waffles the perfect lift, ensuring they come out light, fluffy, and tender on the inside with that desirable crisp exterior.
- Vegan Chocolate Chips (Optional): For truly decadent, double chocolate waffles, stir in a handful of vegan semi-sweet chocolate chips at the end. You can also chop up a bar of your favorite vegan semi-sweet chocolate if you prefer larger chocolate chunks. This optional addition takes the chocolate experience to the next level!

Optional Enhancements & Creative Recipe Variations
While the base recipe for these vegan chocolate protein waffles is fantastic on its own, a few simple additions can elevate the flavor profile or boost the nutritional content even further. Feel free to experiment and customize to your heart’s content!
- A Pinch of Salt: A tiny dash of sea salt can work wonders, enhancing the rich chocolate flavor and balancing the sweetness of the waffles, making them taste even more profound and satisfying.
- Vanilla Extract: Just a teaspoon of good quality vanilla extract will infuse your vegan chocolate protein waffles with a warm, comforting, and more distinctly cake-like flavor, adding another layer of deliciousness.
- Instant Coffee or Espresso Powder: Coffee is a well-known secret weapon for intensifying chocolate. Adding a teaspoon of instant coffee powder or espresso powder will deepen the chocolate notes without making the waffles taste like coffee. For a true mocha experience, increase the amount slightly.
- Natural Food Extracts: Explore a world of flavors by incorporating other natural food extracts. Orange extract pairs beautifully with dairy-free chocolate for a zesty twist, while mint extract offers a refreshing balance. Coconut or even a hint of almond extract could also create unique and delightful combinations.
- Vegan Protein Powder: For those looking to further amplify the protein content, you could try adding a scoop of plain, vanilla, chocolate, coffee, or even peanut butter flavored vegan protein powder. Be mindful that adding protein powder can alter the batter consistency, potentially making it thicker. You might need to adjust the amount of plant-based milk to achieve the desired texture. We haven’t tested this extensively, so results may vary, but it’s a popular option for fitness enthusiasts!
Effortless Preparation: Making Vegan Chocolate Blender Waffles
One of the most appealing aspects of these vegan protein waffles is their incredible ease of preparation. With minimal equipment – just a blender, a spoon, and your waffle maker – you can whip up a batch in just five simple steps. No complex mixing, no multiple bowls, just pure simplicity!
- 1) Begin by preheating your waffle maker to the desired setting. Ensuring it’s fully heated before adding batter is crucial for achieving that coveted crispy exterior and preventing sticking.
- 2) Next, gather your wet and main dry ingredients (excluding flour and baking powder) and add them to your blender. This includes the drained and rinsed black beans, plant-based milk, maple syrup, ripe banana, and cocoa powder. Blend all these ingredients until the mixture is completely smooth and creamy. Scrape down the sides of the blender as needed to ensure everything is fully incorporated.

- 3) Now, add the whole wheat flour and baking powder to the blender. Pulse just a few times until these dry ingredients are *just* combined with the wet mixture. It’s important not to over-blend at this stage.


Important Note: Be extremely careful not to overwork the gluten in the flour during this step. Overmixing can lead to tough, dense, and stodgy vegan waffles instead of the light and fluffy texture you’re aiming for.
- 4) Once the dry ingredients are just combined, remove the blender jar and, if using, gently stir in the vegan chocolate chips with a spoon or spatula. Distribute them evenly throughout the batter for pockets of melted chocolate in every bite.

- 5) Finally, pour or spoon the batter onto your preheated waffle iron according to its specific instructions. Cook until golden brown and crisp. Serve these delightful vegan chocolate waffles warm with your preferred toppings. Keep reading to discover some of our favorite combinations!
Waffle Cooking Wisdom: The cooking time will vary depending on your specific waffle maker, typically ranging from 3 to 6 minutes. Many machines feature an indicator light or an audible timer to signal when the waffles are perfectly done. Alternatively, you can monitor the steam: once the steam stops rising vigorously from the machine, it’s usually a good sign that your waffles are ready to be enjoyed.
Frequently Asked Questions About Vegan Chocolate Waffles
Absolutely! While we’ve used whole wheat flour in this recipe, it’s often possible to substitute it with a high-quality gluten-free all-purpose flour blend. We recommend popular blends from brands like Bob’s Red Mill or King Arthur’s, as these are typically formulated to perform well in baked goods. Keep in mind that gluten-free flours can sometimes absorb liquids differently, so you might need to slightly adjust the amount of plant-based milk to achieve the ideal batter consistency. The texture might also be a touch softer or less chewy, but they should still be delicious!
You might be able to swap black beans with other mild-flavored beans, such as chickpeas (garbanzo beans) or cannellini (white kidney) beans. These alternatives would also provide a good source of protein and fiber. However, we haven’t personally tested these substitutions, so we cannot guarantee the exact flavor or color outcome. Chickpeas, for instance, might impart a slightly different, perhaps nuttier, flavor compared to black beans, and the waffles might not have the same deep chocolate hue. If you do experiment, be prepared for subtle variations and let us know your results!
If you’re using a modern non-stick waffle iron, sticking shouldn’t typically be an issue unless the non-stick coating is worn, the machine needs a thorough cleaning, or you’re opening the lid too soon before the waffle has fully set. For older irons or if you’re consistently encountering sticking problems, we strongly recommend applying a light, even spray of oil (like avocado or coconut oil) or brushing with a small amount of melted vegan butter before adding each batch of batter. Ensure your waffle maker is fully preheated to the correct temperature, as insufficient heat can also cause sticking. A clean iron also makes a big difference, as leftover residue can interfere with the non-stick surface.

Expert Tips & Important Notes for Flawless Vegan Waffles
Achieving perfectly crisp and fluffy dairy-free chocolate waffles is easy with these helpful tips and considerations:
- Always Preheat Your Waffle Maker: This is a non-negotiable step for truly excellent waffles. A properly preheated waffle iron ensures that the batter begins to cook and crisp immediately upon contact, leading to an even cook, a beautiful golden-brown color, and that delightful crispy exterior. Don’t rush this step!
- Do Not Over-Mix the Batter: Once you’ve added the flour and baking powder, mix or pulse the batter only until the dry ingredients are just incorporated. Overworking the gluten in the flour will develop it too much, resulting in chewier, denser, and less airy vegan whole wheat waffles. A few small lumps are perfectly fine and often preferred.
- Avoid Overfilling the Waffle Iron: This is a common pitfall for waffle novices. While it might take a few tries to get the measurement just right for your specific waffle maker, it’s always better to slightly underfill than to overfill. The batter will expand as it cooks, and overfilling can cause it to overflow, creating a messy situation. Refer to your waffle maker’s manual for recommended batter amounts per waffle, or start with a slightly smaller portion and adjust as needed.
- Resist the Urge to Open During Cooking: Once you’ve closed the waffle iron, leave it undisturbed until the cooking cycle is complete or the steam largely subsides. Opening the iron prematurely causes a significant drop in temperature, which can prolong cooking time, lead to uneven browning, and even cause the waffles to stick to the plates. Patience is key for perfection!
- Use Non-Scratch Utensils: To protect the non-stick coating of your waffle iron and prolong its lifespan, always use utensils made from silicone, wood, or heat-resistant plastic when removing waffles or cleaning the plates. Metal utensils can easily scratch and damage the surface.
- Keep Waffles Warm When Making Batches: If you’re preparing a large batch of waffles to serve multiple people, you can keep the cooked waffles warm and crisp in the oven. Simply preheat your oven to a low temperature, around 200°F (100°C), and place the finished waffles directly on a wire rack set on a baking sheet. This allows air to circulate, preventing them from becoming soggy while keeping them perfectly warm until you’re ready to serve everyone.
Creative & Delicious Vegan Waffle Topping Ideas
The beauty of waffles lies in their versatility, and these vegan chocolate waffles are a perfect canvas for an array of delightful toppings. Here are some of our favorite ways to dress them up:
- A dollop of fluffy whipped coconut cream or your favorite store-bought vegan whipped cream for a touch of decadence.
- A scoop of creamy vegan ice cream or wholesome nice cream – vanilla, chocolate, peanut butter, or even a rich caramel flavor would be heavenly.
- A sprinkle of shredded coconut or coconut flakes (toasted for extra flavor) for texture and a hint of tropical sweetness.
- Fresh, vibrant berries like raspberries, blueberries, or sliced strawberries for a burst of freshness and natural sweetness.
- Thinly sliced bananas, a classic pairing with chocolate, offering a creamy and naturally sweet addition.
- A generous drizzle of rich vegan caramel sauce or pure maple syrup to enhance their inherent sweetness.
- A warm strawberry or raspberry compote, syrup, or fruit sauce for a comforting and fruity addition.
- A swirl of your favorite nut butter (peanut, almond, cashew) or seed butter (sunflower, tahini) for extra protein and healthy fats.
- A scattering of chopped nuts (pecans, walnuts, almonds) or seeds (hemp, chia) – raw or lightly toasted – to add a satisfying crunch and nutritional boost.

Make-Ahead & Storage Solutions for Convenience
These egg and dairy-free chocolate vegan protein waffles are perfect for meal prepping, allowing you to enjoy a quick, healthy, and delicious breakfast even on your busiest mornings. Planning ahead means less stress and more deliciousness!
Refrigerator Storage: Once prepared and completely cooled to room temperature, any leftover vegan waffles can be stored in an airtight container in the refrigerator for 2-3 days. Ensure they are fully cool before sealing to prevent condensation and sogginess.
Freezer Storage: For longer-term storage, waffles freeze beautifully. First, arrange the cooked and cooled waffles in a single layer on a baking tray and flash freeze them for about 1-2 hours until solid. This prevents them from sticking together. Once frozen solid, transfer them to a freezer-safe Ziplock bag or a Stasher bag, removing as much air as possible to prevent freezer burn. They will keep well in the freezer for up to 2 months.
Reheating Instructions:
- Oven: For the best results in terms of crispness, reheat frozen or refrigerated waffles in a preheated oven at 225°F (107°C) for about 5-10 minutes, or until warmed through and crisp.
- Toaster: Individual waffles can be easily reheated in a toaster or toaster oven until golden and crisp, much like store-bought frozen waffles. This is a quick and convenient method for single servings.
- Air Fryer: An air fryer also works wonderfully for reheating, delivering a fantastic crispy texture in just a few minutes.
Meal Prep Powerhouse: We cannot stress enough the convenience of making these egg and dairy-free chocolate vegan protein waffles in larger batches. Storing them in the refrigerator or freezer allows you to have a healthy, protein-packed breakfast option ready to reheat at a moment’s notice. You can even prepare a batch early in the morning, let them cool, and then quickly reheat them just before serving to ensure they are all warm and perfectly crisp for breakfast.
Explore More Sweet Vegan Breakfast Treats
If you’ve fallen in love with these healthy vegan chocolate waffles, you’ll surely enjoy exploring other delectable plant-based breakfast options:
- Nourishing Breakfast Quinoa Apple Bowl
- Fluffy Vegan Blueberry Pancakes
- Irresistible Vegan Blueberry Banana Muffins
- Delicate Vanilla Coconut Scones
- Comforting Pumpkin Pie Overnight Oats
- Refreshing Peaches and Cream Smoothie Bowl
- Warm Apple Cinnamon Bread
- Wholesome Carrot Cake Oatmeal
Photos by Alfonso Revilla
Healthy Protein Chocolate Waffles
5
10
15
2 servings

These delicious, healthy vegan chocolate waffles are inexpensive, require just a blender and waffle iron, and pack in plant-based protein and nutrients (with no protein powder!). They’re also oil free, egg-free, and boosted with whole wheat flour and unrefined sugar + ready in 15 minutes.
Video
Equipment
-
Measuring Cups
-
Measuring spoons
-
Blender
Ingredients
- 15 ounces of black beans (or 1.5 cups cooked beans, drained and rinsed)
- ¾ cup of your choice plant-based milk
- ¼ cup + 3 Tablespoons of maple syrup (can substitute for a bit of granulated sugar or agave)
- ½ cup of unsweetened cocoa powder
- 2 ripe bananas
- 1 cup of whole wheat flour
- 2 teaspoons of baking powder
- ½ cup of vegan chocolate chips (optional, for double chocolate)
Instructions
- Preheat your waffle maker according to manufacturer instructions.
- Add the drained black beans, plant-based milk, maple syrup, cocoa powder, and ripe bananas to your blender and blend until the mixture is completely smooth and creamy.
- Add the whole wheat flour and baking powder to the blender. Pulse just a few times until the dry ingredients are combined with the wet mixture. Be careful not to over-blend to avoid overworking the gluten.
- Gently stir in the vegan chocolate chips (if using) with a spoon or spatula until evenly distributed throughout the batter.
- Pour or spoon the batter onto the preheated waffle iron and cook according to your waffle maker’s instructions, until golden brown and crispy. Serve warm with your favorite toppings.
Notes
Preheating the waffle maker is important for crispy, evenly-cooked dairy-free chocolate waffles.
Try not to over-mix the batter, as overworking the gluten in the flour will lead to chewier, denser, less fluffy vegan whole wheat waffles.
Nutrition
Carbohydrates: 174g
Protein: 30g
Fat: 22g
Saturated Fat: 11g
Polyunsaturated Fat: 2g
Monounsaturated Fat: 2g
Sodium: 1373mg
Potassium: 1713mg
Fiber: 35g
Sugar: 60g
Vitamin A: 89IU
Vitamin C: 16mg
Calcium: 578mg
Iron: 13mg