
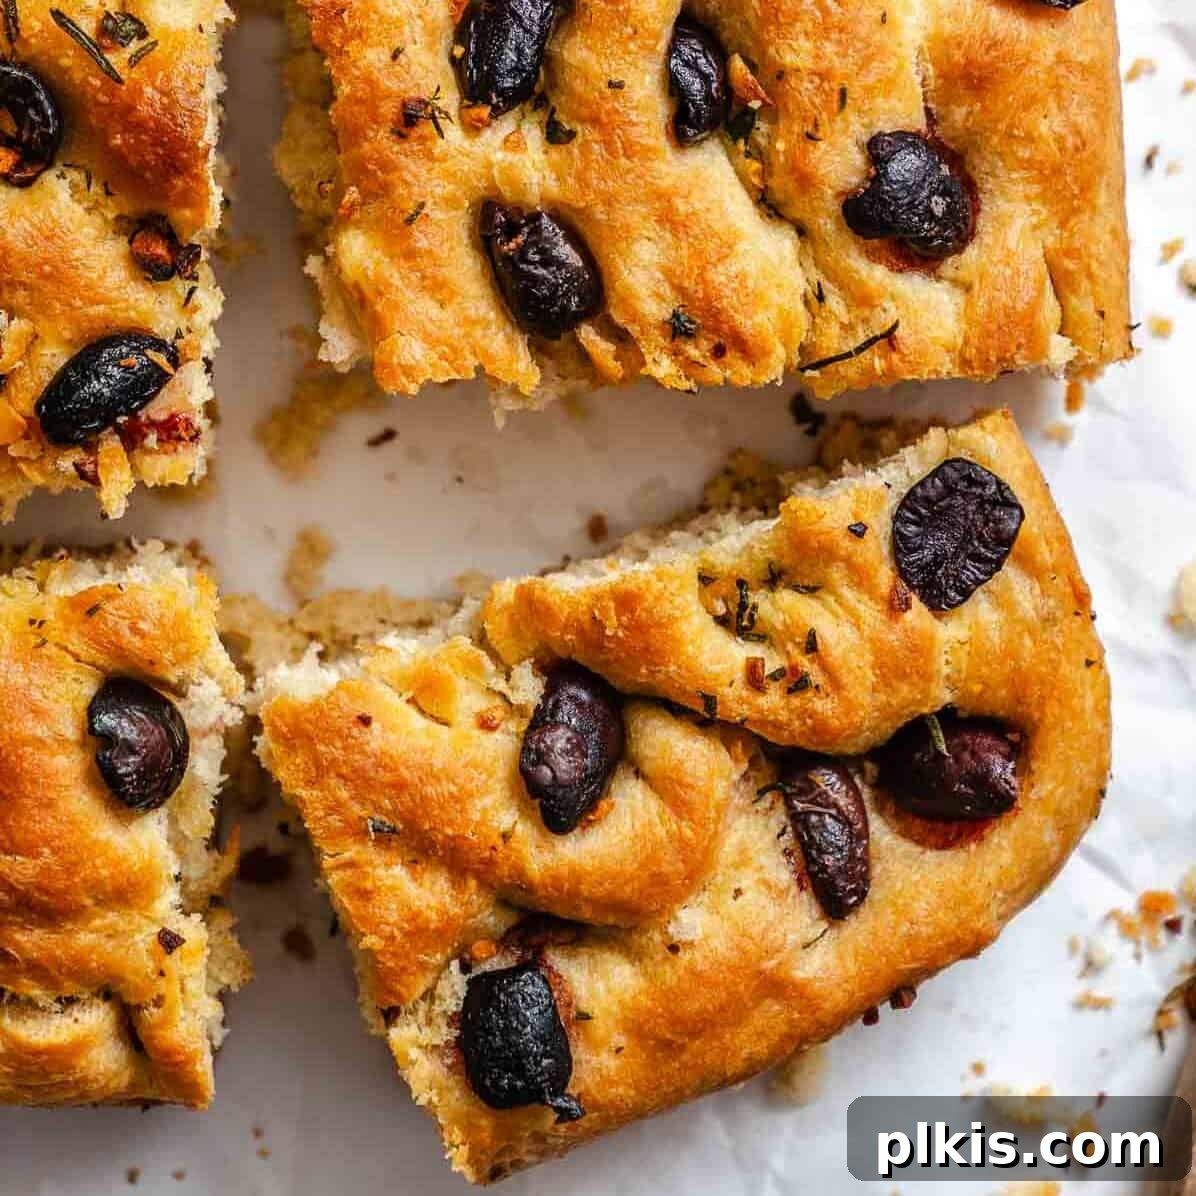
Craving the ultimate homemade bread experience? Learn to bake the BEST vegan focaccia that’s incredibly simple, requiring just 7 core ingredients and a mere 5 minutes of kneading. This recipe promises an unforgettable flatbread with an airy, soft interior, a delightful chew, a perfectly crisp, golden crust, and an irresistible garlic-herb aroma. Discover how to create this bakery-worthy treat, complete with customizable toppings, right in your own kitchen!
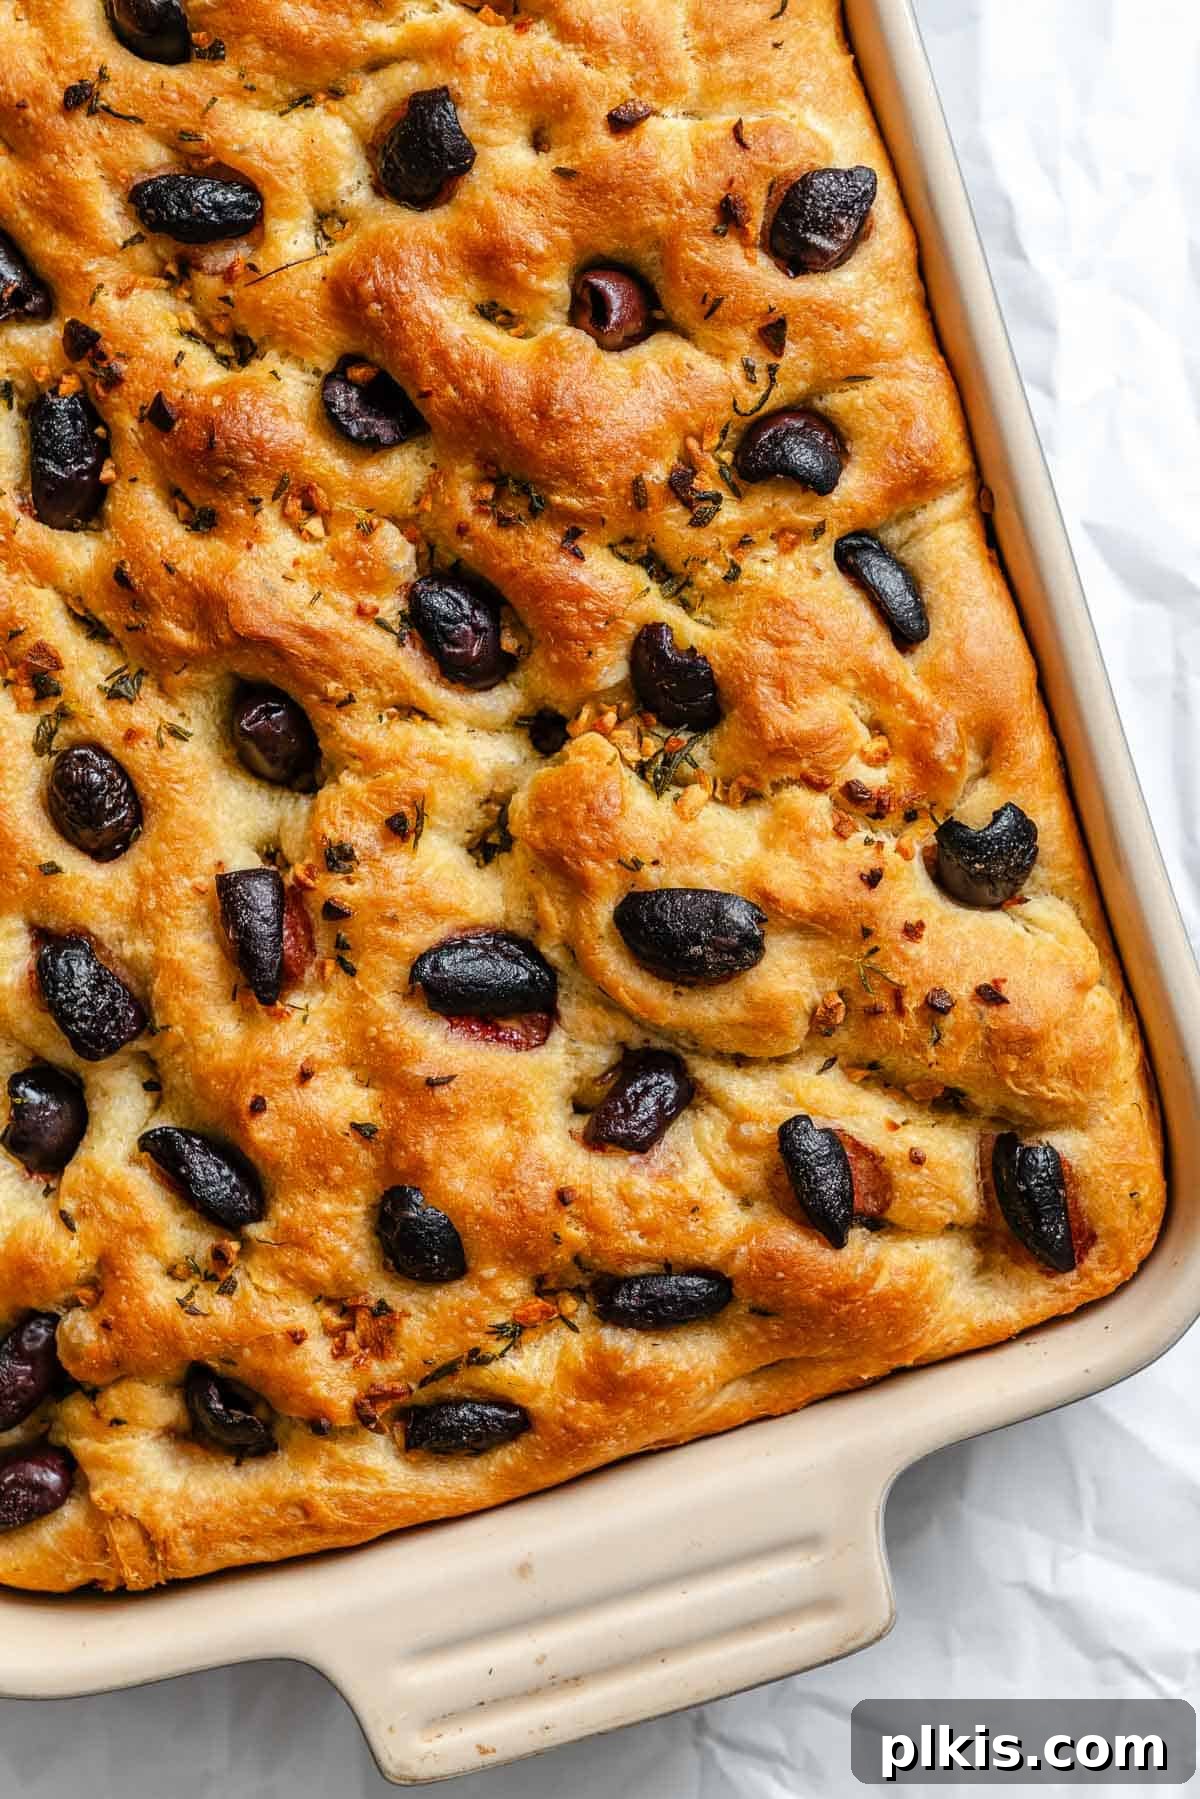
What is Focaccia? A Journey into Italian Flatbread
Focaccia is a traditional Italian flatbread, beloved for centuries for its unique texture and incredible versatility. Originating from Liguria, Italy, its name is derived from the Roman “panis focacius,” meaning “hearth bread” or “bread baked on the hearth.” Traditionally, it’s a simple, rustic bread, often baked directly in the coals or in a hot oven, resulting in a distinctively crisp bottom and a tender, airy crumb.
The hallmark of a great focaccia lies in its characteristic dimpled surface, which acts as a reservoir for olive oil and toppings, infusing every bite with flavor. While authentic focaccia is inherently vegan – crafted from humble, budget-friendly ingredients like flour, yeast, warm water, salt, and generous amounts of olive oil – it’s not uncommon to find modern recipes that incorporate butter, eggs, or dairy products. This is why we’re so excited to share this foolproof, 100% vegan focaccia recipe. It captures the essence of this Italian classic without any animal products, ensuring pure, plant-based deliciousness for everyone to enjoy.
Our easy homemade version ensures that you achieve that perfect balance of a fluffy interior and a satisfyingly crisp crust, all while adhering to a plant-based lifestyle. It’s more than just bread; it’s an experience that transports you straight to the heart of Italy with every flavorful bite.
Why You’ll Adore This Easy Vegan Focaccia Recipe
If you’re new to baking or even an experienced baker looking for a rewarding project, this vegan focaccia recipe is a true gem. It stands out as one of the most accessible artisan breads to master, proving that gourmet results don’t require complicated techniques. While my easy no-knead bread is also a strong contender for simplicity, focaccia offers a uniquely impressive presentation and texture that’s hard to beat.
What makes this recipe truly special for beginners is its forgiving nature and minimal hands-on time. With just 5 minutes of active kneading (which can even be done in a stand mixer to save effort!), you’ll have a dough that transforms into a bakery-quality loaf. Imagine the aroma filling your kitchen as this beautiful bread bakes, promising to impress anyone who tries it with its professional look and authentic Italian taste. It’s a low-effort, high-reward recipe guaranteed to be a crowd-pleaser.
This particular garlic focaccia rendition elevates the classic with a divine garlic and herb-infused olive oil, which saturates the bread with deep, savory flavors. We also include an optional studding of briny olives, adding another layer of complexity. But the true beauty of this focaccia lies in its versatility. Once you have this reliable base dough, it becomes a blank canvas for your culinary creativity. Explore endless flavor combinations and toppings to make it uniquely yours. Whether you stick to the garlic-herb classic or venture into new taste territories, this recipe is designed to deliver deliciousness every time.
Hungry for more homemade bread creations? Explore our other delightful plant-based recipes, including vegan Irish soda bread, savory tomato bread, or our wholesome basic sandwich bread recipe!
Key Ingredients for Perfect Vegan Focaccia
Crafting the perfect focaccia begins with understanding the role of each ingredient. This recipe relies on a few simple, plant-based staples to achieve its signature airy texture and rich flavor. Always refer to the recipe card below for the precise measurements and any specific substitutions.
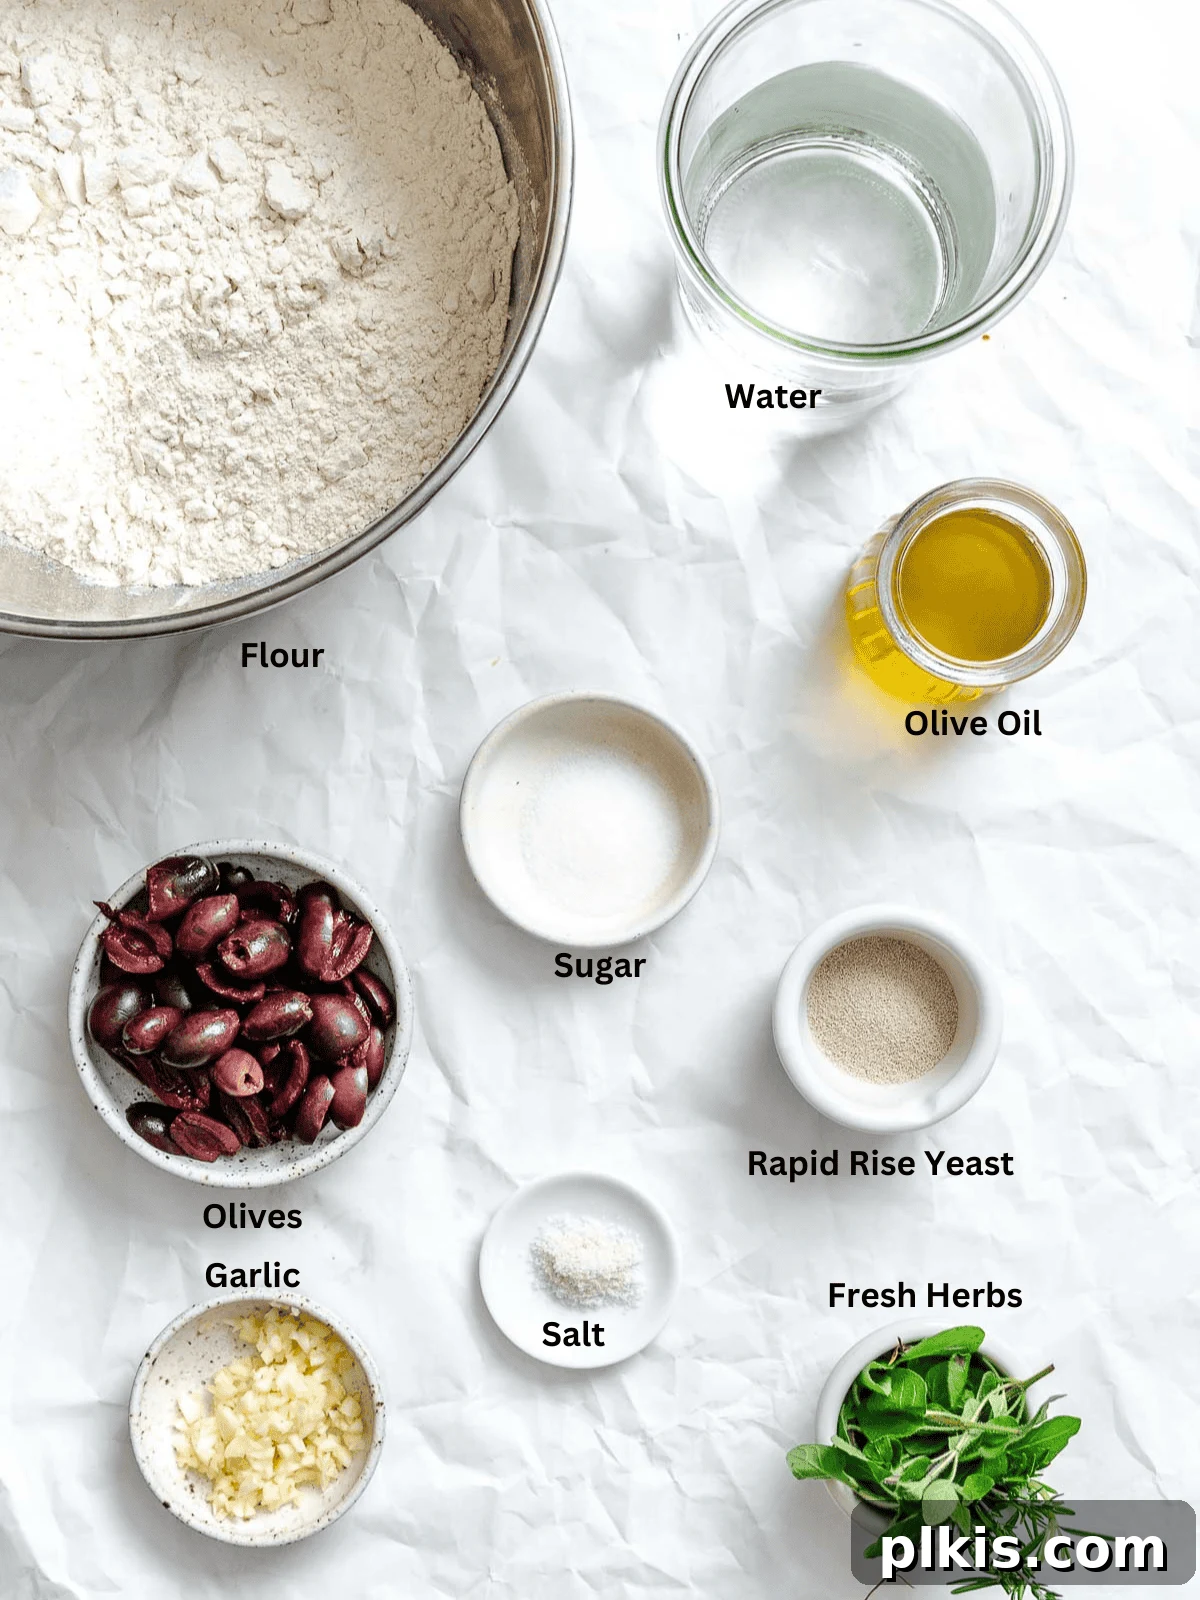
- Olive Oil: A cornerstone of focaccia, high-quality extra virgin olive oil is crucial. It contributes to the bread’s rich flavor, moist crumb, and signature crisp crust. Don’t skimp on this! It’s used both in the dough and generously drizzled over the top before baking.
- Fresh Herbs & Garlic: For our signature garlic-herb focaccia, fresh rosemary, thyme, or oregano (or a combination) and minced garlic are infused into the olive oil. This step creates a fragrant oil that permeates the entire bread with incredible savory depth.
- Warm Water: The perfect temperature is vital for activating the yeast. Aim for lukewarm water (110-115°F / 44-46°C). Water that’s too hot can kill the yeast, while water that’s too cold won’t activate it effectively.
- Yeast: I highly recommend using rapid-rise yeast (also known as instant yeast) for its convenience and reliability. It doesn’t require proofing beforehand, though we still combine it with warm water and sugar to ensure it’s active. If substituting with fresh yeast, you’ll generally need three times the amount of dry yeast. Make sure your yeast is fresh and active for the best rise.
- Sugar: Just a small amount of sugar acts as food for the yeast, helping it to activate and thrive, which in turn contributes to a light and airy focaccia. It also aids in browning the crust.
- All-Purpose Flour: Keep things simple and effective with standard all-purpose flour. Its balanced protein content is ideal for developing gluten without making the bread too dense. For an extra chewy texture, you can substitute up to 50% of the all-purpose flour with bread flour. Alternatively, for a slightly healthier twist, consider using white whole wheat flour for part of the all-purpose flour.
- Salt: Essential for flavor, salt also plays a critical role in controlling yeast activity and strengthening the gluten structure. A good quality sea salt or flaky salt for finishing can make a big difference.
- Olives (Optional): Pitted and halved olives, such as Kalamata or Castelvetrano, add a delightful briny burst to the focaccia. Pressing them into the dough before baking ensures they are perfectly nestled within the bread.
Unleash Your Creativity: Focaccia Bread Seasonings and Toppings
Once you’ve mastered the base vegan focaccia dough, you’ve got a culinary blank canvas waiting for your creative touch! The beauty of homemade focaccia lies in its incredible adaptability to various seasonings and toppings. Here are some fantastic ideas to inspire your next batch:
- Savory Seasonings Integrated into the Dough: Infuse the dough itself with dried herbs like Italian seasoning or dried oregano for a classic Mediterranean flavor. Garlic powder and onion powder can add a foundational savory note. A pinch of turmeric can impart a beautiful golden hue, while red pepper flakes will deliver a subtle, pleasant heat.
- Fresh Herb Extravaganza: Beyond rosemary and thyme, consider pressing other fresh herbs into the dimples before baking. Fresh parsley, dill, chives, basil, or thinly sliced green onions not only add vibrant color but also burst with fresh flavor.
- Vegetable Medley: The possibilities are endless! Thinly sliced onions or shallots caramelize beautifully. Halved cherry tomatoes or slices of larger tomatoes release their juices, creating pockets of intense flavor. Bell peppers, zucchini, eggplant, asparagus, leek, and corn all make excellent additions. For something truly unique, try thinly sliced potatoes, which become wonderfully tender.
- Vegan Cheese Delights: Transform your focaccia with a sprinkle of your favorite vegan cheeses. Vegan shredded parmesan, gooey vegan mozzarella, or sharp plant-based cheddar can be added during the last few minutes of baking for a melted, irresistible topping.
- Plant-Based Protein Boosts: For a more substantial focaccia, consider adding chopped vegan tofu bacon, savory plant-based sausage slices or crumbles, or even vegan pepperoni for a fun, pizza-like twist.
- Intriguing Extras: A scattering of Maldon flaky sea salt not only enhances flavor but also adds a delightful textural crunch. Brighten the flavor with lemon zest, or add a spicy kick with sliced jalapeños or chilies. Capers offer a salty, tangy contrast that works beautifully.
- Flavorful Sauces: Elevate your focaccia by spreading a thin layer of sauce before or after baking. Try a vibrant vegan pesto, classic pizza sauce, or rich tomato paste for a quick and easy flavor foundation.
- Garlic Bread Focaccia: For the ultimate garlic bread experience, brush the freshly baked flatbread with a rich vegan parsley garlic butter. The warm focaccia will soak up all the deliciousness, making it incredibly aromatic and flavorful.
Expert Tip: Always brush any delicate toppings (like fresh herbs or thin vegetable slices) with a little olive oil before baking. This helps prevent them from burning and ensures they cook evenly and beautifully.
Don’t limit focaccia to just savory! For a delightful sweet treat, increase the sugar content in the dough, omit the garlic and savory herbs, and top with dried berries, chopped nuts or seeds, and a generous drizzle of maple syrup. It’s fantastic on its own or served alongside my 2-minute blueberry maple syrup and a dusting of powdered sugar for a truly indulgent dessert or breakfast bread.
How to Master Vegan Focaccia Bread: A Step-by-Step Guide
Baking this vegan focaccia is a straightforward process, even for beginner bakers. Follow these detailed steps to achieve a perfectly airy, flavorful loaf every time. Visual cues are included with images to guide you through each stage.
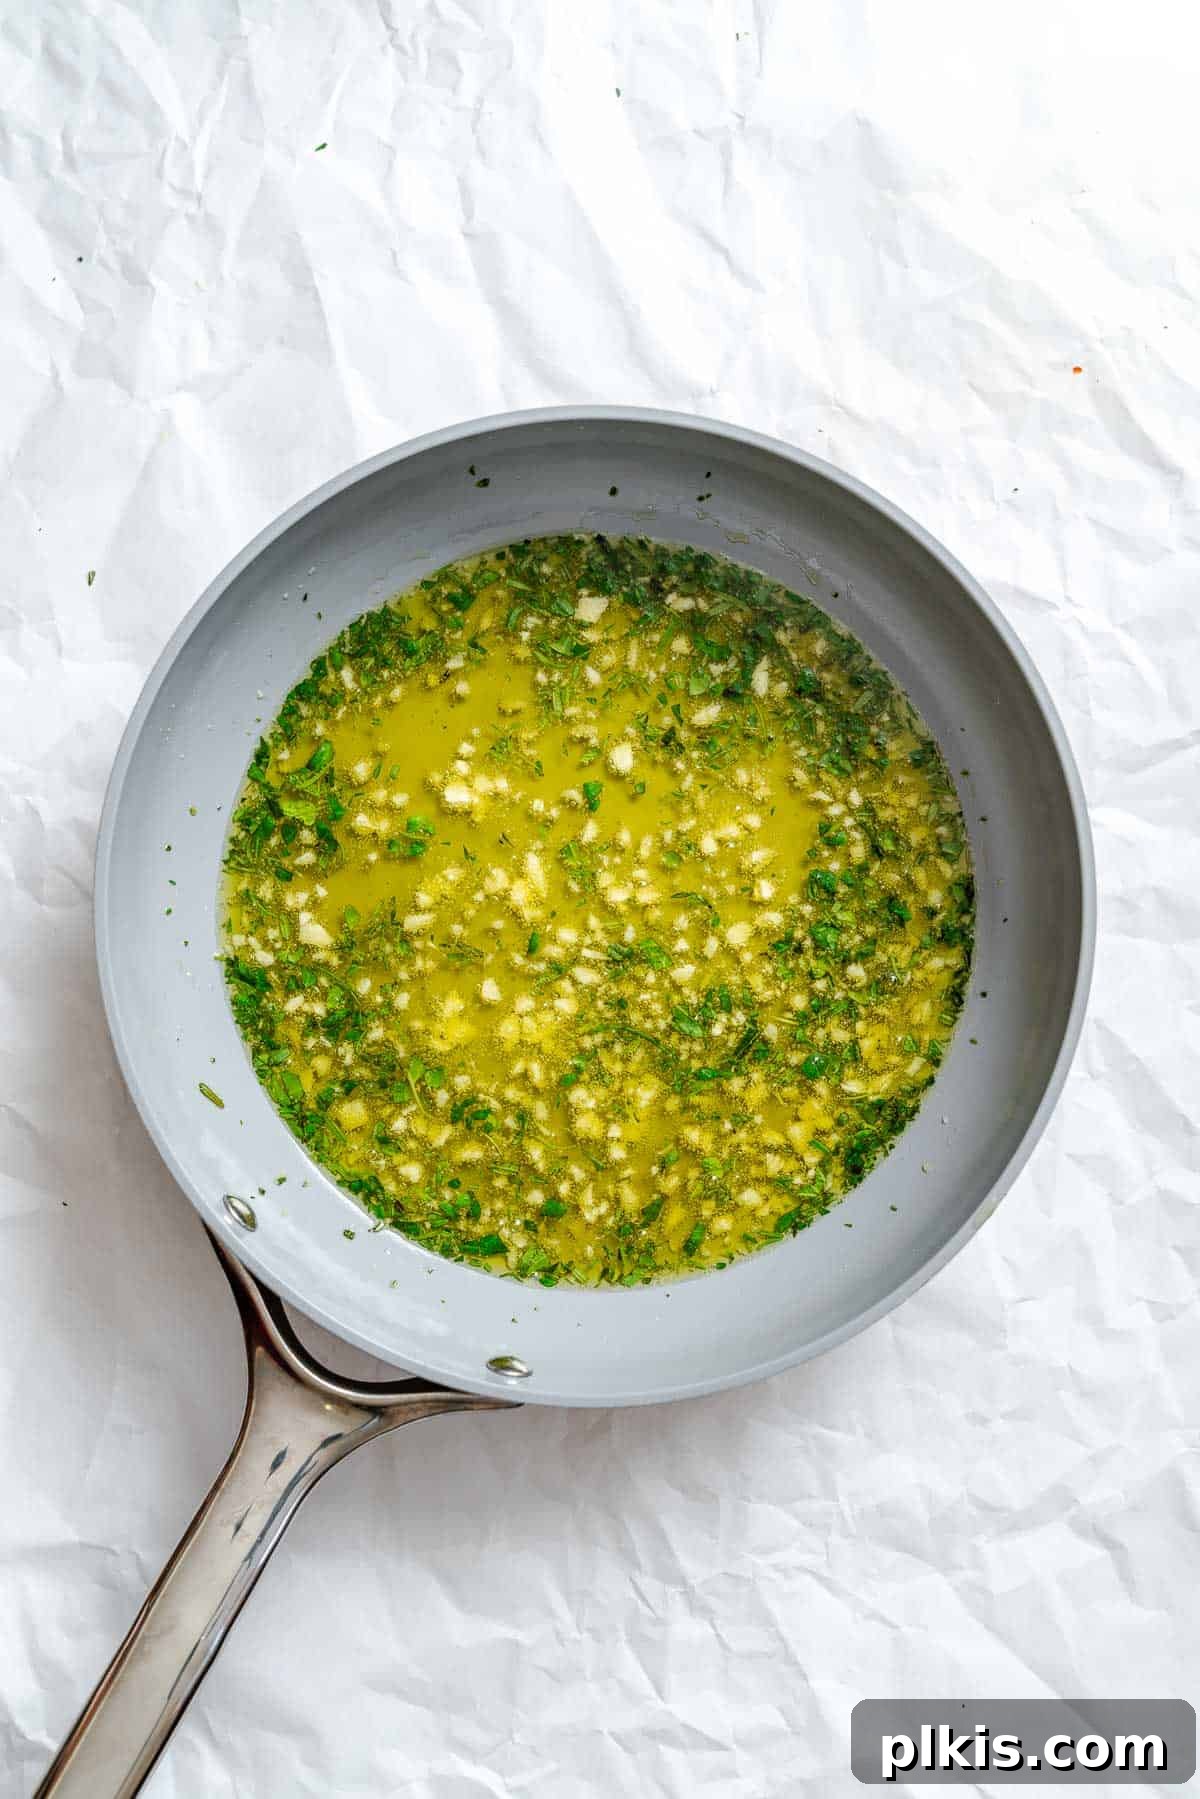
Step 1: Infuse the Garlic and Herb Oil. Begin by mincing your fresh garlic and selected herbs (like rosemary, thyme, or oregano). In a small saucepan, heat the olive oil over medium heat. Once warm, stir in the minced garlic and herbs. Let them gently simmer for about 1 minute, until the garlic becomes fragrant and turns a light golden brown. Be careful not to let the garlic burn; reduce the heat if it browns too quickly. This infused oil will add incredible depth of flavor to your focaccia.
Step 2: Activate the Yeast. In a medium bowl, combine the warm water (ensure it’s between 110-115°F / 44-46°C), rapid-rise yeast, and sugar. Give it a gentle whisk to combine. Let this mixture sit undisturbed for 5-10 minutes. During this time, the yeast should activate, creating a bubbly and foamy surface, indicating it’s alive and ready to make your focaccia rise beautifully.
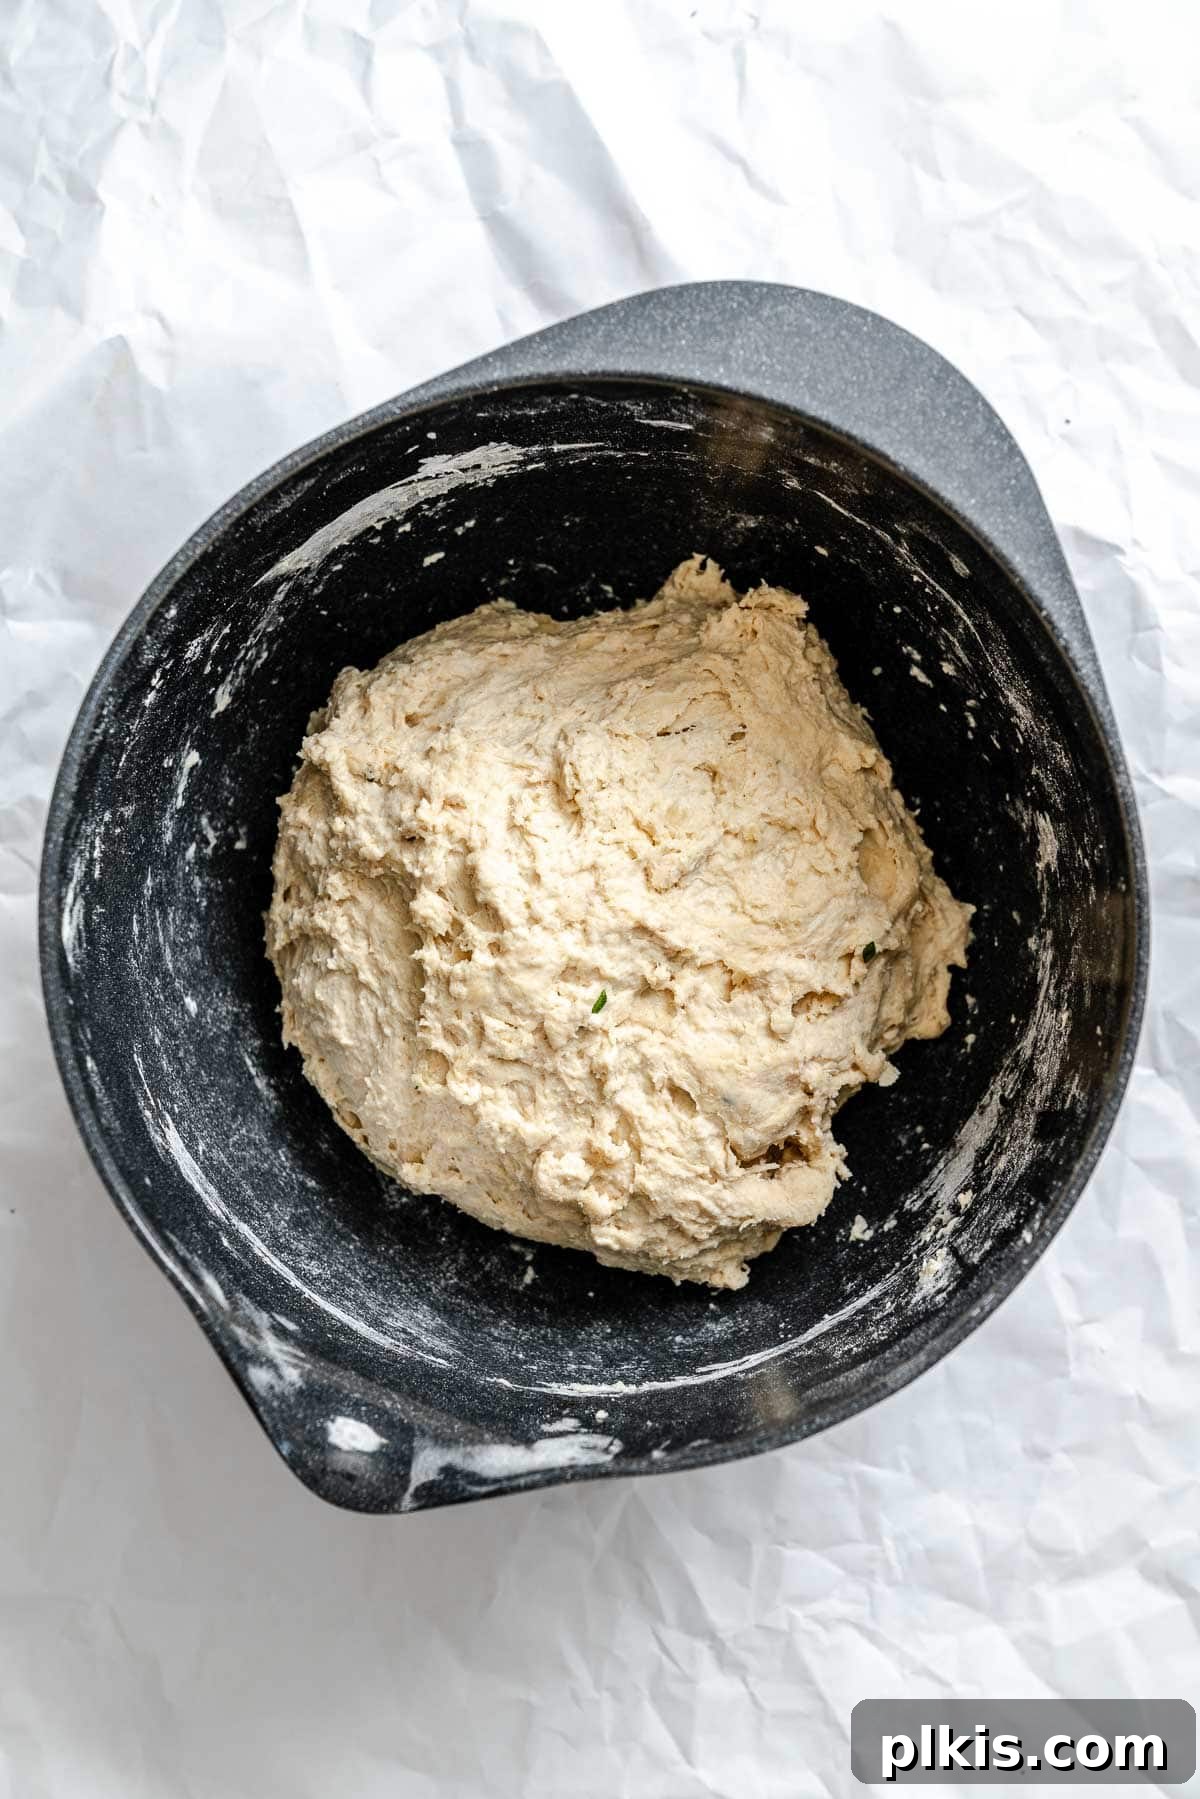
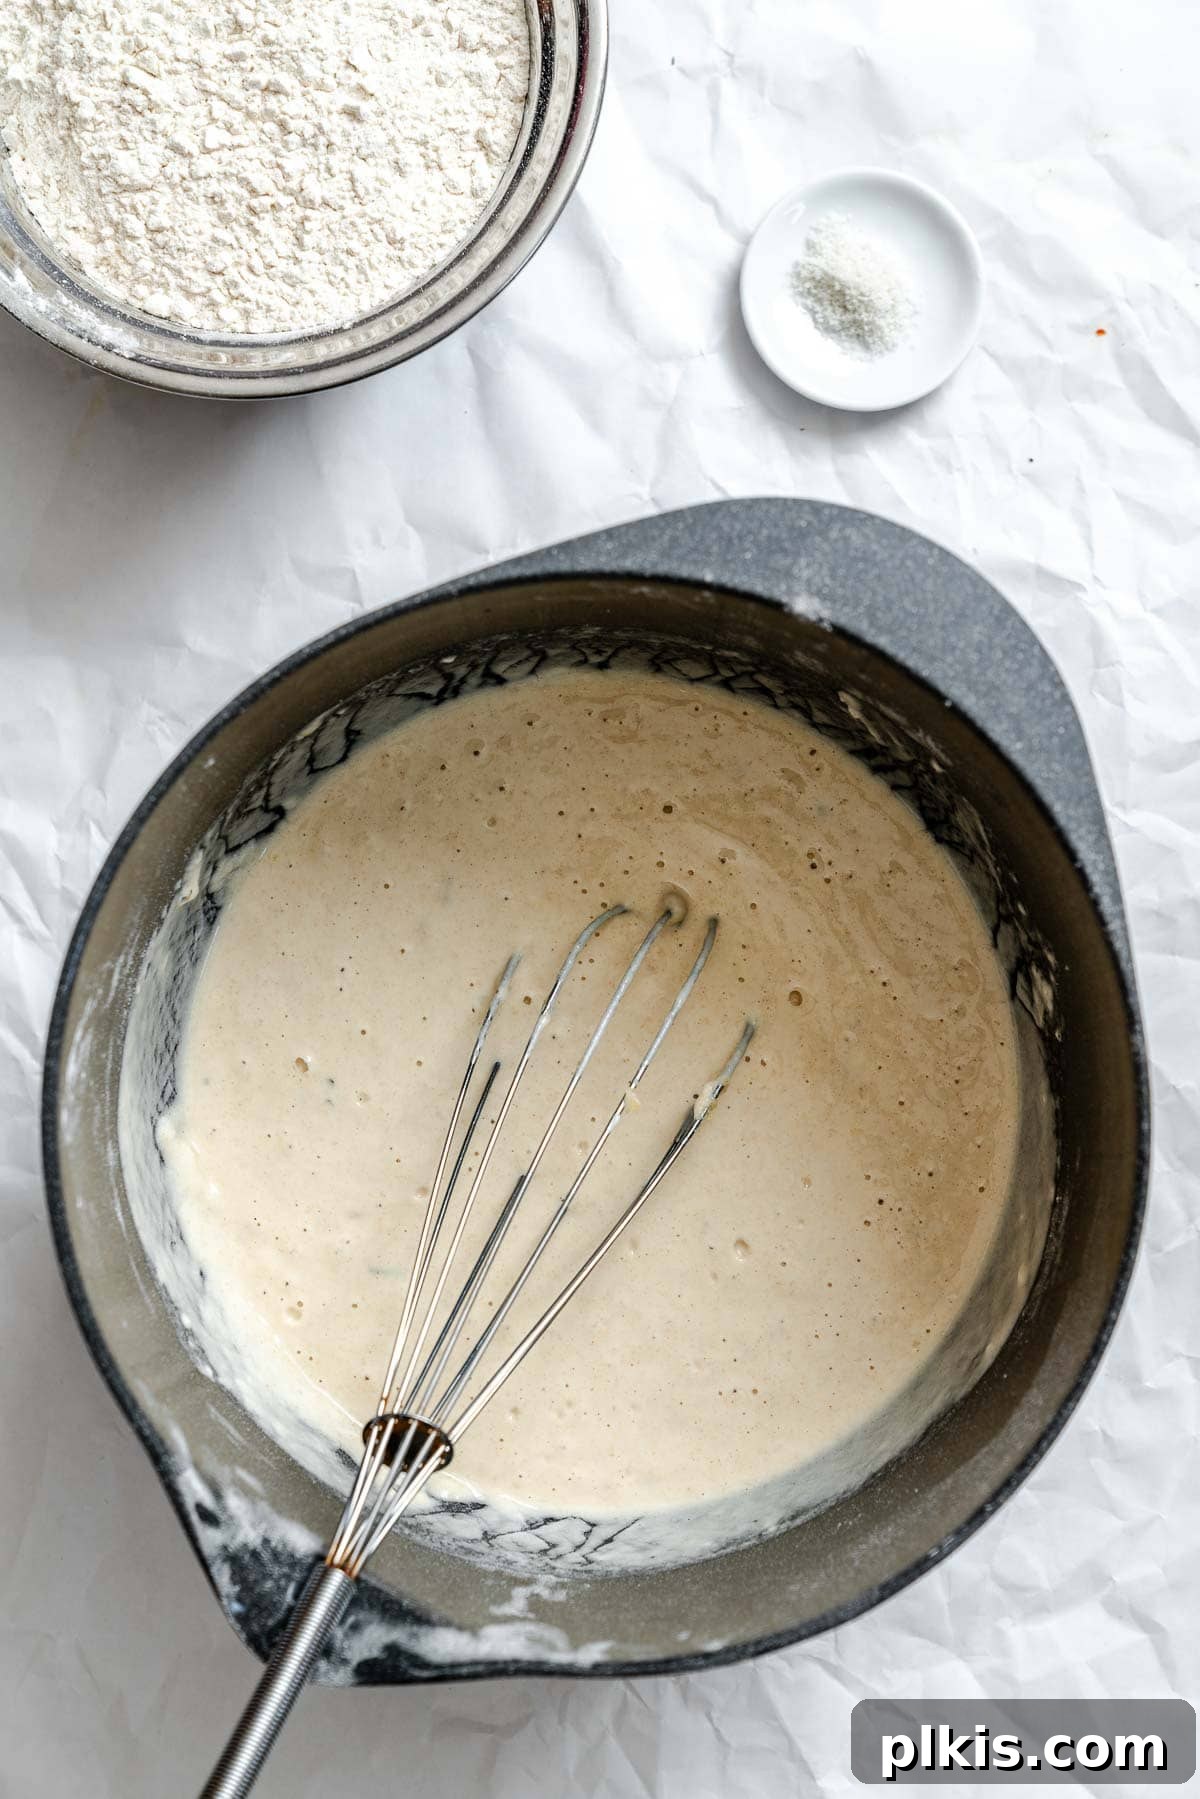
Step 3: Combine and Rise. In a large mixing bowl, whisk together 2 cups of the all-purpose flour, ⅓ cup of your prepared garlic and herb-infused olive oil, and the activated yeast mixture. Allow this mixture to rest for another 3-5 minutes. Then, add the remaining flour and salt to the bowl. Mix by hand (or using a dough hook on a stand mixer) until a cohesive, smooth dough forms. Knead the dough gently for about 5 minutes – just enough to develop some gluten. Once kneaded, cover the bowl with a warm, damp towel or plastic wrap. Place it in a warm, draft-free spot (like a slightly warmed oven or a boiler cupboard) for approximately 45 minutes, or until the dough has proudly doubled in size.
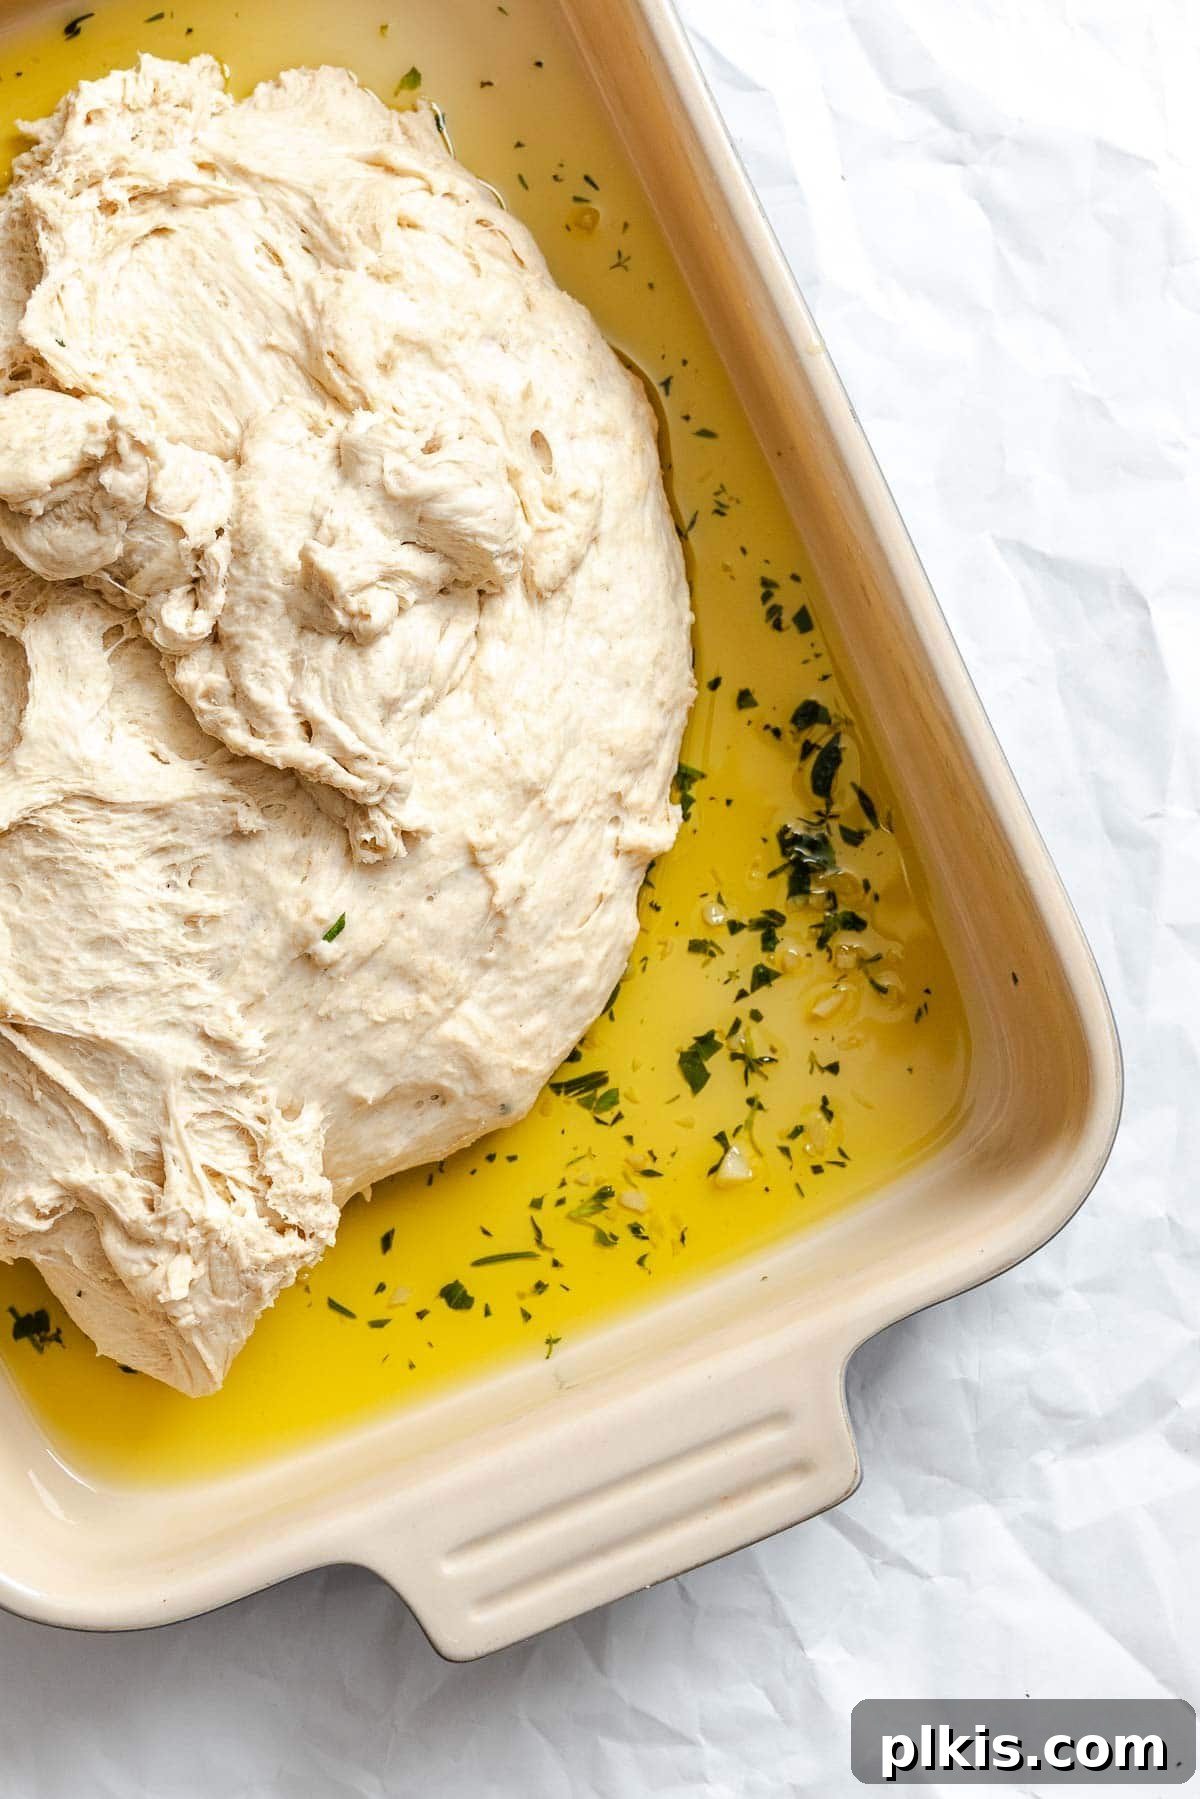
Step 4: Prepare the Pan and Preheat the Oven. While your dough is happily rising, prepare your baking dish. Spread ⅓ of the remaining garlic and herb oil evenly across the bottom of a 9×13-inch baking dish using a pastry brush or paper towel. This ensures a non-stick surface and contributes to that desirable crisp bottom crust. Once your dough has risen, preheat your oven to 410°F (210°C). Gently transfer the risen focaccia dough into the prepared pan and carefully spread it out to fill all corners. Be careful not to deflate it too much.
Tip: To check if your dough is perfectly risen, gently poke it with a floured finger. If the indentation slowly springs back, leaving a slight dimple, your dough is ready for the next step.
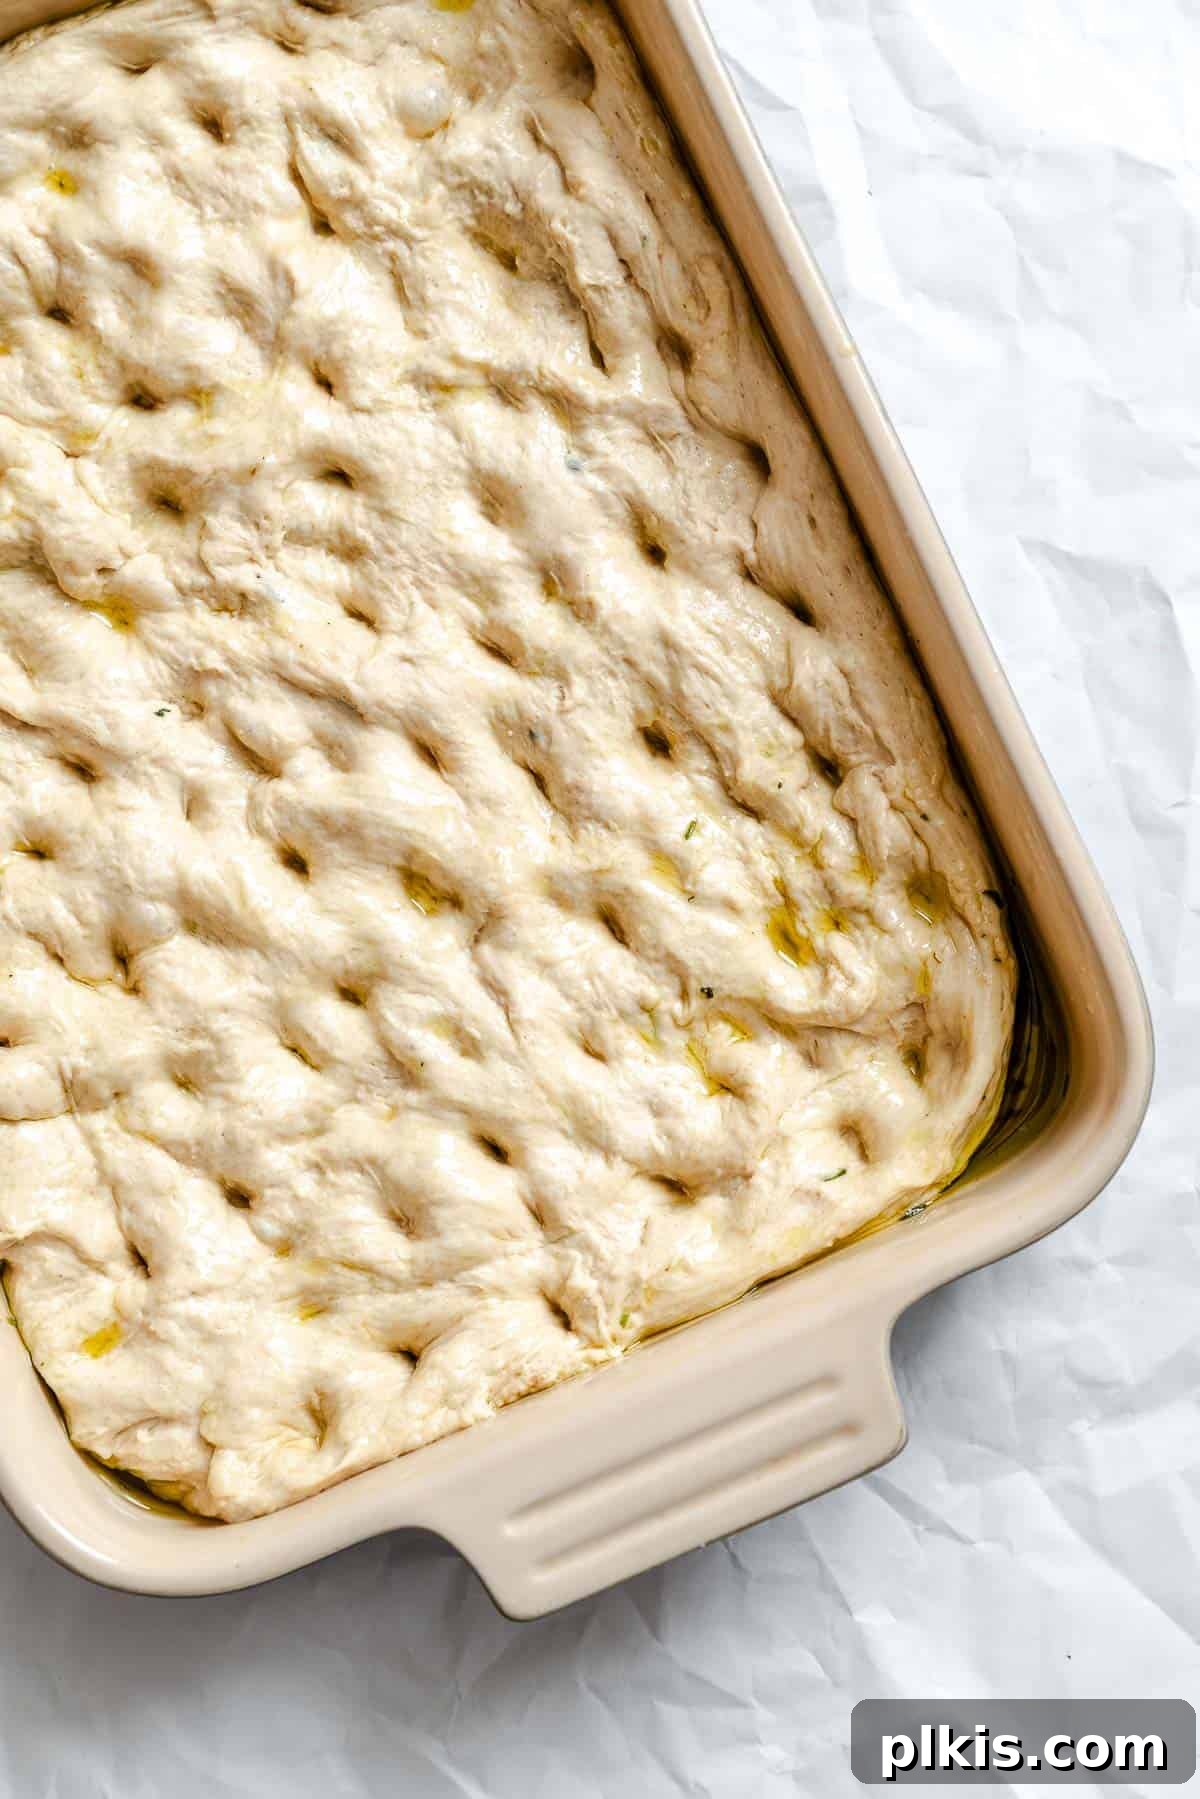
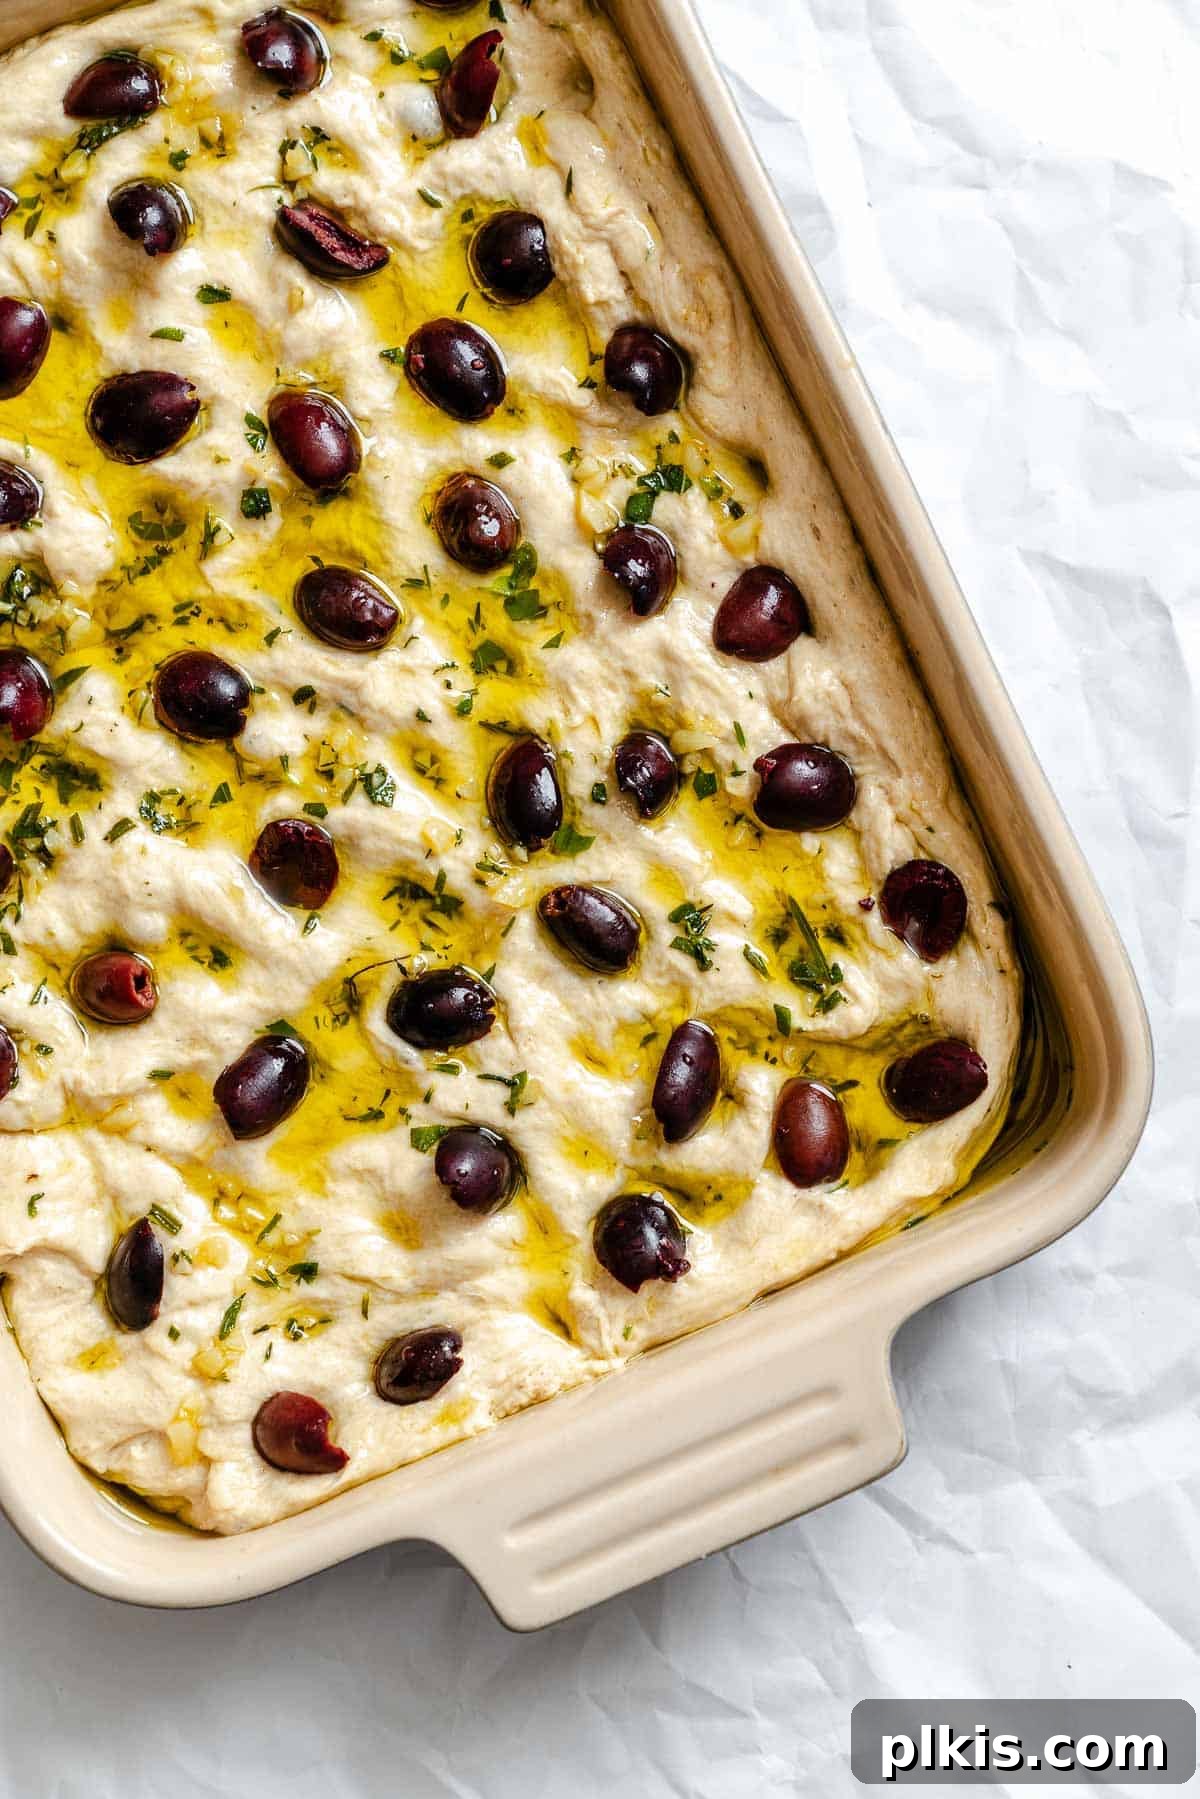
Step 5: Create the Signature Dimples. Dip your fingers in a little olive oil or water to prevent sticking. Then, use your wet or oiled fingertips to gently but firmly press dimples across the entire surface of the dough, pushing almost all the way to the bottom of the pan. These dimples are crucial for focaccia’s unique texture and serve as perfect little pockets for the olive oil and any toppings. Drizzle or spread the remaining herb-infused oil generously over the top of the dimpled dough, and dimple a little more to encourage the oil to settle into the crevices.
Step 6: Add Toppings and Bake. If you’re using olives or any other substantial toppings, gently press them into the dimpled dough at this stage. Place the baking dish into your preheated oven. Bake the garlic and herb focaccia bread for 25-30 minutes, or until the top is beautifully golden brown and the crust feels crisp to the touch. For an extra crispy crust, you can extend the baking time by another 5-10 minutes, keeping a close eye to prevent burning. Once baked, carefully remove from the oven and let it cool slightly before slicing and serving. Enjoy the incredible aroma!
Frequently Asked Questions About Vegan Focaccia
Here are answers to some common questions about making and enjoying vegan focaccia, helping you achieve perfect results every time.
Can I make focaccia in a stand mixer?
Absolutely! Using a stand mixer with a dough hook attachment is a fantastic way to simplify the kneading process. Simply combine your ingredients as directed and then knead the dough at a low-medium speed for about 5-7 minutes, or until it becomes smooth and elastic. This method can save your arms and ensure consistent kneading.
Why is dimpling focaccia dough so important?
Dimpling is a crucial step for two main reasons. First, it creates those iconic pockets and crevices on the surface of the bread, which capture and hold the olive oil and any toppings. This ensures every bite is flavorful and contributes to a beautifully crisp crust. Second, dimpling helps to prevent the focaccia from rising too much and developing too large of an air pocket in the center. It allows for a more even rise and achieves the desired dense yet airy crumb texture characteristic of authentic focaccia.
Is focaccia always vegan?
Traditionally, classic Italian focaccia is indeed vegan, made with just flour, yeast, water, salt, and olive oil. However, in modern interpretations and commercial baking, some recipes may incorporate dairy-based butter, milk, or eggs into the dough, or use non-vegan toppings like certain cheeses or meats. This is why our recipe specifically highlights its 100% vegan nature, ensuring it’s suitable for a plant-based diet without compromise.
Can I use other sized pans for baking focaccia?
Yes, you can certainly experiment with different pan sizes, but be aware that the pan choice will affect the thickness and potentially the baking time of your focaccia. For instance, a larger 13×18-inch sheet pan will yield a thinner focaccia, which is perfect for slicing horizontally to make sandwiches or even using as a ‘pizza’ base. A smaller 9-inch square pan, on the other hand, will produce a much taller and thicker loaf, offering a different textural experience. Always adjust your baking time as needed; thinner focaccia will bake faster, while thicker loaves may require more time.
Can I prepare focaccia dough in advance?
Yes, focaccia dough is excellent for making ahead! You have a couple of options for advanced preparation. You can perform a ‘cold proof’ by allowing the dough to rise slowly in the refrigerator for up to 3 days. This slow fermentation actually enhances the flavor depth and develops an even more open, airy crumb. Before continuing with shaping and baking, bring the cold-proofed dough to room temperature for 2-3 hours. Alternatively, you can freeze the focaccia dough. After its initial rise, gently punch it down, coat it lightly in olive oil, wrap it tightly in plastic wrap, and freeze for up to 3 months. To use, thaw the dough overnight in the refrigerator, then bring it to room temperature, allowing it to double in size before shaping, dimpling, and baking as usual.
Pro Tips for Focaccia Perfection
Achieving a truly exceptional focaccia is easier with a few insider tips. These expert recommendations will help you elevate your homemade bread from good to extraordinary.
- Embrace Cold Proofing for Enhanced Flavor and Texture: For the most incredible flavor depth and an even more open, airy crumb, consider cold proofing your dough. After the initial rise, place the covered dough in the refrigerator overnight, or for up to 3 days. This slow fermentation process develops complex flavors and contributes to a deeper brown, crispier crust. Remember to bring it back to room temperature before baking.
- Mind the Water Temperature for Yeast Activation: The temperature of your water is critical for yeast activity. It should feel warm to the touch, like a warm bath, but not hot. The ideal range is 110-115°F (44-46°C). If you have a thermometer, use it! Water that’s too hot will kill the yeast, preventing your dough from rising, while water that’s too cold will inhibit its activity.
- Always Check Your Yeast: Ensure your rapid-rise yeast is fresh and active. Out-of-date or inactive yeast is a common culprit for dense, flat focaccia. The initial bubbling and foaming when combined with warm water and sugar is your assurance that the yeast is alive and ready to create that wonderfully fluffy, airy texture.
- Generous Oiling of the Pan is Key: Don’t be shy with the olive oil when preparing your baking pan. A well-oiled pan not only prevents the focaccia from sticking but also contributes significantly to the irresistible crispiness of the bottom crust. This layer of oil essentially deep-fries the base of the bread, yielding that sought-after golden, crunchy texture.
- Avoid Over-Kneading or Over-Proofing: While some breads benefit from extensive kneading, focaccia is relatively forgiving and requires only moderate kneading (about 5 minutes). Over-kneading can develop too much gluten, leading to a tough bread. Similarly, over-proofing can cause the dough to rise too much and then collapse in the oven, resulting in a dense, disappointing loaf. Follow the timing in the recipe carefully for the best results.
- Use Oiled Fingers for Dimpling: When it’s time to create those signature dimples in the dough, lightly coat your fingers with olive oil. This simple trick prevents the dough from sticking to your hands, allowing you to press down easily and create perfectly defined dimples without tearing the dough.
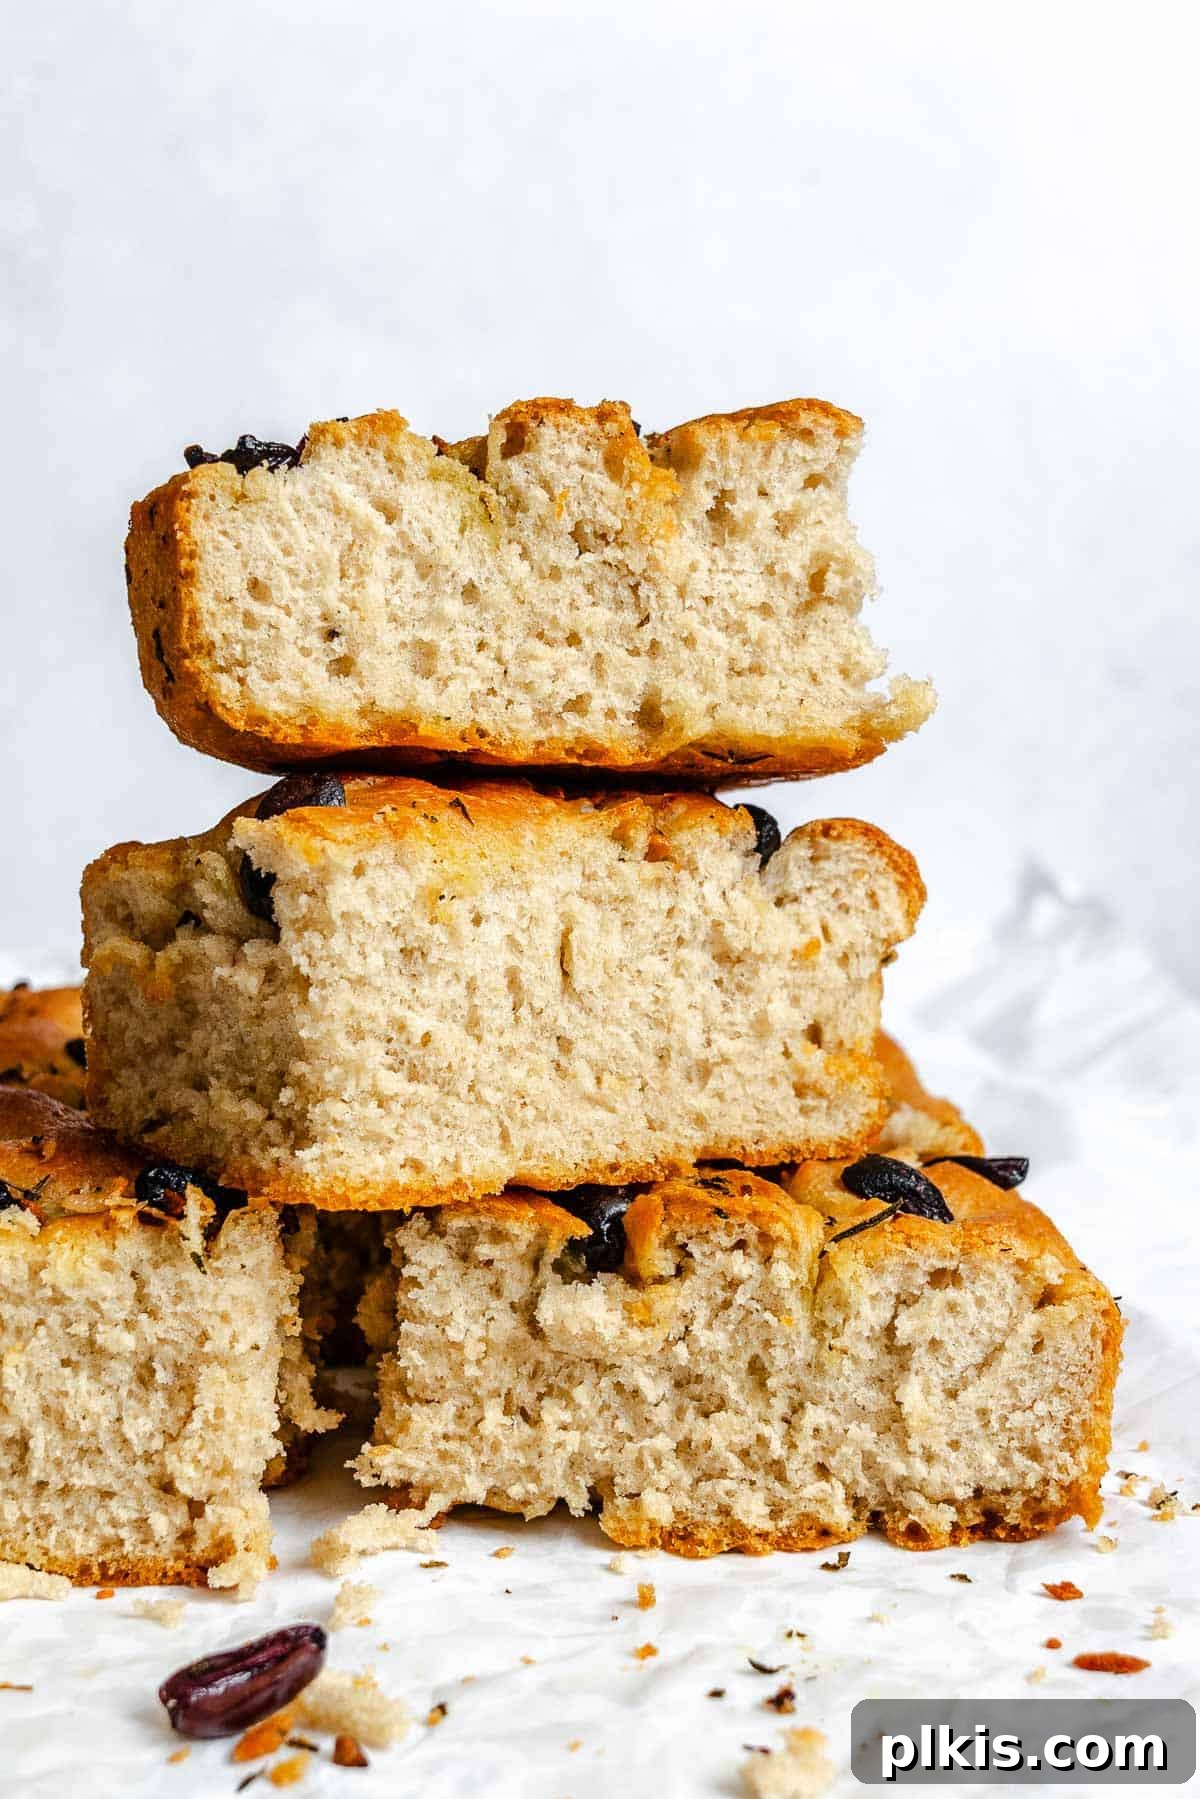
Delicious Ways to Serve Vegan Focaccia Bread
This versatile vegan focaccia bread can be enjoyed in countless ways, whether you’re savoring it as a simple snack or making it the star of a full meal. Its tender crumb and crisp crust make it a perfect companion for a variety of dishes.
- Perfect for Dipping: The ultimate way to enjoy focaccia! Serve warm slices with a small bowl of high-quality balsamic vinegar mixed with extra virgin olive oil. It’s also incredible for soaking up rich flavors from hearty soups, stews, or even a robust pizza sauce.
- An Ideal Side Dish: Focaccia makes an excellent accompaniment to almost any meal. Pair it with fresh, vibrant salads to add substance, or serve it alongside your favorite pasta dishes like a comforting vegan lasagna, creamy vegan fettuccine alfredo, or a quick and flavorful 15-minute cherry tomato basil pasta.
- Elevate Your Sandwiches: Slice a piece of focaccia horizontally to create a magnificent bread base for sandwiches. Its sturdy yet soft texture is perfect for holding your favorite fillings. Toast it lightly and top with creamy mashed avocado, classic easy hummus, fresh vegan pesto, and an abundance of fresh veggies for a gourmet plant-based sandwich.
- A Fantastic Pizza Base: Transform your focaccia into a quick and delicious pizza! Simply spread your favorite pizza sauce over the baked or partially baked focaccia, add your preferred vegan toppings, and bake until everything is hot and bubbly. The thick, chewy base makes for a unique pizza experience.
Don’t let any leftover herbed focaccia go to waste! It’s fantastic when cubed and used in a hearty breakfast casserole, toasted and blended into flavorful croutons for salads, or dried and processed into homemade breadcrumbs. It’s also the star ingredient in a delightful focaccia panzanella salad, where stale bread soaks up dressing and tomato juices.
Storing and Reheating Vegan Focaccia for Lasting Freshness
Proper storage is key to enjoying your homemade vegan focaccia for as long as possible. Here’s how to keep it fresh and delicious, ready for its next appearance.
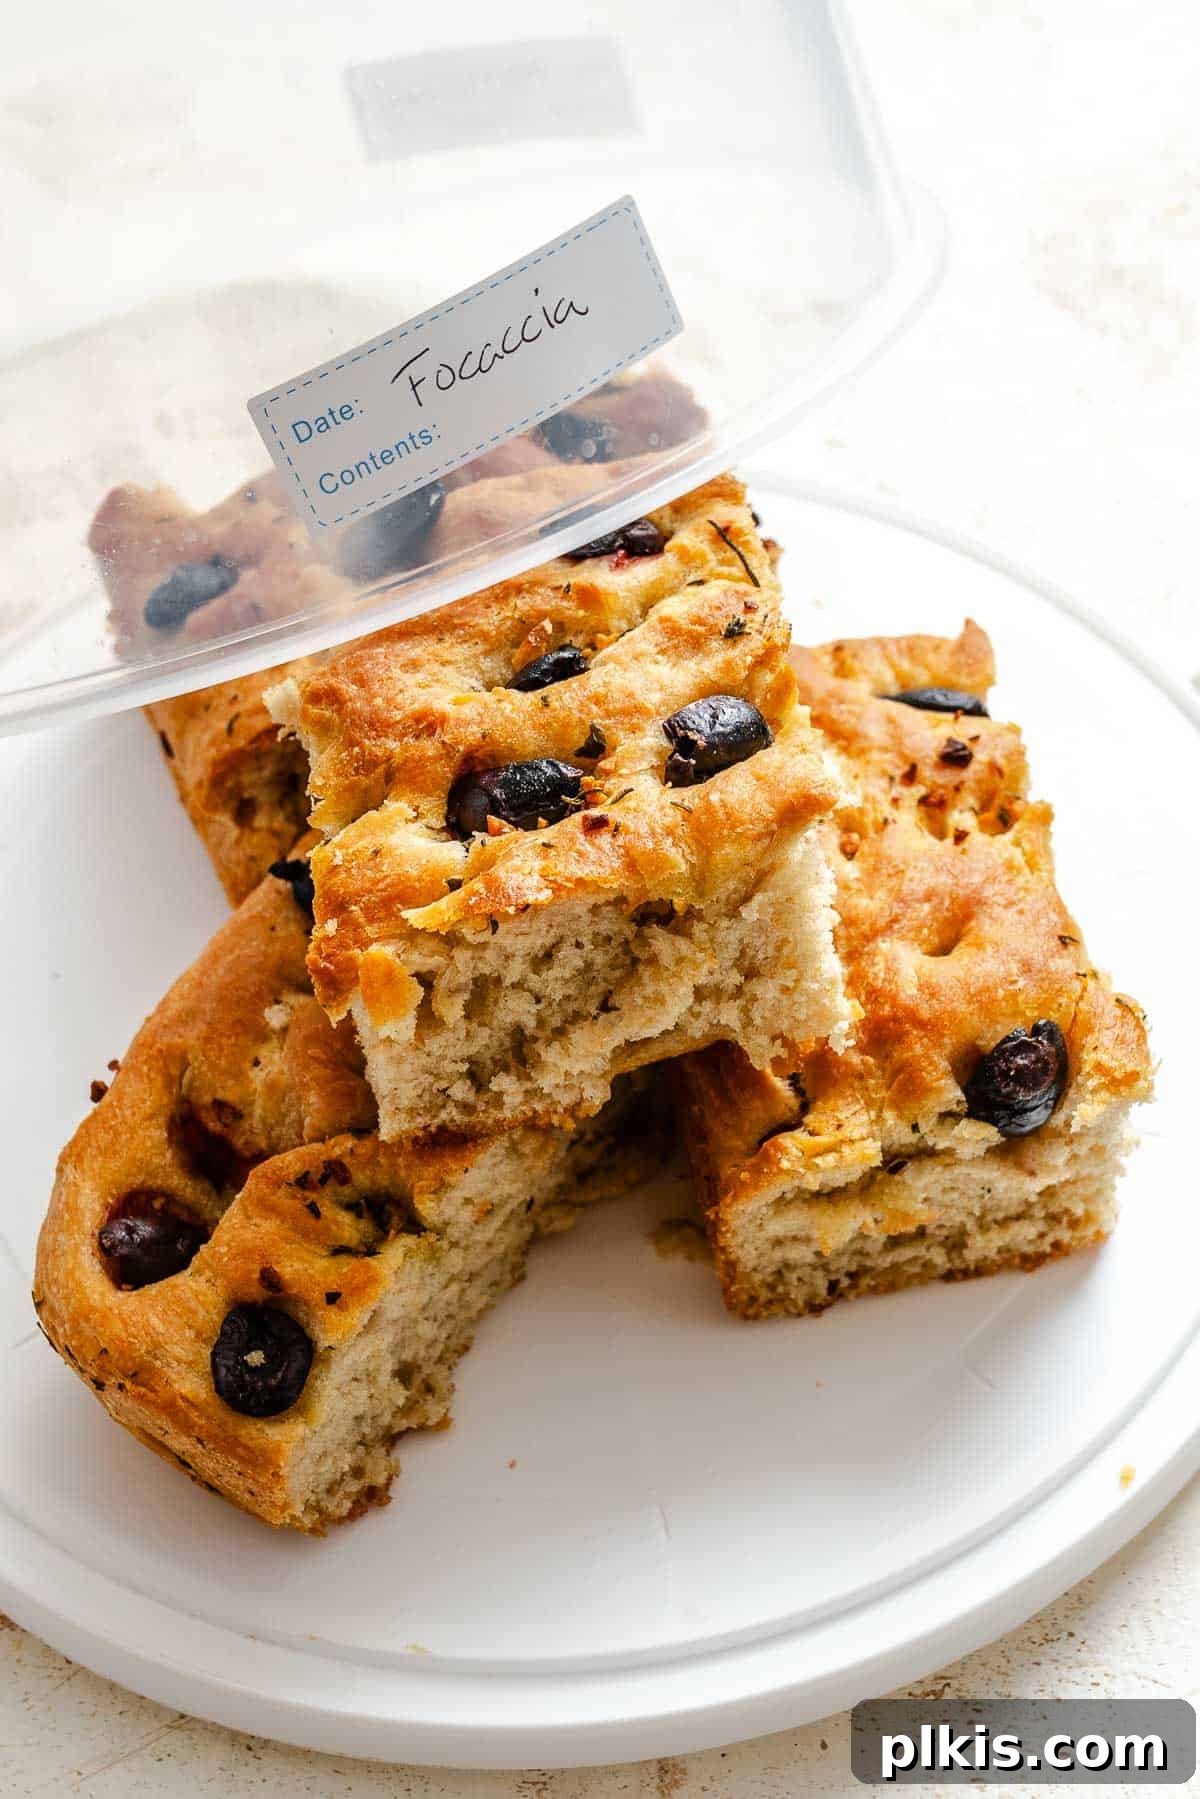
Storage: To keep your focaccia at its best, store it in an airtight container or a Ziplock bag at room temperature. It will remain wonderfully fresh for 3-4 days. For optimal freshness, you might wrap it in foil first, then place it in an airtight container.
Freezing: Focaccia freezes beautifully! Once completely cooled, you can flash freeze individual slices or the entire loaf until solid. Then, transfer the frozen focaccia to a freezer-safe Ziplock bag or an airtight container. It will keep well in the freezer for up to 3 months. To thaw, simply move it to the refrigerator overnight, or let it sit on the counter for several hours until it reaches room temperature.
Reheating: To bring your focaccia back to its warm, fresh-from-the-oven glory, reheat it gently. For an oven reheat, place slices or the whole loaf in a preheated oven at 300°F (150°C) for 8-12 minutes, or until warmed through and the crust crisps up again. If you have an air fryer, it’s a fantastic tool for reheating focaccia quickly; warm for 4-6 minutes at a moderate temperature until crisp.
Explore More Delicious Vegan Bread Recipes
Vegan Lunches
Basic Sandwich Bread Recipe
Vegan Appetizers
Jalapeño Cornbread
Vegan Side Dishes
Vegan Naan
Vegan Side Dishes
Vegan Cornbread Muffins
If you tried this vegan focaccia recipe or any other recipe on my blog, please leave a 🌟 star rating and let me know how it went in the 📝 comments below. Thanks!
Vegan Focaccia (Garlic and Herb) Recipe Card
Vegan Focaccia (Garlic and Herb)
Rated 4.88 out of 5 stars by 48 users.
Prep: 1 hr
Cook: 25 mins
Total: 1 hr 25 mins
Servings: 1 loaf
Print Recipe
Make the BEST vegan focaccia with 7 ingredients and 5 minutes of kneading – Airy inside, chewy, with a crisp, golden crust and irresistible garlic-herb flavor (+ customizable toppings)!
Video Guide
Equipment
- Measuring Cups
- Measuring spoons
- Whisk
- Large bowl
Ingredients
- 1 cup olive oil
- 2 tablespoons minced fresh herbs (like rosemary, thyme, or oregano)
- 4 garlic cloves, minced
- 2 cups lukewarm water
- 2 ¼ teaspoons (1 packet) rapid rise yeast
- 1 ½ teaspoons sugar
- 5 cups all-purpose flour, divided
- ¾ teaspoon salt, plus more for garnish
- ⅓ cup your choice olives, pitted and halved (optional)
Instructions
- In a sauté pan over medium heat, warm the olive oil. Stir in the fresh herbs and garlic, and heat for about 1 minute until fragrant and lightly cooked. Reduce the heat if the garlic begins to brown too quickly. Remove from heat and set aside.
- In a medium bowl, whisk together the lukewarm water, rapid rise yeast, and sugar. Let it sit for 5–10 minutes until bubbles form on the surface.
- In a large bowl, whisk 2 cups of flour with 1/3 cup of the herb oil and the yeast mixture. Let the mixture rest for 3 minutes.
- Add the remaining flour and salt, then mix by hand until a smooth dough forms. Knead the dough for about 5 minutes. Cover the bowl with a warm damp towel or plastic wrap and let rise for 45 minutes.
- While the dough rises, prepare a 9×13-inch pan by spreading 1/3 of the remaining herb oil across the bottom using a brush or paper towel.
- Preheat the oven to 410 degrees F (210 degrees C).
- Once the dough has risen, transfer it to the prepared pan and stretch it to fill the corners. Use your fingers to press dimples all over the dough. Spread the remaining herb oil on top and press the olives gently into the dough.
- Bake for 25 minutes, or until lightly golden. For a crispier top, bake for an additional 5–10 minutes to your preference.
Notes
- For the best flavor/texture: Cold proofing the dough in the fridge overnight (up to 3 days) adds flavor depth, an extra open, airy crumb, and a deeper brown crust.
- Use warm water: It needs to feel warm to the touch, not hot. Even better, use a thermometer and aim for 110 – 115°F/44 – 46 °C.
- Check the yeast: Ensure it’s in date/active for a fluffy, airy homemade focaccia.
- Oil the pan well: To prevent sticking.
Nutrition Information (Approximate per serving for 1 loaf, as provided)
- Calories:
- 4314 kcal
- Carbohydrates:
- 492 g
- Protein:
- 69 g
- Fat:
- 230 g
- Saturated Fat:
- 32 g
- Polyunsaturated Fat:
- 26 g
- Monounsaturated Fat:
- 164 g
- Sodium:
- 2492 mg
- Potassium:
- 817 mg
- Fiber:
- 21 g
- Sugar:
- 8 g
- Vitamin A:
- 389 IU
- Vitamin C:
- 4 mg
- Calcium:
- 166 mg
- Iron:
- 31 mg
Additional Info
- Author:
- Toni Okamoto
- Course:
- Breakfast (can also be an appetizer or side)
- Cuisine:
- American (with Italian influences)
- Method:
- Oven
- Diet:
- Vegan
Tried this recipe? Please tag us at @PlantBasedOnABudget! 🙂