
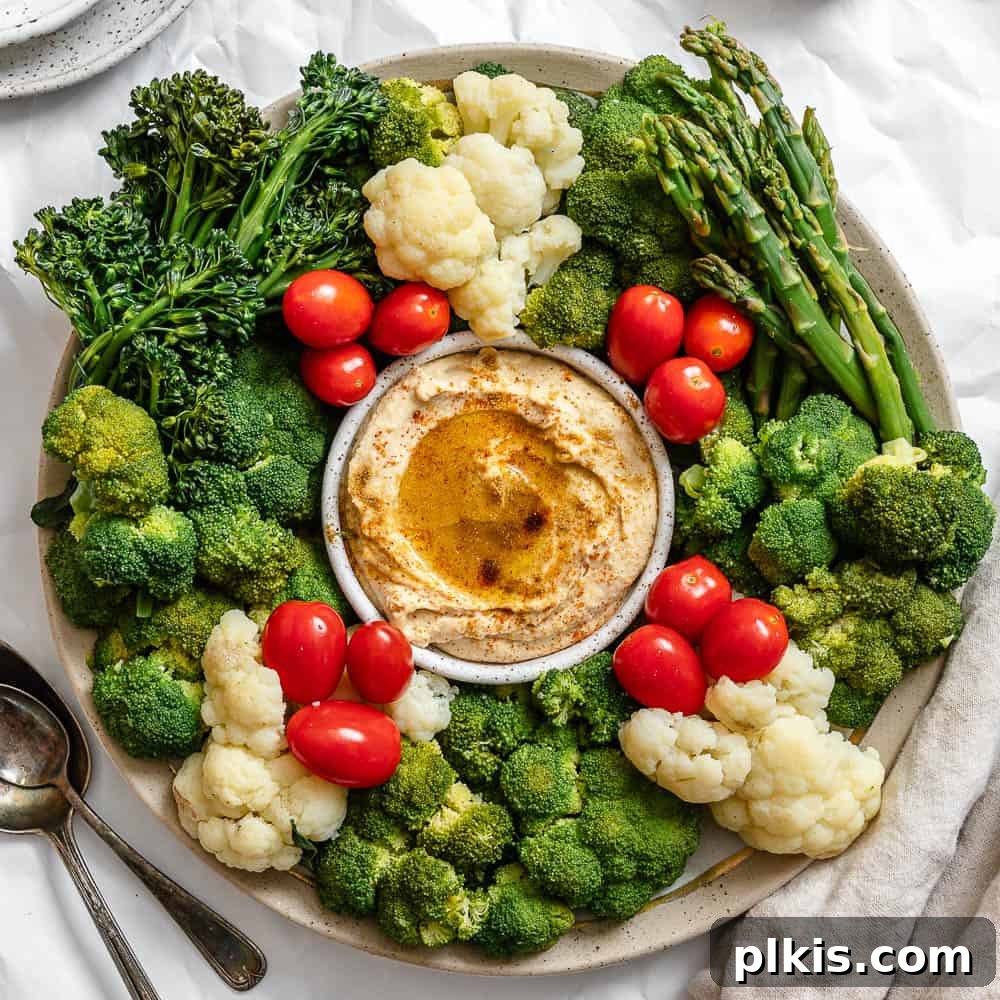
This **Christmas veggie tray** with dip/s can be shaped into a holiday wreath or Christmas tree for a quick, fun, festive appetizer, perfect for entertaining this holiday season!
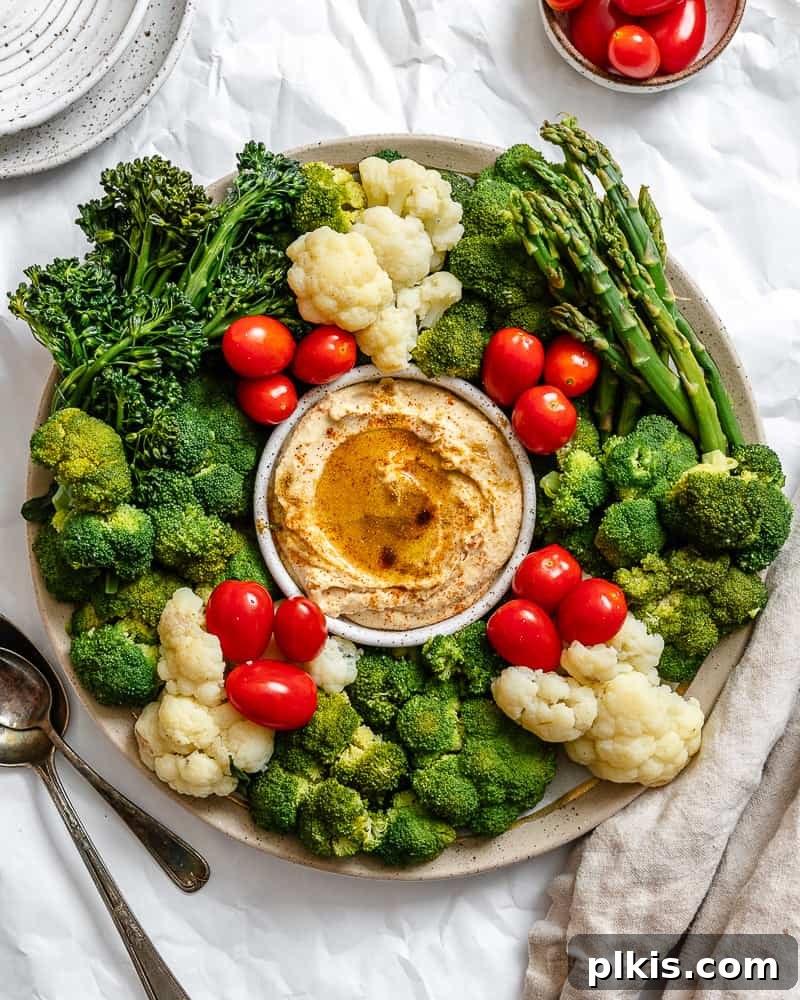
Table of Contents
- Super Festive Veggie Wreath or Christmas Tree Veggie Tray
- Why You’ll Love a Christmas Veggie Tray
- The Ingredients and Substitutes
- The Vegetables
- The Best Veggie Tray Dips
- How to Make an Xmas Veggie Tray
- Prepare the Vegetables
- Christmas Wreath Veggie Tray
- Christmas Tree Veggie Tray
- FAQs
- Top Tips For The Best Christmas Veggie Tray
- Can You Make A Christmas Veggie Tray in Advance?
- More Christmas Appetizer Recipes
Craft the Perfect Festive Veggie Wreath or Christmas Tree Veggie Tray
As the holiday season draws near, the air fills with joy, festive music, and, of course, an abundance of delicious food. While indulgence is part of the charm, many hosts appreciate offering lighter, healthier options alongside the rich holiday fare. Enter the **Christmas veggie tray** – a vibrant, versatile, and surprisingly fun appetizer that brings a refreshing balance to your festive spread. This guide will show you how to transform simple vegetables and delectable dips into a stunning holiday wreath or an adorable Christmas tree, making it the star of your holiday entertaining.
Beyond being a healthy choice, a creatively arranged veggie tray is a feast for the eyes. Imagine a burst of red, green, and white hues adding a cheerful pop to your holiday table, inviting guests to enjoy guilt-free snacking. This isn’t just a snack; it’s a conversation starter, an edible centerpiece that delights both children and adults. You might even be surprised at how quickly these artful arrangements disappear!
While perfect for Christmas, the concept of a themed vegetable platter extends beautifully to other celebrations. Consider assembling a delicious vegan wreath charcuterie board or designing veggie trays for New Year’s Eve, 4th of July, Valentine’s Day, Halloween, or Thanksgiving. Each holiday offers a unique opportunity to get creative with colors and shapes!
Why You’ll Adore This Christmas Veggie Tray
Preparing a festive veggie tray offers a multitude of benefits, making it an ideal choice for your holiday gatherings:
- Effortlessly Quick and Simple: In the midst of holiday preparations, time is often a luxury. This Christmas veggie tray comes to the rescue! You can assemble this eye-catching appetizer in as little as 10-15 minutes, with minimal hands-on effort. It’s the perfect solution for last-minute guests or when you need a beautiful dish without the stress.
- Unquestionably Festive Appeal: The true magic of this appetizer lies in its festive design. By shaping your vegetables into a charming holiday wreath or a whimsical Christmas tree, you instantly elevate a simple snack into a show-stopping centerpiece. Enhance the visual appeal with vibrant red and green veggies like juicy cherry tomatoes, crisp bell peppers, and fresh broccoli florets. A creamy, classic hummus or a colorful dip serves as the perfect foundation, tying the festive look together.
- Wholesome and Nutritious: Amidst the rich treats and heavy meals of the holiday season, providing a healthy option is always a thoughtful gesture. This veggie tray is packed with essential vitamins, minerals, and fiber, offering a guilt-free way for guests to snack. It helps balance out the indulgence, ensuring everyone can find something delicious and nourishing. Plus, it’s inherently friendly to various dietary needs, being naturally gluten-free, dairy-free, and vegan-friendly, accommodating a wider range of guests.
- Conveniently Prepared in Advance: Planning is key for stress-free holiday entertaining. Many components of this Christmas veggie tray can be prepped hours, or even a day, before your event. Washing, cutting, and even cooking certain vegetables can be done ahead of time, allowing you to simply assemble the tray just before serving. This flexibility means less last-minute scrambling and more time to enjoy your guests.
- Infinitely Customizable: One of the greatest joys of creating a veggie platter is the freedom to customize it to your taste and your guests’ preferences. From the selection of vegetables to the variety of dips, the possibilities are endless. You can serve vegetables raw for maximum crunch, lightly blanch them for a tender bite, or even mix and match textures. Keep reading for an extensive list of veggie and dip options to inspire your creativity!
The Essential Ingredients and Smart Substitutes
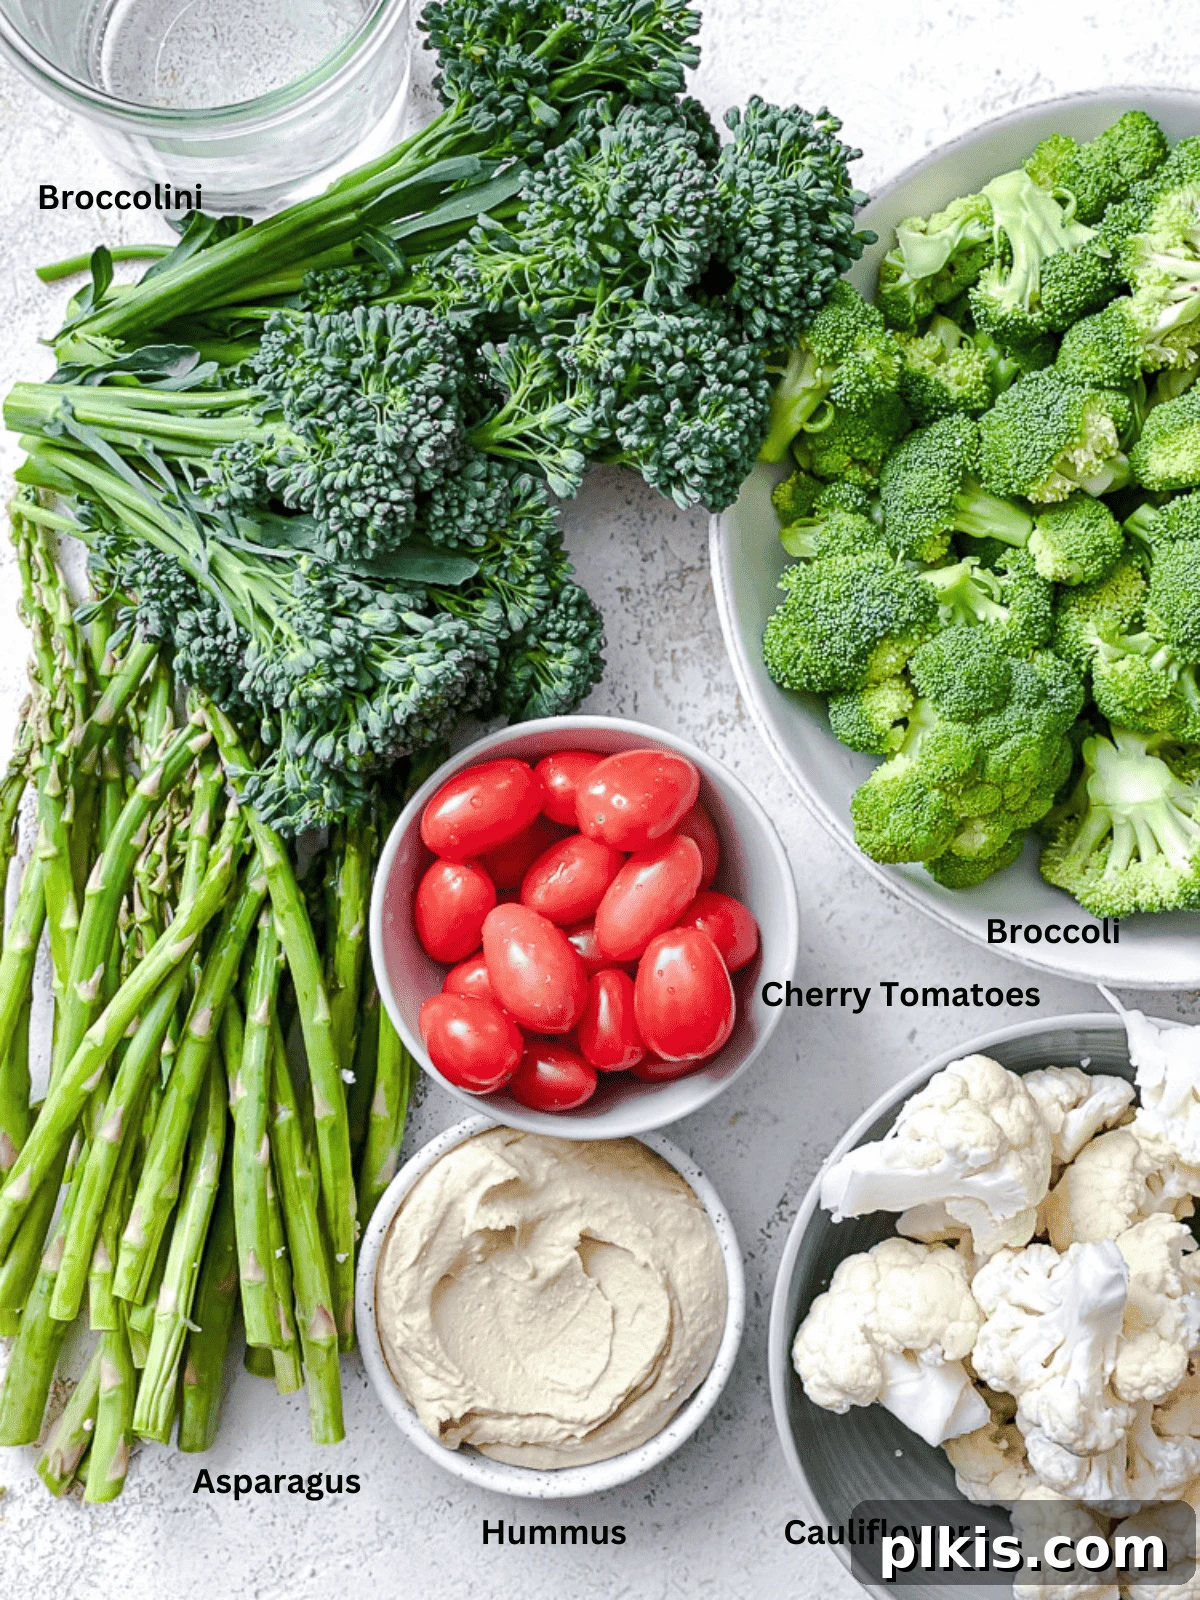
The Festive Vegetable Selection
For a truly spectacular Christmas-themed veggie tray, focus on vegetables that naturally showcase the holiday colors: vibrant reds, lush greens, and crisp whites. Here are some of our top picks, along with other excellent additions:
- Cauliflower: Cut into beautiful 2-inch florets, its white color provides a striking contrast and can represent snow or fluffy clouds. It offers a mild flavor and a satisfying crunch when raw, or a tender texture when blanched.
- Broccoli: Also cut into 2-inch florets, broccoli is essential for the “tree” or “wreath” structure due to its vibrant green color and robust texture. It’s packed with nutrients and offers a distinct, earthy flavor.
- Broccolini: With its slender stems and delicate florets, trimmed broccolini adds an elegant touch and another shade of green. It’s slightly sweeter and more tender than traditional broccoli.
- Asparagus: Ends trimmed, asparagus spears offer a long, elegant green component, perfect for outlining shapes or adding height to your display. Their crisp-tender texture is delightful.
- Cherry Tomatoes: Halved or kept whole, these bright red jewels are perfect for adding splashes of festive color, resembling cranberries or ornaments on your edible wreath or tree.
Expand Your Holiday Veggie Tray with These Wonderful Additions:
- Carrots: Whether you choose classic batons, sticks, or adorable baby carrots, their bright orange hue is a welcome addition. You can also use cookie cutters to create festive shapes like stars or snowflakes.
- Cucumber: Batons, slices, or even fun shapes cut with cookie cutters (stars, candy canes) provide a refreshing, cool element and a lovely green color.
- Snow Peas / Sugar Snap Peas: These flat, crisp pods offer a unique texture and a bright green color, perfect for filling in gaps or creating delicate outlines.
- Green Beans: Lightly steamed or boiled, green beans add another shade of green and a pleasant, tender crunch.
- Bell Peppers: Strips of red, orange, or yellow bell peppers bring vibrant colors and a sweet, crisp bite. Red bell pepper is especially good for creating decorative “ribbons” or “bows.”
- Celery: Crisp celery sticks are a classic choice for dipping and contribute a pale green color and refreshing crunch.
- Radishes: Sliced, halved, or served whole, radishes add a beautiful pop of red and a peppery bite.
- Baby Corn: These miniature ears of corn add a touch of sweetness and a unique visual element.
- Dill Pickles: For a tangy, briny contrast, sliced dill pickles can be a surprising and welcome addition.
- Olives: Black or green olives offer a savory, briny flavor and can serve as small “ornaments” on your tree or wreath.
- Beets: Roasted, steamed, or pickled, sliced beets bring a deep, rich red color. Remember to provide toothpicks as they can stain fingers.
Pro Tip: Get creative with food cutters! Shape cucumber or carrot slices into stars, candy canes, or tiny trees for an extra festive touch. For an elegant garnish, arrange fresh lemon or lime slices and sprigs of fresh herbs like rosemary or dill around your display. These small details make a big impact!
The Best Veggie Tray Dips to Complement Your Platter
No veggie tray is complete without a selection of delicious dips! Offer a variety to cater to different tastes. Here are some fantastic plant-based options:
- Hummus: A universal crowd-pleaser. Choose classic hummus for its creamy texture, or explore exciting variations like dill pickle hummus or caramelized onion hummus for an added twist.
- Creamy White Bean Dip: A lighter alternative to traditional creamy dips, offering a smooth texture and subtle flavor that pairs well with most vegetables.
- Vegan Ranch Dressing: The familiar, tangy flavor of ranch is always a hit, especially with younger guests. Look for store-bought vegan options or make your own.
- French Onion Dip: Rich, savory, and incredibly addictive, this classic dip is a must-have for many. Ensure you use a vegan version made with plant-based sour cream or cashews.
- Guacamole: Fresh, vibrant, and full of healthy fats, guacamole adds a pop of green and a creamy, zesty flavor. Perfect for those who love a bit of avocado goodness.
- Tzatziki: A refreshing, yogurt-based dip with cucumber and garlic. Use a plant-based yogurt (like soy or coconut) for a delicious vegan version.
- Baba Ganoush: A smoky, flavorful dip made from roasted eggplant, offering a Mediterranean flair to your tray.
- Salsa: For a lighter, zesty option, offer salsa. A restaurant-style fresh salsa or a tangy tomatillo green chili salsa can add a delightful kick.
- Spinach Artichoke Dip: A warm, comforting, and cheesy dip (vegan version) that can be served cold or warm. A creamy spinach dip is another excellent choice.
- Creamy Pesto Vegan Yogurt Dip: A unique dip combining the fresh flavors of pesto with the tanginess of vegan yogurt, creating a bright and herbaceous option.
- Buffalo Dip: For those who love a bit of heat, a creamy vegan buffalo dip (often made with cauliflower or cashews) offers a spicy and flavorful kick.
Remember, whether store-bought or homemade, ensure all dips are **vegan versions** to keep your platter fully plant-based and accessible to more guests.
How to Assemble Your Festive Xmas Veggie Tray
Prepare the Vegetables with Care
The foundation of any great veggie platter is fresh, well-prepared vegetables. Here’s how to get them ready for their starring role:
- Wash and Trim: Begin by thoroughly rinsing all your chosen vegetables under cold water. Trim off any tough ends, stems, or blemishes. If you prefer your vegetables raw, simply cut them into bite-sized pieces or desired shapes (florets, sticks, slices).
Customization Tip: Feel free to **mix and match** preparation methods! Some vegetables, like carrots and cucumbers, are fantastic raw, while others, such as broccoli and cauliflower, can benefit from a quick blanch or steam for a slightly softer texture and brighter color. It’s entirely up to your preference and the texture you desire.
- For Tender Veggies (Boiling/Steaming): If you opt for more tender vegetables, boiling or steaming is an excellent method. Bring a large pot of water to a rolling boil.
- Layering for Even Cooking: Carefully add your vegetables to the boiling water (or steamer basket) in layers, starting with those that require the longest cooking time at the bottom. For example, add cauliflower first, then broccoli, followed by broccolini, and finally, the delicate asparagus on top (furthest from the direct heat if boiling, or at the top of the steamer). This ensures all vegetables cook evenly to a crisp-tender consistency.
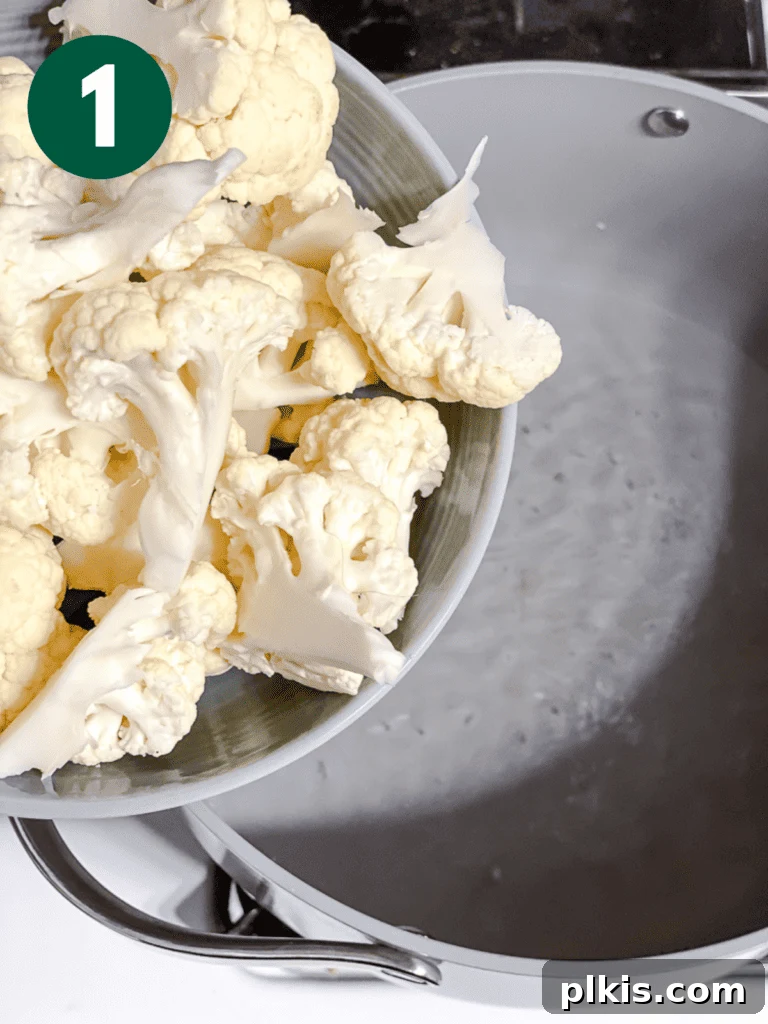
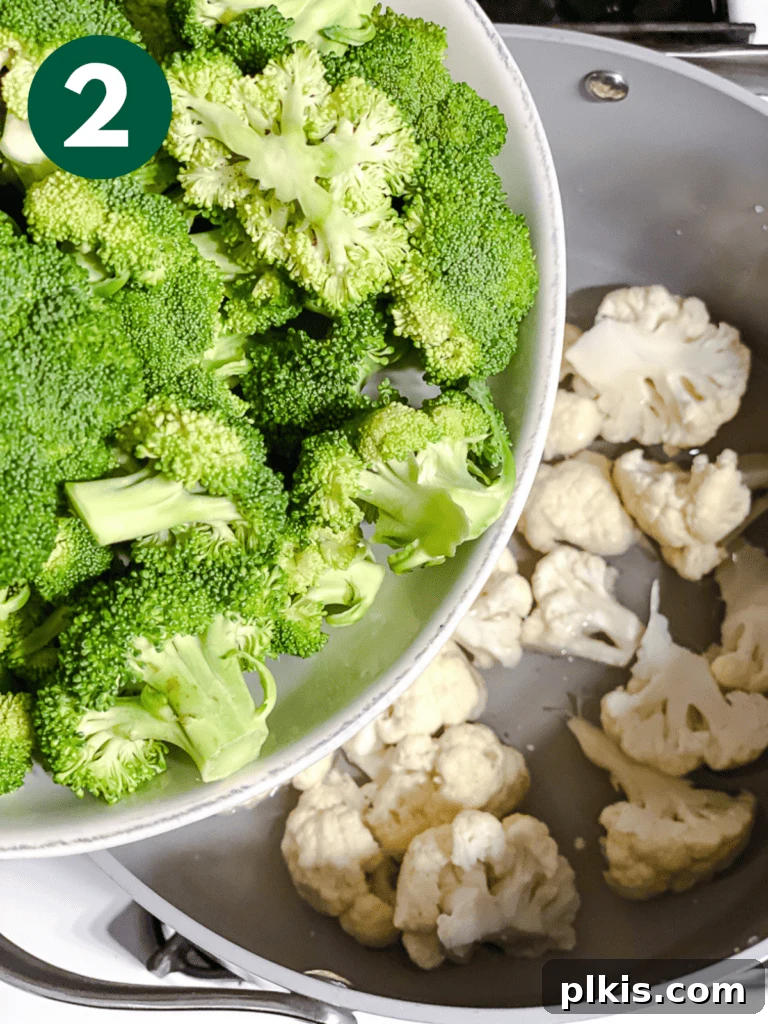
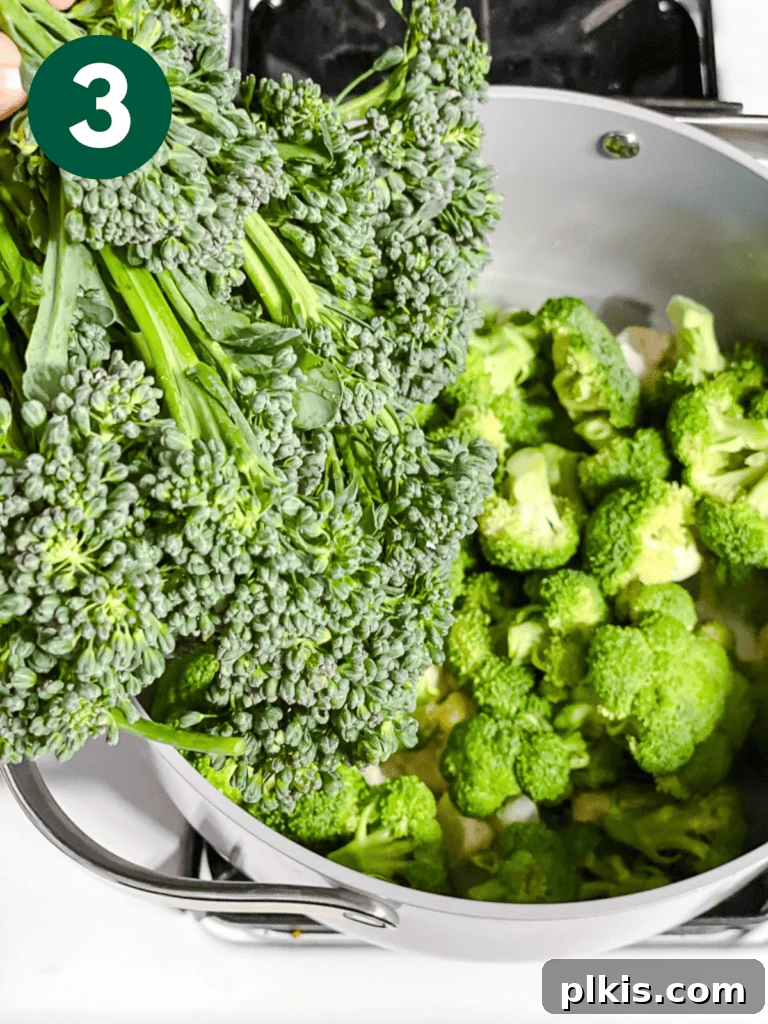
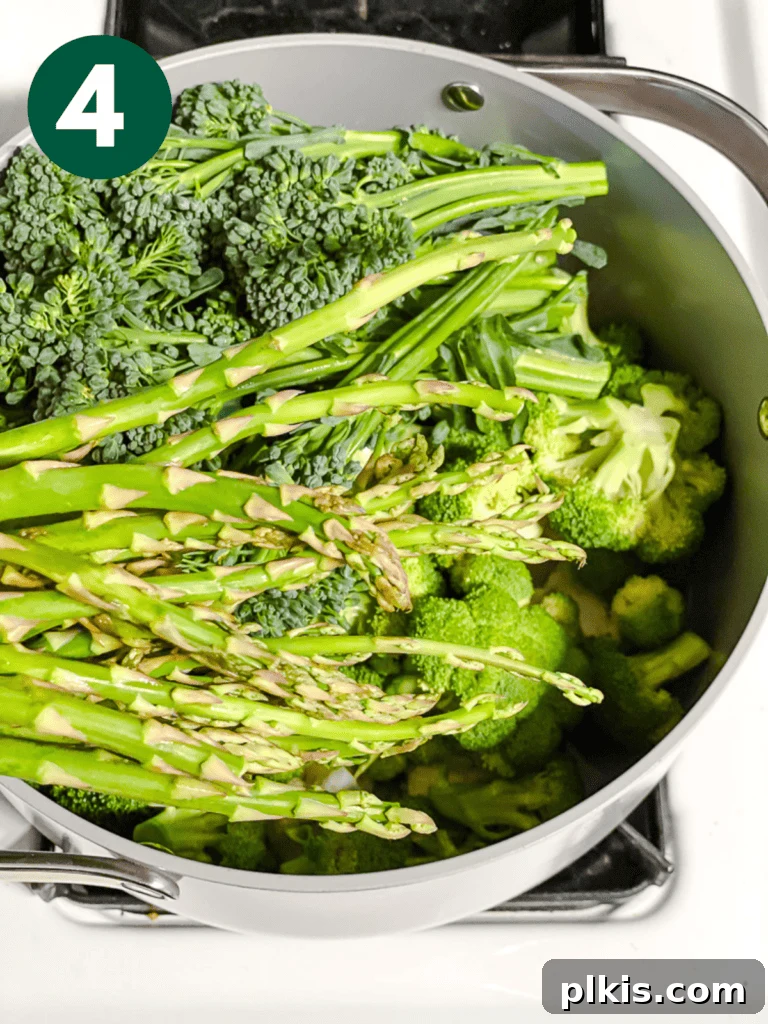
When steaming, apply the same principle: **place the ‘hardest’ or longest-cooking vegetables at the bottom of the basket** and the quickest-cooking ones on top. Steam until they reach your desired level of tenderness – typically just a few minutes for most.
- Cook and Cool: Cover the pot with a lid, reduce the heat to low, and let the vegetables simmer (or steam) for about 5 minutes, or until tender-crisp. Immediately after cooking, carefully remove the vegetables with tongs and transfer them to a colander. Rinse them under cold water (an ice bath works even better) to stop the cooking process and preserve their vibrant color. Allow them to cool completely and drain thoroughly before assembling.
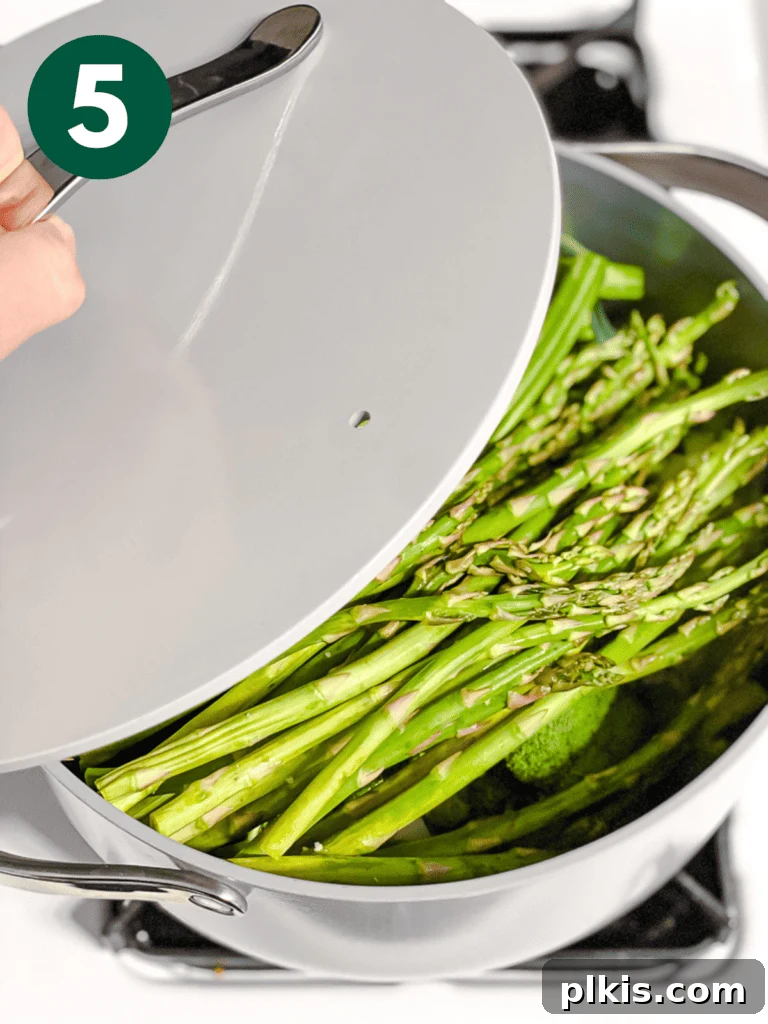
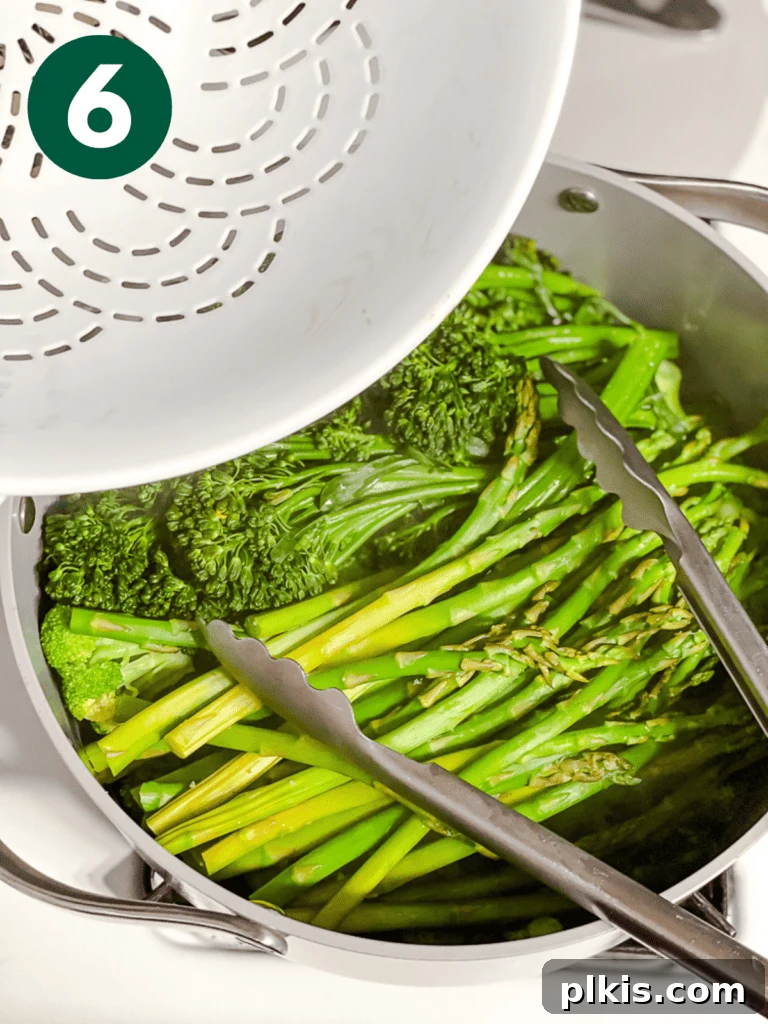
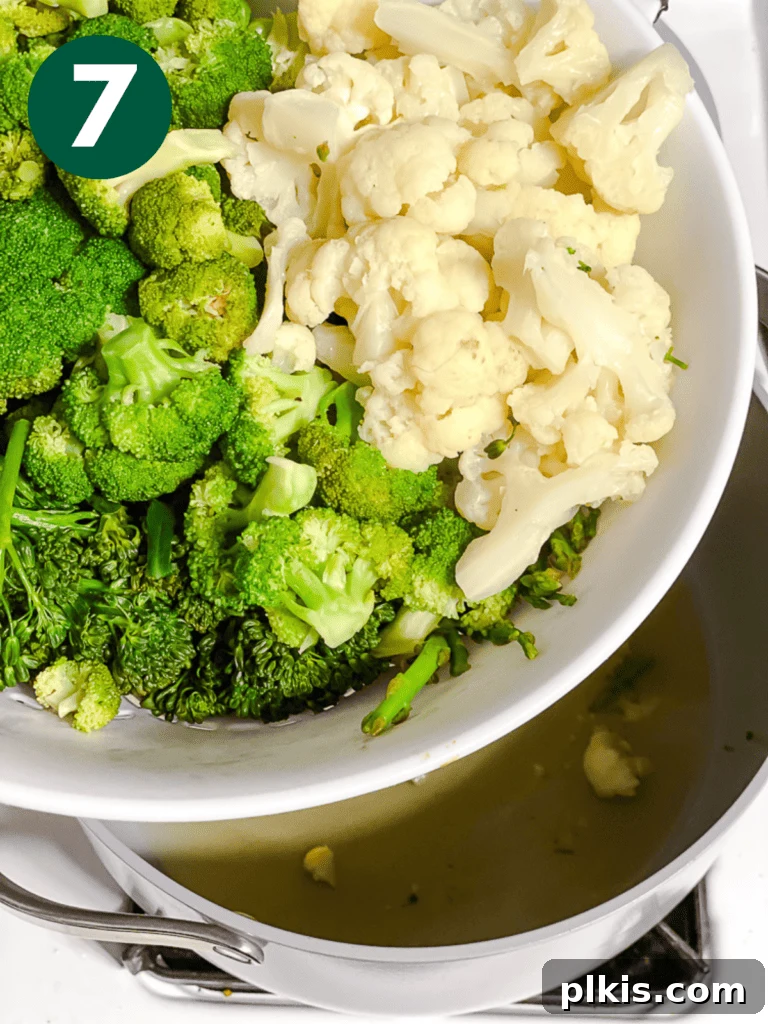
Organizational Tip: As you drain the vegetables, try to **keep the various kinds organized and separate**. This will make it much easier and quicker when you begin to shape them into your elegant Christmas wreath or charming Christmas tree veggie tray.
Crafting a Beautiful Christmas Wreath Veggie Tray
Creating a Christmas vegetable wreath is delightfully simple and serves as an ideal presentation for showcasing one main dip beautifully in the center:
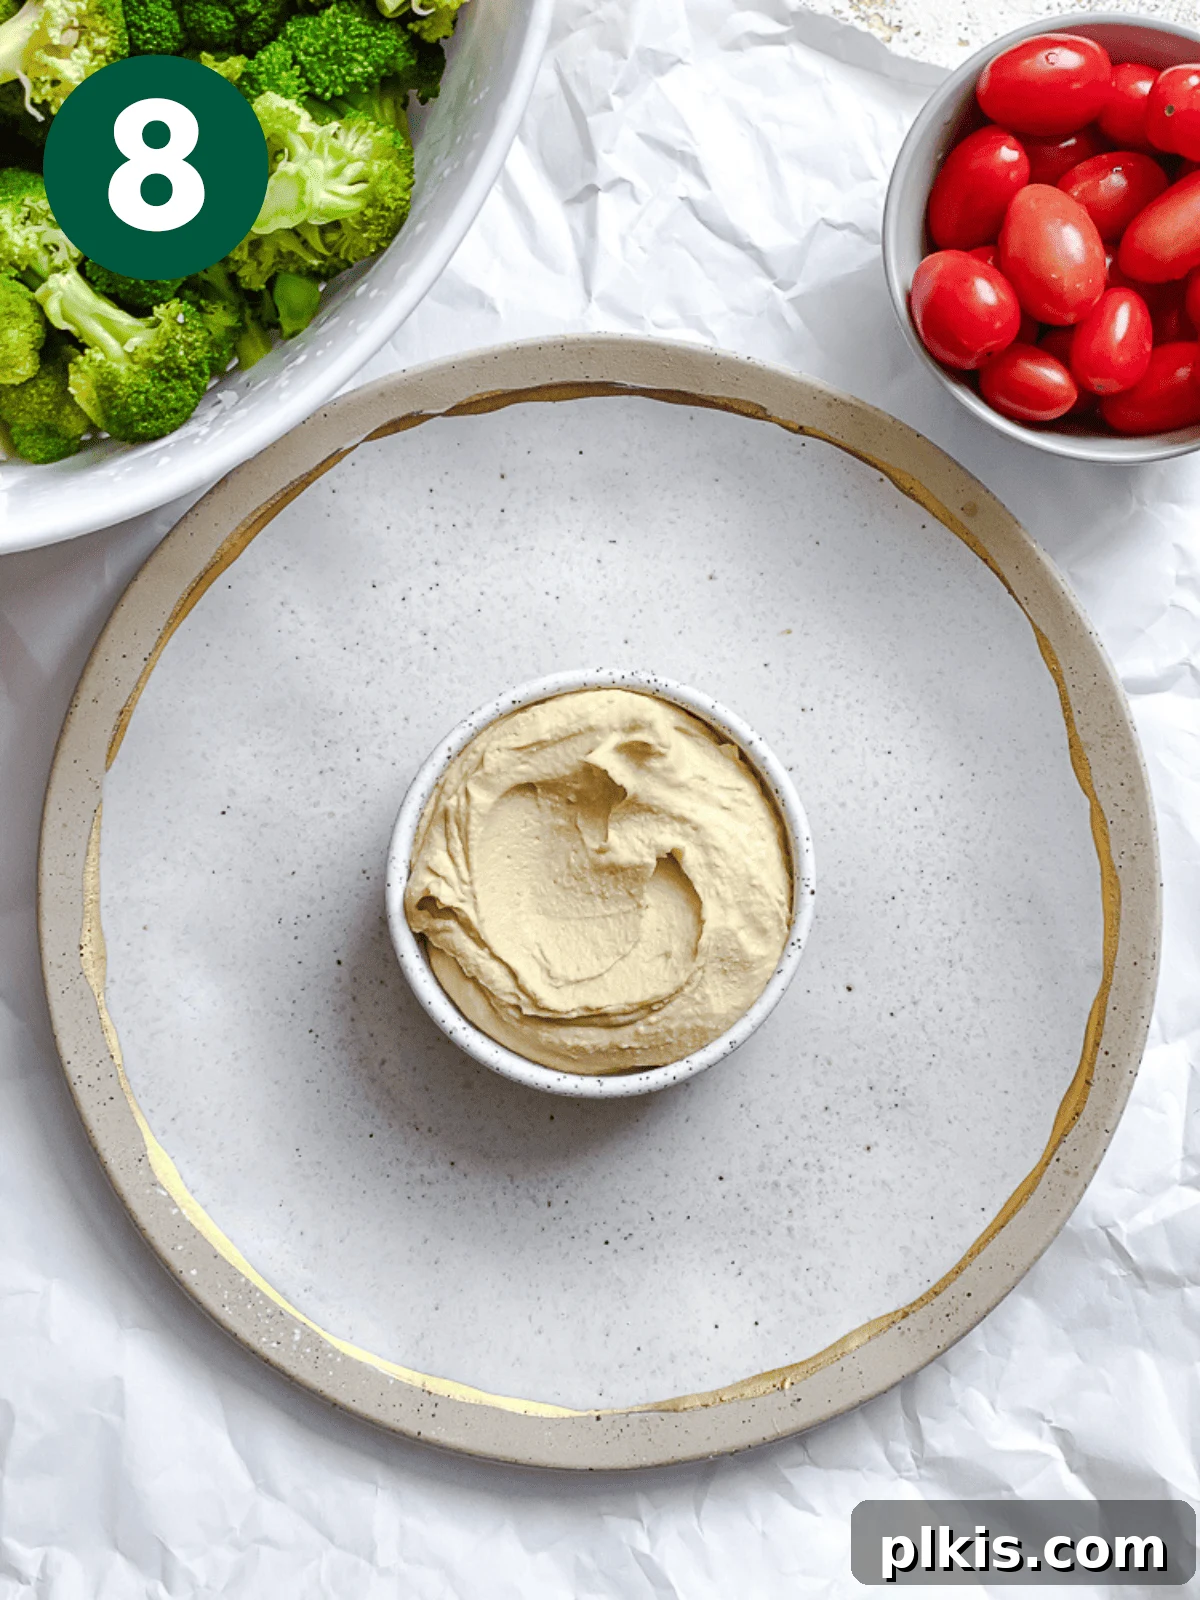
- Center the Dip: Select a large, round serving board or dish. Place a small, attractive bowl of your chosen dip (such as a creamy, fluffy hummus) directly in the middle of the platter. This bowl will form the inner circle of your wreath.
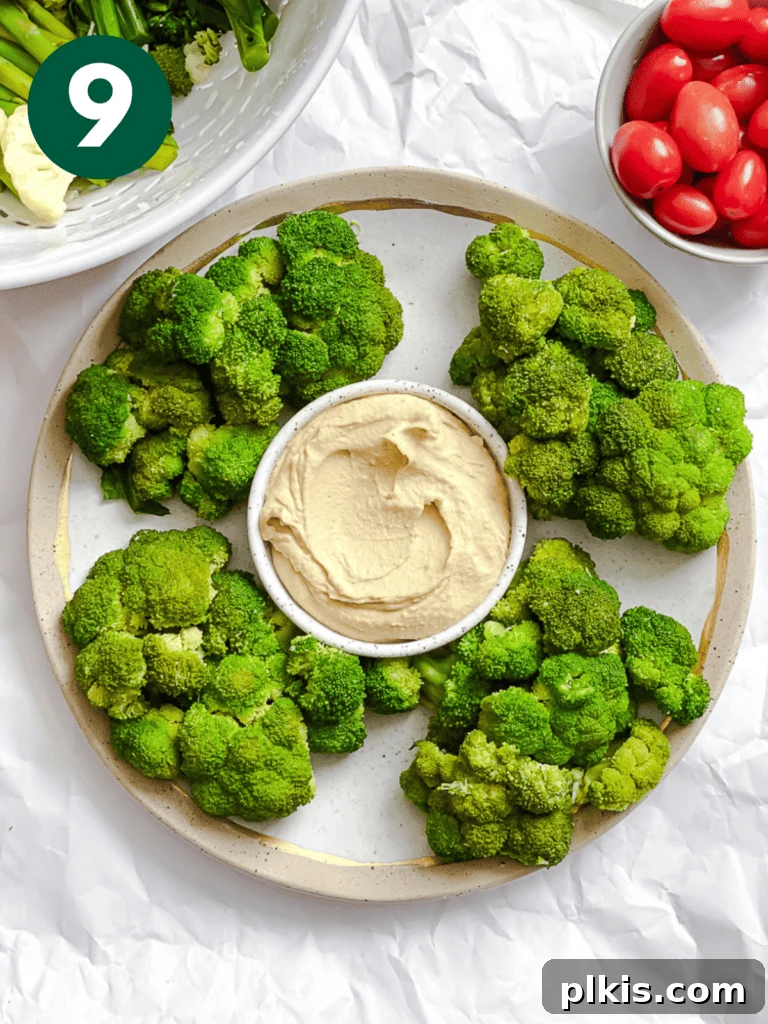
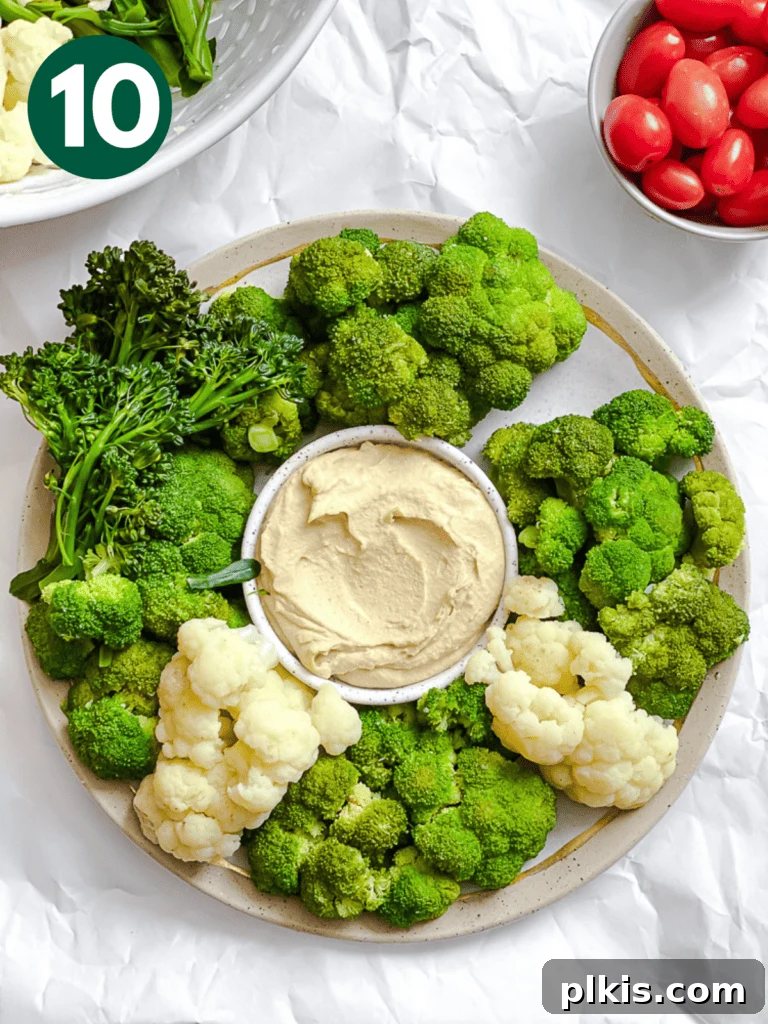
- Form the Wreath Base: Begin arranging the broccoli florets around the dip bowl. Position them so that the green florets face outwards, creating a lush, leafy ring that resembles a natural Christmas wreath. Ensure the broccoli forms a consistent and appealing circle.
- Decorate Your Wreath: Once the broccoli base is established, artfully scatter the remaining prepared vegetables throughout the wreath. Think of these as your ornaments. Distribute cauliflower florets, asparagus spears, and cherry tomatoes (whole or halved) evenly to add varying textures, colors, and visual interest. Aim for a balanced and inviting display.
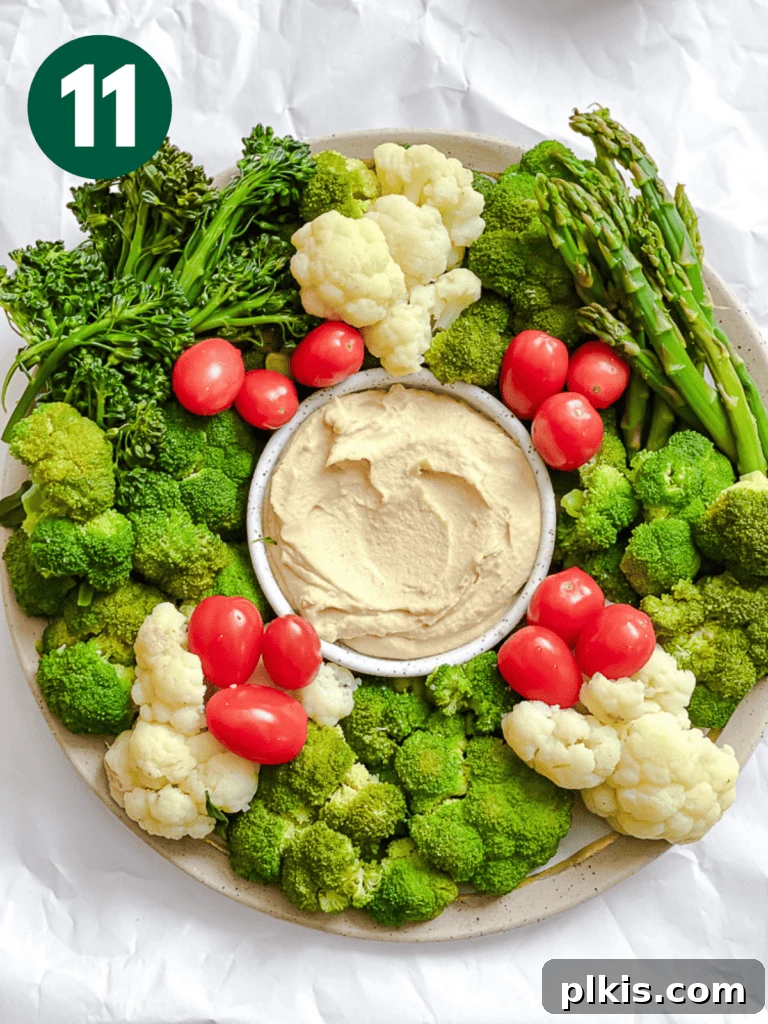
Extra Flair: For an additional touch of festive elegance, consider creating a “ribbon” for your wreath. Simply cut a red bell pepper into five pieces: two wide strips for the loops of the bow, a small square or rectangle for the center knot, and two thin strips for the flowing ribbons. Arrange these carefully on your veggie wreath for a truly polished look.
Designing a Charming Christmas Tree Veggie Tray
This version allows for multiple dips to be placed around the perimeter of the platter, while the main event is the beautifully constructed veggie Christmas tree:
- Build the Tree Base: On your chosen serving board or dish, start by using your largest vegetables (like broccoli florets or celery sticks) to create the widest, bottom layer of your Christmas tree. Arrange them in a triangular shape that will form the sturdy base of your tree.
Creative Trunk Option: Don’t forget the tree’s trunk! You can craft a “trunk” for your vegetable Christmas tree using sturdy vegetables like carrot sticks or cucumber spears. Alternatively, use rosemary crackers or pretzel sticks for an edible and appealing base.
- Layer and Shape: Continue building your tree by adding successive layers of individual vegetables. Arrange them in increasingly narrower rows, gradually tapering upwards to form a classic triangular Christmas tree shape. You can use different colored vegetables in each layer for visual interest, or stick to greens for a more traditional look.
- Add Edible Ornaments: Once your tree shape is complete, it’s time for the “decorations.” Carefully place whole or halved cherry tomatoes, sliced radishes, or colorful bell pepper pieces over the top of the vegetables, resembling festive baubles or twinkling lights.
- Star Topper: To crown your masterpiece, cut a star shape from a piece of yellow bell pepper, carrot, or even a slice of cheese (if not keeping it strictly vegan). Place this star proudly at the very top of your vegetable Christmas tree.
- Arrange the Dips and Fillers: Finally, place small bowls of your selected dips around the outside of the completed Christmas tree veggie tray. For added visual appeal and extra dipping options, you can optionally fill any remaining space on the tray with an assortment of crackers, breadsticks, or extra veggie sticks, creating a beautiful “background” or “snowy ground” for your tree.
Alternative Tree Design: Another approach is to **create a solid ‘base’ silhouette of broccoli** (perhaps with some sugar snap peas or snow peas along the edges for a softer outline). Then, focus on **’decorating’ this green base** with various elements. For example, use cherry tomatoes for baubles, cucumber and carrot slices (cut into shapes like stars or snowflakes) for ornaments, and thin strips of bell pepper for tinsel. This method allows for maximum creative expression!
Frequently Asked Questions About Your Christmas Veggie Tray
To keep your vegetables fresh, transfer any leftover raw or cooked vegetables to individual airtight containers or sealable bags (like Ziplock or Stasher bags). Store them in the refrigerator, where they will typically remain fresh and crisp for 2-3 days. Dips should be stored separately in their own airtight containers.
For food safety, it is generally recommended not to leave perishable food, including vegetable trays with dips, at room temperature for more than 2 hours. This is especially true if the ambient temperature is above 40°F (4°C). If you anticipate your tray being out longer, consider serving it over a larger dish filled with ice to keep the vegetables and dips chilled, extending their safe serving time slightly.
Absolutely not! Many vegetables are perfectly delicious and wonderfully crunchy when served raw, such as carrots, celery, cucumbers, bell peppers, and radishes. Some, like broccoli and cauliflower, can be enjoyed raw as well, though many people prefer them lightly blanched or steamed to soften their texture and brighten their color. It’s entirely a matter of personal preference and the variety of textures you want to offer.
For children, focus on colorful, easy-to-eat vegetables that are often mildly flavored. Baby carrots, cucumber sticks, bell pepper strips (especially red and yellow), cherry tomatoes, and snap peas are typically popular. You can also use cookie cutters to make fun shapes out of cucumbers or carrots to entice picky eaters. Offering their favorite dip, like a mild hummus or vegan ranch, can also encourage them to try more veggies.
While fresh vegetables are always preferred for their crispness and vibrant appearance on a raw veggie tray, you can use frozen vegetables if properly prepared. For vegetables like broccoli or cauliflower, thaw them completely and then blanch or steam them until tender-crisp. Ensure they are thoroughly drained and cooled before adding them to the tray to avoid excess moisture. However, for “raw” items like cucumber or carrots, fresh is essential.
Top Tips For The Best Christmas Veggie Tray Ever
- Prioritize Super Fresh Vegetables: The quality of your vegetables directly impacts the taste and appearance of your tray. Always choose the freshest, crispest produce available for the best flavor and texture.
- Embrace Both Raw and Cooked: Don’t limit yourself! Some vegetables shine brightest when raw (like crisp cucumber, sweet carrots, and crunchy bell peppers), while others benefit from a quick steam, boil, or blanch to soften their “raw” edge and enhance their color (such as cauliflower, broccoli, and green beans). A mix offers wonderful textural contrast.
- Avoid Overcooking the Vegetables: If you choose to cook your vegetables, be careful not to overcook them. Mushy or limp vegetables lose their appeal quickly. Aim for a “tender-crisp” texture, where they still have a slight bite. Remember the layering technique for even cooking – longest-cooking veggies closest to the heat source.
- Unleash Your Creativity with Flavors and Designs: Half the fun of assembling an Xmas veggie tray is experimenting! Don’t be afraid to try new vegetable combinations, introduce unexpected colors, or play with different presentation styles. Let your holiday spirit guide your design choices.
- Thoughtfully Label Your Dips: If you’re offering multiple dips, it’s a courteous gesture to label them. This helps guests (especially those with dietary preferences or allergies) know exactly what they’re enjoying and makes navigating your delicious spread much easier.
- Choose the Right Platter: The size and shape of your serving platter or board are important. A larger platter allows for more elaborate designs and a greater variety of vegetables. Round boards are perfect for wreaths, while rectangular ones work well for trees or linear arrangements.
- Consider Temperature Control: Especially if your party stretches over several hours, keeping your veggie tray cool is crucial. Place the platter on top of a larger bowl filled with ice, or consider refreshing smaller portions throughout the event.
- Don’t Forget the Garnish: A simple garnish can elevate your tray from good to gourmet. Fresh herbs like parsley, dill, or rosemary sprigs can add a touch of green and a pleasant aroma. A few strategically placed lemon or lime wedges also add a fresh, vibrant touch.
- Provide Adequate Serving Utensils: Make sure you have enough small tongs or toothpicks available for guests to easily pick up vegetables without directly touching the tray.
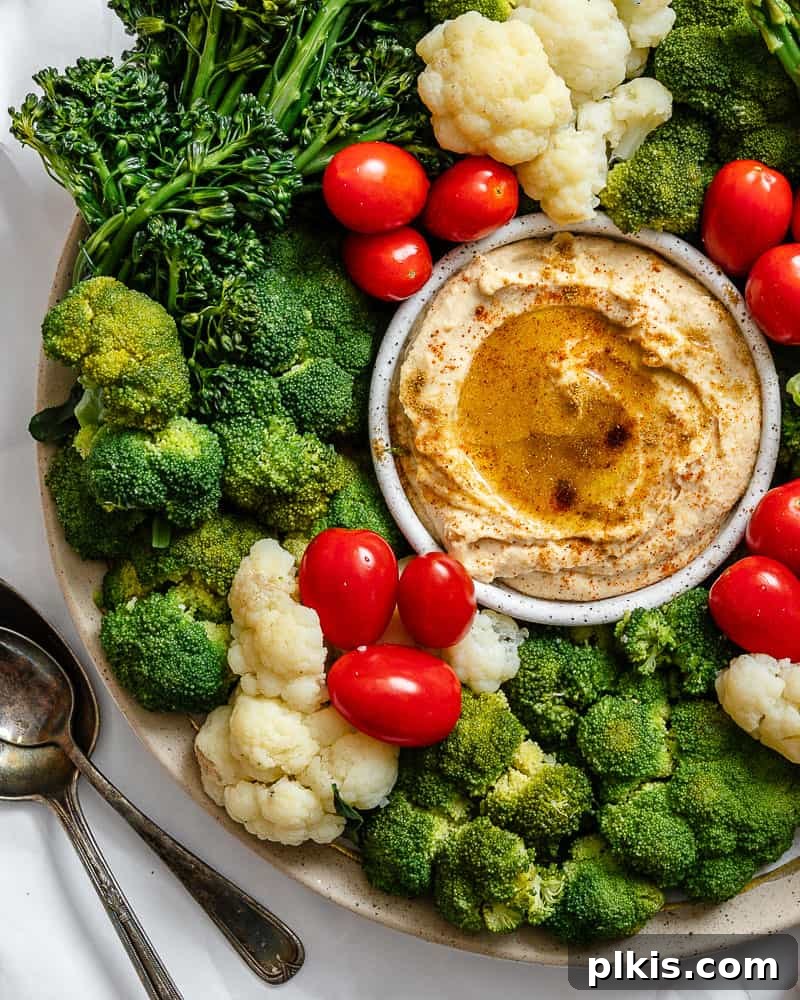
Can You Make A Christmas Veggie Tray in Advance? Absolutely!
One of the greatest advantages of a Christmas veggie tray is its adaptability to advance preparation, which can significantly reduce holiday stress. Here are several effective strategies for getting ahead:
- Pre-Wash and Cut Vegetables: Most vegetables can be washed, trimmed, and cut into their desired shapes 1-2 days before your event. Store these prepared veggies in airtight containers or reusable storage bags (like Ziplocks or Stasher bags) in the refrigerator. This keeps them crisp and ready for assembly.
- Cook Vegetables in Advance: If you plan to serve blanched or steamed vegetables, you can cook them a day in advance. After cooking, ensure they are thoroughly cooled and dried before storing them in airtight containers in the fridge. This prevents them from becoming soggy.
- Prepare Your Dips: Homemade dips often taste even better after a day or two in the refrigerator, allowing their flavors to meld and deepen. Prepare your dips 2-3 days in advance and store them in sealed containers. This is a huge time-saver!
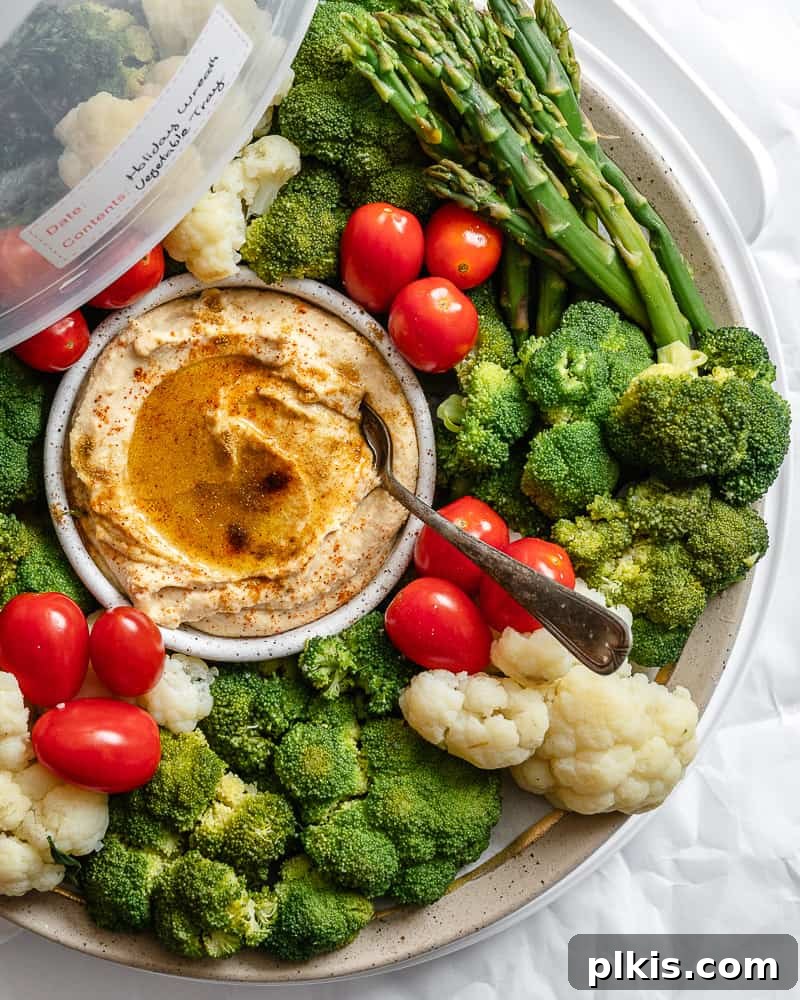
- Assemble the Tray (Partially or Fully): For ultimate convenience, you can even assemble the entire vegetable tray with all the veggies and dips up to a day before serving. Once assembled, wrap the platter tightly in plastic wrap to prevent the vegetables from drying out, and keep it chilled in the refrigerator.
A Small Caveat: While most elements hold up beautifully, we recommend slicing delicate vegetables like cucumbers and tomatoes freshly on the day of serving, if possible. This ensures they maintain their crispness and don’t release too much moisture onto the platter.
More Delightful Christmas Appetizer Recipes
Looking for more plant-based appetizers to round out your holiday spread? Here are some fantastic recipes that pair wonderfully with your festive veggie tray:
- Mushroom Pâté: A rich, savory, and sophisticated spread that’s perfect with crackers or crusty bread.
- Guacamole Skins: A creative and delicious twist on potato skins, loaded with creamy guacamole.
- Easy Vegan Stuffed Mushrooms: Flavorful mushrooms filled with a savory plant-based stuffing, a classic party favorite.
- Spinach and Mushroom Puffs: Flaky, golden pastry pockets filled with a delectable spinach and mushroom mixture.
- Buffalo Cauliflower Wings: Spicy, tangy, and incredibly satisfying, these cauliflower wings are a fantastic alternative to traditional chicken wings.
- Vegan Pizza Rolls: A fun, bite-sized appetizer that’s always a hit with both kids and adults.
Or, browse our comprehensive list of 50 easy vegan appetizer recipes for even more inspiration to make your holiday entertaining memorable and delicious.
Photos by Alfonso Revilla
Christmas Veggie Tray (Tree OR Wreath)
20 mins
5 mins
25 mins
6 – 10 servings

Print Recipe
This festive Christmas veggie tray, complete with delicious dips, can be elegantly shaped into a holiday wreath or a charming Christmas tree. It’s a quick, fun, and visually stunning appetizer, perfect for bringing joy and healthy snacking to your holiday celebrations!
Video Tutorial
Equipment Needed
- Measuring Cups
- Measuring Spoons
- Quality Knives
- Large Pot
- Kitchen Tongs
- Colander
- Round Serving Platter
- Small Bowls for Dips
Ingredients
- 2 cups of water (for boiling/steaming)
- ¼ head of cauliflower, cut into 2” florets
- 5 heads of broccoli, cut into 2” florets
- 2 bunches of broccolini, ends trimmed
- 1 bunch of asparagus, ends trimmed
- 1 pint of cherry tomatoes (halved or whole)
- Classic Hummus (or other preferred dip/s)
Instructions for Assembly
- Prepare for Cooking (Optional): If you prefer tender veggies, pour 2 cups of water into a large pot with a lid and bring it to a rolling boil. (If you prefer raw veggies, you can skip to step 4.)
- Boil or Steam Vegetables: Once the water is boiling, carefully add the vegetables in layers to ensure even cooking. Start with the cauliflower, then broccoli, followed by broccolini, and finally, place the asparagus on top. Cover the pot with a lid and reduce the heat to low. Let it simmer gently for 5 minutes without lifting the lid to allow the vegetables to steam thoroughly.
- Cool and Organize: After 5 minutes, carefully lift the lid. Using kitchen tongs, remove your cooked vegetables and place them immediately into a colander. Rinse them with cold water (or plunge into an ice bath) to halt the cooking process and maintain their vibrant color. As you remove them, try to keep different types of vegetables organized and separate; this will simplify the assembly process for your wreath or tree.
- Assemble the Christmas Wreath Veggie Tray:
- Choose a large, round serving platter. Place a small bowl of classic hummus (or your chosen dip) directly in the center of the tray.
- Arrange the broccoli florets around the hummus bowl, ensuring the florets face upwards to create a lush, green wreath-like base.
- Artfully scatter the remaining prepared vegetables, such as cauliflower florets, asparagus spears, and cherry tomatoes (whole or halved), throughout the broccoli wreath. Distribute them evenly to create a festive and colorful design.
- Optional: For an extra touch, cut a red bell pepper into strips to form a “ribbon” and “bow” to adorn your vegetable wreath.
- Assemble the Christmas Tree Veggie Tray:
- On your serving platter, start by forming the widest base of your tree using larger vegetables like broccoli or celery sticks, arranged in a triangular shape.
- Layer additional vegetables, progressively narrowing each row as you build upwards, to create a distinct Christmas tree silhouette.
- Decorate your tree with “ornaments” by placing cherry tomatoes (whole or halved) and other colorful small vegetables randomly across the green layers.
- Optional: Cut a star shape from a yellow bell pepper or carrot slice to place at the very top of your vegetable tree. You can also add a “trunk” using carrot sticks or pretzel sticks at the base.
- Arrange several small bowls of various dips around the base of the Christmas tree on the platter for guests to enjoy.
Helpful Notes for Success
- Always use super fresh vegetables: This ensures the best flavor, crispness, and visual appeal for your holiday tray.
- Mix raw and cooked textures: While some vegetables are delightful raw (cucumbers, carrots), others like broccoli and cauliflower often taste better lightly steamed or blanched to soften them slightly and brighten their color. Choose what you prefer!
- Prevent overcooking: If cooking, aim for a tender-crisp texture. Overcooked vegetables become limp and mushy, which is less appealing for a platter. Always place longer-cooking vegetables towards the heat source for even results.
- Experiment with designs and colors: The fun part is making it your own! Don’t hesitate to play with different vegetables, dips, and arrangements to create a unique and personalized festive display.
- Consider dietary needs: Since this is naturally vegan, gluten-free, and dairy-free, it’s suitable for many guests. Labeling dips clearly helps those with specific dietary requirements.
Nutritional Information (per serving)
Calories: 299kcal
Carbohydrates: 51g
Protein: 22g
Fat: 6g
Saturated Fat: 1g
Polyunsaturated Fat: 2g
Monounsaturated Fat: 2g
Sodium: 361mg
Potassium: 2090mg
Fiber: 19g
Sugar: 14g
Vitamin A: 5121IU
Vitamin C: 538mg
Calcium: 328mg
Iron: 7mg
Additional Information
Author: Toni Okamoto
Course: Appetizer
Cuisine: American
Method: Stovetop / No Cook
Diet: Vegan
Tried this recipe? Please share your creation and tag us on Instagram at @PlantBasedOnABudget! We love seeing your festive veggie trays!