
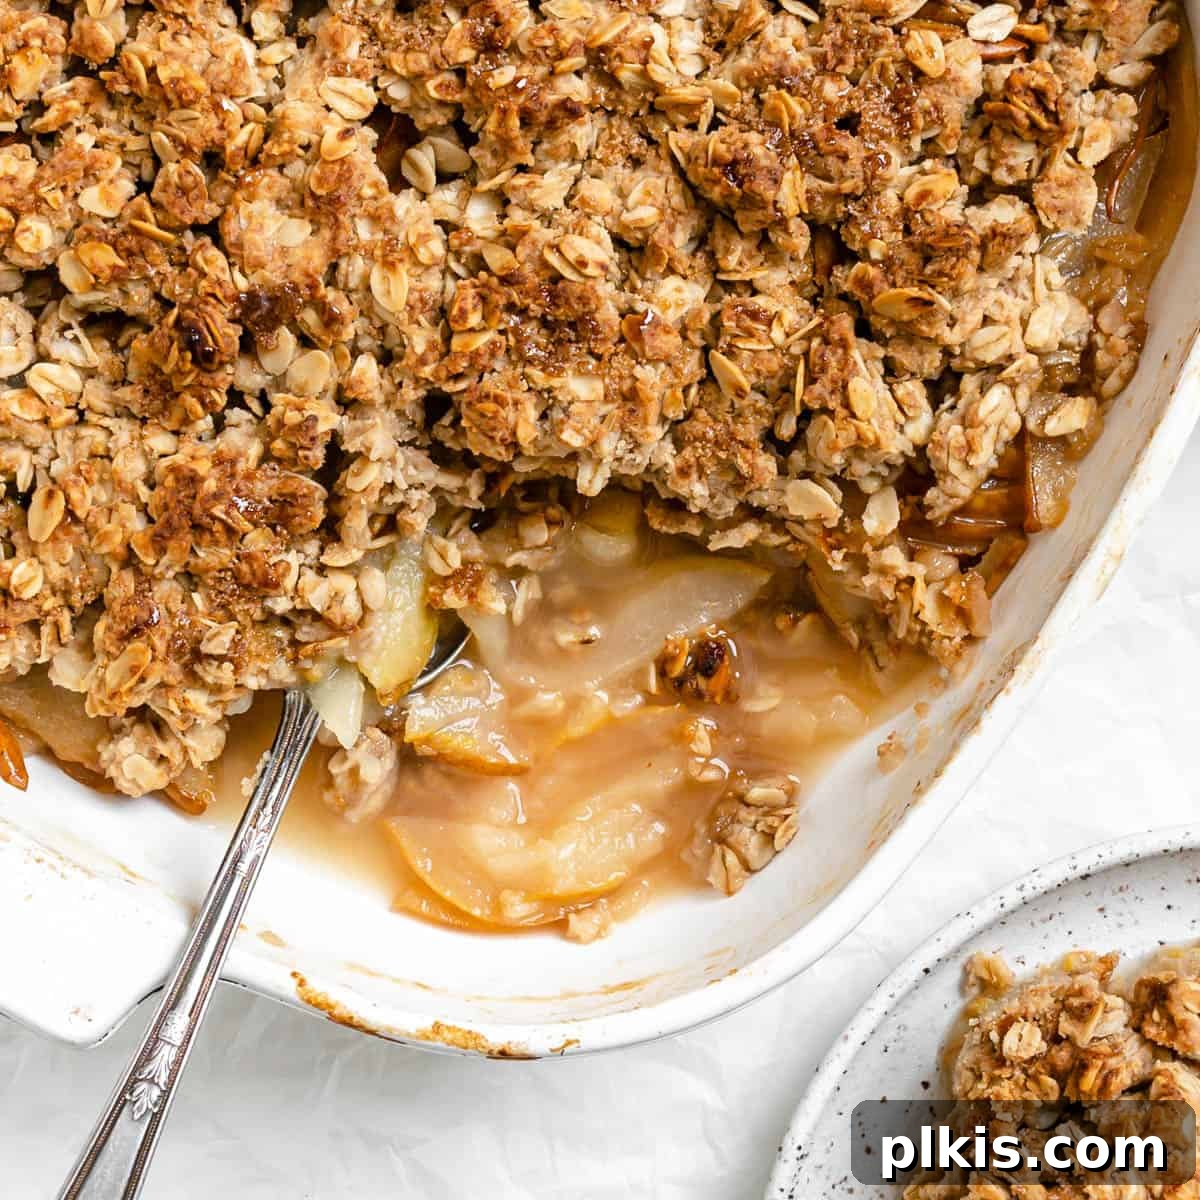
As the vibrant hues of summer fade into the warm, earthy tones of autumn, our kitchens beckon for cozy, comforting treats. This Easy Pear Crisp, also known as a Vegan Pear Crumble, perfectly captures the essence of fall in every delightful bite. It masterfully combines a luscious, sweet pear filling with a golden, warmly spiced, and ‘buttery’ oat streusel topping. Whether you’re seeking a simple, low-effort mid-week dessert or a show-stopping treat for holiday gatherings, this recipe delivers an unforgettable experience that’s both deeply satisfying and incredibly easy to make. Forget complex baking — this crisp is your go-to for harnessing the seasonal bounty of pears into a dessert that tastes like a warm hug.
![A golden-brown Easy Pear Crisp [Vegan Pear Crumble] in a rustic baking tray, with a single, perfectly portioned piece on a white plate beside it, ready to be served.](https://plkis.com/wp-content/uploads/2025/12/img_31431_1.jpg "Easy Vegan Pear Crisp or Crumble 2")
Sweet and Spiced Warming Pear Crisp (Vegan Pear Crumble): Your Ultimate Fall Dessert
With summer’s sun giving way to the crisp air of autumn, my kitchen transitions from bright berry tarts and fruit salads to heartier, warming desserts. While I love tucking away the last of the season’s apricot and plum crisps into the freezer for future enjoyment, it’s truly time for fall fruits to take center stage. This season brings us delights like stuffed baked apples and apple crescent rolls, but for me, nothing quite signals the arrival of autumn like a perfectly spiced pear crisp. This easy pear crisp with oats, affectionately known as a pear crumble, is a testament to the simple elegance of fall baking.
Crafted with succulent pears, rich brown sugar, and a harmonious blend of warming spices such as cinnamon and allspice, this recipe transforms humble ingredients into a spectacular fall and Thanksgiving dessert. It’s a wonderful opportunity to let the crisp, juicy, and often more budget-friendly pear shine, moving apples to the side for a moment. Beyond its exquisite taste, this dessert fills your home with an intoxicating aroma that will have everyone eagerly awaiting its emergence from the oven. What makes it even more brilliant is its sheer simplicity and foolproof nature, requiring minimal prep time for maximum reward. It’s the epitome of cozy comfort, a super simple preparation, and an excellent way to utilize your seasonal pears. If you’re eager for more pear-inspired creations, don’t miss our delightful apple pear pie or these easy baked pears.
Why You’ll Adore This Easy Pear Crisp
This pear crisp isn’t just another dessert; it’s a celebration of simplicity, flavor, and the comforting spirit of autumn. Here’s why it will quickly become a cherished recipe in your kitchen:
- Effortlessly Delicious: True to its name, this recipe is incredibly easy to prepare, making it perfect for busy weeknights or when you need a quick, impressive dessert without the stress.
- Aromatic Bliss: The blend of pears, brown sugar, and warm spices fills your home with an irresistible aroma that embodies the essence of fall.
- Vegan & Wholesome: Made with plant-based ingredients, it’s a satisfying treat suitable for vegans and those looking for a healthier dessert option. The oats in the topping add a wonderful texture and fiber.
- Seasonal Highlight: It’s a fantastic way to showcase the natural sweetness and delicate texture of fresh, seasonal pears.
- Versatile Serving: Enjoy it warm with a scoop of vegan vanilla ice cream, a dollop of whipped cream, or simply on its own. It’s delicious for dessert, brunch, or even breakfast!
- Foolproof Baking: This recipe is designed to be straightforward and forgiving, ensuring a perfect result every time, even for novice bakers.
Essential Ingredients for Your Pear Crisp
Crafting this delightful pear crisp relies on readily available and inexpensive pantry staples, ensuring that a comforting dessert is always within reach. Each ingredient plays a vital role in creating the perfect balance of sweet, spiced, and crunchy.
![All the necessary ingredients for Easy Pear Crisp [Vegan Pear Crumble] meticulously measured and displayed on a pristine white surface, ready for preparation.](https://plkis.com/wp-content/uploads/2025/12/img_31431_2.webp "Easy Vegan Pear Crisp or Crumble 3")
Ingredient Spotlight & Substitutions:
- Pears: The star of our show! Opt for firm, slightly underripe pears that will soften beautifully without becoming mushy during baking. Bosc, Anjou, or Bartlett pears are excellent choices. If only super ripe pears are available, you might need a touch more cornstarch or tapioca flour to prevent the filling from being too runny.
- Brown Sugar: This provides a deep, molasses-rich sweetness that complements the pears and spices perfectly. You can adjust the amount based on the natural sweetness of your pears and your personal preference. For a lighter touch, coconut sugar can be used.
- All-Purpose Flour: Essential for both thickening the pear filling slightly and providing structure to the crisp topping. For a gluten-free version, a 1:1 gluten-free baking blend works wonderfully.
- Quick Oats: These are key to achieving that signature crispy, chewy streusel topping. Rolled oats can also be used, but quick oats provide a finer texture.
- Warming Spices (Cinnamon & Allspice): These spices are the heart of the fall flavor profile, infusing the crisp with cozy warmth. Feel free to add a pinch of nutmeg, ginger, or a touch of cardamom for an even more complex aroma.
- Salt: A crucial ingredient that enhances all the other flavors, balancing the sweetness and making the spices pop.
- Vanilla Extract: Adds a subtle, aromatic depth that rounds out the flavor profile beautifully.
- Melted Vegan Butter: This binds the streusel topping and gives it that rich, irresistible ‘buttery’ flavor and texture. Any good quality vegan butter brand will work, or you can use melted coconut oil for a slightly different flavor.
How to Make an Easy Pear Crisp: A Step-by-Step Guide
Just like most comforting crumbles and crisps, this easy pear crisp recipe is incredibly straightforward, making it a perfect kitchen activity for the whole family – even little ones can join in! The process is simple: prepare your fruit, whip up the delicious crumble topping, assemble with care, and bake to golden perfection.
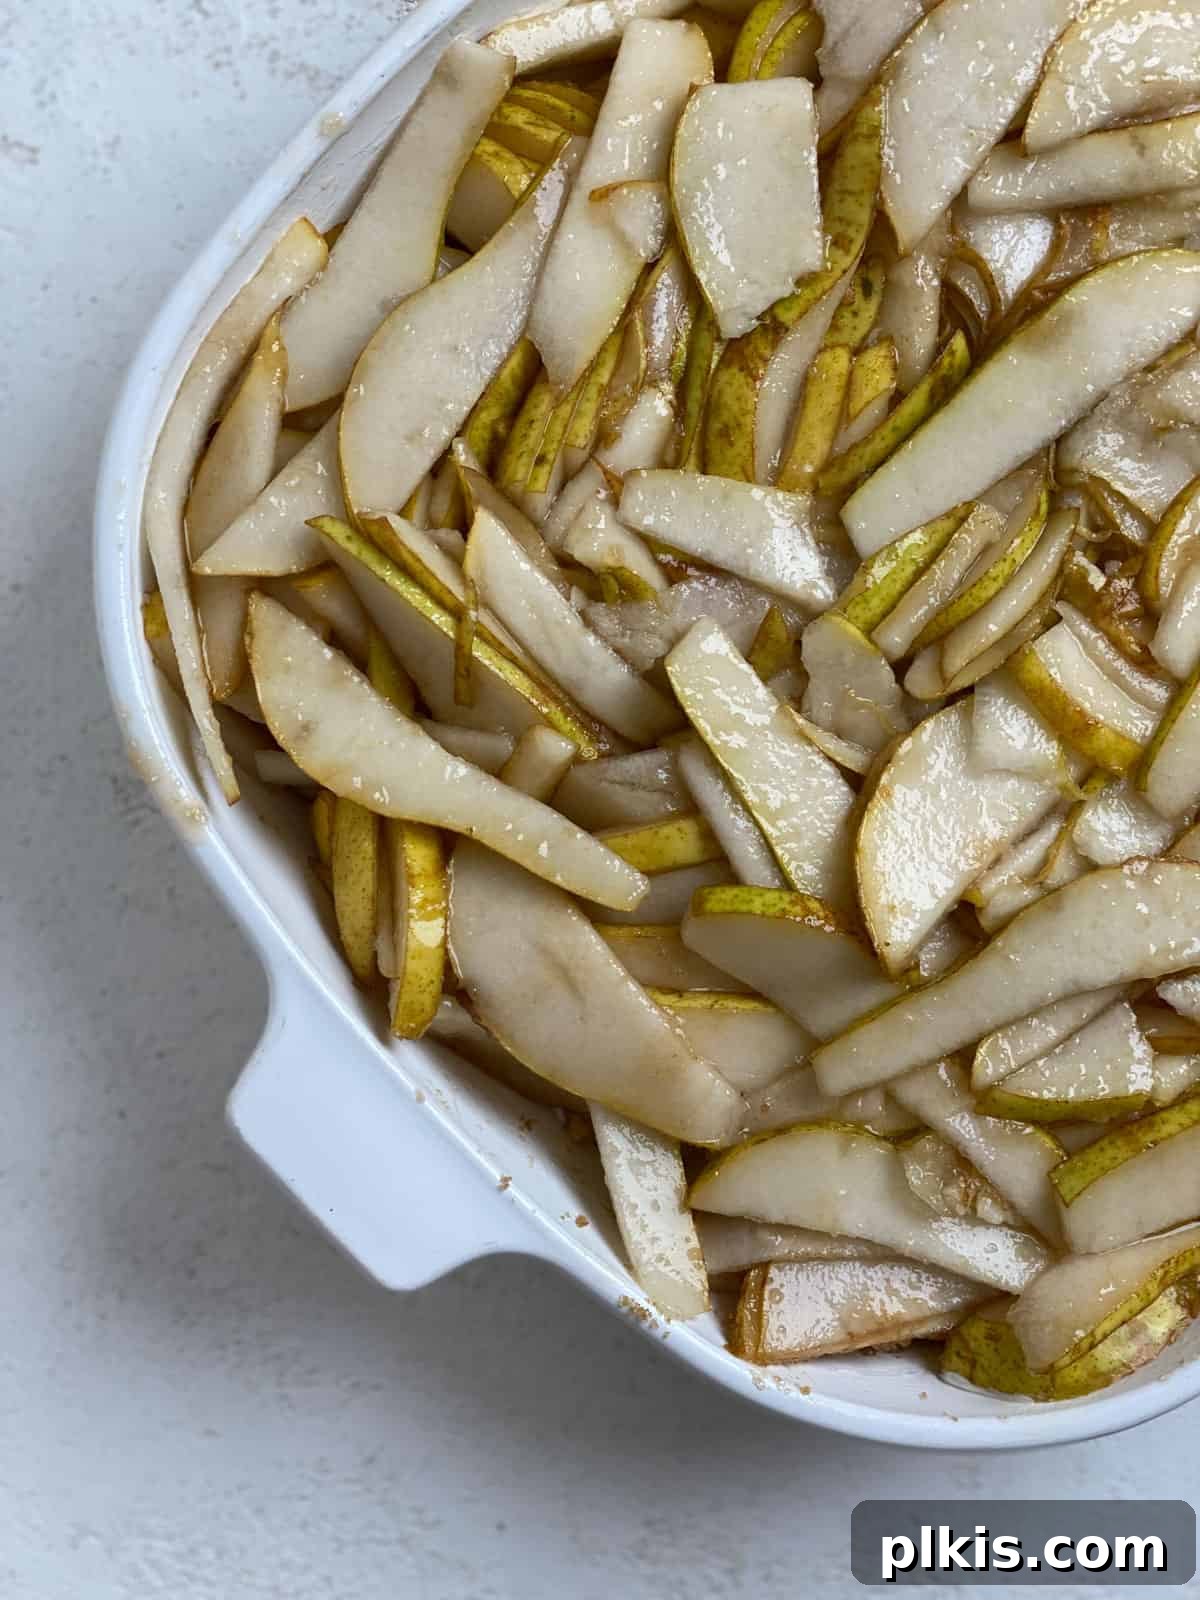
Step 1: Prepare the Pears. Begin by preheating your oven to 350°F (175°C). While the oven heats, lightly grease an 8-inch pie dish or a similar baking vessel with a little vegan butter or cooking spray. Rinse your pears thoroughly, then thinly slice them. Once sliced, transfer the pears directly into the prepared baking dish and sprinkle them evenly with ¼ cup of the brown sugar. Gently toss to coat the pears, ensuring each slice is touched by the sweet sugar.
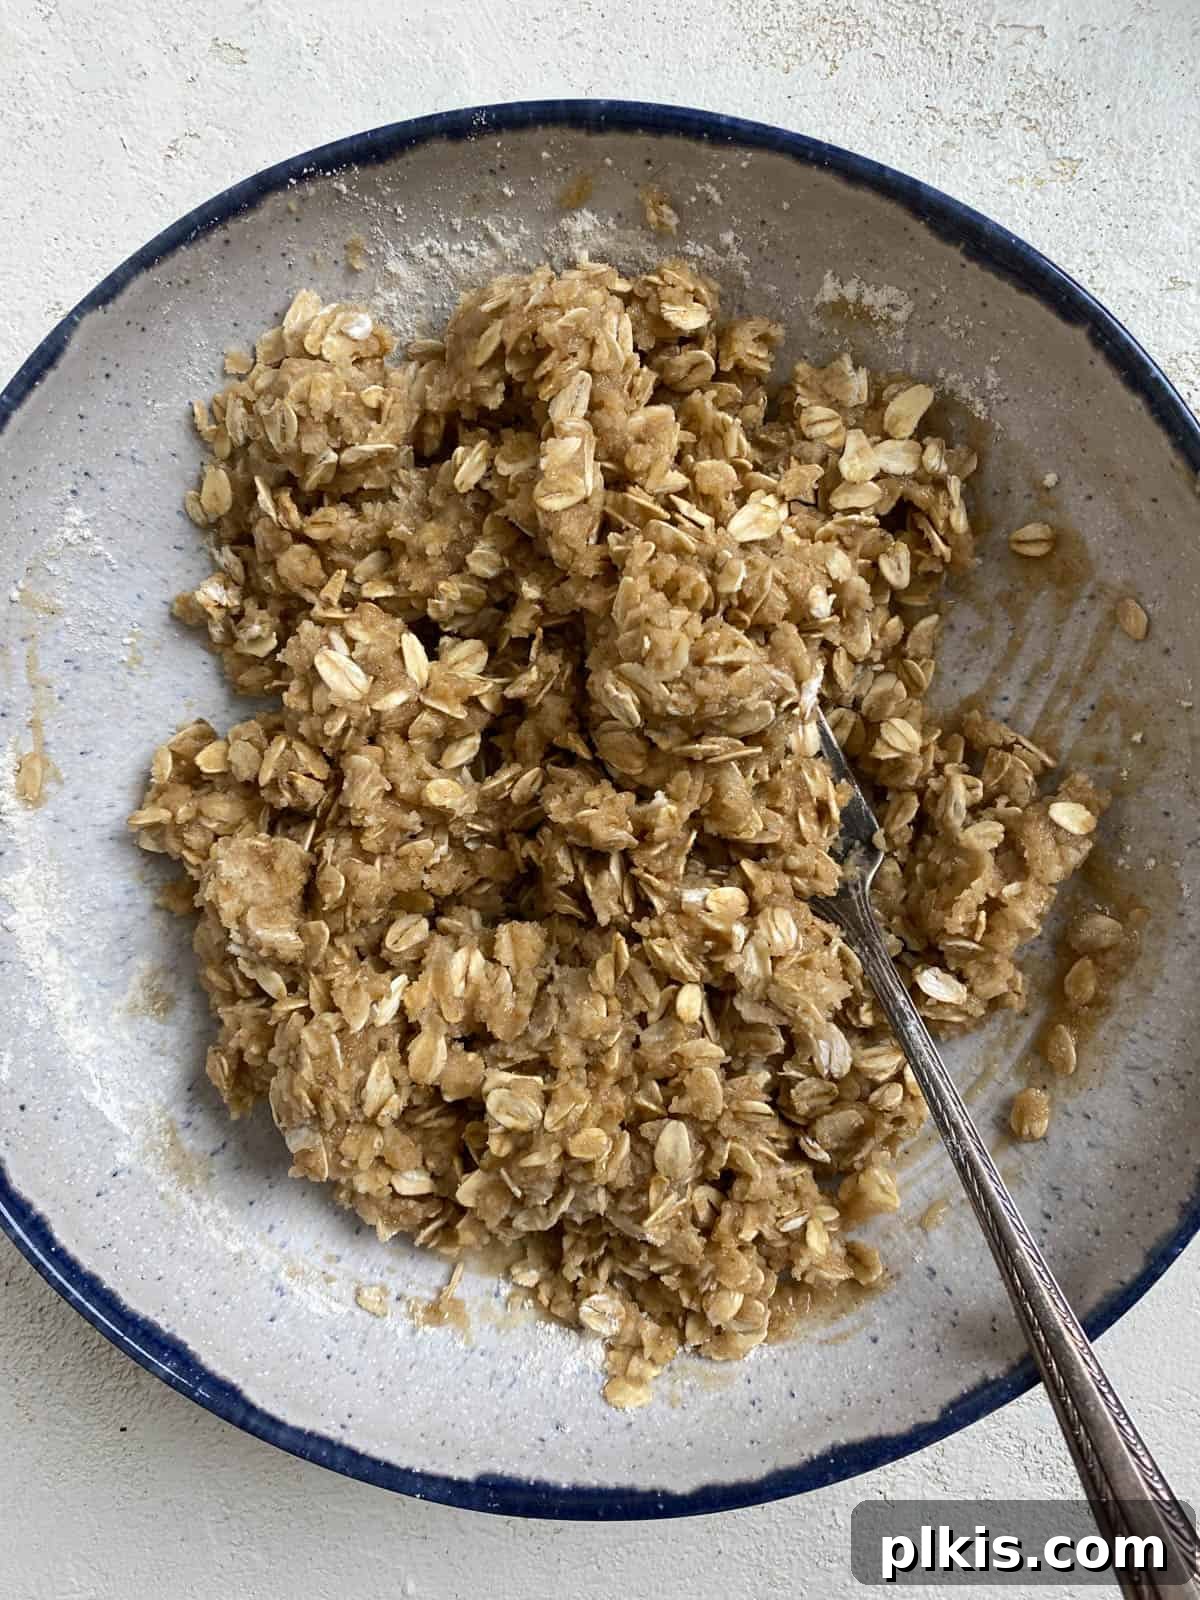
Step 2: Craft the Crumble Topping. In a separate, medium-sized mixing bowl, combine the flour, quick oats, the remaining ½ cup of brown sugar, all the warming spices (cinnamon and allspice), vanilla extract, and the melted vegan butter. Use a fork or your fingertips to thoroughly mix these ingredients together until they form a coarse, crumbly consistency. The goal is small, cohesive clumps that will crisp up beautifully in the oven.
Pro Tip for Slicing Pears: For uniform slices, cut each pear in half lengthwise. Use a small spoon or melon baller to scoop out the seeds and core. Then, place the cut-side down on a chopping board and use a sharp knife to thinly slice the pear halves. A mandoline slicer can also be a fantastic tool for achieving consistent, thin slices quickly and effortlessly.
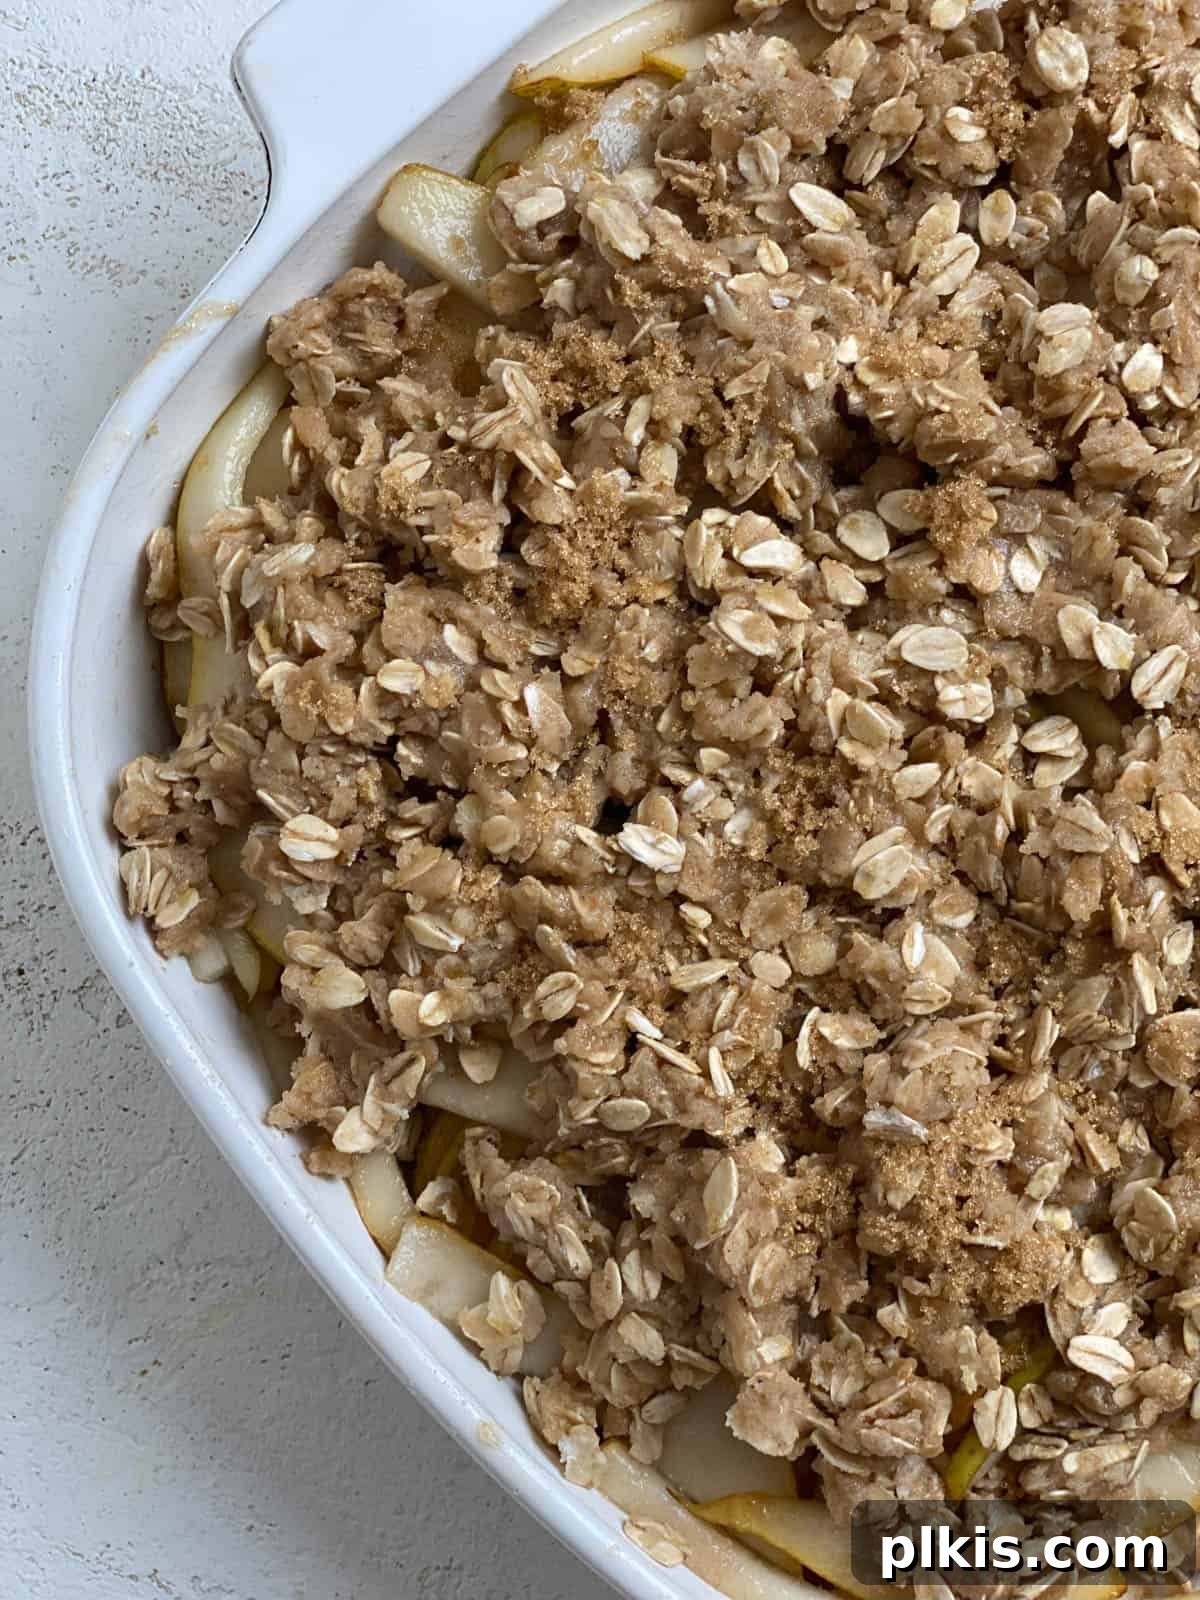
Step 3: Assemble and Bake. To bring your pear crisp together, simply sprinkle the prepared streusel topping evenly over the sugared pears in the baking dish. Ensure a good, consistent layer across the entire surface. Optionally, you can sprinkle a little extra brown sugar over the topping for added caramelization and sparkle. Place the dish into your preheated oven and bake for approximately 45 minutes. The crisp is ready when the topping is golden brown and the pear filling is bubbling around the edges, indicating the pears are tender. Remove the baked pear crumble from the oven and allow it to cool for at least 15 minutes before serving. This crucial cooling time allows the filling to set and thicken to the perfect jammy consistency.
Baking Notes: Baking times can vary slightly depending on your oven and how thickly you sliced your pears. If the pears aren’t tender after 45 minutes, return the crisp to the oven for an additional 5-10 minutes. If the topping browns too quickly, loosely tent a piece of foil over the dish to prevent burning while the pears finish cooking. For an extra crispy, caramelized topping, you can carefully use the broiler for the last minute or two, watching it very closely to avoid burning.
Frequently Asked Questions About Pear Crisp
Peeling pears is entirely optional. If you prefer a smoother texture without the slight chewiness of pear skins, go ahead and peel them. However, for added fiber and a more rustic feel, leaving the skins on is perfectly fine, especially if your pears have thin skins.
For the best pear crisp, aim for pears that are just reaching ripeness. They should have a slight give when gently squeezed near the stem, but still be firm overall. Pears that are too soft or overly ripe can result in a mushy filling. Slightly firm pears will hold their shape better and offer a more pleasant texture.
While possible, using canned pears typically results in a much softer, often mushy, filling. If you choose to use canned pears, be sure to drain them thoroughly and consider adding 1-2 tablespoons of cornstarch or tapioca flour to the pear mixture to help thicken the juices into a jammy consistency during baking.
If you notice the topping browning faster than the pears are softening, simply tent a piece of aluminum foil loosely over the baking dish. This will protect the topping from further browning while allowing the pears underneath to continue baking and become tender.
Absolutely! While oats contribute to the crisp’s signature texture and toasted flavor, you can certainly make a delicious pear crumble without them. The topping will be more like a traditional ‘buttery’ streusel, still wonderfully flavorful and comforting.
Historically, a “crisp” was defined by a topping that included oats, creating a crisper texture, while a “crumble” typically featured a streusel topping without oats. However, in modern culinary usage, these terms are often used interchangeably. So, whether you call it a pear crisp or a pear crumble, you’re describing the same beloved dessert!
Expert Tips for the Best Pear Crisp
Achieving the perfect pear crisp is simple with a few key insights. These tips will help you elevate your dessert from good to absolutely unforgettable:
- Sweeten to Your Liking: Pears vary in sweetness depending on their ripeness and variety. Taste a small slice of your pears before mixing the filling. Adjust the amount of brown sugar accordingly, adding more if your pears are less sweet, or slightly less if they’re very ripe.
- Experiment with Texture: While slicing pears thinly creates a lovely, tender filling, you can also dice them into chunks for a different textural experience. Diced pears might require a few extra minutes of baking time.
- Where to Spice: We’ve spiced the streusel topping for maximum aromatic impact, but don’t hesitate to incorporate a pinch of cinnamon or allspice directly into the pear filling. It’s a matter of personal preference and can add another layer of flavor.
- For an Extra Crunchy Topping: To take your streusel from delicious to divine, consider adding about ¼ to ½ cup of chopped nuts (like pecans, walnuts, or almonds) to the topping mixture. For an even crispier top, try chilling your prepared streusel topping in the refrigerator for about 30 minutes before sprinkling it over the pears and baking.
- Patience is a Virtue: It’s tempting to dive into a warm crisp straight from the oven, but allowing it to cool for at least 15 minutes is crucial. This cooling time allows the pear juices to thicken, resulting in a perfectly set and less runny filling.
- Save Time with Tools: If you’re preparing multiple crisps or have a large batch of pears, a mandoline slicer or a food processor with a slicing disk can significantly cut down on your prep time for the pears.
- Don’t Overmix the Topping: When preparing the streusel, mix just until combined and crumbly. Overmixing can develop the gluten in the flour, leading to a tougher topping rather than a crisp one.
![A beautifully baked Easy Pear Crisp [Vegan Pear Crumble] captured in a rustic baking tray, showcasing its golden-brown, crumbly topping and bubbling fruit filling.](https://plkis.com/wp-content/uploads/2025/12/img_31431_6.jpg "Easy Vegan Pear Crisp or Crumble 7")
Serving Your Delicious Pear Crisp
While this pear crisp is utterly delicious enjoyed simply at room temperature, it truly shines when served warm, especially when paired with a complementary accompaniment. Here are some delightful suggestions to elevate your pear crisp experience:
- Classic with Vegan Ice Cream: A generous scoop of creamy vegan vanilla ice cream is a timeless pairing. Other flavors like pecan, cinnamon, or even a rich banana ice cream would also be fantastic. The cold, melting ice cream against the warm crisp is pure bliss.
- Rich Vegan Custard: For a more decadent touch, serve your warm pear crisp with a smooth and creamy vegan custard.
- Light & Airy Vegan Whipped Cream: A dollop of fluffy vegan whipped cream provides a delightful contrast in texture and a touch of elegance.
- Sweet Caramel Drizzle: Drizzle your warm crisp with a luscious vegan date caramel sauce for an extra layer of sweetness and sticky richness.
- Simple & Unadorned: Sometimes, the pure flavors of the pear crisp are all you need. Enjoy it on its own with a cup of hot tea or coffee for a perfect afternoon treat.
How to Make Ahead and Store Your Pear Crisp
This easy pear crisp is wonderfully convenient for meal prepping or preparing for a gathering, as it can be made ahead of time and stored. Its freezer-friendly nature also means you can enjoy a taste of fall anytime you wish!
Make Ahead: You can prepare this fruit crisp in advance by completing the pear filling and the crumble topping separately. Store the sliced, sugared pears in an airtight container in the refrigerator for up to 2 days. Keep the dry crumble topping in a separate airtight container at room temperature, or in the fridge if it contains vegan butter. When ready to bake, remove both components from the fridge about 20 minutes beforehand to come slightly to room temperature, then assemble and bake as directed.
Storage: Once baked, any leftover pear crisp will keep beautifully. Covered loosely with foil or plastic wrap, it can be stored at room temperature for 1-2 days. For longer freshness, transfer it to an airtight container and refrigerate for up to 4-5 days. The topping may soften slightly in the fridge, but it’s still delicious.
Freezing: This pear crisp is an excellent candidate for freezing, either baked or fully assembled but unbaked, for up to 3 months. If freezing unbaked, wrap the entire baking dish tightly with plastic wrap and then foil. If freezing baked, allow it to cool completely before wrapping. To reheat from frozen, thaw overnight in the refrigerator, then follow the reheating recommendations below.
Reheating Recommendations
- Microwave: For individual portions, the microwave is a quick and efficient option. Heat in 20-second intervals until warmed through (usually between 60-80 seconds total). Note that the topping will remain soft and won’t re-crisp this way.
- Oven: To reheat larger portions or to restore the crispiness of the topping, the oven is your best bet. Preheat your oven to 350°F (175°C) and reheat the pear crumble with oats for approximately 20-25 minutes, or until thoroughly warmed and the topping is golden and crisp again.
More Delightful Vegan Desserts to Consider
Vegan Desserts
Classic Vegan Apple Pie
Vegan Desserts
Easy Apple Pear Pie
Vegan Desserts
Zesty Vegan Lemon Loaf Cake
Vegan Desserts
Sweet Potato Chocolate Cake
If you tried this easy pear crisp recipe or any other recipe on my blog, please leave a ⭐ star rating and let me know how it went in the 📝 comments below. Your feedback is truly appreciated!
Easy Pear Crisp (Vegan Pear Crumble) Recipe
![Completed Easy Pear Crisp [Vegan Pear Crumble] in a baking tray alongside a plate of one piece of crisp](https://plkis.com/wp-content/uploads/2025/12/img_31431_12.jpg "Easy Vegan Pear Crisp or Crumble 8")
Print Recipe
Equipment
- Measuring Cups
- Measuring Spoons
- Mixing Bowl
- Sharp Knife
Ingredients
- 3 large ripe pears, thinly sliced
- ¾ cup brown sugar, divided (plus more for sprinkling on top, optional)
- ½ cup all-purpose flour
- ½ cup quick oats
- ¼ teaspoon cinnamon
- ¼ teaspoon allspice
- ½ teaspoon salt
- 1 teaspoon vanilla extract
- ½ cup melted vegan butter
Instructions
- Preheat the oven to 350°F (175°C) and lightly grease an 8×8 inch baking dish or 8-inch pie dish.
- Place the thinly sliced pears in the prepared baking dish and sprinkle with ¼ cup of the brown sugar. Toss gently to coat.
- In a separate mixing bowl, combine the flour, quick oats, remaining ½ cup brown sugar, salt, allspice, cinnamon, vanilla extract, and melted vegan butter. Mix with a fork or your fingers until a crumbly streusel forms.
- Spoon the oat streusel mixture evenly over the sugared pears in the baking dish. If desired, sprinkle with a little extra brown sugar on top for added caramelization.
- Place the dish in the preheated oven and bake for 45 minutes. Check if the pears are tender by gently piercing them with a fork. If they are not yet tender, bake for an additional 5-10 minutes. The topping should be golden brown and the filling bubbly.
- Remove the baked pear crisp from the oven and allow it to cool for at least 15 minutes before serving. This helps the filling to set and thicken.
Notes
- Sweetness Adjustment: Tailor the sugar amount based on the natural sweetness of your pears. Taste a small slice first!
- Texture Variation: For a different mouthfeel, dice the pears instead of slicing them. This will alter the texture slightly.
- Spice Placement: While we’ve added spices to the streusel, you can also mix them directly into the pear filling for a deeper spiced flavor.
- Crunchy Topping: For an extra crisp topping, add chopped nuts (like pecans or walnuts) to the streusel or chill the topping for 30 minutes before baking.
Nutrition Information (per serving, estimated)
- Calories: 367 kcal
- Carbohydrates: 58g
- Protein: 2g
- Fat: 15g
- Saturated Fat: 3g
- Polyunsaturated Fat: 5g
- Monounsaturated Fat: 7g
- Trans Fat: 3g
- Sodium: 707mg
- Potassium: 216mg
- Fiber: 5g
- Sugar: 38g
- Vitamin A: 31IU
- Vitamin C: 5mg
- Calcium: 44mg
- Iron: 1mg
Additional Info
Tried this recipe?
Please tag us at @PlantBasedOnABudget! 😊