
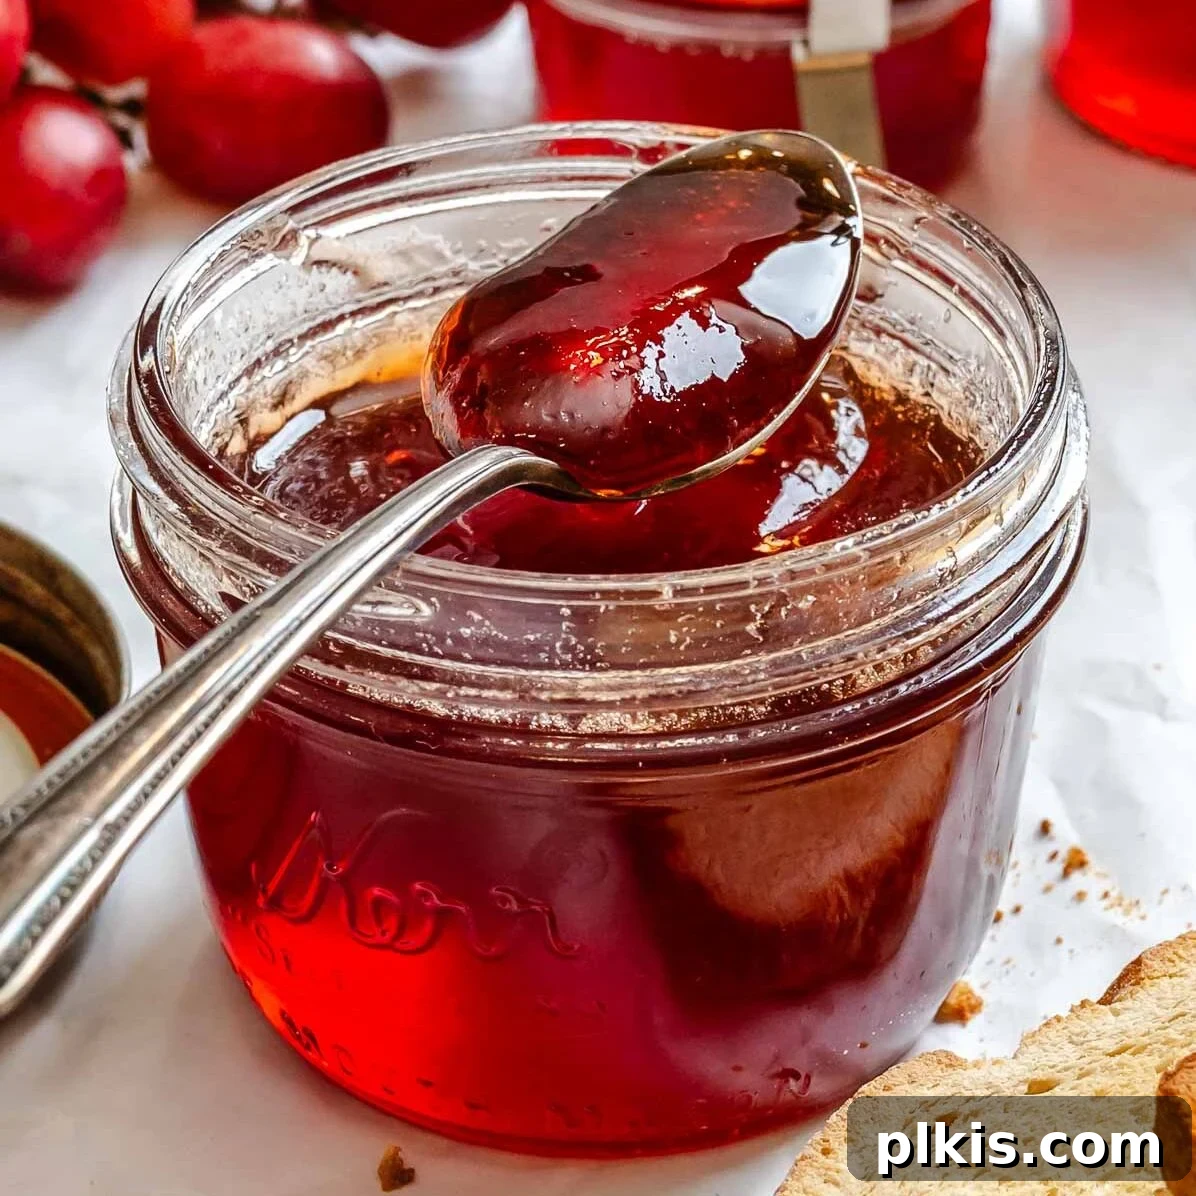
Easy Homemade Grape Jam: Your Pectin-Free Guide to Sweet Perfection
Discover how to create luscious homemade grape jam (or a silky grape jelly!) with incredible ease, using just three simple ingredients. This foolproof recipe requires no added pectin and no tiresome peeling, making it perfect for both novice and experienced preservers. Whether you plan to water bath can it for long-term pantry storage or keep a fresh batch in your refrigerator, you’ll be amazed by the bright, sweet flavor of this naturally thickened grape spread.
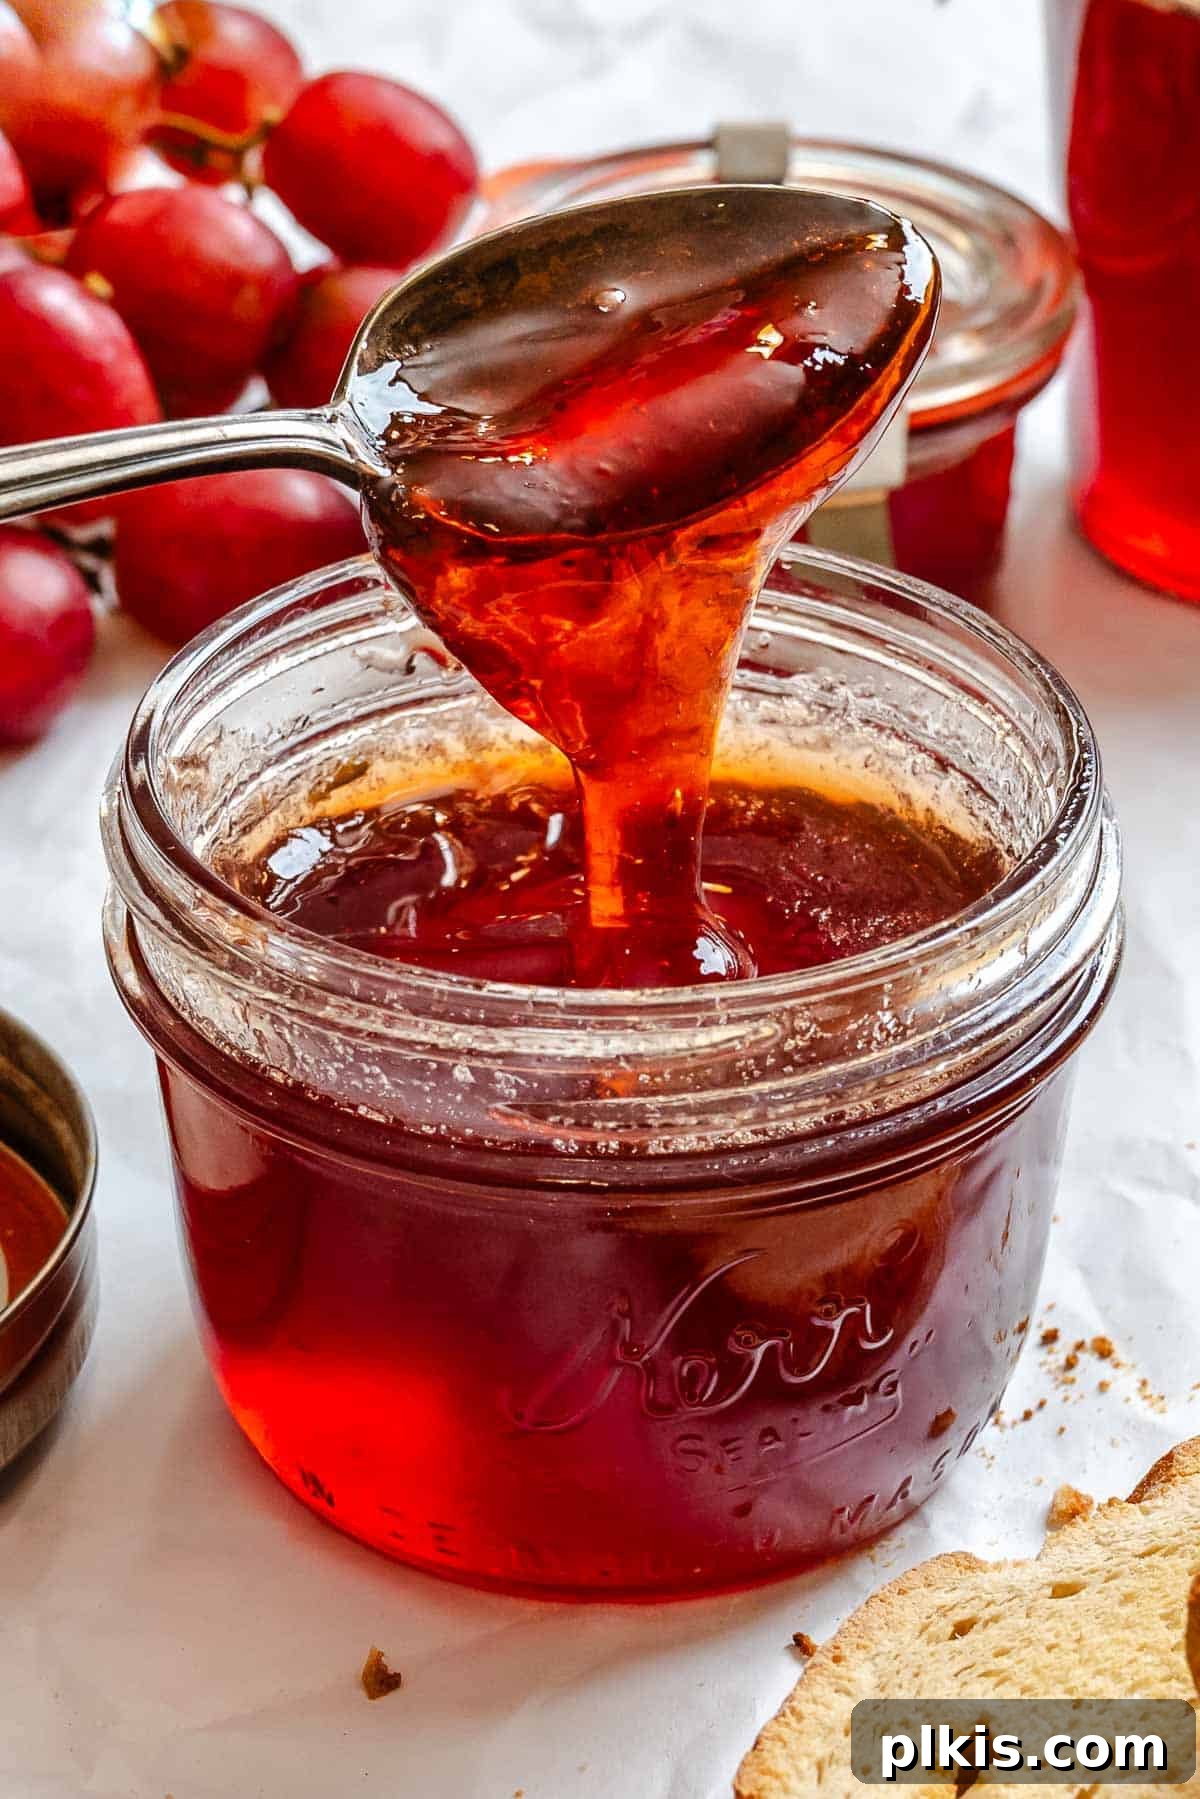
Why You’ll Adore This Pectin-Free Grape Jam Recipe
There’s nothing quite like the taste of homemade jam, and this simple grape jam recipe truly stands out. Depending on your location, finding quality grape jam or jelly can be a challenge. But with this recipe, you can effortlessly make your own, capitalizing on peak grape season or taking advantage of special offers at the grocery store. It’s an ideal way to enjoy the bountiful harvest of grapes, transformed into a spread that’s brimming with natural flavor.
- Unrivaled Fresh Flavor: Unlike many store-bought varieties that can taste overly sweet or artificial, this homemade grape jam boasts a pure, intense grape flavor. Using ripe grapes ensures a deep sweetness and vibrant aroma that truly sings.
- Simple & Accessible: Say goodbye to complicated canning processes or hunting for specialty pectin. This recipe utilizes the natural pectin found in grapes and the power of sugar and lemon juice to achieve a perfect set. With only three main ingredients and straightforward steps, it’s incredibly beginner-friendly.
- Versatile Creation: Whether you prefer a chunky, rustic grape jam or a smooth, crystal-clear grape jelly, this recipe adapts to your preference. The method allows you to easily strain out the solids for jelly or blend them in for a thicker jam.
- Smart Preservation: This recipe offers flexible storage options. Enjoy it fresh from the fridge for immediate gratification, or opt for water bath canning to preserve its goodness for up to a year, making it a wonderful gift or pantry staple.
- Budget-Friendly & Seasonal: Making your own jam is often more economical than buying artisanal brands, especially when grapes are in season and affordably priced. It’s a delicious way to reduce food waste and savor seasonal fruit long after harvest.
Beyond toast, this versatile spread enhances many dishes. Slather it generously on toasted homemade no-knead bread, incorporate it into elegant vegan charcuterie boards, stir it into hearty breakfast bowls like this breakfast quinoa apple bowl, or elevate your classic PB&J sandwich to gourmet status. You might also enjoy experimenting with my equally simple persimmon jam or plum jam recipes.
The Essential Ingredients for Your Homemade Grape Jam
Crafting exceptional homemade grape jam begins with understanding the role of each ingredient. While simple, their quality and interaction are key to the jam’s success. Always refer to the full recipe card below for precise quantities, but here’s a deeper dive into what you’ll need:
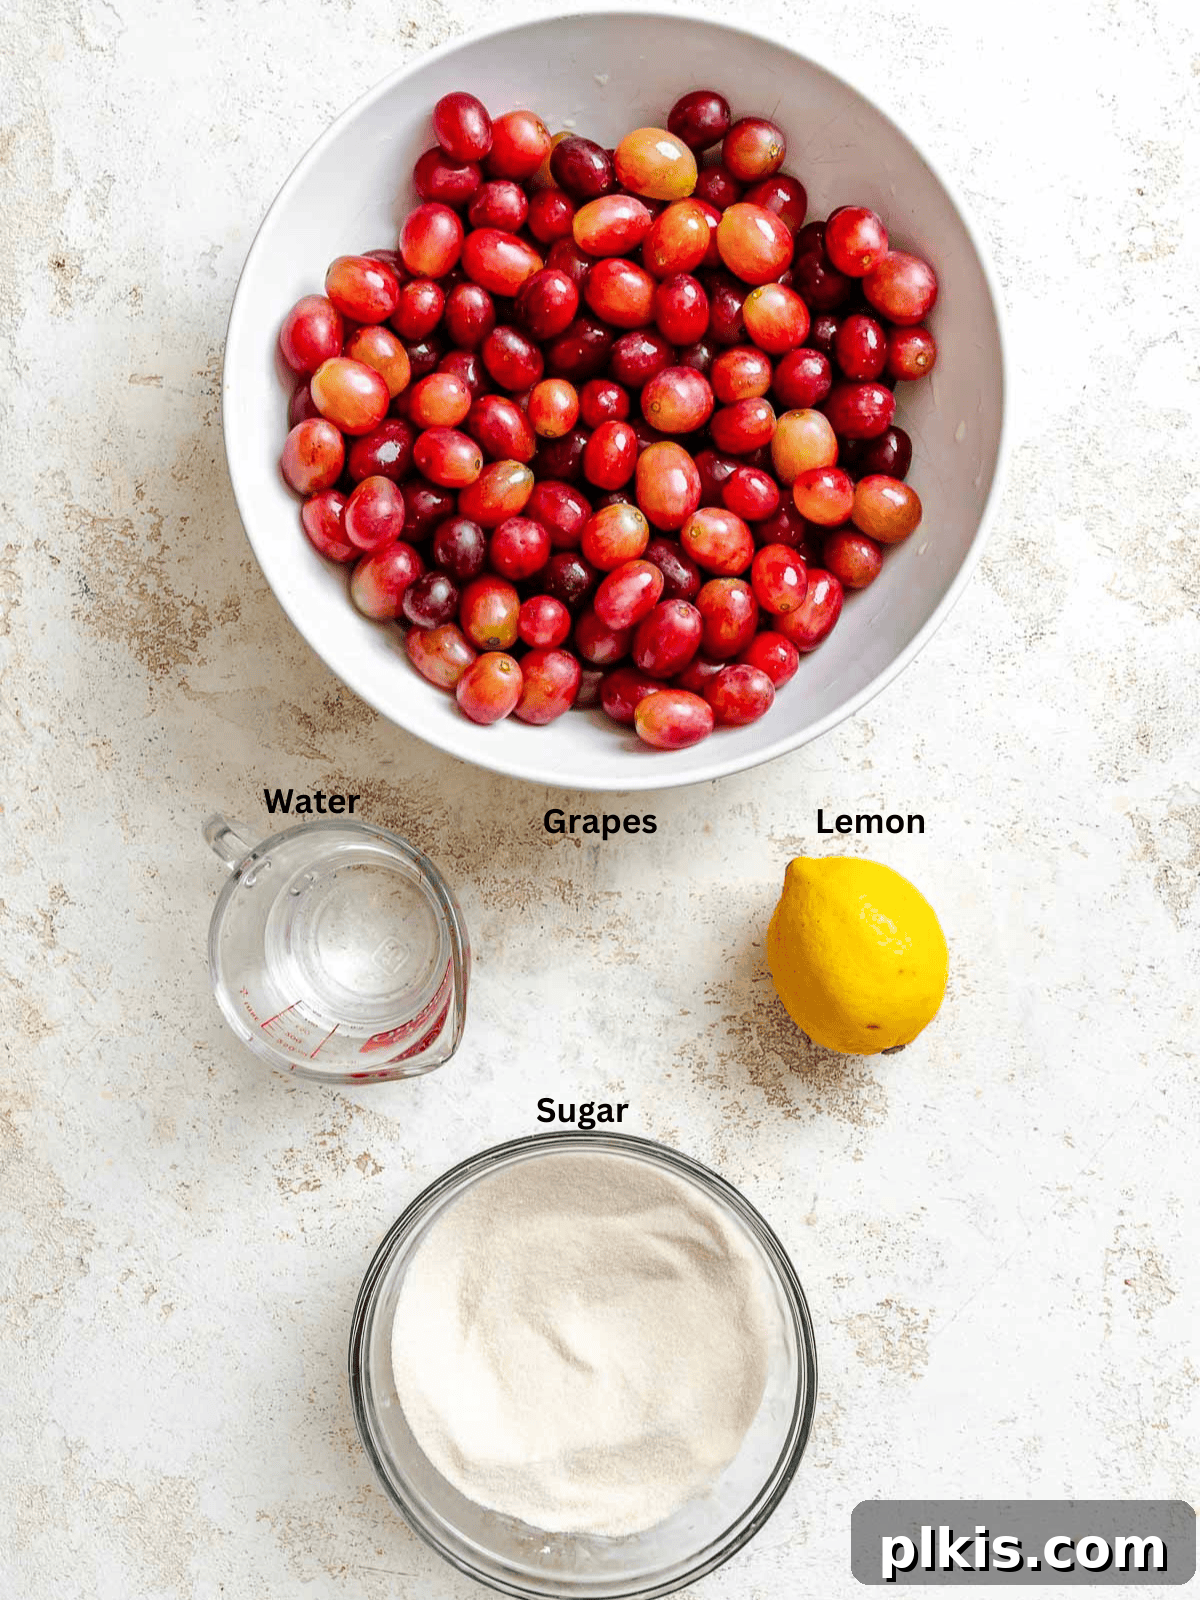
- Grapes (The Star): The quality of your grapes directly impacts the final flavor of your jam.
- Type: While many varieties work, sweet, ripe red, black, or Concord grapes are ideal. Concord grapes, in particular, are famed for their intense grape flavor and aroma, making them a classic choice for jam. However, crimson, Flame, or even green seedless grapes can also yield delicious results.
- Ripeness: The riper the grapes, the better! Ripe grapes contain higher levels of natural sugars, reducing the need for excessive added sugar, and also possess more natural pectin, which helps the jam set without commercial additives.
- Seedless vs. Seeded: Seedless grapes offer the easiest preparation, as you won’t need to strain out seeds. If using seeded varieties, ensure you use a fine-mesh sieve or food mill thoroughly to remove all seeds for a smooth consistency.
- Granulated Sugar (The Sweetener & Preserver): Sugar isn’t just for sweetness; it plays a critical role in the jam’s texture and preservation. It helps to draw out moisture from the fruit, preventing spoilage, and contributes to the jam’s thick, spreadable consistency. While it’s tempting to reduce sugar, doing so can affect the jam’s set and shelf life, especially if you plan to can it.
- Lemon Juice (The Brightener & Setter): Freshly squeezed lemon juice is indispensable in pectin-free jam making. It provides a bright, tangy counterpoint to the sweetness of the grapes, enhancing their natural flavor. More importantly, the acidity in lemon juice is crucial for activating the natural pectin in the grapes, helping the jam to achieve its perfect set. Without it, your jam might remain too runny.
Unleash Your Creativity: Exciting Flavor Variations
While classic grape jam is undeniably delicious, don’t hesitate to experiment with these simple additions to create unique and tantalizing flavor profiles. These variations allow you to customize your homemade jam to suit your palate or complement specific dishes.
- Fruitful Blends: Introduce other fruits for a delightful medley of flavors. Substitute a portion of the grapes with finely chopped apples, pears, blackberries, raspberries, or even peaches. These fruits often contain their own natural pectin, further assisting the jam’s set, and introduce new layers of taste complexity.
- Warm Spice Infusions: Embrace the cozy warmth of spices. Add ¼ to ½ teaspoon of ground cinnamon, nutmeg, ground cloves, or allspice to the grape mixture during the boiling stage. For an even more complex flavor, a small pinch of ginger or star anise can be a wonderful addition, particularly with darker grape varieties.
- Aromatic Herbs: For a fresh and sophisticated twist, infuse your jam with herbs. A sprig of fresh rosemary or thyme added during the simmering stage and removed before jarring can lend an earthy, fragrant note. For a brighter, more summery feel, stir in finely chopped fresh basil or mint after the jam has cooked, just before jarring (remove any larger sprigs before sealing).
- Rich Balsamic Touch: A splash (about 1-2 teaspoons) of good quality balsamic vinegar can add an unexpected depth and a complex, slightly tart note that beautifully complements the sweetness of the grapes. Add it during the final stages of cooking.
- Classic Vanilla Essence: For a comforting and familiar aroma, stir in ¼ to ½ teaspoon of vanilla extract or vanilla bean paste once the jam is removed from the heat. The vanilla rounds out the fruitiness and adds a warm, inviting fragrance.
Crafting Your Easy Grape Jam: A Step-by-Step Guide
Making homemade grape jam is a truly rewarding experience, transforming fresh fruit into a delectable spread with minimal effort. Follow these detailed steps to achieve perfect, pectin-free grape jam every time.
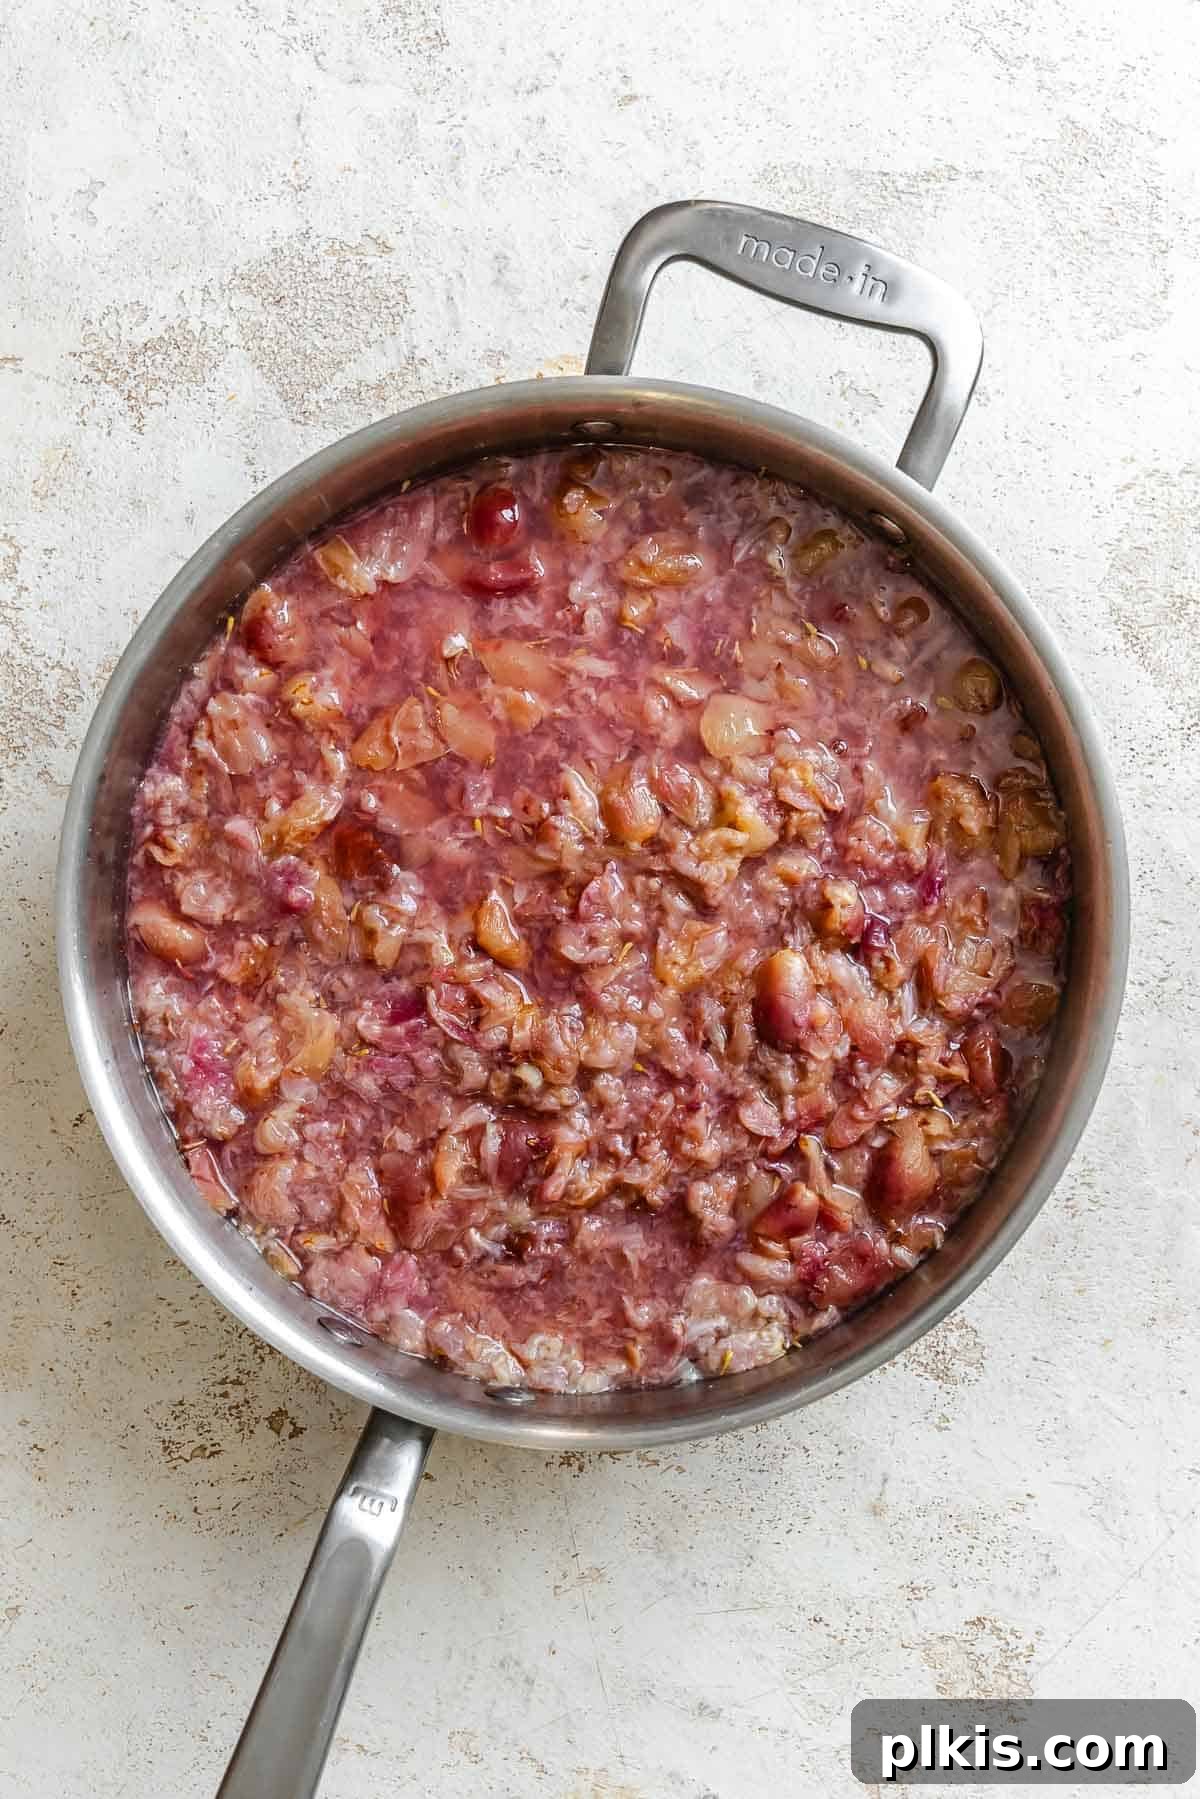
Step 1: Prepare and Simmer the Grapes. Begin by thoroughly washing your grapes and removing them from their stems. Transfer the clean grapes to a large, heavy-bottomed saucepan. Add the specified amount of water. Place the saucepan over medium heat and bring the mixture to a gentle simmer. Cook for approximately 10 minutes, stirring occasionally. During this time, the grapes will soften significantly and begin to burst, releasing their flavorful juices. This initial cooking helps to extract maximum flavor and natural pectin from the fruit.
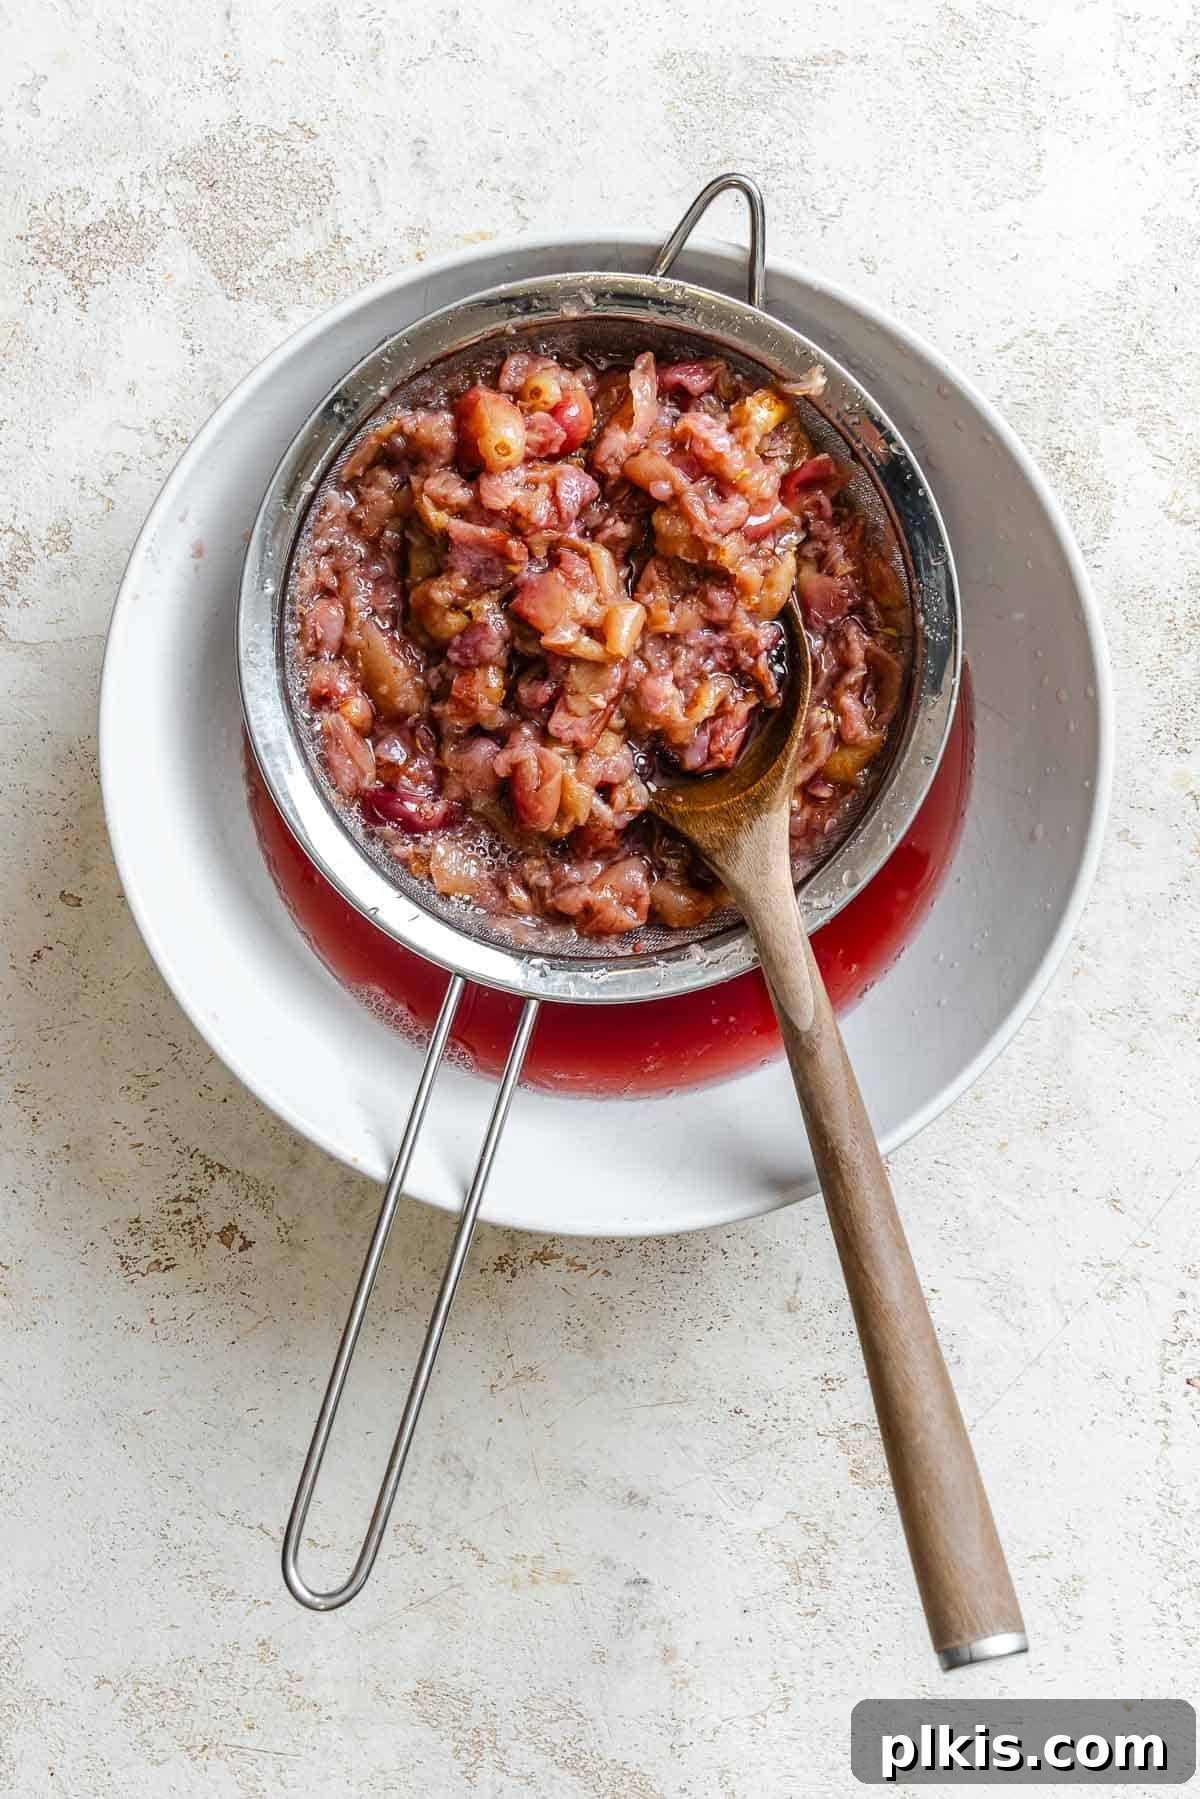
Step 2: Mash and Strain (or Blend). Once the grapes are tender, use a potato masher or the back of a sturdy spoon to thoroughly mash them directly in the pot. This further breaks down the fruit and releases more juice and pulp. For a smooth, jelly-like consistency, carefully pour the mashed grape mixture through a fine-mesh sieve or a food mill set over a large bowl. Press firmly on the solids to extract as much liquid and pulp as possible, leaving behind only the skins and seeds. Discard these solids. If you prefer a chunkier jam, you can skip this straining step entirely. Alternatively, for a slightly thicker, less chunky jam that retains more of the fruit’s body, use an immersion blender directly in the cooked grape mixture until you reach your desired texture.
Tip for Texture: If you want a perfectly clear jelly, don’t press the fruit through the sieve; simply let the juice drip naturally for several hours or overnight. For a jam, pressing the pulp through is recommended.
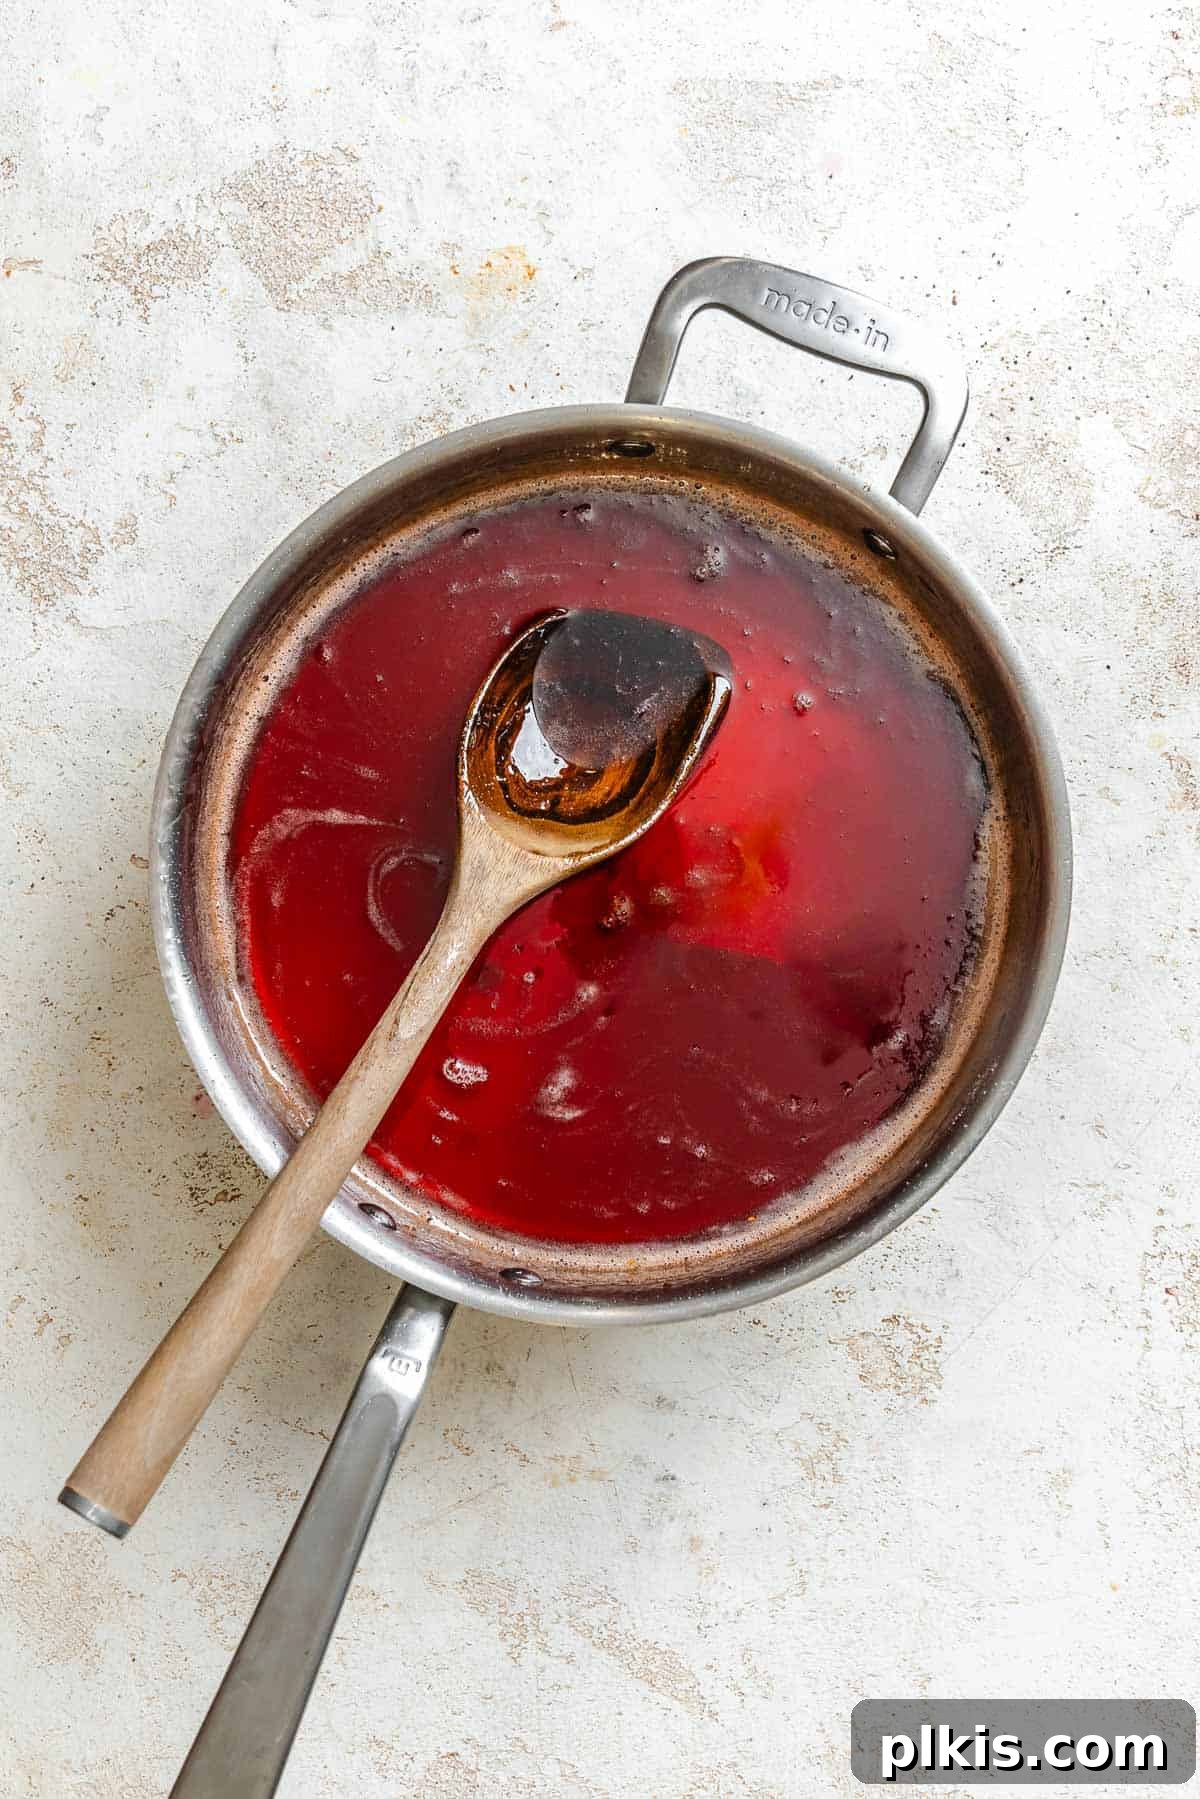
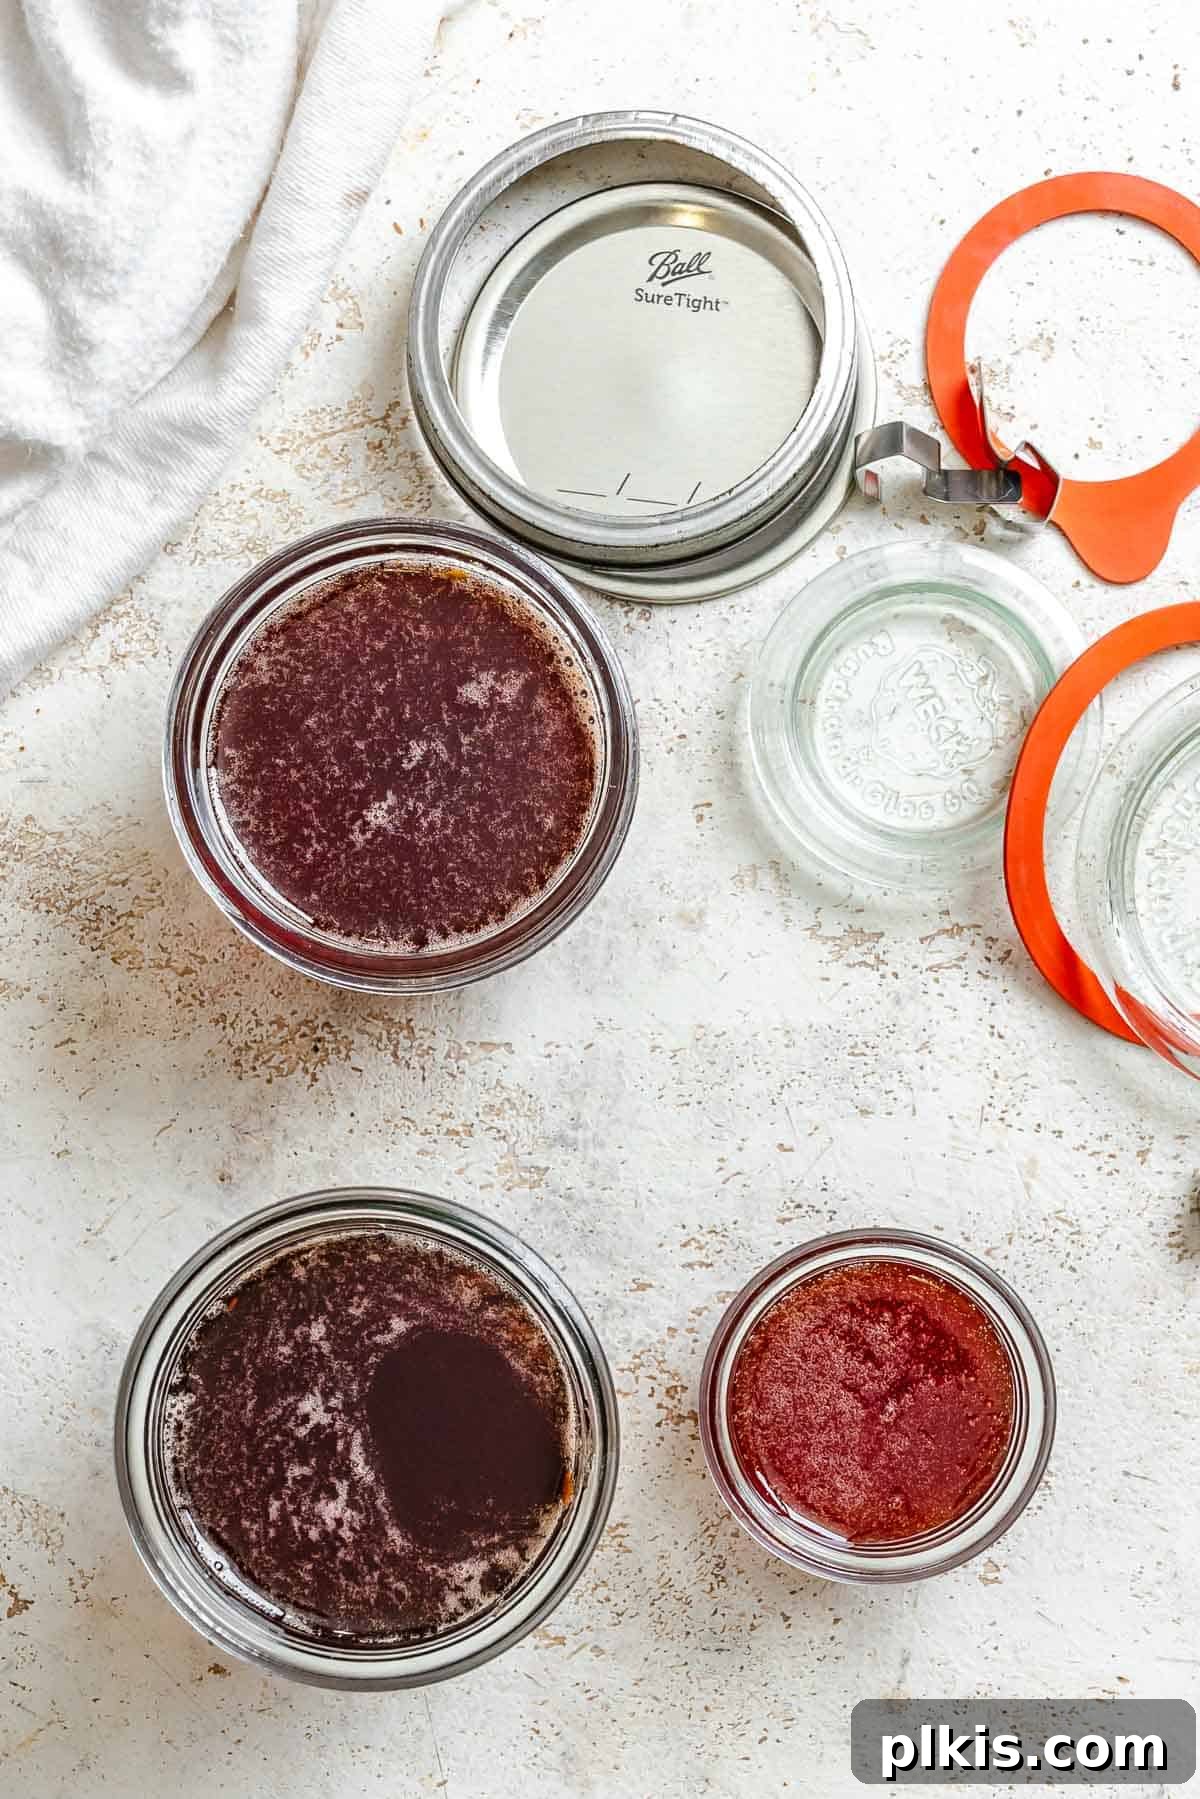
Step 3: Sweeten and Boil to Perfection. Return the strained grape pulp and juice (or the blended mixture if skipping straining) to the clean saucepan. Stir in the granulated sugar and lemon juice until the sugar is completely dissolved. Place the saucepan back over medium-high heat and bring the mixture to a steady, rolling boil. It is crucial to stir frequently during this stage to prevent the jam from sticking to the bottom of the pot and scorching. Continue to boil for 30-45 minutes, or until the jam has visibly thickened. The cooking time will vary depending on your stove, pot, and the moisture content of your grapes.
Step 4: Test for Setting Point and Store. The jam is ready when it reaches its setting point. There are two primary ways to test this:
- The Chilled Plate Test: Place a small spoonful of hot jam onto a plate that has been chilling in the freezer for at least 10-15 minutes. Let it sit for 30-60 seconds, then push the jam with your finger. If the surface wrinkles, the jam is ready. If it’s still runny, continue boiling for a few more minutes and retest.
- The Thermometer Method: For a precise measure, use a candy thermometer. The jam is set when it reaches 105°C (221°F) at sea level.
Once the jam has reached its setting point, remove it from the heat. For immediate fridge storage, carefully transfer the hot jam into clean, sterilized jars, leaving about ¼-inch headspace. Allow the jars to cool completely at room temperature, then seal them tightly with lids and refrigerate. This jam will be good for up to a month (and often longer) in the fridge.
Important Note: Never overcook the jam beyond its setting point, as this can lead to a thick, grainy texture and an unpleasant, caramelized flavor. Always stir frequently to prevent scorching, especially towards the end of the cooking process.
Mastering Water Bath Canning for Long-Term Storage
Water bath canning is a fantastic way to preserve your delicious homemade grape jam, extending its shelf life significantly and ensuring you can enjoy the taste of summer throughout the year. It’s a safe and effective method when done correctly.
Essential Canning Equipment:
- Canner or Large Pot: A dedicated water bath canner is ideal, but any tall, large, heavy-based pot with a lid that is deep enough to cover your jars by at least an inch of water will work.
- Canning Rack or Trivet: This goes at the bottom of your pot to keep jars from touching the direct heat and allows water to circulate. Without it, jars can crack.
- Canning Jars & Lids: Use standard glass canning jars (pint or half-pint are common for jam), with new flat lids and screw bands. Always use new flat lids for canning to ensure a proper seal.
- Canning Tongs: Specialized canning tongs are designed to securely lift hot jars in and out of boiling water, preventing burns and breakage. Regular kitchen tongs are not as secure and can be dangerous.
- Wide-Mouth Funnel: Helps to fill jars cleanly, avoiding spills on the rims.
- Ladle: For transferring hot jam into jars.
- Bubble Remover/Headspace Tool: A non-metallic tool (or a clean chopstick) to remove air bubbles from jars and measure headspace.
- Clean Kitchen Towels/Cloths: For wiping jar rims and cooling jars.
Preparing Your Canner and Jars:
- Sterilize Jars and Tools: Before you even start making your jam, ensure all your canning jars, lids, and tools (tongs, funnel, ladle) are thoroughly sterilized. You can do this by washing them in hot, soapy water and then keeping the jars hot in a simmering water bath (not boiling) until ready to fill. New lids should be simmered in hot water (not boiled) according to manufacturer instructions.
- Set Up the Canner: Place the canning rack or trivet at the bottom of your canner or large pot. Add enough water to the pot to ensure that when the jars are submerged, they will be covered by at least 1 inch of water. Bring this water to a near boil (around 180-200°F / 82-93°C) and maintain this temperature until you are ready to process the filled jars.
Water Bath Canning Process:
- Fill Jars with Hot Jam: Once your grape jam has reached its setting point, remove the saucepan from the heat. Skim off any foam that has risen to the surface; this prevents clouding in your finished jam. Using your wide-mouth funnel and ladle, carefully pour the hot jam into the hot, sterilized jars, leaving exactly ¼-inch headspace from the rim.
- Remove Air Bubbles and Adjust Headspace: Insert your bubble remover tool or a clean chopstick along the inside edge of each jar to release any trapped air bubbles. Recheck the headspace and add more jam if necessary to maintain the ¼-inch headspace.
- Clean Rims and Seal: Thoroughly wipe the rims of each jar with a clean, damp kitchen towel to remove any jam residue. Residue can prevent a proper seal. Center a new, sterile flat lid on each jar, then screw on the band fingertip-tight. This means tightening until you feel resistance, then giving it just a gentle tug. Do not overtighten.
- Process in Water Bath: Carefully place the filled jars onto the canning rack in your prepared canner, ensuring they don’t touch each other. The water level should cover the jars by at least 1 inch. Bring the water to a full, rolling boil. Once boiling, begin your processing time. For most altitudes, process for 10 minutes. If you live at a higher altitude, adjust processing time according to recommended guidelines (e.g., add 1 minute for every 1,000 feet above 1,000 feet elevation).
- Cool and Check Seals: After the processing time is complete, turn off the heat and let the jars sit in the hot water for an additional 5 minutes. This helps prevent siphoning (loss of liquid from the jars). Using canning tongs, carefully transfer the hot jars to a clean kitchen towel placed on your counter. Ensure there is space between the jars for air circulation. Let them cool undisturbed for 12-24 hours. Avoid placing jars directly on a cold counter, as thermal shock can cause them to crack.
- Verify Seals: After the jars have completely cooled, check the seals. The center of the lid should be concave (curved inwards) and should not flex when pressed. Remove the screw band and try to lift the lid with your fingertips. If the lid stays firmly attached, it is sealed. If a lid does not seal, refrigerate that jar of jam and consume it within 2-3 weeks. You can also re-process unsealed jars with new lids within 24 hours of the initial canning, ensuring there are no chips on the jar rim.
Safety First: Always follow tested canning recipes and guidelines to ensure the safety of your preserved foods. Improper canning can lead to spoilage and foodborne illness.
Frequently Asked Questions About Homemade Grape Jam
The primary difference lies in their texture and consistency, which comes down to how the fruit is prepared. Grape jam is made using crushed or chopped grape pulp along with the juice. This results in a thicker, often chunkier spread that contains small pieces of fruit, offering a more rustic and robust flavor. Grape jelly, on the other hand, is made exclusively from strained grape juice. All fruit solids (pulp, skins, seeds) are removed, yielding a clear, smooth, and translucent spread with a delicate texture. This particular recipe is versatile enough that you can make either homemade grape jelly or jam, depending on whether you choose to strain out the pulp or leave some in.
Technically, straining the grape peels is optional. The peels soften considerably during cooking and contribute significantly to the jam’s flavor, color, and natural pectin content. Leaving them in will result in a more rustic, slightly tarter jam with a richer color and often a firmer set due to the pectin in the skins. If you desire a super smooth jam or jelly, then straining the peels (and seeds) through a fine-mesh sieve or food mill is essential. For a compromise, an immersion blender can break down the peels into smaller, less noticeable pieces, creating a smoother jam while retaining their benefits.
You can reduce the sugar, but it’s important to understand the implications. Sugar plays several vital roles in jam making: it’s a primary preservative, contributes significantly to the jam’s setting ability (texture), and of course, provides sweetness. If you reduce the sugar, your jam will likely take longer to reach the gel stage, may yield less final product, and will have a shorter shelf life. Reduced-sugar jams are generally not suitable for water bath canning without adding commercial pectin formulated for low-sugar recipes, or without using a pressure canner for certain fruits. For safety, low-sugar jams are best stored in the refrigerator and consumed within 2-3 weeks, or frozen for longer storage.
Absolutely! Frozen grapes work wonderfully for jam. Simply let them thaw slightly before you begin the cooking process. Thawing may release extra liquid, so be aware that your initial simmer might take a few extra minutes to concentrate the juices before mashing. The freezing process can actually help break down the fruit’s cell walls, which can sometimes make the mashing and juice extraction even easier.
There are a few common reasons why jam might not set properly. The most frequent culprits include insufficient cooking time (the jam didn’t reach the proper temperature or consistency), too little acid (not enough lemon juice to activate natural pectin), or under-ripe fruit (lacking sufficient natural pectin). Ensure your grapes are very ripe, measure lemon juice accurately, and be patient during the boiling phase, using either the chilled plate test or a candy thermometer to confirm the setting point. High humidity or large batch sizes can also sometimes affect setting.
Expert Tips for Jam-Making Success
Achieving a perfect batch of homemade grape jam is within reach with these expert tips. Pay attention to these details, and you’ll be enjoying your delicious spread in no time!
- Hygiene is Paramount: Always use thoroughly sterilized jars, lids, and all cooking utensils that will come into contact with your jam. This is especially crucial if you plan to can the jam, as it helps prevent bacterial growth and premature spoilage. Cleanliness ensures your jam remains safe and flavorful for longer.
- The Power of Ripe Grapes: Select the ripest grapes you can find. Very ripe grapes naturally contain more sugar and higher levels of pectin, which is essential for achieving a good set without adding commercial pectin. They also contribute a richer, sweeter, and more complex flavor to your finished jam.
- Achieving the Perfect Set: Patience and observation are key. Cook the jam until it consistently reaches the setting point, which is typically 105°C (221°F) on a candy thermometer. If you don’t have a thermometer, rely on the chilled plate test (as described in the instructions): a spoonful placed on a cold plate should wrinkle when nudged. Avoid the temptation to overcook, as this can lead to a jam that is too stiff, grainy, or has a caramelized, unpleasant flavor.
- Crystal Clear or Rustic Charm: If you desire a jam with a very clear, translucent appearance (like a jelly), ensure you thoroughly skim any foam that rises to the surface during cooking. Foam can cause the final product to look cloudy. For a more rustic, chunkier jam, you can be less meticulous with skimming, and definitely don’t strain out all the pulp.
- Adjusting Consistency: For a delightful, chunky jam that retains more of the fruit’s texture, consider using an immersion blender directly in the cooked grape mixture instead of straining, or simply mash the grapes and leave most of the pulp in. For a smoother, more traditional jelly-like consistency, thorough straining through a fine-mesh sieve or food mill is essential.
- Sugar’s Scientific Role: Remember that sugar is not just for taste; it’s a vital component in jam’s structure and preservation. If you plan to water bath can your jam, strictly adhere to the recipe’s sugar content. Significantly reducing sugar without using low-sugar pectin or an alternative preservation method can compromise the jam’s safety and ability to set.
- Altitude Adjustments for Canning: If you are canning your jam and live at an altitude above 1,000 feet, you will need to adjust your processing time in the water bath canner. Typically, you add 1 minute for every additional 1,000 feet of elevation to ensure proper sterilization. Consult your local extension office or a reliable canning guide for precise adjustments for your specific altitude.
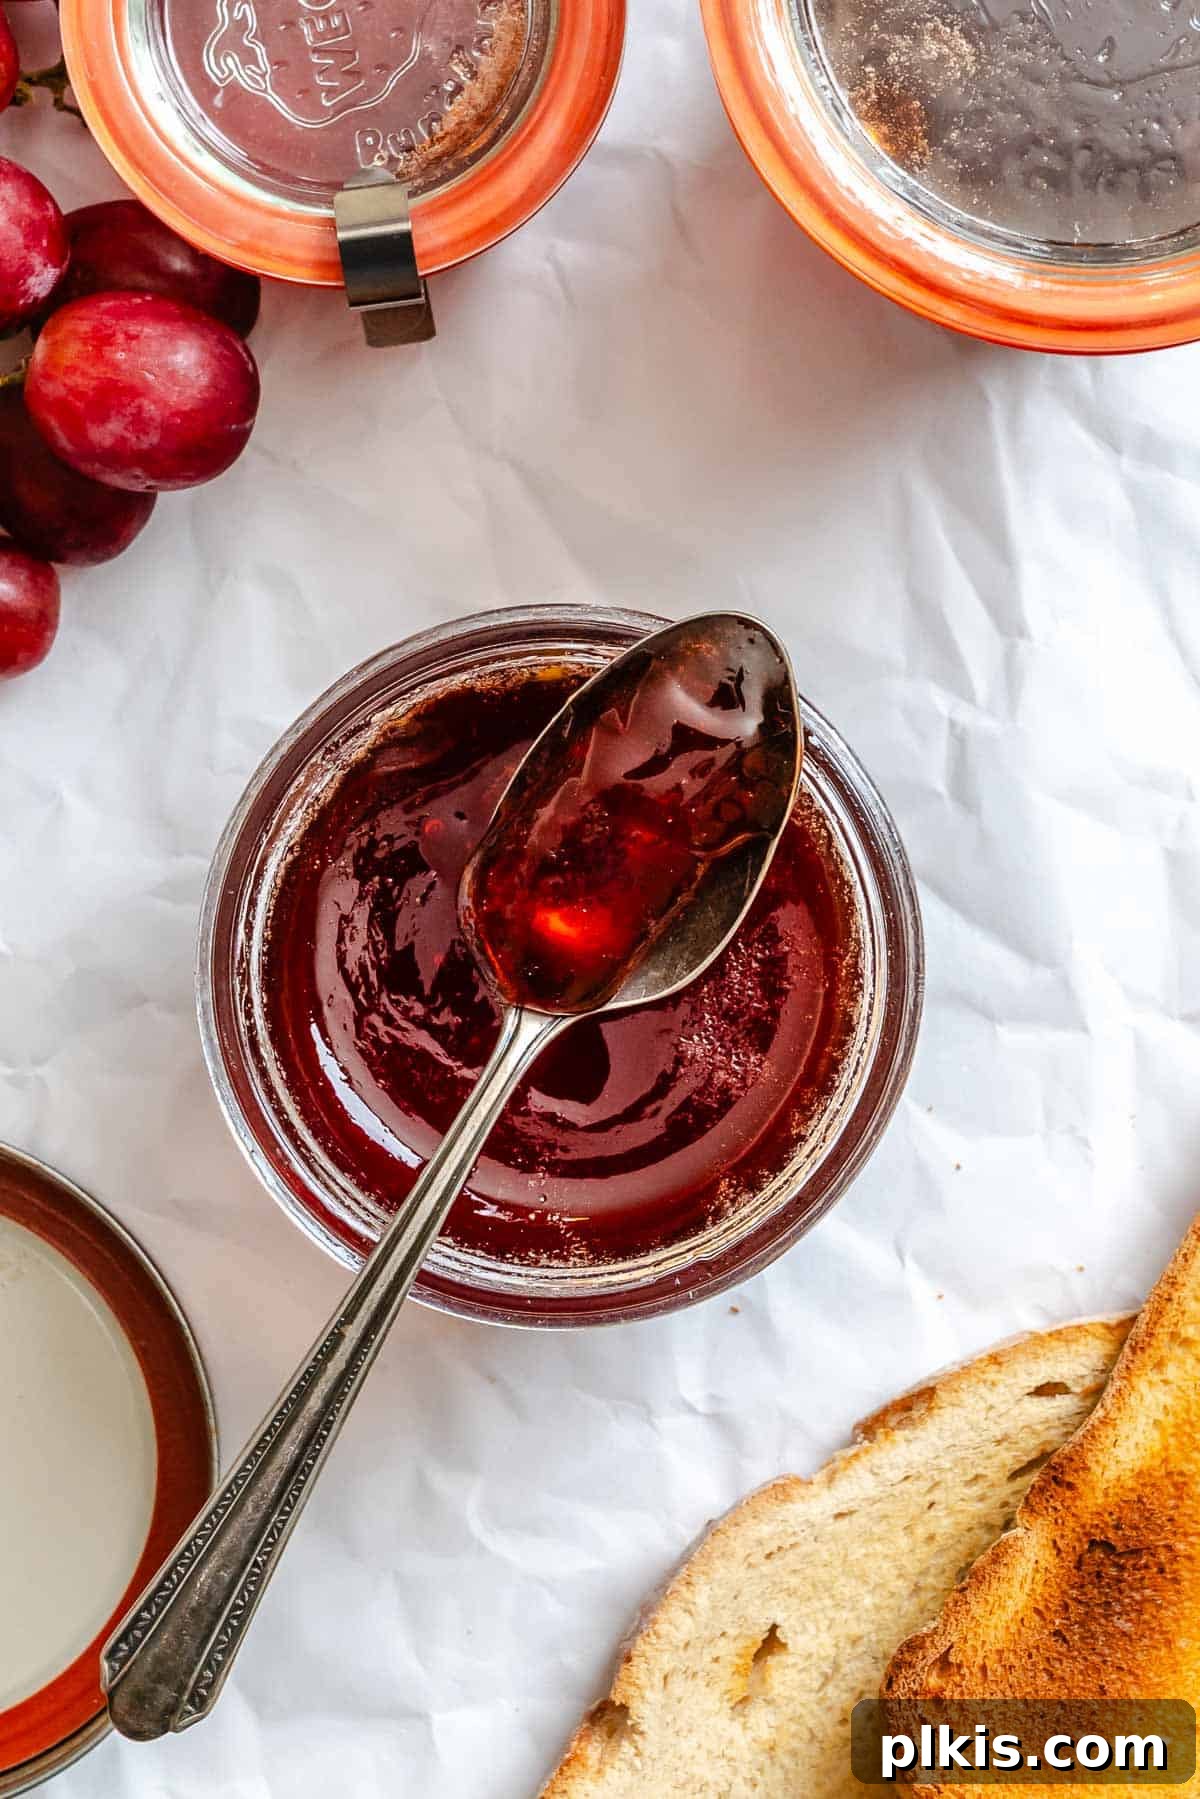
Delicious Ways to Enjoy Your Homemade Grape Jam
Once you’ve made a batch of this vibrant homemade grape jam, you’ll find endless ways to enjoy its sweet and fruity goodness. Here are some of my favorite ways to incorporate it into meals and snacks:
- Classic Breakfast Spreads: The most obvious, yet always satisfying. Spread it generously over warm toast, flaky pastries, fluffy homemade vegan banana bread, or delicate vanilla scones.
- Breakfast Staples: Elevate your morning routine by dolloping grape jam onto stacks of light and airy pancakes (especially these vegan protein pancakes!), crispy vegan waffles, or rich vegan French toast.
- Sweet Treats: Incorporate it into desserts. It’s a fantastic filling for thumbprint cookies, a layer in a vegan cake, or even swirled into vegan peanut butter cups for a PB&J twist.
- Porridge & Yogurt: Stir a spoonful or two into your morning stovetop oatmeal or overnight oats. It’s also delicious swirled into vegan yogurt or layered into a peanut butter chia pudding for a wholesome dessert or snack.
- Savory Pairings: Don’t limit jam to sweet dishes! Grape jam makes a wonderful addition to a vegan charcuterie board or vegan cheese board, offering a sweet counterpoint to savory crackers and plant-based cheeses.
- The Ultimate PB&J: Revisit your childhood favorite with a grown-up twist. A sandwich made with homemade grape jam and creamy peanut butter is simply incomparable.
Storage Solutions for Your Grape Jam
Proper storage is essential to maintain the quality and safety of your homemade grape jam. Depending on whether your jam is canned or not, different methods will ensure it stays fresh and delicious.
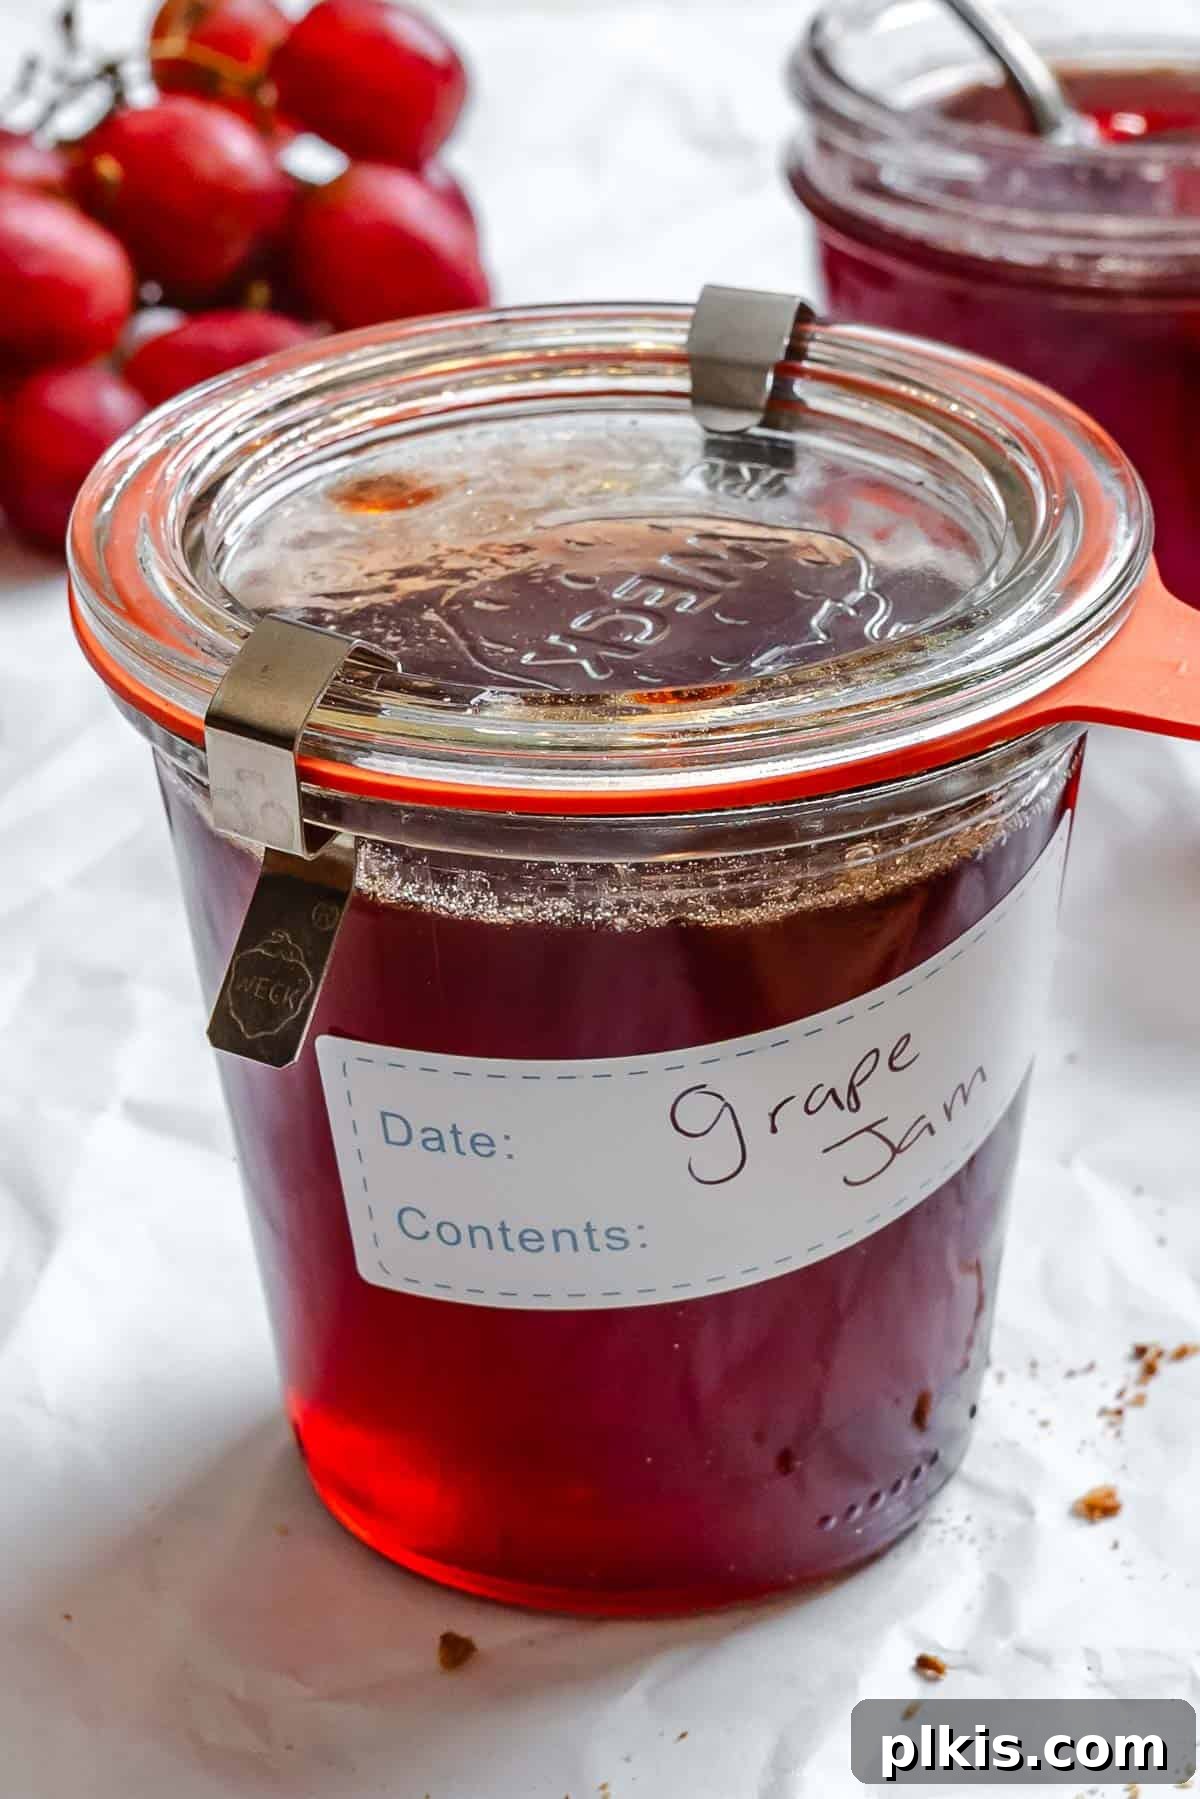
- Pantry Storage (Canned Jam): Properly water bath canned jam, with lids that have sealed correctly, can be stored in a cool, dark, and dry location like a pantry for up to 1 year for optimal flavor and texture. While technically it may keep longer, its quality can diminish over time. Always label your jars with the date of canning.
- Refrigerator Storage (Non-Canned or Opened Jam): Any jam that has not been water bath canned, or any jar of canned jam that has been opened, must be stored in the refrigerator. It will typically remain fresh for about 1 month, often longer, depending on how cleanly it’s handled. Always use only clean cutlery to scoop out jam to prevent introducing bacteria, which can cause premature spoilage.
- Freezer Storage: For extended storage beyond refrigeration without canning, you can freeze your grape jam. Transfer the cooled jam into airtight, freezer-safe containers, leaving a small amount of headspace to allow for expansion. It can be stored in the freezer for up to 6 months. To use, simply thaw the jam overnight in the refrigerator. The texture might be slightly softer after thawing, but the flavor will remain excellent.
Explore More Vegan Grape Recipes
Vegan Snacks
Easy Grape Smoothie
Vegan Lunches
Vegan Chicken and California Grape Salad
Vegan Appetizers
Fresh Grape Salsa
Vegan Side Dishes
Carrot and California Grape Side Dish
If you tried this easy homemade grape jam recipe or any other recipe on our blog, please leave a 🌟 star rating and let us know how it went in the 📝 comments below. We’d love to hear from you!
Easy Homemade Grape Jam (No Pectin)
20 mins
1 hr
3 – 4 cups
Make easy homemade grape jam (or jelly!) with no pectin or peeling! A sweet and simple 3-ingredient recipe perfect for canning or fridge storage!
Video
Equipment
-
Measuring Cups
-
Measuring Spoons
-
Large, Heavy-Bottomed Saucepan
-
Potato Masher
-
Fine-Mesh Sieve or Food Mill (for jelly)
-
Canning Jars with Lids and Bands
-
Canning Tongs
-
Wide-Mouth Funnel
-
Candy Thermometer (optional, but recommended)
Ingredients
- 4 pounds seedless grapes (washed and stems removed)
- ½ cup water
- 2 ½ cups granulated sugar
- 2 tablespoons lemon juice
Instructions
-
Place the washed and stemmed grapes in a large saucepan with the water.
-
Bring to a simmer over medium heat and cook for 10 minutes, stirring occasionally, until grapes are soft and starting to burst.
-
Mash the grapes thoroughly with a potato masher or the back of a sturdy spoon to release their juices and pulp.
-
For a smooth jam or jelly, pour the grape mixture through a fine-mesh sieve or food mill into a bowl, pressing to extract as much liquid and pulp as possible. Discard the skins and seeds. For a chunkier jam, skip this straining step or use an immersion blender directly in the pot.
-
Return the strained pulp and juice (or blended mixture) to the saucepan.
-
Stir in the granulated sugar and lemon juice until the sugar is completely dissolved.
-
Place over medium-high heat and bring to a steady, rolling boil, stirring often to prevent sticking.
-
Continue boiling until the mixture thickens and reaches its setting point – typically 30-45 minutes. The jam is ready when a spoonful placed on a freezer-chilled plate wrinkles when pushed with your finger, or a candy thermometer reaches 105°C (221°F).
-
Remove from heat and carefully skim off any foam from the surface to ensure a clear jam.
-
For fridge storage: Pour the hot jam into clean, sterilized jars, leaving about ¼-inch headspace. Let cool completely, then seal and refrigerate.
-
For water bath canning: Carefully fill hot, sterilized jars with hot jam, leaving ¼-inch headspace. Wipe rims, apply lids and bands fingertip-tight.
-
Process the jars in a boiling water bath for 10 minutes (adjust for altitude if needed).
-
Turn off heat, let jars sit in water for 5 minutes, then remove and let cool completely on a towel-lined surface for 12-24 hours.
-
Check the jar seals: lids should be concave and not move when pressed.
-
Store sealed jars in a cool, dark place for up to 1 year. Refrigerate any unsealed jars and use within 3 weeks.
Notes
- For a properly set jam: Cook until 105°C/221°F or use the chilled plate test. Avoid overcooking as it may become thick, grainy, or have an unpleasant flavor.
- For the clearest jam: Skim foam from the surface during cooking, as it can cause clouding.
- To adjust the consistency: For chunkier jam, do not strain all the mashed grapes. This will result in a more typical jam-like texture versus a smoother, jelly-like one.
- Sugar content is important: Especially if you plan to can it, as sugar significantly affects texture, thickening, and preservation. Do not drastically reduce sugar for canned jam without using specialized low-sugar pectin.
Nutrition
Carbohydrates: 276g
Protein: 4g
Fat: 2g
Saturated Fat: 0.3g
Polyunsaturated Fat: 0.3g
Monounsaturated Fat: 0.04g
Sodium: 16mg
Potassium: 1169mg
Fiber: 5g
Sugar: 260g
Vitamin A: 400IU
Vitamin C: 23mg
Calcium: 64mg
Iron: 2mg
Additional Info
Tried this recipe?
Please tag us at @PlantBasedOnABudget! 🙂