
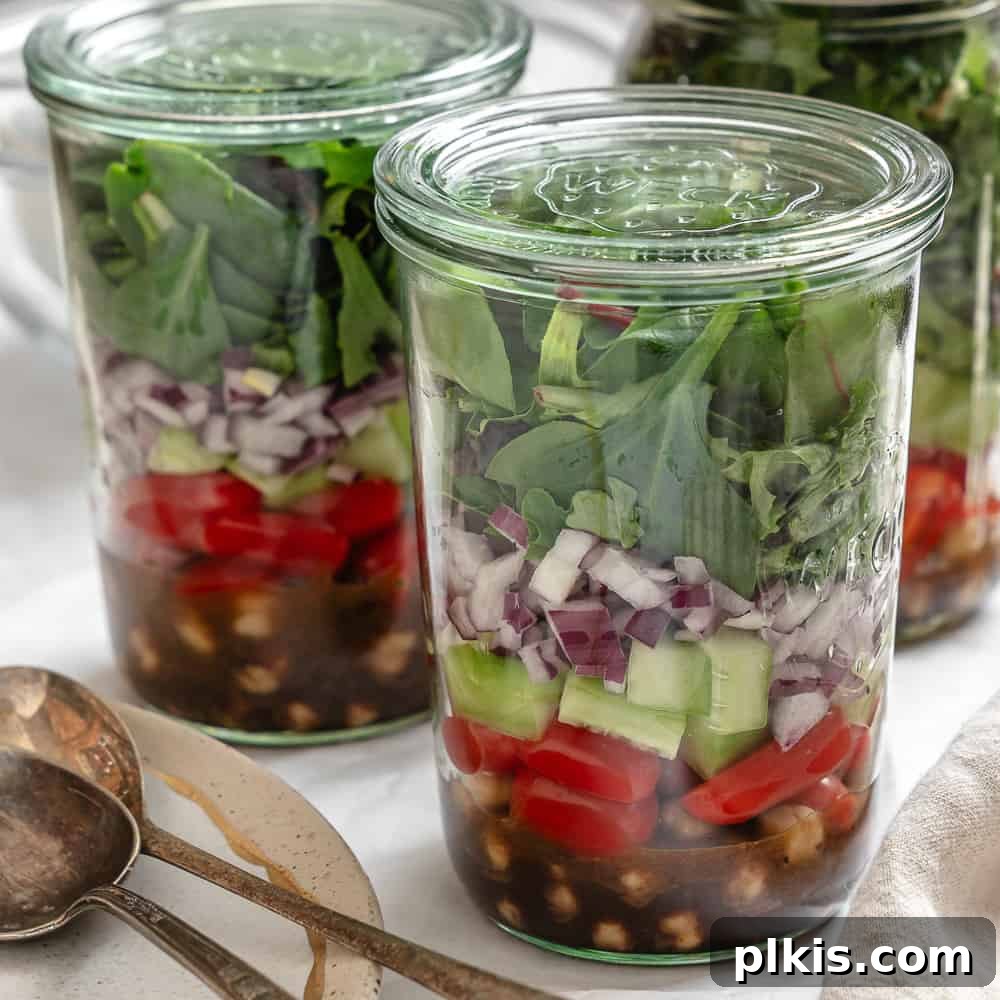
Transform your approach to healthy eating with the ultimate guide to crafting irresistible Quinoa Chickpea Salads in a Jar! This vibrant, nutritious, and incredibly convenient meal-prep solution is designed for busy individuals who refuse to compromise on flavor or health. In less than 30 minutes, you can prepare a week’s worth of fresh, delicious lunches that are perfectly portioned and ready to grab-and-go. Discover the secrets to strategic layering, unlock endless recipe variations, and master the art of the mason jar salad for optimal freshness and taste. Say goodbye to soggy salads and hello to crisp, satisfying meals every single day!
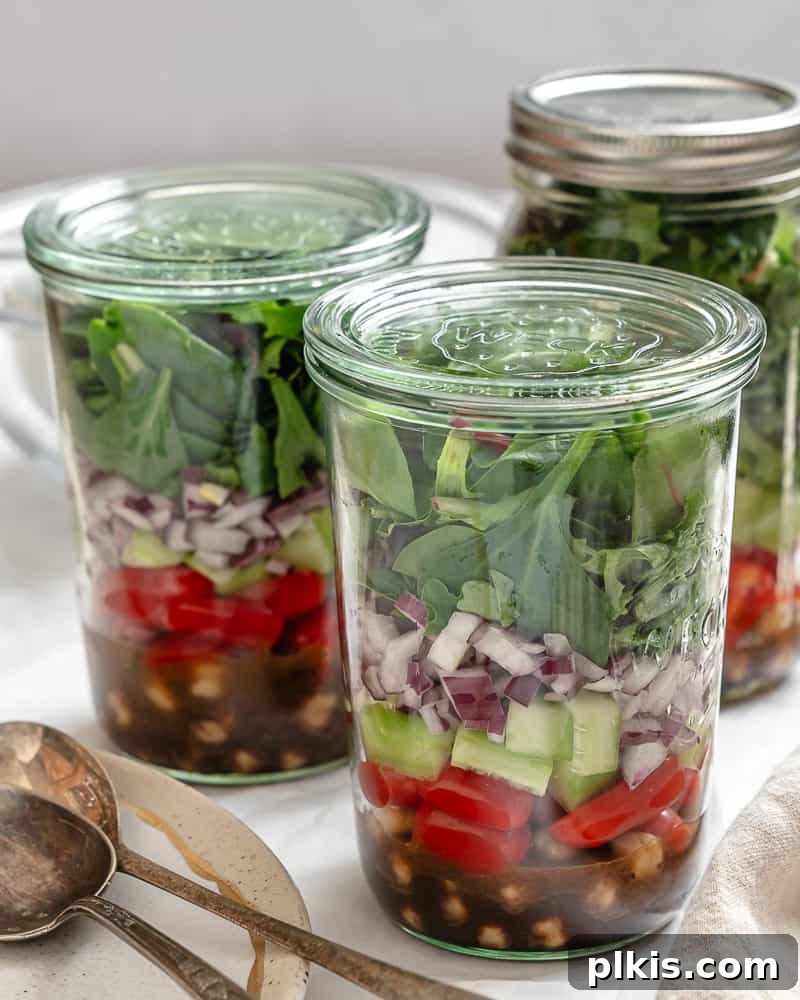
What Are Mason Jar Salads and Why Are They a Meal Prep Game-Changer?
Mason jar salads have revolutionized the way we approach meal prepping, offering a simple yet brilliant method to enjoy fresh, crisp salads throughout the week with minimal effort. At their core, salad jars involve layering ingredients strategically within a sealed glass jar, preventing dreaded sogginess and preserving peak flavor and texture for several days. This ingenious approach makes them a favorite for busy schedules, offering unparalleled convenience, portability, and healthy eating.
Unlike traditional salads that can wilt and become unappetizing quickly, mason jar salads are designed to maintain their integrity. The secret lies in understanding which ingredients go where, creating a protective barrier between the dressing and the delicate greens. This not only keeps your salad fresh but also ensures that each component retains its unique crunch, vibrant color, and distinct taste until you’re ready to eat.
For this particular recipe, we’re diving into a hearty and wholesome Quinoa Chickpea Salad. It’s a refreshing green salad built upon a base of crisp lettuce or nutrient-dense kale, complemented by crunchy vegetables like cucumber, juicy tomatoes, and a punch of finely diced red onion. When combined with your chosen dressing, it transforms into a deliciously balanced meal packed with essential fiber, plant-based protein, and a rich array of vitamins and minerals. It’s not just a salad; it’s a complete, satisfying experience that fuels your body and delights your taste buds.
Beyond the incredible convenience and freshness, mason jar salads offer numerous benefits:
- Effortless Meal Prep: Dedicate a short block of time, typically less than 30 minutes, to prepare multiple lunches or dinners for the entire week. This frees up precious time during busy weekdays.
- Perfect Portions: Each jar holds a single, well-balanced serving, making calorie control and healthy eating intuitive and easy.
- Reduced Food Waste: By preparing ingredients in advance and storing them correctly, you minimize the likelihood of vegetables going bad before you can use them.
- Portable & On-the-Go: Mason jars are durable, spill-proof, and easy to transport, making them ideal for work, school, picnics, or travel. Simply grab a jar and go!
- Endless Customization: Once you master the fundamental layering technique, the possibilities are limitless. You can adapt the method to virtually any salad recipe, experimenting with different ingredients, dressings, and flavor profiles to keep your meals exciting. This flexibility ensures you never get bored and always have something delicious to look forward to.
If you’re looking to diversify your vegan salad repertoire, explore other delightful options like our Mediterranean couscous salad, the zesty Southwest quinoa salad, or the flavorful easy curried chickpea salad. Each can be adapted into a convenient jar format, ensuring variety and consistent healthy eating.
Essential Ingredients & Versatile Substitutions for Your Jar Salads
The beauty of mason jar salads lies in their adaptability. While this recipe provides a fantastic template for a delicious Quinoa Chickpea Salad, feel free to get creative with the components. Here’s a detailed look at the core ingredients and how you can customize them to suit your taste and pantry.
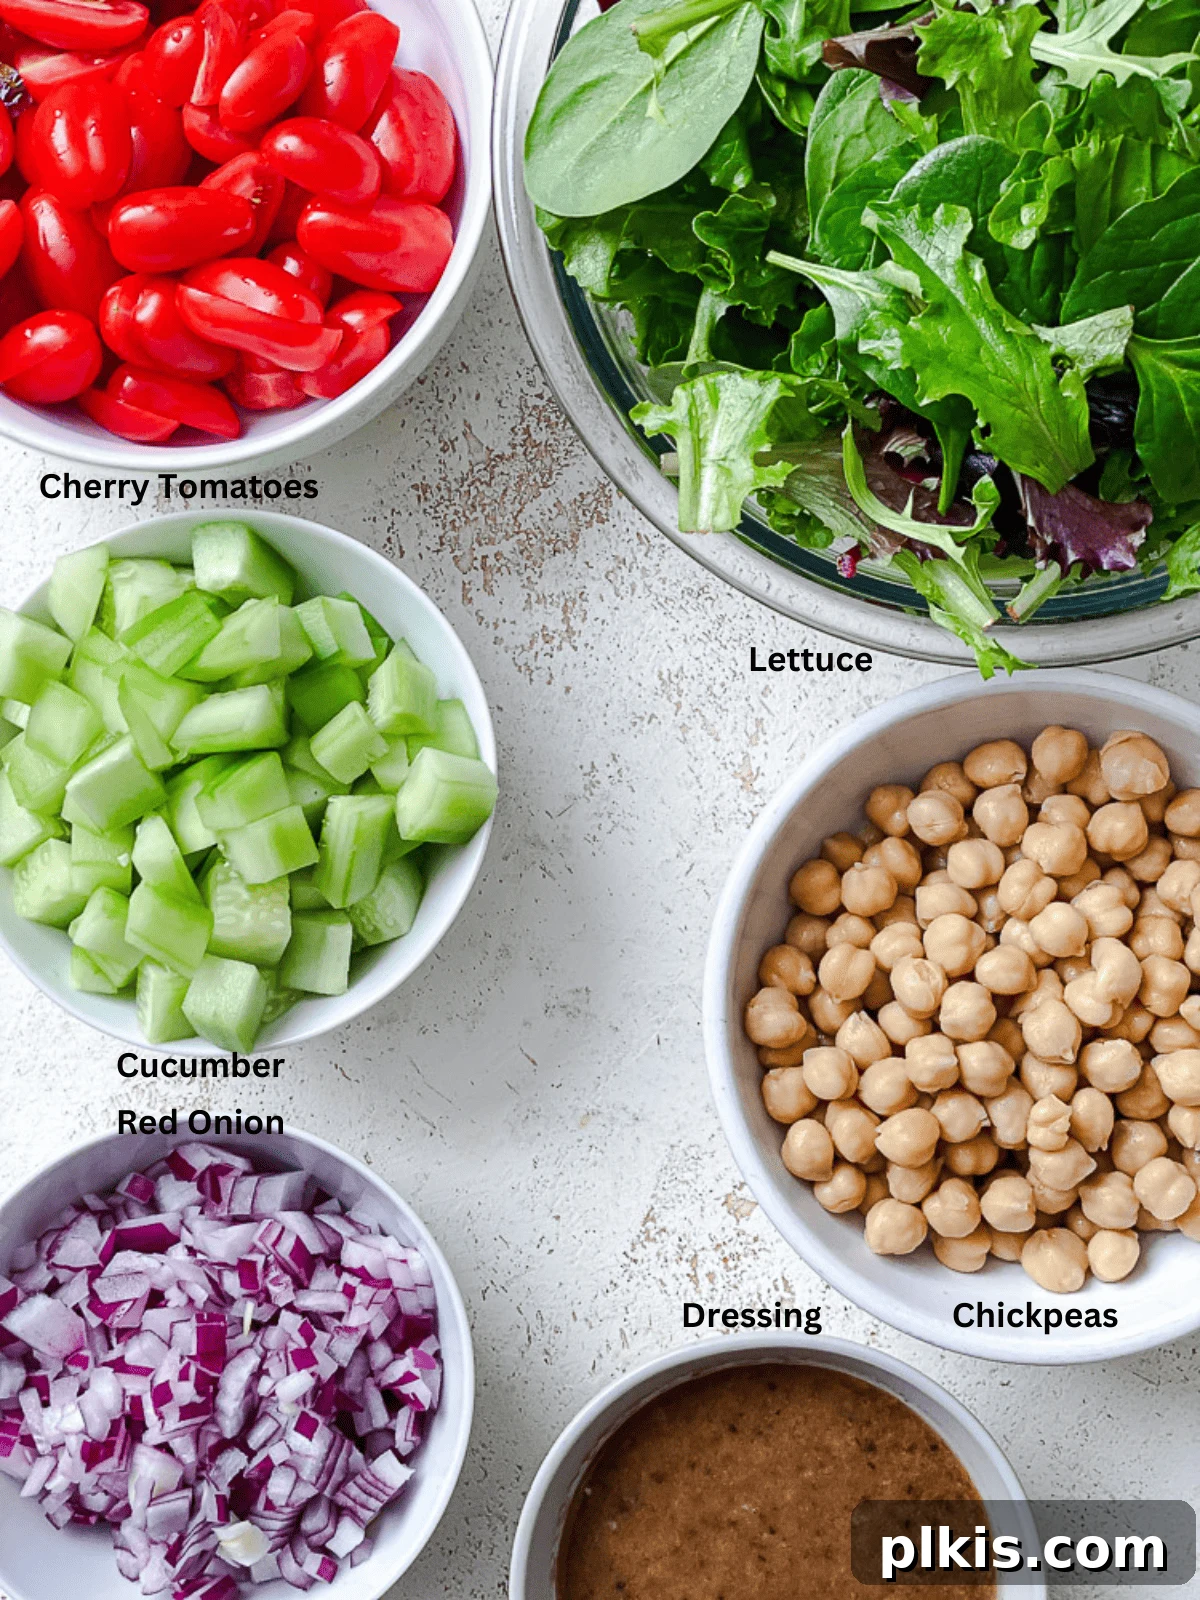
- Greenery: The foundation of your salad.
- Crisp Romaine Lettuce: Offers a refreshing crunch and mild flavor.
- Iceberg Lettuce: A classic choice for maximum crispness.
- Nutrient-Rich Kale: For a heartier, more robust salad packed with vitamins. Massage it lightly with a squeeze of lemon juice or a tiny bit of dressing before layering to soften its texture.
- Substitutions: Mixed greens, baby spinach, arugula, or even shredded cabbage can work beautifully, offering different textures and nutrient profiles.
- Red Onion: Adds a sharp, piquant bite and vibrant color.
- Substitutions: Milder white onion, sweet onion, or delicate shallots can be used for a less intense flavor. If you prefer a milder onion, soak diced onion in cold water for 10-15 minutes before adding.
- Cucumber: Provides essential hydration and a refreshing crunch.
- Persian or English Cucumbers: These varieties have thin skins and fewer seeds, making them ideal. They rarely need peeling or de-seeding.
- Substitutions: Regular cucumbers will work, but you might want to peel and de-seed them to prevent excess moisture release.
- Tomatoes: Burst with sweetness and juiciness.
- Cherry or Grape Tomatoes: Conveniently available year-round and ideal for halving.
- Substitutions: Diced Roma tomatoes or any ripe, flavorful tomato can be used when in season. Ensure they are firm to avoid sogginess.
- Chickpeas (Garbanzo Beans): A powerhouse of plant-based protein and fiber, making your salad satisfying and filling.
- Canned Chickpeas: Opt for regular or low-sodium, drained and rinsed thoroughly.
- Home-cooked Chickpeas: If you have time, cooking chickpeas from scratch offers a superior texture and flavor.
- Substitutions: Other legumes like cannellini beans, black beans, kidney beans, or butter beans are excellent alternatives for varying the protein source and texture.
- Quinoa: While technically optional, incorporating quinoa elevates the salad to a truly hearty and complete meal. It’s a complete protein and adds a lovely texture.
- Preparation: Ensure your quinoa is cooked and cooled completely before adding to the jar.
- Substitutions: Other cooked grains like couscous, brown rice, wild rice, farro, or barley can be used to add substance and complex carbohydrates.
- Nuts/Seeds: An optional but highly recommended garnish for an extra layer of crunch and healthy fats.
- Pumpkin Seeds: Our go-to for their earthy flavor and satisfying snap.
- Substitutions: Sunflower seeds, an omega seed mix (hemp, chia, flax), or toasted nuts like cashews, slivered almonds, or walnuts would also be delicious. Remember to add these right before serving to maintain their crispness.
- Dressing: This is where you infuse your personality into the salad. The choice of dressing can dramatically alter the flavor profile.
- Versatile Options: Classic Italian dressing, bright lemon vinaigrette, an aromatic basil ‘pesto’ dressing, or a creamy vegan Caesar dressing are all fantastic choices.
- Homemade vs. Store-bought: Consider making your own dressings for fresher ingredients and control over sugar and sodium levels.
Elevate Your Salad Jar: More Meal Prep-Friendly Additions
Beyond the core recipe, mason jar salads are incredibly forgiving and invite experimentation. Consider these additions to boost flavor, texture, and nutritional value:
- Additional Protein Power:
- Diced Tofu: Baked, air-fried, or pan-fried for extra texture.
- Tempeh: Crumbled or diced, offering a nutty flavor.
- Mock Meats: Vegan chick’n strips, ham, or bacon bits for a familiar taste and texture.
- Cooked Lentils: Another excellent source of fiber and protein.
- Harder Vegetables (Dressings-Friendly): These resilient veggies can sit closer to the dressing without wilting.
- Bell Peppers: Any color, diced for sweetness and crunch.
- Carrots: Shredded or julienned for a sweet earthiness.
- Radishes: Sliced thin for a peppery kick.
- Broccoli Florets: Small, finely chopped pieces add a robust crunch and nutrients.
- Cauliflower Florets: Similar to broccoli, great for texture.
- Baby Potatoes: Cooked and diced, add a starchy, comforting element.
- Softer Vegetables (Above Harder Layers): These release more moisture or are more delicate, so they need a protective layer.
- Roasted or Grilled Zucchini or Eggplant: Adds a tender, savory depth.
- Olives: Sliced or whole, for a briny touch.
- Corn: Fresh or thawed frozen kernels for sweetness.
- Mushrooms: Sliced, either raw or lightly sautéed.
- Artichoke Hearts: Marinated or plain, for a tangy, tender addition.
- Diverse Greens:
- Mixed Salad Leaves: For variety in taste and texture.
- Baby Spinach: Mild and tender.
- Arugula: For a peppery, slightly bitter note.
- Watercress: Adds a fresh, peppery zing.
- Fresh Herbs (Top Layer/Added at Serving): Sprinkle on top of your greens for aromatic freshness.
- Basil, Parsley, Dill, Cilantro, Mint.
- Sprouts: Alfalfa, broccoli, or radish sprouts are also best placed here for delicate crunch.
- Vegan Cheese (Top Layer/Added at Serving): To avoid sogginess, add these directly on top of the leafy greens or pack separately.
- Dairy-free mozzarella shreds, cheddar crumbles, or tangy vegan feta.
Ingredients like avocado, chopped apple, and pear are prone to browning quickly when exposed to air. For this reason, they are not ideal for extended storage in mason jar salads and are best sliced and added just before you’re ready to serve and enjoy your meal.
Mastering the Art of Layering: How to Pack a Perfect Salad In A Jar
The secret to a successful, non-soggy mason jar salad lies entirely in its strategic layering. This method ensures that each ingredient remains fresh and crisp until you’re ready to indulge. Follow these steps for the perfect stack, remembering that the fundamental principle is to keep wet ingredients away from delicate greens.
- Layer 1: The Dressing (The Foundation)
This is the very first layer at the bottom of your jar. By placing the dressing here, it stays far away from the leafy greens, preventing them from becoming soggy. Hardier ingredients placed directly above will slowly absorb the dressing’s flavor, enhancing the taste without compromising texture. This is also where you would place dips like guacamole or salsa if you’re using them as a dressing base.
- Layer 2: Hard Ingredients (Grains & Legumes)
Immediately above the dressing, add your hearty grains and pulses. Cooked quinoa, chickpeas, black beans, or couscous are perfect for this layer. They are robust enough to soak up the delicious flavors of the dressing without turning mushy. This ensures they become more flavorful over time, rather than deteriorating. If you prefer your grains and pulses less saturated, you can swap this layer with hardier vegetables.
- Layer 3: Hearty Proteins (Optional, Flavor Absorption)
If you’re adding solid vegan proteins like diced tofu, tempeh, or mock meats, this is a great place for them. Some people prefer them directly above the grains to absorb maximum flavor from the dressing. Others might place a layer of hard vegetables first for a slight buffer. Experiment to see what you prefer! Smaller, more delicate proteins like chopped vegan ham or bacon bits are often better placed higher up, above the softer vegetables, to prevent them from becoming too moist.
- Layer 4: Harder Vegetables (The Protective Barrier)
Next come your resilient vegetables that can withstand a bit of moisture and provide a firm barrier. Think carrots, bell peppers, celery, or firm onions. These vegetables are less prone to wilting and help create a physical separation between the dressing and more delicate layers. Dice them into bite-sized pieces for easy eating.
- Layer 5: Softer Vegetables & Fruits (Mid-Layer Cushion)
This layer is for vegetables that are more prone to releasing moisture or are slightly softer in texture. Cucumbers, tomatoes, cooked beets, mushrooms, or olives fit well here. It’s crucial to layer them beneath the greens to ensure any moisture they release doesn’t directly affect your lettuce. Keep them in larger chunks or halves if possible to minimize surface area and moisture release.
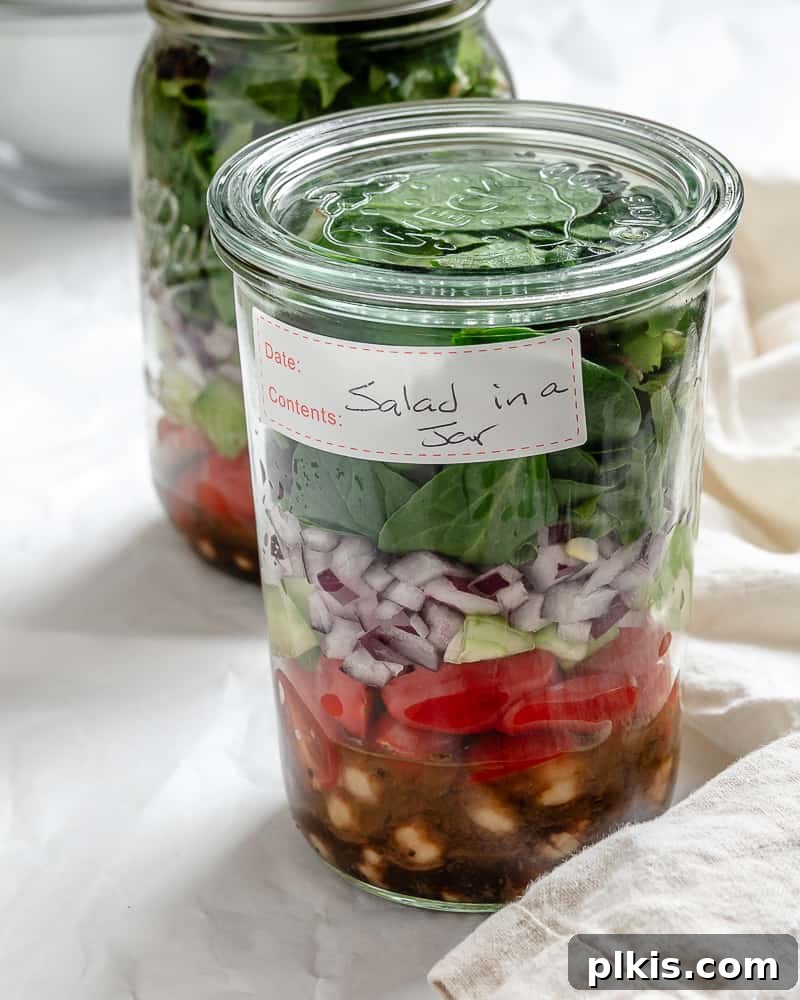
- Layer 6: The Leafy Greens (The Top Protector)
Finally, fill the rest of your jar with your chosen leafy greens—romaine, kale, spinach, or mixed greens. Pack them in loosely but firmly, ensuring they are as far away from the dressing as possible. This is the ultimate protective layer, safeguarding your crisp greens until it’s time to enjoy your salad.
Important Note on Toppings: Delicate toppings such as nuts, seeds, croutons, or fresh herbs are best kept separate until serving. To store them with your jar, you can place a small piece of plastic wrap over the top of the leafy greens, leaving a slight overhang. Then, place your toppings on the plastic wrap. This clever trick ensures they remain perfectly crisp and crunchy, unaffected by any residual moisture within the jar.
Step-by-Step Guide: Crafting Your Quinoa Chickpea Salad in a Jar
Creating these delightful mason jar salads is surprisingly quick and simple, making them an ideal component of your weekly meal prep routine. Follow these straightforward instructions to assemble your fresh and flavorful Quinoa Chickpea Salads.
- Step 1: Prepare Your Ingredients.
Begin by getting all your salad components ready. Drain and thoroughly rinse your canned chickpeas (or ensure home-cooked ones are cooled). Halve the cherry tomatoes, dice the cucumber into uniform pieces, finely dice the red onion for a consistent bite, and chop your romaine lettuce or kale to your preferred size. If using kale, a quick massage with a tiny bit of olive oil or lemon juice can help tenderize it.
If you are incorporating quinoa into your salads, make sure it is cooked according to package directions and allowed to cool completely before assembly. Similarly, have your favorite salad dressing prepared or ready to go.
- Step 2: Start Layering with Dressing, Grains, and Pulses.
Carefully pour approximately ⅓ cup of your chosen dressing into the bottom of each of your three wide-mouth mason jars. This ensures the dressing is well-separated from the greens. Next, equally divide the drained chickpeas and the cooled cooked quinoa (if you’re using it) among the three jars. Placing these ingredients at the bottom allows them to slowly absorb the dressing’s flavors over time, making them even more delicious and tender, while preventing lighter ingredients from getting soggy.
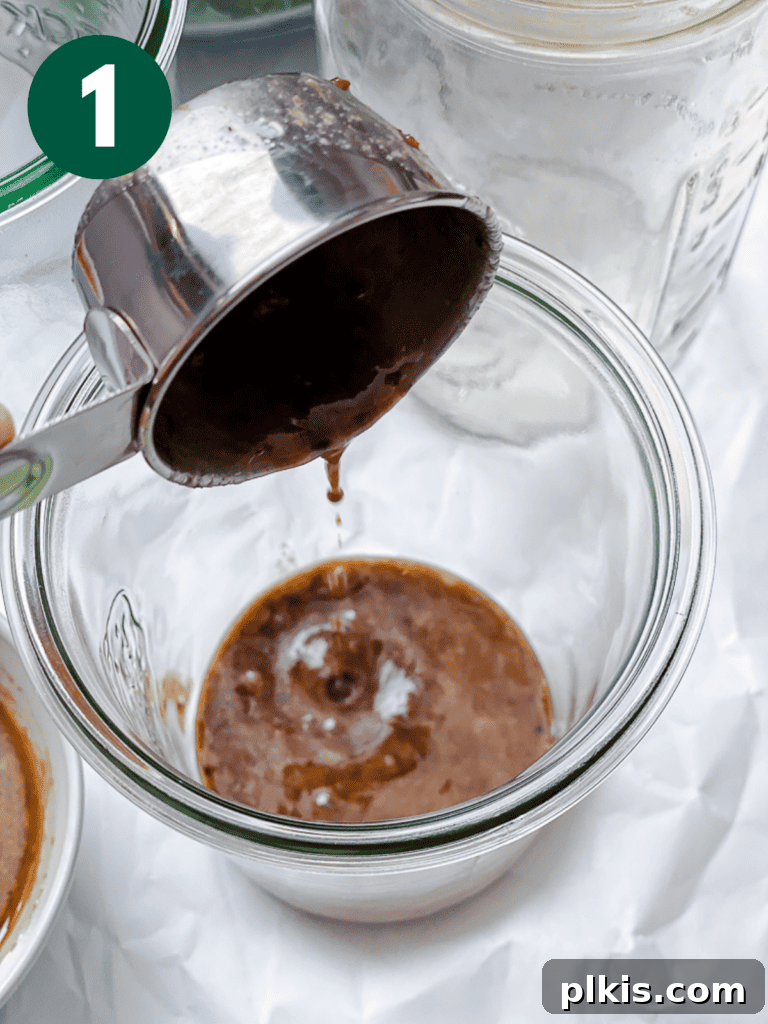
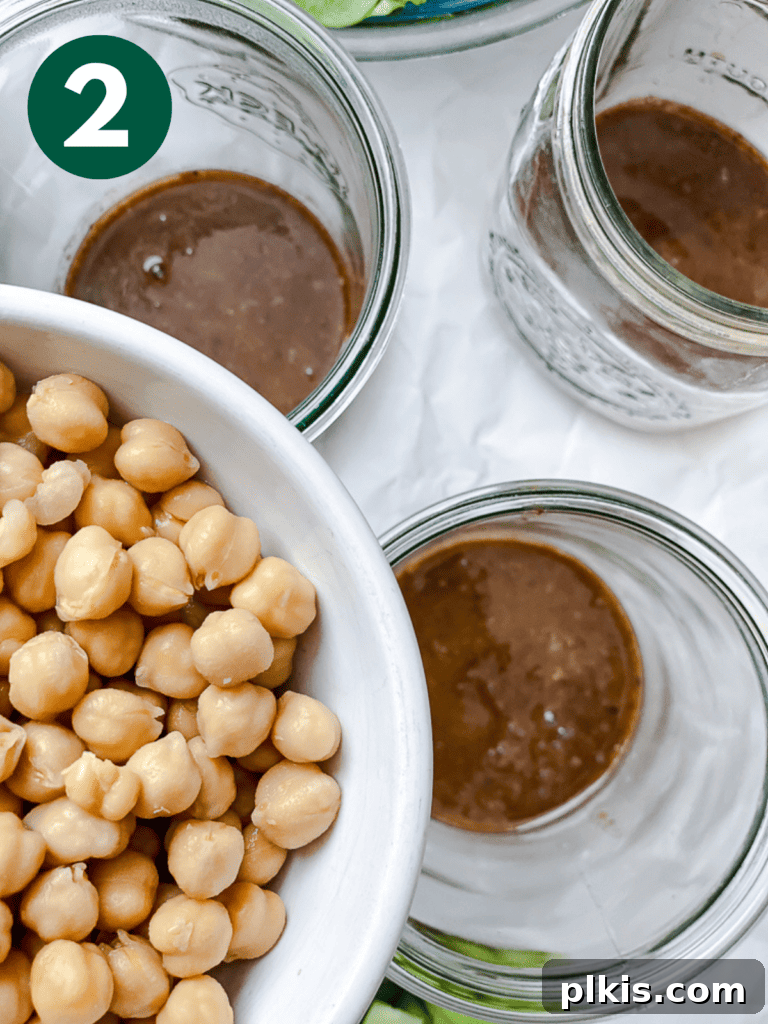
By adding these ingredients to the bottom, they’ll absorb flavor from the dressing. Just note they will soak up dressing and soften more. If you prefer them firmer, place a layer of hard vegetables between the dressing and these ingredients.
- Step 3: Add the Vegetables and Leafy Greens.
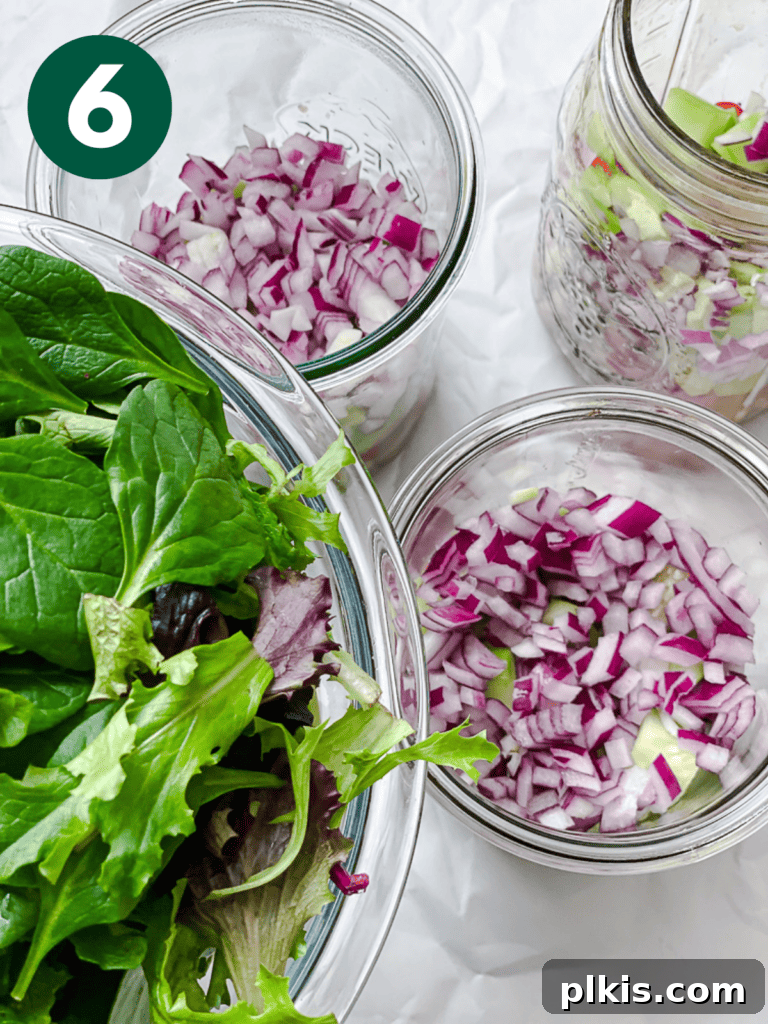
Proceed by evenly distributing the cherry tomatoes, diced cucumbers, and diced red onion among the three jars. These form the middle layers, creating a buffer for the greens. After these firmer vegetables are in place, gently but firmly pack the chopped lettuce or kale into the remaining space in each jar. Make sure the greens are snugly placed at the very top, as far from the dressing as possible to ensure maximum crispness.
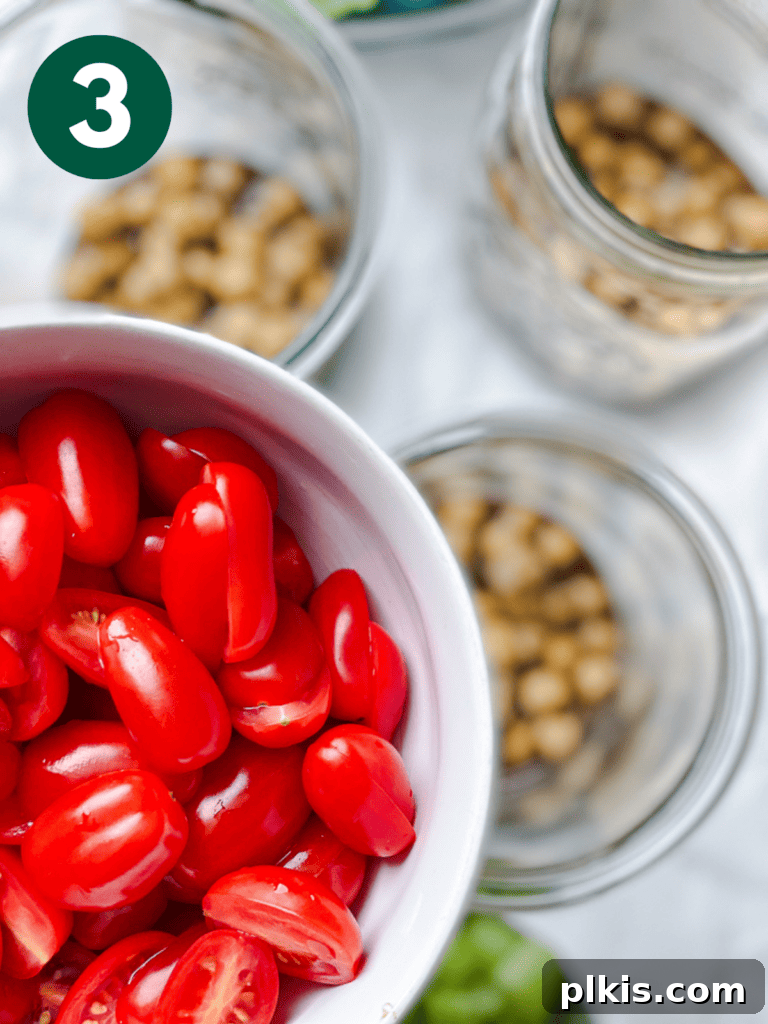
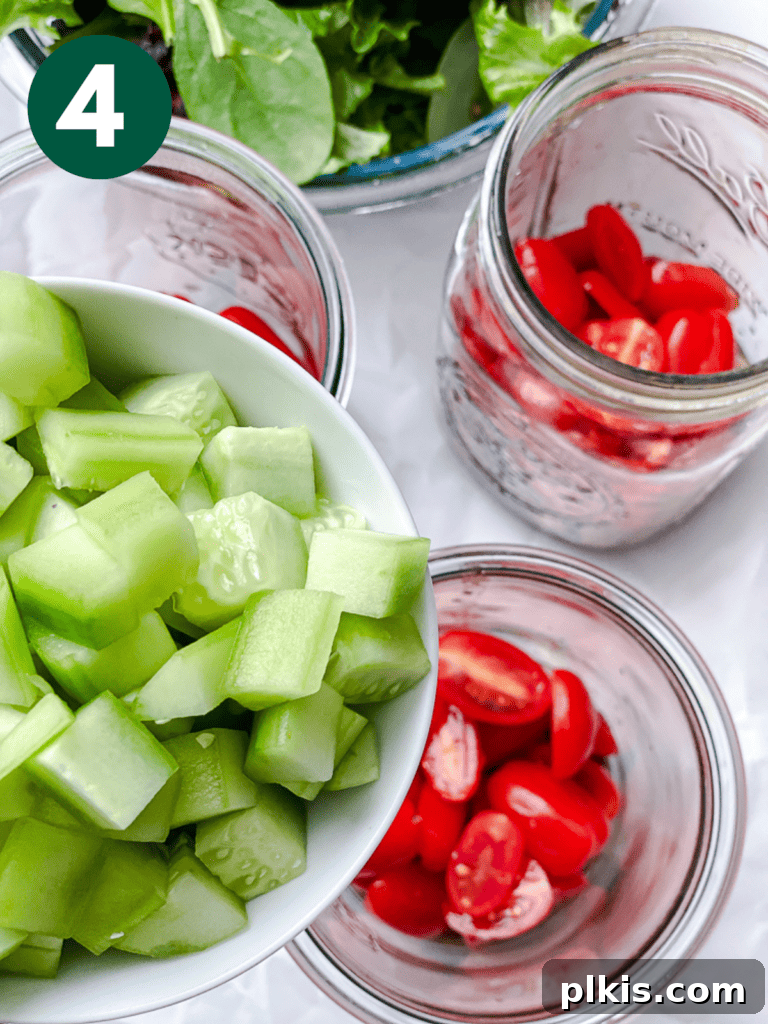
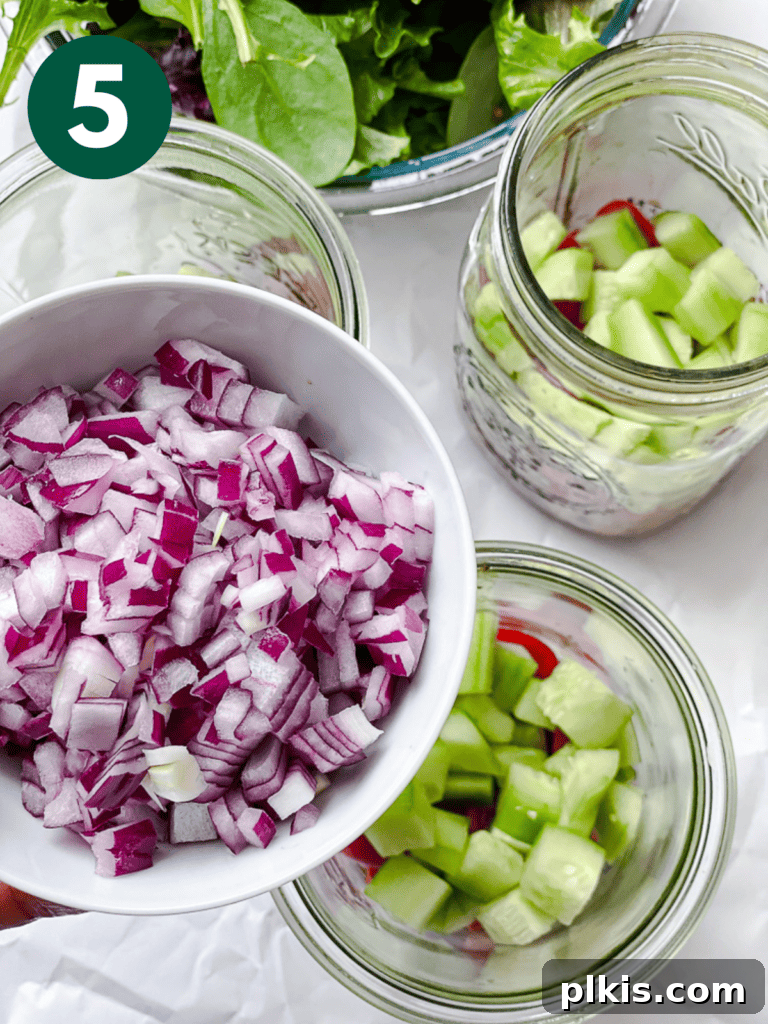
- Step 4: Seal and Store.
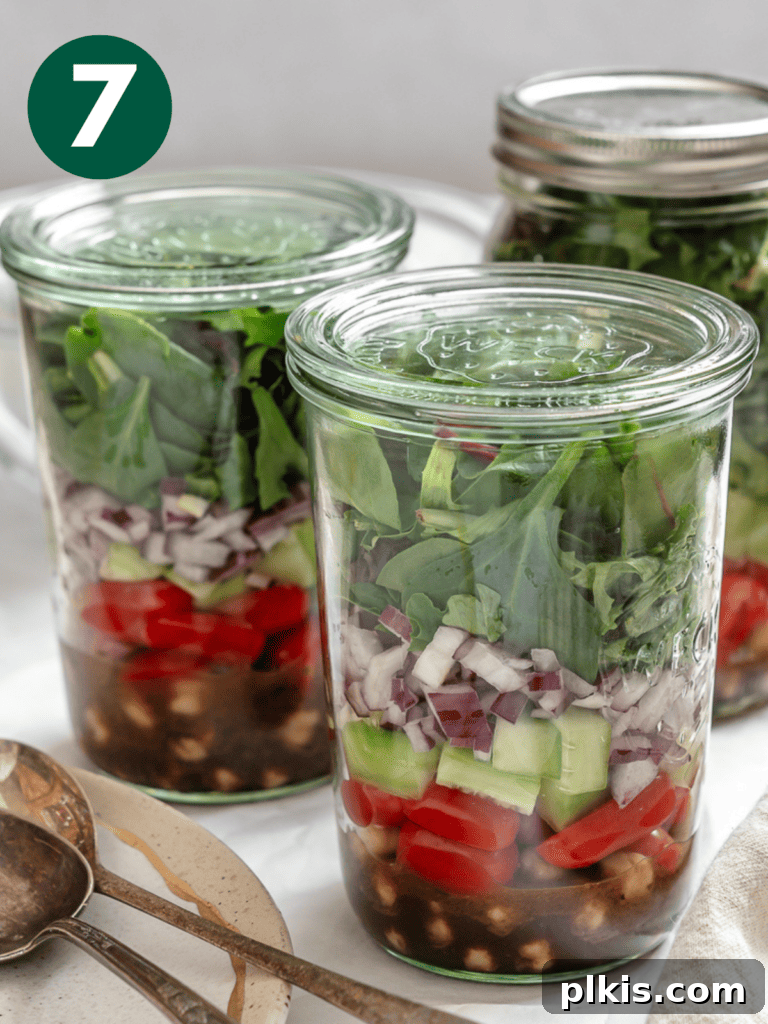
Once all the layers are complete, securely place the lid on each jar. Refrigerate the assembled jars until you are ready to enjoy your meal. This organized storage method keeps your salads fresh and vibrant for days. When lunchtime arrives, simply remove the lid, invert the jar into a large bowl to allow the dressing to cascade over all the ingredients, give it a good toss, and savor your perfectly fresh and flavorful quinoa chickpea salad!
Frequently Asked Questions About Mason Jar Salads
The storage duration largely depends on the ingredients used, but most properly assembled mason jar salads will remain fresh and delicious for 3-5 days when stored in airtight jars in the refrigerator. Hardier ingredients like kale and chickpeas tend to last longer than more delicate greens like arugula. Always ensure your dressing is at the bottom to maximize freshness.
Preventing a soggy salad is all about strategic layering. Always start with your dressing at the very bottom of the jar. Follow with hearty, durable ingredients like grains (quinoa, rice), pulses (chickpeas, beans), and hard vegetables (carrots, bell peppers). Above these, layer softer vegetables (cucumbers, tomatoes), and finally, place your delicate leafy greens and fresh herbs right at the very top. This creates a protective barrier, keeping the greens crisp.
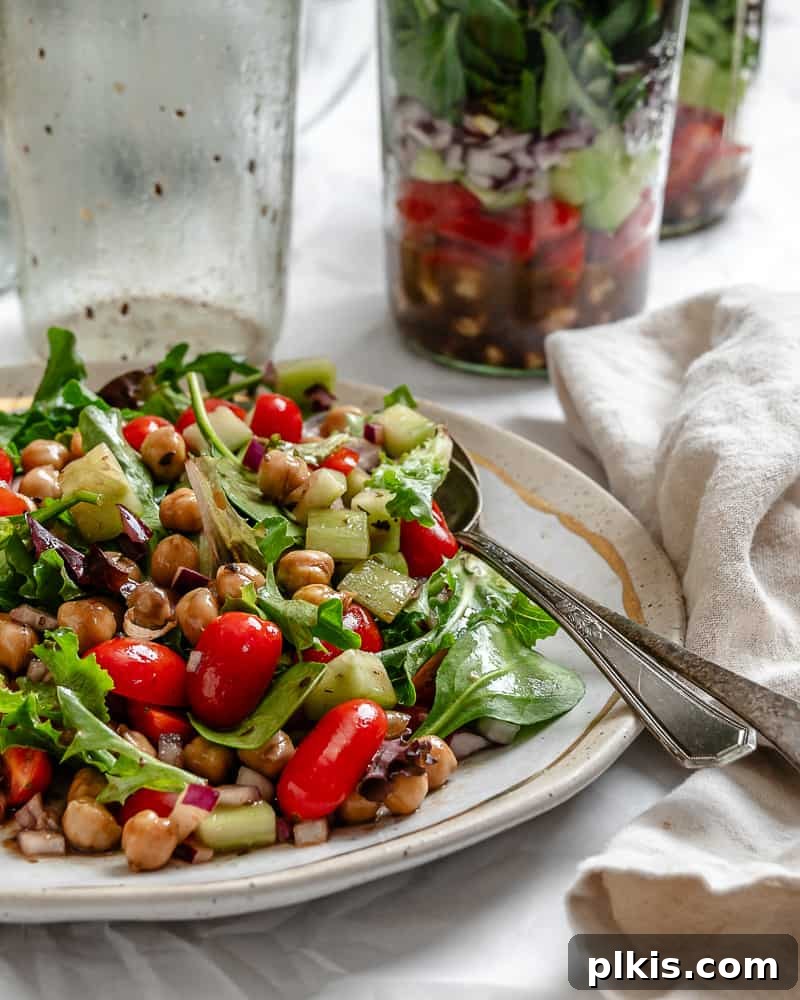
You have a couple of options. If you left enough space at the top of your jar, you can simply shake it up vigorously to distribute the dressing and then eat directly from the jar with a long fork. Alternatively, and often preferred for a more even mix, remove the lid, invert the contents into a large bowl or plate, toss everything thoroughly with a fork or tongs, and then enjoy. This method ensures every ingredient is coated in the delicious dressing.
For a single-serve lunch or dinner salad, a pint-sized jar (500ml/16 oz) or a pint and a half (750ml/24 oz) is generally ideal. Wide-mouthed jars are highly recommended as they make both the assembly process and eating directly from the jar much easier. Consider purchasing a set of reusable glass jars for long-term meal prepping.
While technically possible, glass mason jars are generally preferred. Plastic containers are more likely to absorb odors and flavors from your dressing and ingredients, and can sometimes stain. Glass jars are non-reactive, easier to clean thoroughly, and better for long-term freshness and sustainability. If you do use plastic, ensure it’s food-grade and BPA-free.
Absolutely! Always wash and thoroughly dry your leafy greens before adding them to the jar. Any excess moisture can lead to premature wilting and sogginess. A salad spinner is an excellent tool for removing all traces of water.
It’s best to ensure all ingredients are completely cooled to room temperature, or even chilled, before layering them into your mason jars. Adding warm ingredients can create condensation inside the jar, which will cause your salad to become soggy much faster and can also promote bacterial growth. Plan ahead and allow cooked grains or roasted vegetables to cool down fully.
Pro Tips for Perfect Mason Jar Salads Every Time
Elevate your meal prep game with these expert tips, ensuring your mason jar salads are consistently fresh, delicious, and perfectly put together:
- Master the Layering Technique: This is the golden rule. Always start with the dressing at the bottom, followed by the hardest, most durable ingredients (grains, pulses, root vegetables). Gradually move to softer vegetables and fruits, and finally, top with delicate leafy greens and fresh herbs. This creates a protective gradient that keeps everything fresh.
- Invest in Quality Airtight Jars: Using high-quality, airtight mason jars is crucial. They create a vacuum seal that minimizes air exposure, which is key to keeping your ingredients fresh and crisp for as long as possible. Wide-mouth jars are especially convenient for both filling and eating.
- Chill All Ingredients: Ensure all cooked ingredients (like quinoa or roasted vegetables) are completely cooled to room temperature or even chilled before layering them into the jars. Warm ingredients create condensation, leading to soggy salads.
- Thoroughly Dry Your Greens: After washing your leafy greens, use a salad spinner or paper towels to dry them completely. Any residual moisture is a primary culprit for premature wilting and spoilage.
- Shake Well Before Serving: To ensure the dressing thoroughly coats all your ingredients, give the sealed jar a good shake just before you’re ready to eat. Alternatively, empty the contents into a bowl and toss everything together for a perfectly mixed salad.
- Leave Headroom for Shaking: If you plan to eat directly from the jar or shake it, make sure to leave about an inch or two of space at the top. This allows for proper mixing without spilling.
- Store Upright: While it might seem obvious, always store your mason jar salads upright in the refrigerator. This maintains the integrity of the layers and prevents the dressing from prematurely soaking into the upper, more delicate ingredients.
- Don’t Overfill: Packing the jar too tightly can crush delicate ingredients and make it harder to mix the salad later. Fill to a comfortable level, allowing the layers to breathe.
- Experiment with Dressings: Don’t stick to just one! Different dressings can completely change the flavor profile of your salad. Try a creamy tahini dressing one week and a zesty vinaigrette the next.
- Add Delicate Toppings Separately: For ingredients like croutons, nuts, seeds, or fresh avocado slices, it’s best to add them just before eating to preserve their texture. You can carry them in a small separate container or use the plastic wrap trick mentioned earlier.
- Plan Your Combinations: Think about complementary flavors and textures when choosing your ingredients. A good balance of sweet, savory, crunchy, and soft elements makes for a more satisfying salad.
More Inspiring Mason Jar Salad Recipes for Your Meal Prep
Once you fall in love with the convenience and freshness of jar salads, you’ll want to explore even more delicious combinations. Many of our favorite vegan salads can be effortlessly adapted into this meal-prep friendly format:
- Vegan Taco Salad: Layer with a spicy dressing, corn, black beans, salsa, and then your greens.
- Peanut Noodle Salad: Dressing at the bottom, then noodles, edamame, shredded carrots, and cabbage.
- Rainbow Salad: A colorful mix with a vibrant dressing, layers of bell peppers, carrots, beets, and greens.
- Mediterranean Chickpea Lentil Salad: Lemon-herb dressing, lentils, chickpeas, cucumber, tomatoes, and spinach.
- Vegan Greek Millet Salad: A tangy dressing, cooked millet, olives, diced cucumber, tomatoes, and fresh herbs.
- Lemon-Garlic Mediterranean Quinoa Salad: A bright lemon-garlic dressing, quinoa, white beans, artichokes, and greens.
Explore More Easy Vegan Salad Recipes
Beyond the fantastic world of mason jar salads, our collection of easy vegan salad recipes offers a wealth of fresh, plant-based inspiration for any occasion. From light appetizers to hearty main courses, these salads are simple to prepare and bursting with flavor:
- Panzanella Salad: A rustic Italian bread salad, perfect for using up stale bread.
- Fattoush Salad: A refreshing Middle Eastern salad with crisp vegetables, toasted pita, and a zesty sumac dressing.
- Strawberry Kale Salad: A delightful blend of sweet and savory with fresh strawberries, massaged kale, and a light vinaigrette.
- Easy Edamame Salad: A protein-packed and satisfying salad featuring vibrant edamame, crisp veggies, and a flavorful dressing.
- Vegan Broccoli Salad: A creamy, crunchy, and sweet-savory classic, made entirely plant-based.
- Shaved Brussels Sprout Salad: A sophisticated and flavorful salad that transforms Brussels sprouts into a delightful dish.
Photos by Alfonso Revilla
Quinoa Chickpea Salad [In A Jar]
15 minutes
15 minutes
3
to 6
![completed Quinoa Chickpea Salad [In A Jar] against a white background](https://plkis.com/wp-content/uploads/2025/12/img_64767_13.jpg "Jarred Quinoa Chickpea Power Salad 13")
This lettuce, quinoa and chickpea salad is fresh, vibrant, nutritious, and makes for perfect meal-prep mason jar salads in less than 30 minutes! Plus, discover how to make salad in a jar with top tips & recipe variations!
Equipment
-
Knife set
-
Measuring Cups
Ingredients (Serves 3)
- 3 (26-ounce) wide mouth jars with a lid
- 1 cup of your favorite dressing
- 1 (15-ounce) can of garbanzo beans
- 1 cup of cooked quinoa, optional
- 1 cup halved cherry tomatoes
- 1 large cucumber, diced
- ¾ cup of diced red onion
- 4 ½ cups of chopped romaine lettuce or kale
- Pumpkin seeds, optional (for serving)
Instructions
-
Divide ⅓ cup of dressing evenly among each of the three jars. Then, add the drained garbanzo beans and cooled cooked quinoa (if using) as the next layer. These ingredients will absorb flavor from the dressing.
-
Next, add ⅓ of the prepared cherry tomatoes, diced cucumbers, and diced red onion to each jar. Finally, pack the chopped romaine lettuce or kale firmly into the remaining space in each jar, ensuring it’s at the top. Securely place the lid on each jar and store them upright in the refrigerator until you are ready to eat.
-
When ready to enjoy, remove the lid and invert the jar into a large bowl. Toss the salad well to distribute the dressing and ingredients evenly. Add pumpkin seeds or other delicate toppings at this stage, and serve immediately.
Notes
- Layer Correctly: Always place the dressing at the bottom, followed by hardier ingredients like grains and pulses. Then layer harder vegetables, softer vegetables, and finally, delicate leafy greens or herbs on top.
- Use Airtight Jars: To maximize freshness and prevent spoilage, ensure you use mason jars with tight-fitting, airtight lids.
- Shake or Toss Before Serving: For the best flavor distribution, either shake the jar vigorously (if space allows) or transfer the entire salad into a bowl and toss thoroughly before eating.
- Store Upright: Keep your assembled salad jars stored in an upright position in the refrigerator to maintain distinct layers and prevent premature sogginess.
- Cool All Cooked Ingredients: Any cooked components like quinoa should be completely cooled before being added to the jar to prevent condensation and maintain freshness.
Nutrition
Calories:
566kcal
Carbohydrates:
74g
Protein:
20g
Fat:
23g
Saturated Fat:
3g
Polyunsaturated Fat:
11g
Monounsaturated Fat:
6g
Trans Fat:
0.1g
Sodium:
851mg
Potassium:
1237mg
Fiber:
19g
Sugar:
21g
Vitamin A:
10591IU
Vitamin C:
109mg
Calcium:
373mg
Iron:
7mg
Additional Info
Toni Okamoto
Salad
American
No cook
Vegan
Tried this recipe?
Please tag us at @PlantBasedOnABudget! 🙂