

Mastering Fresh Herb Storage: Your Ultimate Guide to Keeping Herbs Vibrant and Flavorful
Unlock the secrets to prolonging the life of your fresh herbs, ensuring they remain vibrant, aromatic, and packed with flavor for much longer. This comprehensive guide covers everything you need to know about storing fresh herbs effectively—whether in the fridge, freezer, or through drying techniques. Say goodbye to wilted leaves and wasted produce, and embrace a kitchen always ready with the freshest ingredients.
The Best Way To Store Herbs and Why It Matters
Fresh herbs are culinary superstars, capable of transforming any dish, from a simple pasta to a gourmet entree, a vibrant vegan pesto, or a zesty Pico de Gallo. They add brightness, depth, and essential nutrients that elevate your cooking. However, their delicate nature often means they wilt and spoil quickly, leading to frustration and food waste. Many home cooks simply shove their newly purchased herbs into the fridge, only to find a slimy, unusable mess days later.
But it doesn’t have to be this way! Learning how to store fresh herbs properly is a game-changer. Through a combination of research and practical experimentation, culinary experts have discovered that not all herbs are created equal; their unique characteristics dictate different optimal storage methods. By understanding these distinctions—primarily between soft, tender herbs and more robust, woody varieties—you can significantly extend their shelf life, preserve their intense flavors and valuable nutrients, and ultimately save money by reducing waste. This guide is your key to keeping your herb supply fresh and ready whenever inspiration strikes.
How to Store Tender Herbs for Maximum Freshness
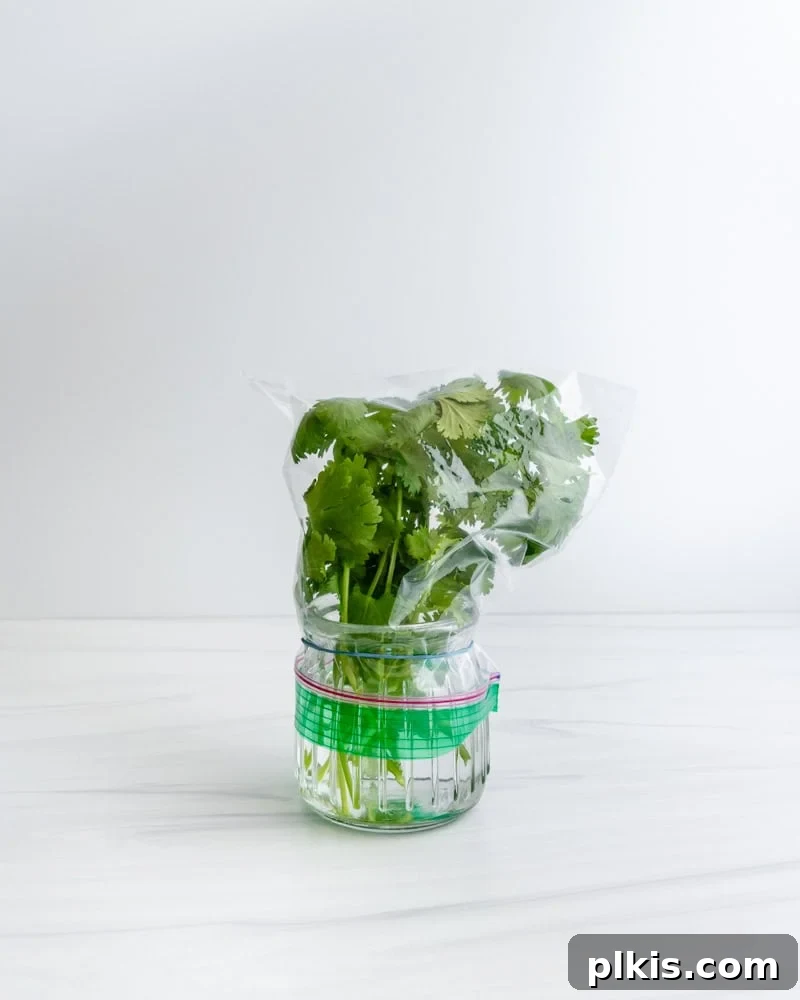
Tender herbs, characterized by their soft stems and delicate leaves, thrive on hydration. Think of them as flowers needing a constant supply of water. The following method effectively replicates a bouquet, providing the moisture and protection these herbs need to stay crisp and flavorful:
- Cilantro: Known for its bright, citrusy notes.
- Parsley: A versatile herb, available in flat-leaf and curly varieties.
- Mint: Refreshing and widely used in both sweet and savory dishes.
- Dill: With its feathery leaves and unique tangy flavor.
- Chives: Offering a mild oniony zest.
- Tarragon: Distinctive for its subtle licorice-like aroma.
- Basil: (Note: While tender, basil requires a slightly different approach, detailed below.)
To store these delicate beauties like a pro, follow these steps:
- Gently Clean the Herbs: Begin by carefully removing any rubber bands or ties that might crush or damage the delicate stems. Submerge the herbs in a bowl of clean, cold water and gently swish them around to remove dirt or debris. This helps prevent spoilage caused by contaminants.
- Thoroughly Dry the Herbs: Excess moisture can lead to rot. After washing, it’s crucial to dry them completely. Use a salad spinner for efficiency, or gently pat them dry with a clean kitchen towel. Ensure as much water as possible is removed from the leaves and stems.
- Trim the Stems: Gather the bunch of herbs and trim about ½-inch from the bottom of the stems. This fresh cut allows the herbs to absorb water more efficiently, much like freshly cut flowers.
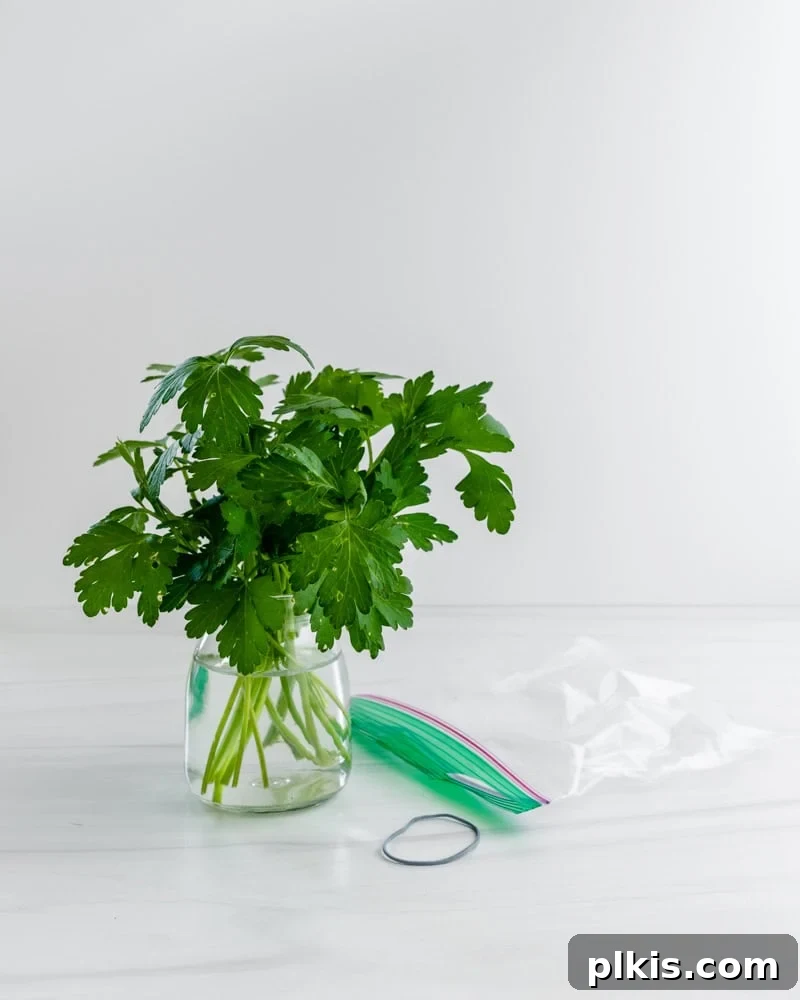
- Create a Water Bath: Select a clean glass jar or container. Pour 1 to 2 inches of fresh, clean water into the bottom. The water level should be just enough to cover the trimmed stems, without submerging any of the leaves.
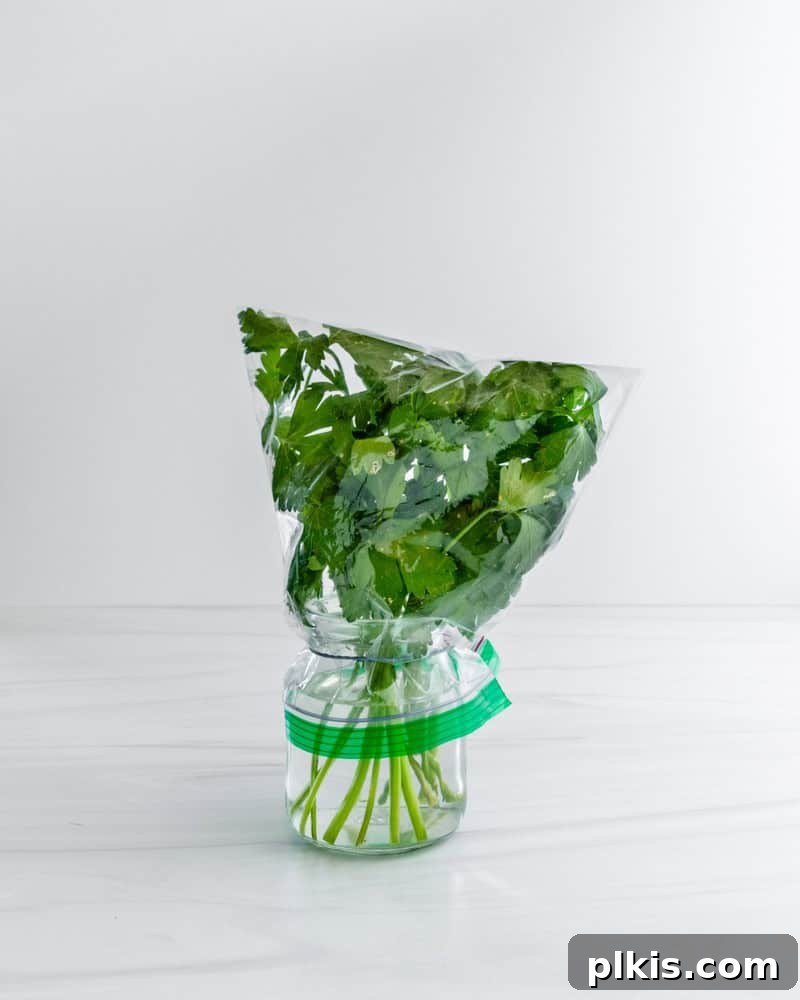
- Form a Protective Cover: Place the herb bouquet into the water-filled jar. If your jar is tall enough, you can loosely place a lid over the top without crushing the leaves. Alternatively, and often more effectively, drape a clear plastic bag (like a Ziplock bag) over the entire setup, creating a mini-greenhouse effect. Secure the bag gently with a rubber band around the jar’s rim to minimize air exposure.
For optimal results and to maximize longevity, remember to change the water every 2-3 days. At the same time, giving the stems a small, fresh trim can further enhance water absorption. This meticulous method can extend the life of your tender herbs from just a few days to an impressive two to three weeks.
Special Instructions: How To Store Fresh Basil
While basil is undoubtedly a tender herb, its unique sensitivity to cold temperatures means it deviates slightly from the standard refrigeration method. Placing basil in the fridge can cause its delicate leaves to bruise, blacken, and lose their vibrant flavor.
Instead, treat basil like a true houseplant. Prepare your basil ‘bouquet’ as described above, but critically, do not wash the herb before storage. Washing introduces moisture that can accelerate spoilage when stored at room temperature. Simply trim the stems and place them in a jar with water. Then, store the basil on your kitchen counter, away from direct sunlight and excessive heat. This environment allows basil to thrive, maintaining its freshness and aromatic qualities for up to two weeks.
How to Store Hardy Herbs for Lasting Flavor
Hardy or woody herbs possess tougher, more robust stems and leaves, making them less susceptible to wilting from lack of water but more prone to drying out. These herbs benefit from a slightly different approach that balances humidity with proper air circulation. Here are some examples of hardy herbs that thrive with the following method:
- Rosemary: Aromatic and piney, perfect for roasting.
- Thyme: Earthy and versatile, great with meats and vegetables.
- Sage: Distinctive and pungent, often paired with poultry.
- Oregano: Bold and essential in Mediterranean cuisine.
- Marjoram: A milder, sweeter cousin to oregano.
- Chives: (Though tender, this method often proves more effective for chives, especially if they are bundled.)
While exceptionally fresh hardy herbs can sometimes be stored bouquet-style, the most reliable and effective way to preserve their freshness is by bundling them in damp paper towels:
- Wash and Dry Thoroughly: Just like tender herbs, hardy herbs need to be cleaned. Swish them in cold water to remove any dirt. The drying step is equally crucial here; use a salad spinner or a clean kitchen towel to ensure they are thoroughly dry. Any residual moisture can promote mold growth.
- Trim the Stems: Remove approximately an inch from the bottom of the stems. This helps refresh the herbs and prepares them for optimal storage.
- Dampen Paper Towels: Get a couple of pieces of paper towel lightly damp. They should be moist but not dripping wet. You can use a spray bottle for an even mist, or saturate them and then firmly squeeze out all excess liquid. The goal is to provide a humid environment without waterlogging the herbs.
- Wrap the Herbs: Lay the cleaned, dried herbs in a single layer on the damp paper towel. Carefully roll or wrap the herbs within the paper towel bundle. Ensure they are snug but not overly compressed.
- Transfer to an Airtight Container: Place the wrapped herb bundles into a Ziplock bag or another airtight container. This critical step prevents oxygen exposure, which is a primary culprit for premature wilting and browning, especially in hardy herbs.
- Store in the Fridge: For the longest-lasting freshness, store your wrapped hardy herb bundles in the crisper drawer of your refrigerator. The crisper drawer offers an ideal balance of humidity and cold to keep these herbs vibrant.
To maintain peak freshness, make it a habit to re-dampen or replace the paper towels every 2-3 days, or sooner if you notice they are beginning to dry out. This simple maintenance ritual ensures a consistent level of humidity, allowing your hardy herbs to last for weeks.
How Long Will Properly Stored Herbs Last?
The longevity of your fresh herbs largely depends on their initial freshness when purchased, the specific herb variety, and the diligence with which you follow the storage guidelines. However, with proper storage techniques, both soft and hardy herbs can typically last for a remarkable 2-3 weeks, and sometimes even longer under ideal conditions.
Generally, certain herbs have slightly shorter or longer lifespans: chives, for instance, tend to last around 7-10 days. Mint and basil, when stored correctly, can remain fresh for about 2 weeks. Most other tender and hardy herbs, benefiting from consistent hydration or humidity, often endure for the full 2-3 week period. Factors like ambient temperature fluctuations within your fridge and how frequently you open the storage container can also play a role in their ultimate shelf life.
How Do I Know if Herbs Have Gone Bad?
Recognizing the signs of spoilage in herbs is essential for food safety and flavor. You’ll know your herbs have passed their prime when they exhibit several clear indicators:
- Visual Changes: The most obvious signs include darkening of the leaves, transitioning from a vibrant green to a dull brown or black. Wilting, where the leaves become limp and droopy instead of crisp, is another key indicator.
- Textural Changes: A slimy or mushy texture is a definite sign of bacterial growth and spoilage. The stems may also become soft and discolored.
- Mold: Any visible fuzzy spots or discoloration (white, green, black, or blue) on the leaves or stems indicates mold, meaning the herbs are no longer safe to consume.
- Odor: Fresh herbs have a distinct, appealing aroma. If your herbs no longer smell fresh and “herby,” or if they develop an off-putting, sour, or musty smell, it’s time to discard them.
Always trust your senses. When in doubt, it’s best to err on the side of caution and dispose of any suspicious-looking or smelling herbs.
Frequently Asked Questions About Herb Storage
Herbs are delicate plants highly susceptible to various environmental factors. Excessive exposure to oxygen can accelerate oxidation, leading to browning (especially with basil and mint). Too much light can cause delicate herbs to yellow. An incorrect balance of moisture – either too much leading to rot or too little causing dehydration and wilting – also contributes to spoilage. Additionally, extreme temperatures, whether too hot or too cold, can significantly shorten their shelf life.
In most cases, yes, it’s beneficial to wash herbs before storing them. Herbs can carry dirt, pesticides, or microbes that might hasten their decay. However, the most crucial follow-up step is to ensure they are thoroughly dried afterward. Any residual moisture can promote bacterial growth and mold, especially when stored in an enclosed environment.
Yes, generally you can store different types of fresh herbs together in the same jar or container, provided they require the same storage method (e.g., all tender herbs in a water bouquet, or all hardy herbs in a damp paper towel). The most important consideration is to ensure that each herb bunch has enough space to “breathe” and isn’t overly packed, which could lead to crushing or trapped moisture.
If your herbs are just beginning to wilt but haven’t turned slimy or discolored, you can often revive them. Try shocking them by placing them in a bowl of ice-cold water (an “ice bath”) for about 15 to 60 minutes. The cold water helps the cells rehydrate, making the herbs appear brighter and perkier. After revival, drain them thoroughly and use them immediately.
Absolutely! As long as your herbs haven’t shown signs of browning, sliminess, mold, or a rotten smell, slightly wilted herbs are still perfectly safe and flavorful to use. They might not look their best for garnishes, but they are excellent for recipes where their appearance isn’t critical. Consider using them in soups, stews, sauces, pestos, infused olive oils, herb-infused vegan butters, or even smoothies. Cooking often rehydrates them and brings out their flavor.
How To Freeze Fresh Herbs for Long-Term Convenience
Freezing is an excellent method for preserving herbs when you have an abundance or want to ensure a ready supply for cooking year-round. It locks in their flavor and nutrients, making them perfect for dishes where texture isn’t the primary concern, such as soups, stews, sauces, and casseroles.
For Hardy Herbs:
You have a couple of straightforward options. You can prepare them as you would for fridge storage by creating damp paper towel bundles, then transfer these bundles into a freezer-safe Ziplock bag, squeezing out as much air as possible to prevent freezer burn. Alternatively, you can portion the cleaned, dried herbs into small amounts, wrap each portion tightly in plastic wrap, and then place these wrapped portions into a larger freezer bag. This method makes it easy to grab just the amount you need for a recipe.
For Soft Herbs:
This method is highly popular and practical. Begin by finely chopping your soft herbs or blending them into a coarse paste – the latter works especially well if you have large quantities. Then, portion these chopped or blended herbs into an ice cube tray. Top the herb-filled compartments with a small amount of water or, for richer flavor and longer preservation, olive oil. Once completely frozen solid, transfer these herb cubes to a freezer-safe Ziplock bag. Label with the herb type and date. These convenient cubes can be directly dropped into simmering pans, soups, or sauces from frozen, making meal prep a breeze.
For Basil Leaves (Special Freezing Method):
Basil leaves benefit from a quick blanching process before freezing to help preserve their vibrant green color and prevent discoloration. Briefly dunk fresh basil leaves into boiling water for about 10-15 seconds, then immediately transfer them to an ice bath to stop the cooking process. Thoroughly dry the blanched leaves, then spread them in a single layer on a cookie sheet and freeze until solid. Once frozen, transfer the individual leaves to a freezer-safe bag, again pressing out all excess air.
Frozen herbs, regardless of the method, can be conveniently stored for 3-6 months. Those frozen in oil often tend to last even longer, sometimes up to a year, thanks to the oil’s protective properties against oxidation.
Drying Fresh Herbs for Ultimate Shelf-Stability
Drying herbs is an ancient and effective method for long-term preservation, concentrating their flavors and making them shelf-stable for many months. While the fresh aroma might mellow, dried herbs offer a distinct and potent addition to your culinary repertoire.
Air-Drying Herbs: The Traditional Method
Air-drying is a simple, low-tech way to preserve many varieties of herbs, especially those with lower moisture content like rosemary, thyme, oregano, and bay leaves. To air-dry, gather small bundles of 3-5 stems. Tie them together securely with kitchen twine. Find a dry, warm, well-ventilated area in your home, ideally away from direct sunlight (which can bleach their color and diminish flavor). Hang the bundles upside down. This method allows for gentle, natural dehydration. The drying time can vary significantly, taking anywhere from several days to up to two weeks, depending on the herb’s moisture content, the ambient temperature, and humidity levels.
Dehydrator or Oven Drying: Faster Alternatives
For a quicker and more controlled drying process, a food dehydrator or even your oven can be used.
Using a Dehydrator: Spread the clean, dry herb leaves in a single layer on your dehydrator trays. Set the temperature to a low setting, typically between 95-115°F (35-46°C). This gentle heat ensures that the essential oils, which contribute to the herb’s flavor, are not cooked away. Dry the herbs for approximately 2-5 hours, checking their brittleness every 30-45 minutes. They are ready when they crumble easily between your fingers.
Using an Oven: If you don’t have a dehydrator, your oven can work too. Arrange the herbs in a single layer on a parchment-lined baking tray. Set your oven to its absolute lowest temperature setting (many ovens go down to 170°F/75°C). Crucially, prop the oven door slightly ajar with a wooden spoon or a heat-safe object. This allows moisture to escape and prevents the herbs from cooking. Drying time will be similar to a dehydrator, but keep a closer eye on them to prevent burning.
It’s also possible to dry herbs in a microwave for small batches. Place a single layer of herbs between two paper towels and heat them in 30-second increments on medium to high power. Check after each interval until they become brittle and crisp. This method is fast but requires careful monitoring to prevent scorching.
How To Store Dried Herbs for Maximum Potency
Once your herbs are thoroughly dried and brittle, proper storage is key to maintaining their potency and flavor. Allow them to cool completely before transferring them to airtight containers, such as mason jars or sealed glass jars. Store these containers in a cool, dark place, away from direct sunlight, heat, and humidity. A pantry or cupboard is ideal. When stored correctly, dried herbs can retain their quality and flavor for up to a year, ensuring you always have a touch of garden freshness at your fingertips.