

Welcome to your new favorite dessert! This incredibly simple yet utterly delicious vegan strawberry pie is perfect for any occasion. Whether you have an abundance of fresh summer strawberries or a stash of frozen berries, you can whip up this crowd-pleasing treat with minimal fuss thanks to the magic of pre-made dough. Get ready to impress your family and friends with a pie that tastes homemade, even if it comes together in minutes!
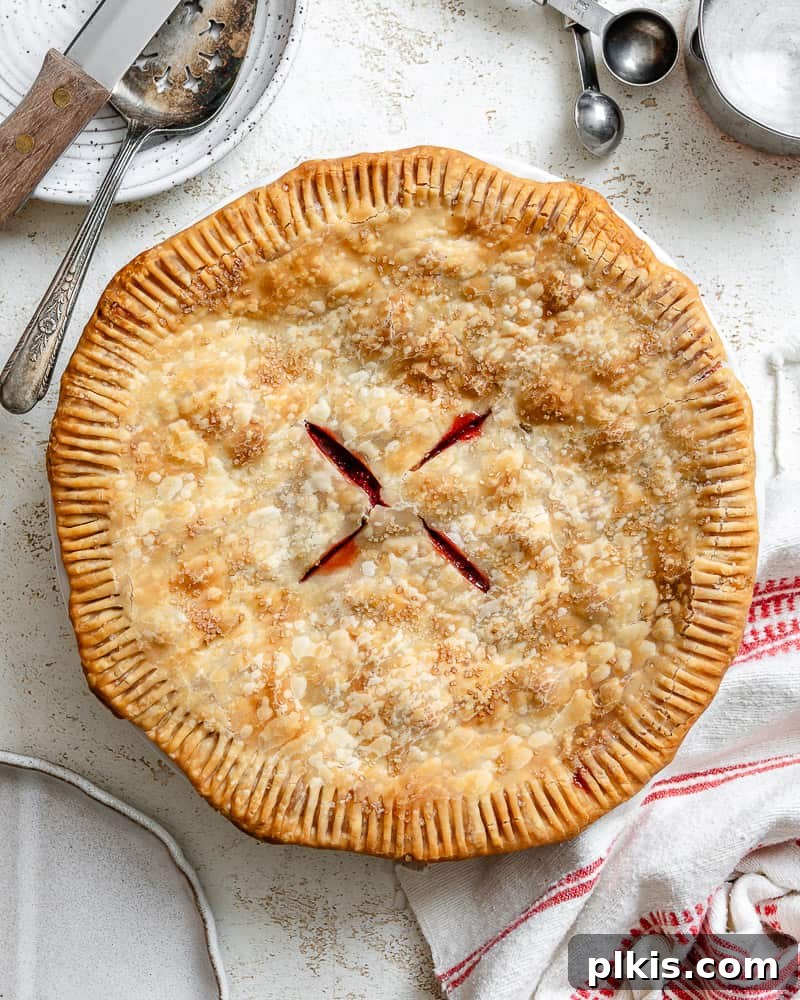
Effortlessly Delicious: Baked Strawberry Pie for Every Season
Indulge in the vibrant, sweet flavor of juicy strawberries all year long with this fantastic baked strawberry pie recipe. Designed for ultimate convenience, it uses either fresh peak-season strawberries or easily accessible frozen ones, ensuring that this delightful dessert is never out of reach. The secret to its simplicity? Ready-made pie dough, which transforms what could be a lengthy baking project into a quick and enjoyable experience.
Imagine spending just about 10 minutes on hands-on preparation, gathering only 5-6 common ingredients, and then letting your oven do the rest. That’s the beauty of this easy vegan strawberry pie! Forget complicated steps like par-baking the crust, pre-boiling the fruit, or using baking beans and gelatin. Our perfected method guarantees a perfectly crispy, ‘buttery’ pastry every time, without any worry of a soggy bottom. The filling? A luscious, naturally thickened strawberry medley that allows the bright, authentic flavor of the fruit to truly shine through.
This simple strawberry pie is more than just a dessert; it’s a versatile crowd-pleaser. It’s ideal for summer barbecues, potlucks, holiday gatherings, or simply as a comforting treat for a family dinner. Its rustic charm and irresistible taste make it a staple in any recipe collection.
What makes this strawberry pie even more remarkable is its adaptability. By simply choosing a suitable pre-made dough, this recipe can effortlessly cater to various dietary needs, making it entirely vegan and even gluten-free. Just like our other plant-based favorites such as creamy coconut pineapple pie, delightful peach mango pie, and hearty apple-pear pie, this strawberry creation proves that plant-based baking is both accessible and incredibly flavorful. If you love strawberries, you might also want to try our easy strawberry bread or a festive strawberry upside down cake!
Key Ingredients for Your Perfect Strawberry Pie
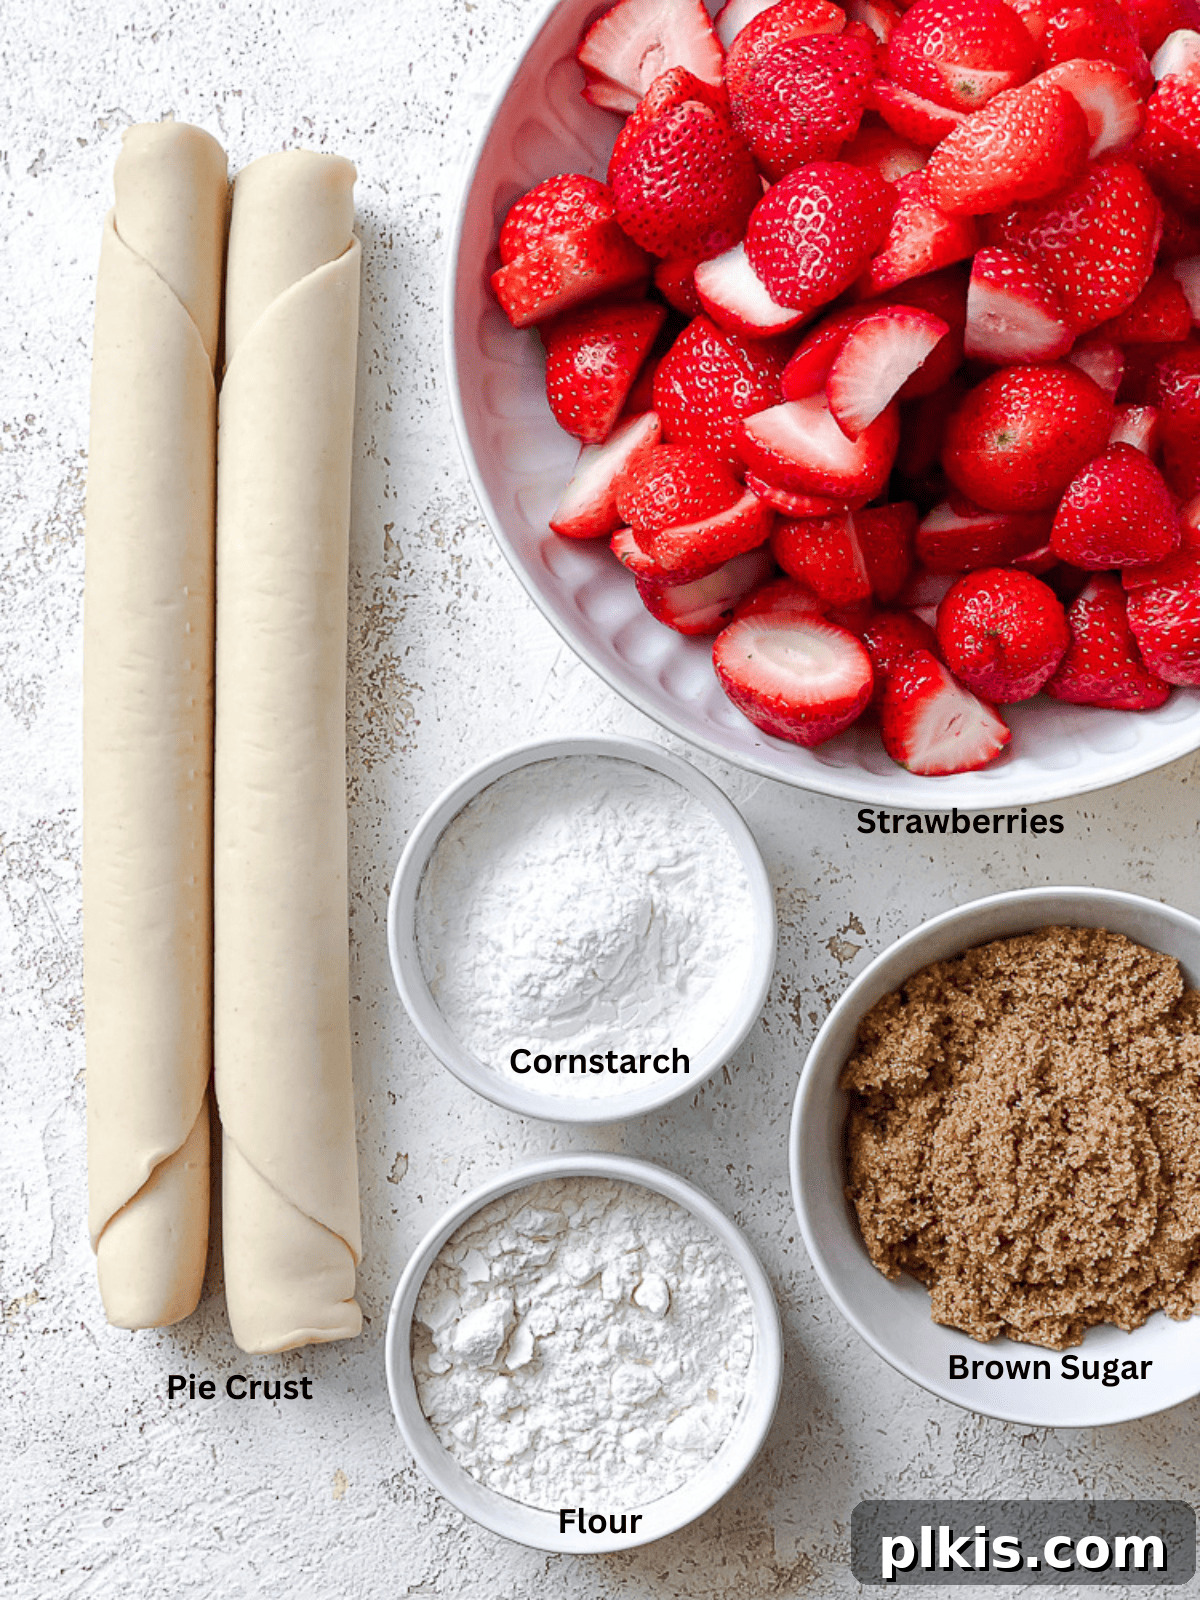
The beauty of this strawberry pie lies in its minimal ingredient list, making it approachable for even the most novice bakers. Here’s a closer look at what you’ll need to create this delectable dessert:
- Pre-made Pie Crusts: The ultimate time-saver! Opt for a vegan-friendly brand. Many supermarket options are accidentally vegan, but always check the label for ingredients like butter, lard, or dairy. Look for crusts made with vegetable shortening or oil. For a gluten-free option, select a certified gluten-free pie crust.
- Fresh or Frozen Strawberries: The star of the show! Fresh, ripe strawberries offer the most vibrant flavor, but high-quality frozen strawberries work wonderfully too, making this a year-round treat. Make sure to hull and slice them.
- Brown Sugar: Adds a rich, caramel-like sweetness that beautifully complements the strawberries. A little extra for sprinkling on top creates a lovely caramelized crunch.
- All-Purpose Flour & Cornstarch: These are your thickening agents. They work together to absorb the excess moisture from the strawberries, ensuring a perfectly set, juicy (not runny) filling. When using frozen strawberries, you’ll need a bit more thickener.
- Cinnamon & Nutmeg (Optional): A pinch of these warm spices can elevate the pie’s flavor, adding a subtle depth that enhances the natural sweetness of the strawberries. Feel free to adjust to your preference or omit for a purer strawberry taste.
Dietary Adaptations: For those managing sugar intake, you can experiment with sugar alternatives like erythritol. Bear in mind that some sugar substitutes might require a slight adjustment to the thickener amount, as they can sometimes affect the texture of fruit fillings.
Elevate Your Pie: Exciting Flavor Variations
While delicious on its own, this strawberry pie recipe is a fantastic canvas for creative flavor enhancements. Here are some ideas to take your pie to the next level:
- Vanilla Extract: A classic pairing! Add a teaspoon of pure vanilla extract to the filling for a warm, comforting aroma and taste. It complements the sweetness of the strawberries beautifully.
- Citrus Zest & Juice: A squeeze of fresh lemon, lime, or orange juice (about 1-2 tablespoons) adds a bright, tangy counterpoint that makes the strawberry flavor pop. For an even more pronounced citrus note, grate in a teaspoon of citrus zest.
- Almond Extract: Just a few drops of almond extract (start with ¼ teaspoon and adjust to taste) can impart a sophisticated, nutty undertone that harmonizes wonderfully with strawberries.
- Other Spices: Beyond cinnamon and nutmeg, consider a small pinch of ground ginger for a subtle warmth, or even some finely chopped candied ginger for a delightful textural and spicy kick. Cardamom can also add an exotic, fragrant depth.
- Crumble Topping: For a delightful textural contrast, swap the top pie crust for a buttery, streusel-like crumble topping. This works exceptionally well and can be easily adapted from recipes like our peachy crumb pie or berry crumb pie.
Beyond spice and extract additions, strawberries also play well with other fruits. We’ve already explored the delightful combination in our blueberry strawberry pie. Other incredibly popular pairings include strawberry rhubarb pie (a classic!), strawberry apple pie, peach strawberry pie, and the rich flavor of strawberry cherry pie. Feel free to experiment with your favorite fruit combinations!
How to Make the Best Easy Strawberry Pie: A Step-by-Step Guide
Creating this delicious strawberry pie is a straightforward process, designed for maximum flavor with minimum effort. Follow these simple steps for a perfect result every time:
- Step 1: Prepare Your Dough and Oven. First, take your pre-made pie dough out of the refrigerator and allow it to come to room temperature according to package instructions. This usually makes it more pliable and easier to roll without cracking. While the dough is softening, preheat your oven to 375°F (190°C) and lightly grease a standard pie pan.
- Step 2: Prepare the Strawberries. As your oven heats up, rinse your fresh strawberries thoroughly under cool water. Gently hull them (remove the green leafy tops and core) and then slice them into even pieces. Aim for slices that are about ¼ to ½ inch thick so they cook evenly and create a beautiful texture in the filling.
Tip for Frozen Strawberries: If you’re using frozen strawberries, there’s no need to thaw them beforehand. Simply add them directly to the bowl. However, frozen berries release more liquid, so you will likely need to add an extra 1-2 tablespoons of cornstarch to the filling mixture to achieve the desired thickness.
- Step 3: Mix the Filling. Transfer all the prepared strawberries to a large mixing bowl. Add the brown sugar, all-purpose flour, cornstarch, and any optional spices like cinnamon and nutmeg. Mix everything together gently but thoroughly, ensuring that the strawberries are evenly coated with the sugar and thickener mixture. Set the bowl aside to allow the flavors to meld slightly while you prepare the crust.
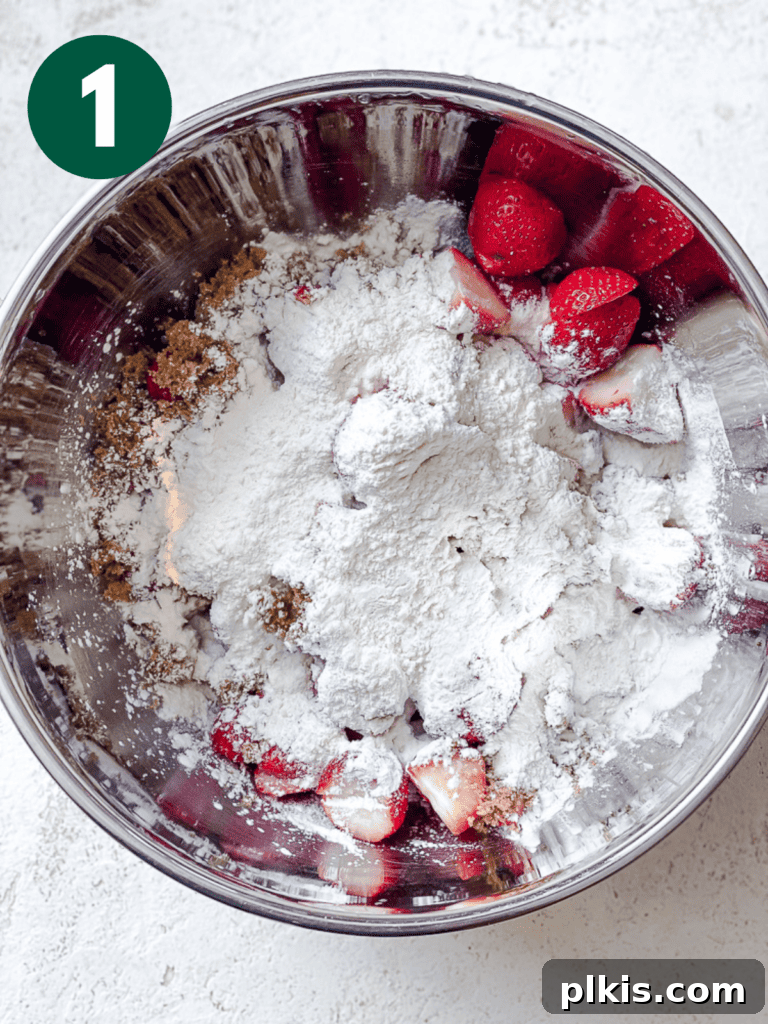
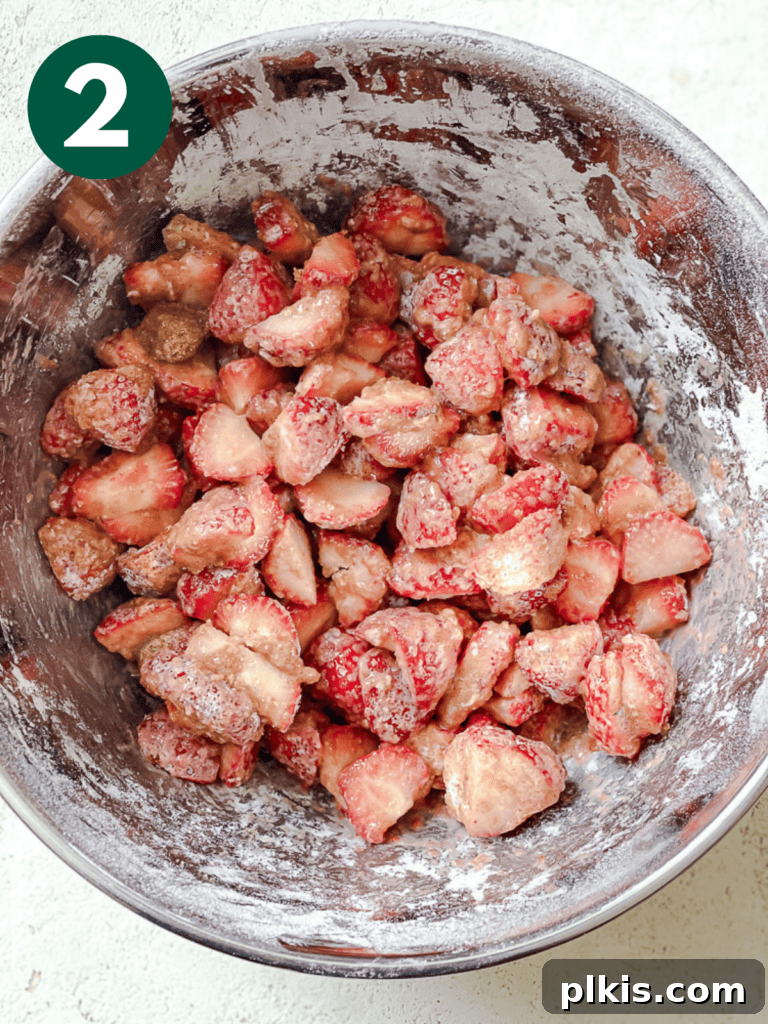
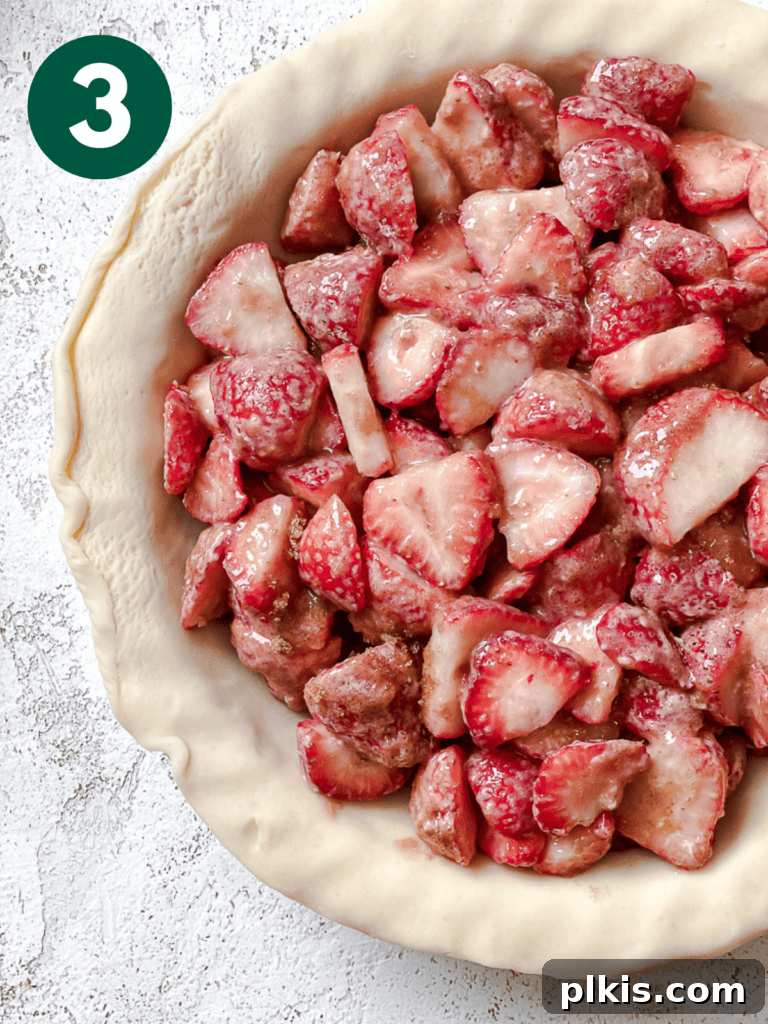
- Step 4: Assemble the Pie. Carefully unroll one sheet of the pie dough and press it into your prepared pie pan. Trim any excess dough around the edges, leaving about an inch overhang. Pour the strawberry filling evenly into the pie crust, mounding it slightly in the center as the fruit will cook down.
- Step 5: Add the Top Crust and Seal. Place the second piece of pie dough over the strawberry filling. Trim the top crust, leaving about an inch of overhang as well. Press the edges of the top and bottom crusts together firmly, pinching or crimping them to create a tight seal. This prevents the filling from bubbling out during baking.
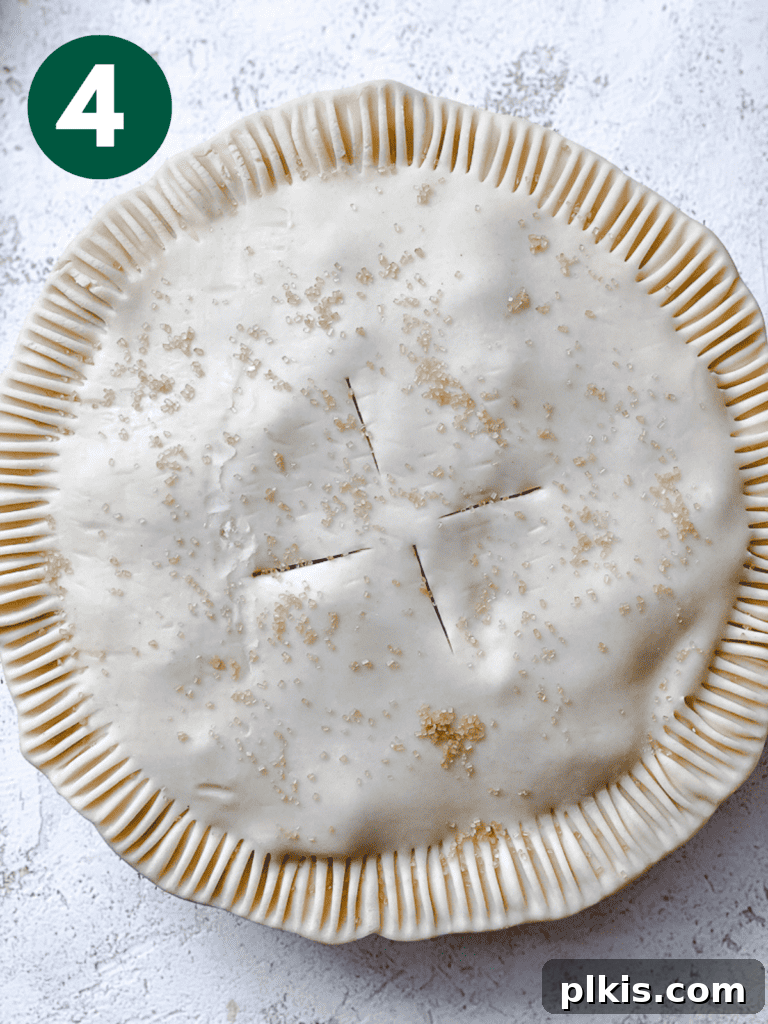
Get Creative with Your Top Crust: Instead of a solid top crust, you can cut the dough into strips to create a beautiful lattice pattern. Feel free to experiment with your favorite decorative designs and patterns for the top of the pie. Just remember, don’t forget ventilation!
- Step 6: Vent and Garnish. Use a sharp knife to cut several slits or a small “X” into the top of the pie crust. These vents are crucial for allowing steam to escape during baking, preventing a soggy crust and ensuring the filling cooks properly. For an extra touch of sweetness and a beautiful golden finish, sprinkle the top of the pie with a little more brown sugar. To prevent the crust edges from browning too quickly, gently cover them with strips of aluminum foil.
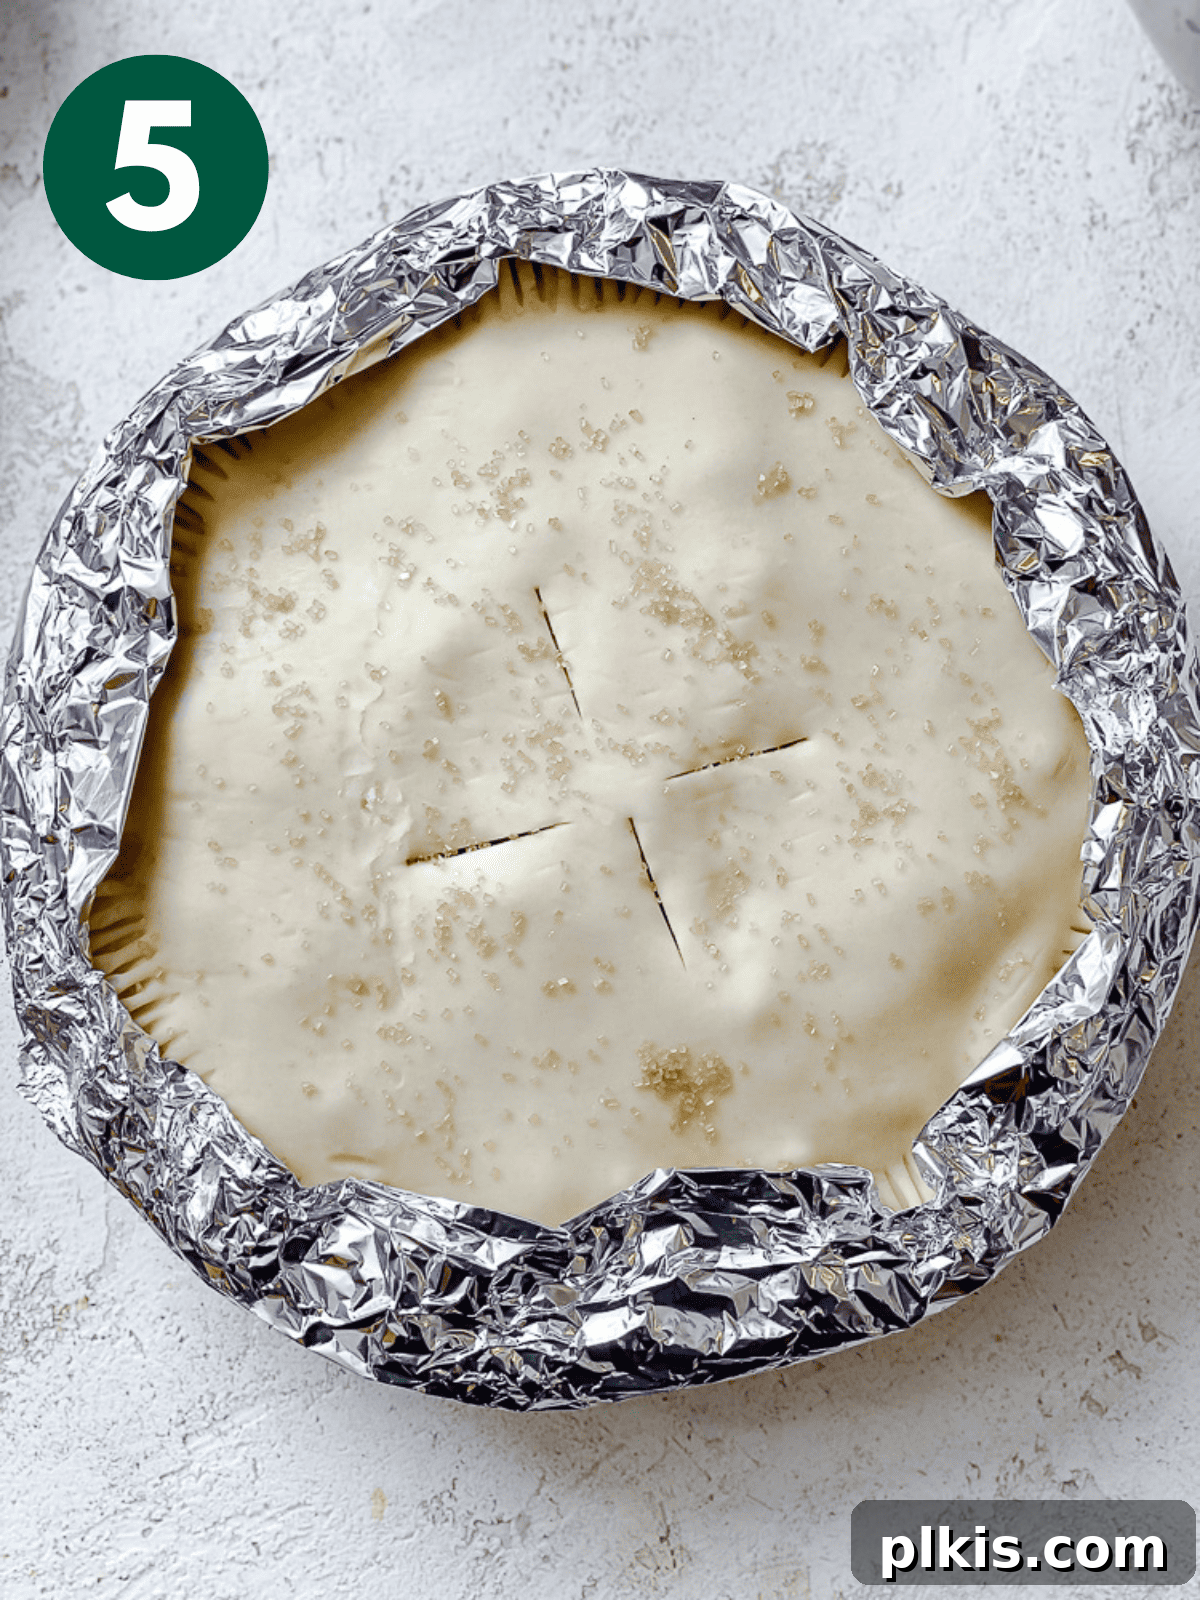
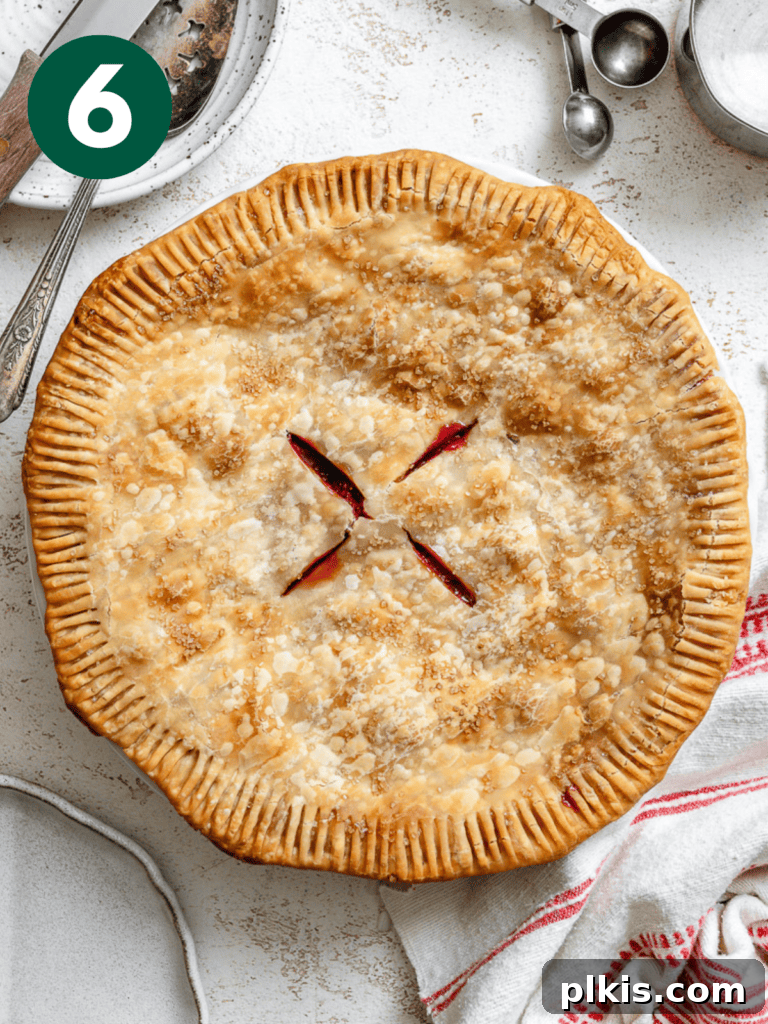
- Step 7: Bake to Perfection. Transfer the pie to the preheated oven and bake for 30 minutes. Keep an eye on the pie; if the entire top crust begins to brown too quickly, you can cover the entire pie loosely with aluminum foil for the remainder of this baking time. After 30 minutes, remove any foil from the edges and bake for another 10 minutes, or until the crust is golden brown and the filling is bubbly.
- Step 8: The Essential Rest. This step is critical! Once baked, carefully transfer the hot strawberry pie to a wire cooling rack and allow it to rest for at least 5 hours. This lengthy resting period is essential for the filling to properly set and thicken as it cools. Rushing this step will result in a runny, messy pie, so patience is key for beautifully sliced portions.
Frequently Asked Questions About Strawberry Pie
Absolutely! Frozen strawberries are a fantastic option, allowing you to enjoy this pie any time of year. There’s no need to thaw them first; simply add them to your filling mixture. However, because frozen berries contain more moisture, you’ll need to increase the cornstarch by an additional 2-3 tablespoons to ensure the filling sets properly. Alternatively, you can thaw them and thoroughly drain any excess liquid before using, which might reduce the need for extra thickener.
The combination of cornstarch and all-purpose flour in this recipe naturally thickens the fruit juices as the pie bakes. This creates a luscious, saucy consistency. For an even thicker strawberry pie filling, you can simmer the mixed filling ingredients (strawberries, sugar, thickeners) in a saucepan on the stovetop over medium heat for 5-7 minutes, stirring constantly, until it visibly thickens before pouring it into your pie crust. This pre-cooking step guarantees a very firm set.
A runny pie filling is a common concern but usually easily remedied. Several factors can contribute to it:
- Insufficient Baking Time: The pie might not have baked long enough for the thickeners to fully activate and for the fruit juices to reduce.
- Not Enough Cooling Time: The most frequent culprit! The filling continues to thicken and set as it cools. Cutting into a warm pie too soon will almost always result in a runny mess. Patience is key – allow at least 5 hours for proper setting.
- Too Much Moisture (especially with frozen berries): If using frozen strawberries, they release more liquid. If you didn’t add extra starch or thoroughly drain them after thawing, the filling will be too wet.
- Incorrect Thickener Ratios: Ensure you measure your flour and cornstarch accurately.
Expert Tips for the Best Vegan Strawberry Pie
Achieve pie perfection with these tried-and-true tips:
- Combatting a Soggy Pie Crust: To prevent a dreaded soggy bottom, ensure you use enough cornstarch/flour (adding 2-3 tablespoons extra when using frozen berries) and always create ventilation slits in the top crust. An extra layer of defense: sprinkle a thin layer of breadcrumbs or crushed plain cookies on the bottom pie crust before pouring in the strawberry filling. This absorbs excess moisture.
- The Importance of Resting: This cannot be stressed enough! The long cooling period (at least 5 hours, ideally at room temperature) is crucial. During this time, the pie filling truly thickens and sets. Attempting to slice and serve a warm pie will result in a delicious but messy, runny dessert.
- Adjusting Texture: For a more varied texture, mash about half of the sliced strawberries before mixing them with the other ingredients, leaving the remaining half in chunkier bits. This creates a delightful contrast of smooth and fruit-filled bites.
- Making Mini Strawberry Pies: For individual servings, divide your pastry and filling between a greased muffin tin. Bake these delightful mini pies for approximately 30-35 minutes, or until golden brown and bubbly. They make for charming individual desserts!
- Avoid Glass Bakeware: While visually appealing, glass pie dishes can sometimes lead to uneven baking and a less crispy bottom crust. Metal or ceramic pie pans are generally better conductors of heat, ensuring a more evenly baked and perfectly golden crust.
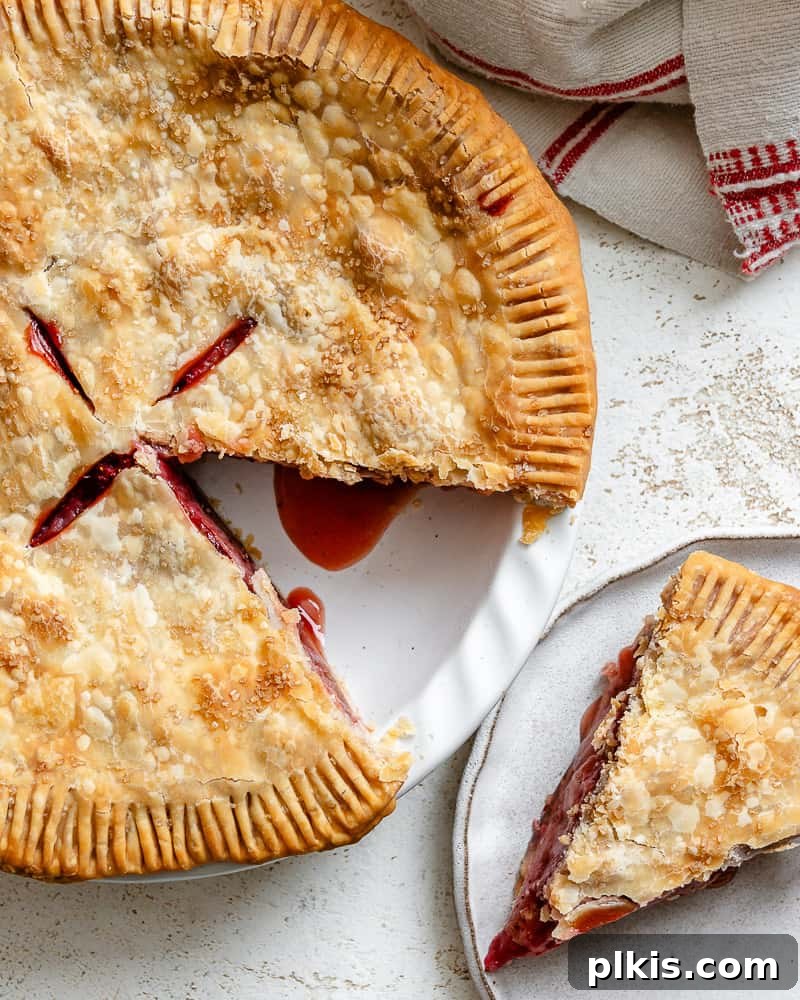
Delicious Serving Suggestions
A warm slice of this baked vegan strawberry pie is a treat on its own, but it truly shines when paired with complementary toppings. Here are some delightful recommendations to elevate your dessert experience:
- Dairy-Free Whipped Cream: A dollop of fluffy coconut whip cream or another vegan whipped topping adds a creamy contrast to the sweet, tangy fruit.
- Dairy-Free Yogurt: For a slightly healthier and tangier option, serve your pie with a scoop of plain or vanilla dairy-free yogurt.
- Vegan Vanilla Custard: Warm vegan vanilla custard poured over a slice of pie is a comforting and luxurious combination.
- A Scoop of Nice Cream: Pair your pie with a scoop of refreshing nice cream (banana-based ice cream) in flavors like classic vanilla, rich coconut, or sweet caramel.
- Homemade Caramel Sauce: Drizzle a rich homemade caramel sauce over your pie for an extra layer of indulgence.
- Fresh Mint Garnish: A few fresh mint leaves add a touch of color and a refreshing aromatic note that beautifully brightens the dessert.
Storage & Reheating for Freshness
To ensure your delicious strawberry pie remains fresh and enjoyable, proper storage is key:
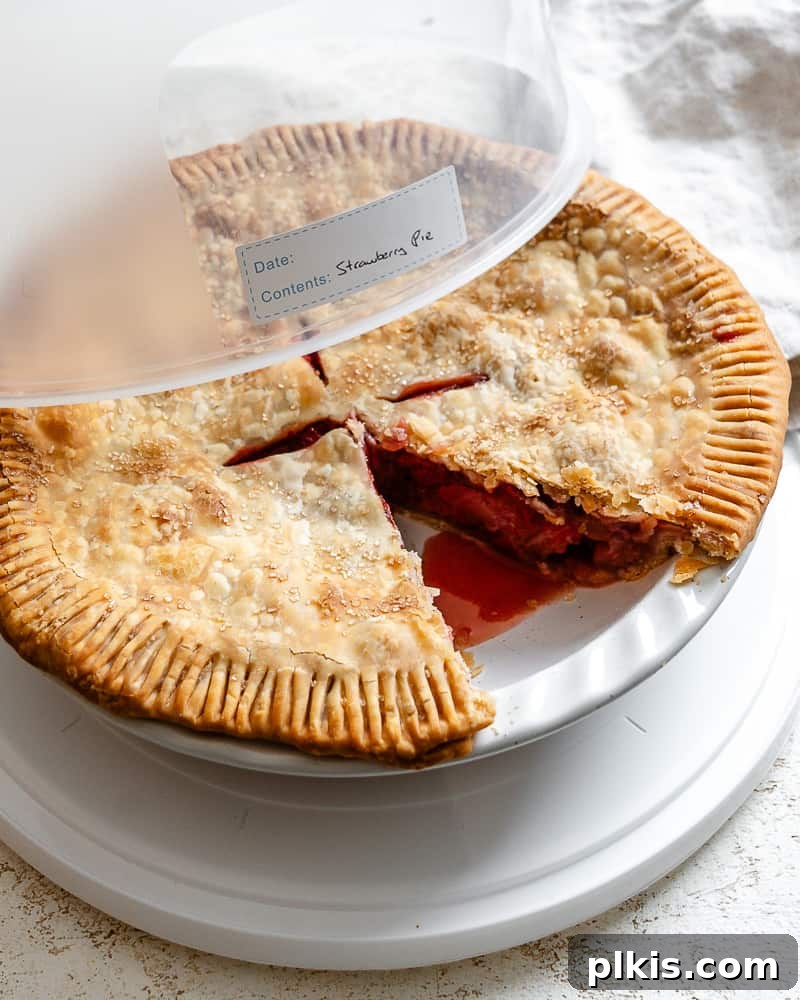
Once the baked strawberry pie has completely cooled (this is crucial for preventing condensation and sogginess), store any leftovers in an airtight container in the refrigerator for 4-5 days. Be aware that the bottom crust may become softer over time due to the moisture from the filling. For optimal freshness and to keep track of when it was made, I highly recommend using a dedicated pie container like this tupperware pie carrier and utilizing these handy labels.
This pie also freezes exceptionally well for longer storage. Wrap the entire cooled pie (or individual slices) tightly in plastic wrap, then an additional layer of aluminum foil to prevent freezer burn. It will maintain its quality in the freezer for 3-4 months. When you’re ready to enjoy it, simply allow the frozen strawberry pie to thaw in the refrigerator overnight before serving.
To reheat the pie, you can place the entire dish in a preheated oven at 350°F (175°C) for 20-25 minutes, or until warmed through. Individual portions can also be reheated quickly in the microwave for 1-2 minutes, though the crust may lose some of its crispiness.
Easy Strawberry Pie
15 mins
40 mins
5 hrs
5 hrs 55 mins
1 pie

Print Recipe
Equipment
-
Measuring Cups
-
Measuring spoons
-
Knife set
Ingredients
- 2 premade pie crusts
- 3 pounds of fresh strawberries, sliced
- ½ cup + 2 tablespoons of brown sugar, plus more for garnish
- ¼ cup of all-purpose flour
- ¼ cup of cornstarch
- 1 teaspoon of cinnamon (optional)
- ½ teaspoon of nutmeg (optional)
Instructions
-
Prepare the crust according to package instructions (allowing it to come to room temperature). Preheat the oven to 375 degrees F (190°C) and lightly grease your pie pan.
-
In a large bowl, combine the sliced strawberries, brown sugar, all-purpose flour, cornstarch, and optional cinnamon and nutmeg. Mix well until the strawberries are evenly coated, then set aside.
-
Gently place one pie crust into the prepared pie pan. Pour the strawberry mixture into the crust. The strawberries should be mounded and almost spill out slightly.
-
Cover the pie with the second crust. Pinch the edges of both crusts together firmly to seal the pie. Using a sharp knife, cut a small slit or “X” into the top of the pie for essential ventilation. Sprinkle additional brown sugar on top for garnish and a sweet, crunchy finish.
-
Carefully cover the edges of the pie with strips of aluminum foil to prevent over-browning. Bake the pie for 30 minutes. If the top of the pie starts to darken too quickly during this time, remove it, cover the entire top loosely with foil, and return it to the oven. After 30 minutes, remove the foil from the edges and bake for an additional 10 minutes, or until the crust is golden brown and the filling is bubbly.
-
Once baked, transfer the pie to a wire cooling rack and allow it to sit for at least 5 hours before serving. This crucial resting period allows the filling to properly set and thicken.
Notes
- To avoid soggy pie crust: Use enough cornstarch/flour (adding 2-3 tbsp when using frozen berries) and ventilate the pie. You can further avoid sogginess by sprinkling a layer of breadcrumbs or crushed plain vegan cookies before pouring in the strawberry pie filling.
- Leave it to rest: During this time, the filling will thicken and set, so it’s easy to slice and serve without leaking all over the place.
- Avoid glass bakeware: Metal or ceramic pie dishes are better conductors for even baking, helping to achieve a crispier bottom crust compared to glass.
Nutrition
Carbohydrates: 293g
Protein: 18g
Fat: 6g
Saturated Fat: 1g
Polyunsaturated Fat: 3g
Monounsaturated Fat: 1g
Sodium: 71mg
Potassium: 3908mg
Fiber: 40g
Sugar: 180g
Vitamin A: 749IU
Vitamin C: 846mg
Calcium: 824mg
Iron: 9mg
Additional Info
Toni Okamoto
Dessert
American
Oven
Vegan
Please tag us at @PlantBasedOnABudget! 🙂