
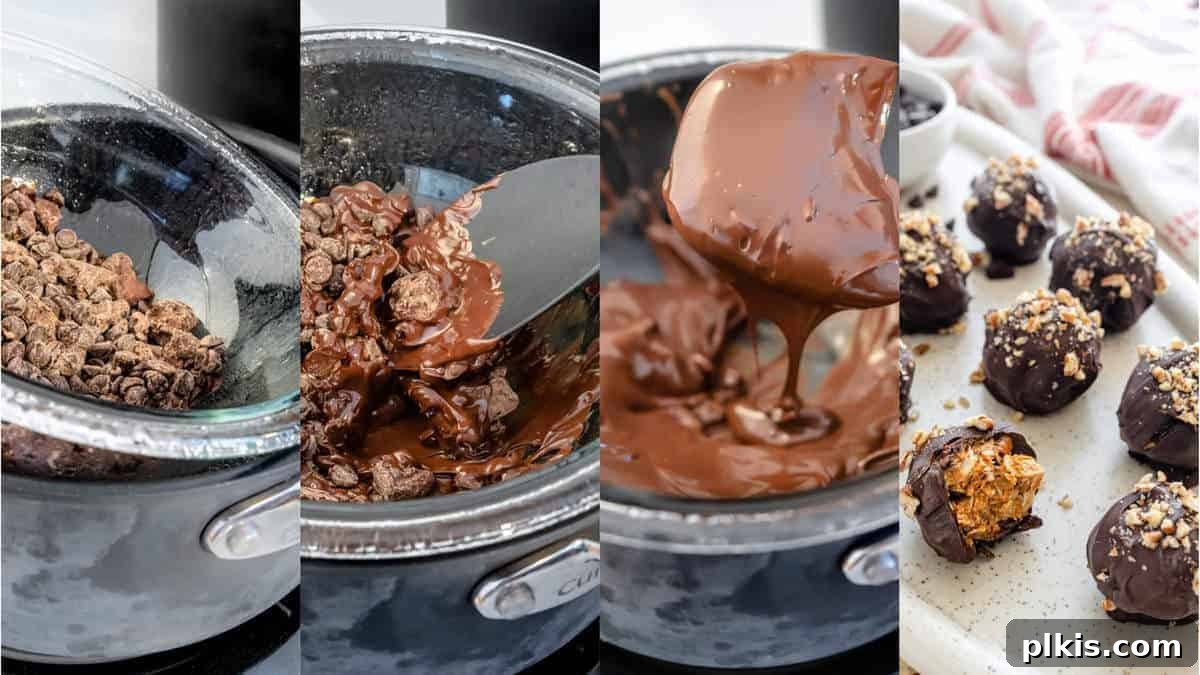
Chocolate: a universal language of joy, comfort, and indulgence. Whether you’re crafting an elaborate dessert, dipping fresh fruit, or simply enjoying a warm chocolate drizzle, the magic often begins with perfectly melted chocolate. Far from being a daunting task, mastering this fundamental skill can elevate your culinary creations and unlock a world of delicious possibilities. This comprehensive guide will transform you into a chocolate melting pro, equipping you with the knowledge, techniques, and confidence to achieve silky-smooth results every single time.
Mastering the Art of Melting Chocolate: Your Ultimate Guide to Perfect Consistency
The allure of melted chocolate is undeniable. It transforms from a solid block or chip into a glossy, velvety liquid, ready to be incorporated into countless recipes. From decadent glazes and luscious ganaches to simple chocolate-dipped strawberries, understanding how to melt chocolate correctly is a cornerstone of dessert-making. But achieving that flawless, unblemished consistency can sometimes feel like a delicate art. Fear not! We’re here to demystify the process, offering step-by-step instructions for the most reliable melting methods, along with expert tips to ensure success and troubleshoot common challenges. Get ready to enhance your culinary repertoire and enjoy your beloved chocolate even more.
Choosing the Right Chocolate for Melting
The foundation of perfectly melted chocolate lies in selecting the appropriate type and quality. While many chocolates can be melted, some are inherently better suited for the task, especially when aiming for a smooth, even consistency for dipping, drizzling, or baking.
Chocolate Chips vs. Chocolate Bars
For practical purposes, chocolate chips are often your best friend when a recipe calls for melted chocolate. Their smaller, uniform size allows them to melt quickly and evenly, reducing the risk of scorching and ensuring a consistent texture. They are designed to hold their shape during baking, but their small size also makes them ideal for melting. However, if you happen to have a chocolate bar on hand, it will work just fine – just ensure you chop it into small, uniform pieces (about ¼ to ½ inch) before melting to promote even heating and prevent burning. Finer chopping leads to faster, more consistent melting.
Quality Matters for Optimal Melt
Any good to medium quality chocolate will work beautifully for melting. Higher quality chocolates often contain a higher percentage of cocoa butter, which contributes to a smoother melt and a more luxurious texture and sheen. While premium chocolate can offer superior flavor and a naturally silkier finish, even a reliable supermarket brand can yield excellent results if melted correctly. It’s important to avoid “baking chocolate” that contains paraffin wax or other non-cocoa butter fats, as these can affect texture, flavor, and how well the chocolate sets. Always opt for real chocolate with a decent cocoa butter content.
Understanding Vegan Chocolate Options
For those following a plant-based diet, selecting vegan chocolate is crucial. The good news is that many delicious and high-quality vegan chocolates are readily available. While dark chocolate is frequently vegan by nature, it’s always essential to check the ingredients label carefully. Look out for common non-vegan additives such as milk fat, milk solids, whey, lactose, or casein, even in products that seem like they should be dairy-free.
Dark chocolate, especially varieties with 70% cocoa or higher, often contains only cocoa mass, sugar, cocoa butter, and sometimes lecithin (often soy-derived and vegan). However, lighter dark chocolates or semi-sweet varieties can sometimes include dairy components for creaminess. Many brands specifically label their products as “dairy-free,” “plant-based,” or “vegan,” making your selection easier.
Some popular and reliable vegan chocolate options include:
- Trader Joe’s chocolate chips and chunks are widely recognized and loved by the vegan community for their quality and accessibility.
- Guittard’s semi-sweet chocolate chips are another safe bet for plant-based melting, offering a rich flavor.
- Many reputable brands of quality dark chocolate (e.g., Godiva, Lindt, Ghirardelli often have vegan dark chocolate options; always verify ingredients).
- Specialty vegan chocolate brands found in health food stores or online (e.g., Enjoy Life, Pascha, Hu Kitchen) are specifically formulated to be dairy-free and are excellent for melting.
When selecting semi-sweet chocolate, be extra vigilant with the ingredient list, as this category is more prone to containing dairy. If your recipe calls for additional sugar or sweetener, a darker vegan chocolate might be an excellent choice, allowing you to control the sweetness level while ensuring it’s completely plant-based.
Essential Tools for Chocolate Melting Success
While melting chocolate can be accomplished with basic kitchen items, having the right tools at hand can make the process smoother, more efficient, and lead to better results. Here’s a list of what you’ll typically need:
- Heat-proof Bowls: Glass, stainless steel, or ceramic bowls are ideal. For the double boiler method, ensure the bowl is large enough to fit snugly over your chosen saucepan without falling in, and crucially, without its bottom touching the water.
- Saucepans: A small to medium saucepan is needed as the base for the double boiler method.
- Rubber Spatula: This is an indispensable tool. A heat-resistant rubber or silicone spatula is perfect for gently stirring the chocolate and scraping down the sides of the bowl, ensuring even melting and preventing scorching. Its flexibility helps in gathering all the melted chocolate.
- Whisk (Optional): A small whisk can be used for very thin chocolate or for incorporating other ingredients once the chocolate is fully melted, but a spatula is generally preferred for the initial melting process.
- Cutting Board and Sharp Knife: If you’re using a chocolate bar instead of chips, these are necessary for chopping it into small, uniform pieces, which is vital for even melting.
- Oven Mitts or Kitchen Towels: Essential for safely handling hot bowls and saucepans.
The Best Ways to Achieve Perfectly Melted Chocolate
There are several tried-and-true methods for melting chocolate, each with its own advantages depending on your kitchen setup, the quantity of chocolate, and your desired speed. The key to success across all methods is applying gentle, consistent heat and maintaining constant vigilance.
Method 1: The Classic Double Boiler (Bain-Marie)
This time-honored technique, utilized by chefs and home cooks for centuries, remains the gold standard for melting chocolate. It offers unparalleled control, preventing overheating and ensuring a smooth, lump-free consistency with a beautiful sheen. It’s the best way to keep your melting chocolate closely monitored, almost foolproof.
Why Choose the Double Boiler?
- Gentle Heat: The chocolate is heated indirectly by steam, not direct flame. This provides a very even and gradual melt, preserving the chocolate’s delicate structure and flavor.
- Prevents Scorching: The indirect heat significantly reduces the risk of burning the delicate chocolate, which can happen quickly with direct heat.
- Maintains Temperature: The steam helps keep the chocolate warm and pliable once melted, which is ideal for applications like dipping, coating, or making a ganache, where you need it to stay liquid for a longer period.
Step-by-Step Double Boiler Melting:
- Prepare Your Setup: Fill the bottom part of your double boiler or a small saucepan with about 1-2 inches of water. Ensure the water level is low enough so that when the top bowl is placed, its bottom does not touch the simmering water. This is absolutely critical for preventing steam from directly heating the chocolate or water droplets from splashing in.
- Heat the Water: Bring the water to a gentle simmer over medium-low heat. You want steady steam, not a vigorous, rolling boil, as strong boiling can cause excess splashing or condensation into your chocolate.
- Add Chocolate: Place your chocolate (chips or finely chopped bar pieces) into the top bowl of the double boiler. Make sure the bowl is completely dry before adding the chocolate.
- Melt and Stir: Set the top bowl securely over the simmering water. As the chocolate begins to melt from the rising steam, stir frequently and gently with a rubber spatula. Continually scrape the sides and bottom of the bowl to ensure all chocolate melts evenly and no parts become overheated. Continue stirring until the chocolate is fully melted, smooth, and glossy, with no lumps remaining.
- Remove from Heat: Once the chocolate reaches your desired smooth consistency, immediately remove the top bowl from the saucepan. Be very careful of the hot steam escaping from the bottom pan. Wipe any condensation from the bottom of the bowl before using the chocolate.
Tips for Double Boiler Success:
- No Water Contact: This is paramount! Even a tiny drop of water coming into contact with melting chocolate can cause it to “seize,” turning it thick, lumpy, and unworkable.
- Gentle Simmer: Avoid boiling water vigorously. A gentle simmer provides sufficient steam without the risk of splashing.
- Constant Stirring: Stirring ensures even heat distribution throughout the chocolate and prevents any single part from overheating.
- Remove Promptly: Don’t leave the melted chocolate over the heat for too long after it’s fully smooth. Continued exposure to steam, even after melting, can still cause it to seize or burn.
Method 2: The Improvised Double Boiler (Saucepan & Bowl)
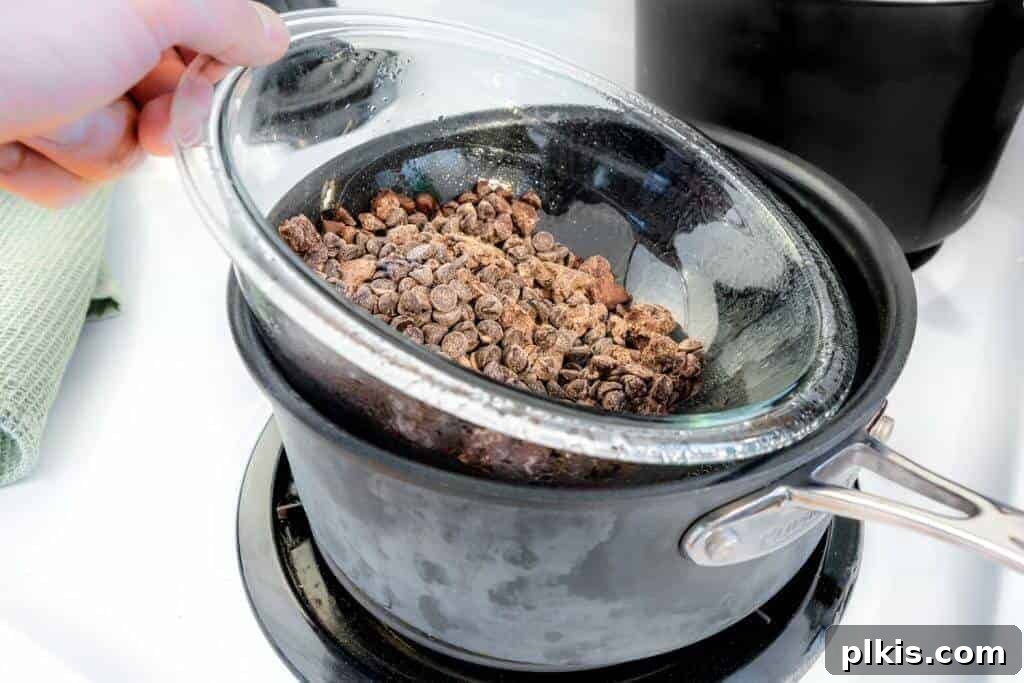
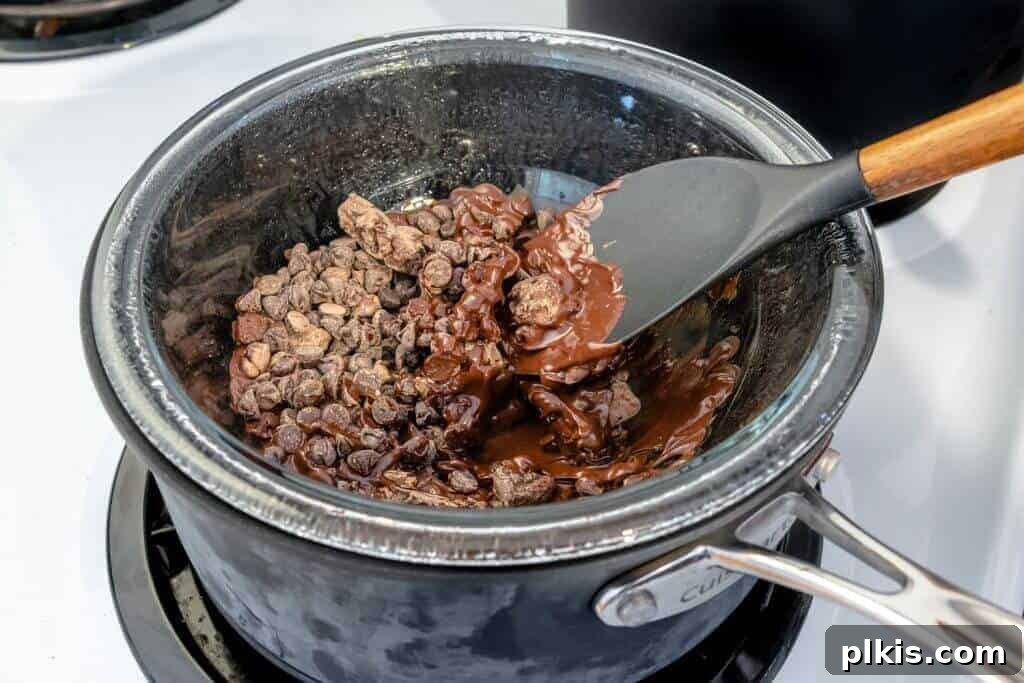
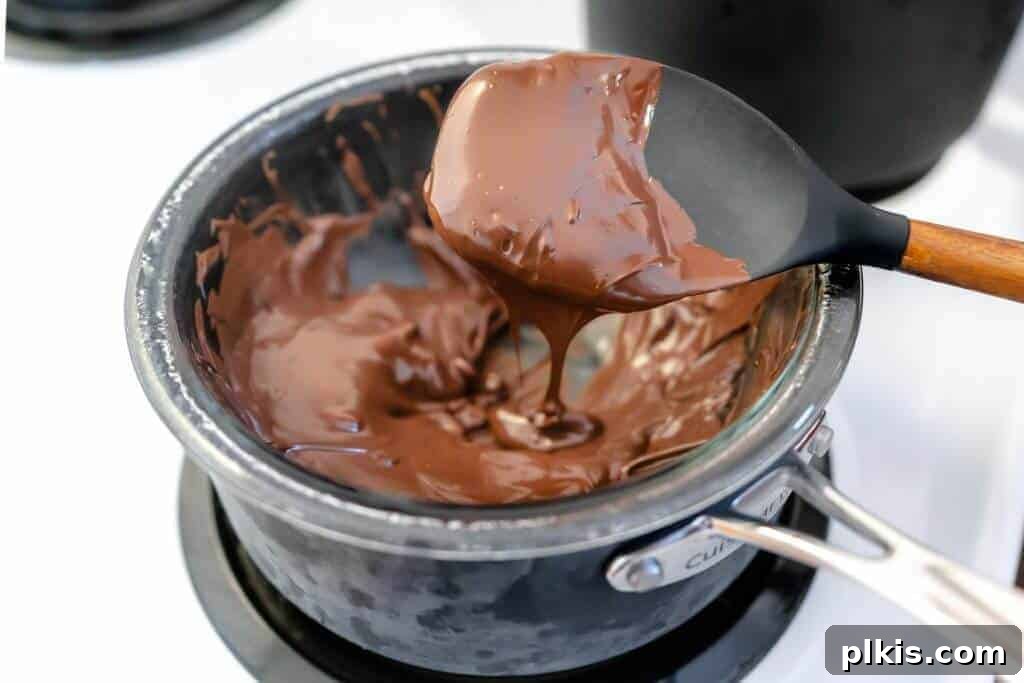
No dedicated double boiler? No problem! You can easily create a makeshift version using a heat-proof bowl and a saucepan you likely already have in your kitchen. This method works just as effectively and follows the same principles as a traditional double boiler, providing excellent results without specialized equipment.
Setting Up Your Improvised Double Boiler:
- Select Your Bowl: Choose a metal or glass bowl that is slightly larger than your saucepan. It should rest securely on the rim of the saucepan without falling in. The bowl needs to be wide enough that steam cannot easily escape around the sides, forcing it to heat the chocolate efficiently.
- Ensure No Water Contact: Critically, when the bowl is placed on the saucepan, its bottom must not touch the water simmering below. This is the golden rule for gentle, indirect melting and preventing seizing.
- Follow Double Boiler Steps: Once your setup is ready and stable, follow the exact same instructions as outlined for the classic double boiler (Steps 1-5 above). Heat water to a gentle simmer, place chocolate in the bowl, and stir frequently with a rubber spatula until it is smooth and melted.
For those who frequently melt small amounts of chocolate and prefer a dedicated tool without buying a full double boiler, specialized metal bowls with extended handles designed to rest over saucepans are an excellent middle-ground option. They provide stability, a comfortable grip, and are perfectly sized for small batches of melting chocolate.
Method 3: Quick & Convenient Microwave Melting
For speed and minimal cleanup, the microwave is an excellent choice, especially for smaller quantities of chocolate. This is often the method of choice for many busy home cooks due to its ease and efficiency. However, it requires a bit more vigilance to prevent burning, as microwave heating can be uneven and intense.
Step-by-Step Microwave Melting:
- Prepare Chocolate: Place your chocolate chips or small, uniform pieces of chopped chocolate into a microwave-safe bowl. Spread the chocolate in a single layer if possible, or at least evenly, to promote uniform heating.
- First Interval: Microwave the chocolate for 1 minute on medium power (around 50-70% power if your microwave has adjustable settings). Using a lower power setting is crucial for gentle heating.
- Stir Thoroughly: Remove the bowl from the microwave and stir the chocolate vigorously with a rubber spatula. Even if it doesn’t look completely melted, the heat is likely transferring internally. Stirring helps distribute this latent heat evenly and starts the melting process from within.
- Subsequent Intervals: Continue to microwave in short 30-second increments, stirring thoroughly after each interval. Keep a close eye on the chocolate; it might look solid on the surface even when it’s mostly melted underneath. Stop microwaving when only a few small lumps remain, and the chocolate is about 75-80% melted.
- Finish with Residual Heat: Remove the chocolate from the microwave before it’s completely smooth. Continue stirring for another minute or two. The residual heat from the melted chocolate will continue to melt the remaining small lumps, resulting in a perfectly smooth, glossy consistency. This prevents overheating and significantly reduces the risk of burning.
Tips for Microwave Success:
- Short Intervals are Key: This is the golden rule for microwave melting. Chocolate can go from perfectly melted to burnt in a matter of seconds without obvious visual cues.
- Stir, Stir, Stir: Regular and thorough stirring after each interval is crucial for even melting, eliminating hot spots, and ensuring a uniform consistency.
- Medium Power: Using 50-70% power rather than full power can provide a gentler, more controlled melt, mimicking the indirect heat of a double boiler more closely.
- Know Your Microwave: Every microwave is different in terms of wattage and how it heats. Experiment a little to find the perfect timings and power settings for your specific appliance. Once you find them, stick with them for consistent results!
Microwave Troubleshooting: Avoiding Burnt Chocolate
The primary pitfall of microwave melting is burning the chocolate. Burnt chocolate will become hard, crumbly, develop a distinctly acrid smell, and taste bitter – unfortunately, it’s irreparable and will ruin your recipe. To avoid this, always err on the side of under-microwaving and rely on residual heat for the final smooth finish. If you notice any signs of burning (a hard, crusty edge, an unpleasant smell, or a change in color to a darker, duller brown), discard that portion immediately and start fresh with new chocolate.
Common Pitfalls and How to Avoid Them
Even with the right methods, a few common issues can arise when melting chocolate. Knowing how to identify, prevent, and sometimes even fix them will save you time, ingredients, and frustration, ensuring your chocolate creations turn out perfectly.
1. Seizing (Thick, Lumpy Chocolate)
What it is: Seized chocolate is thick, lumpy, dull, and stiff, resembling mud or gritty paste rather than a smooth, flowing liquid. It becomes completely unworkable for most applications.
Why it happens: The most common culprit is even a tiny drop of water or steam coming into contact with the chocolate. Water causes the sugar crystals in the chocolate to clump together, creating a gritty texture. Overheating can also sometimes cause a similar effect, breaking down the cocoa solids.
How to prevent it: Ensure your bowl, spatula, and any other utensils are completely dry before they touch the chocolate. When using a double boiler, make certain the bowl doesn’t touch the water and that steam doesn’t condense and drip from the lid or rim into the chocolate. Work in a dry environment.
How to fix it: While notoriously difficult to fully recover, sometimes you can rescue seized chocolate. Immediately remove it from the heat. Stir in a tablespoon of a neutral oil (like vegetable, canola, or grapeseed oil) or melted coconut oil (for vegan chocolate) for every 6-8 ounces of chocolate. Stir vigorously until it smooths out. This won’t restore the original texture perfectly but can make it usable for some applications like brownies or cookies, though it won’t be ideal for dipping or coating.
2. Burning (Acrid Taste, Hard Texture)
What it is: Burnt chocolate develops a bitter, acrid taste and becomes hard, dry, and crumbly. It loses its pleasant aroma and shine.
Why it happens: Overheating, especially in the microwave or by using too high a heat on the stovetop (direct heat). Chocolate is delicate and sensitive to high temperatures; its cocoa solids can quickly scorch.
How to prevent it: Use low to medium-low heat for double boiler methods, never direct high heat. For microwaves, use short intervals (30-60 seconds) and lower power settings (50-70%). Always stir frequently to distribute heat evenly and remove from heat source just before fully melted, relying on residual heat.
How to fix it: Unfortunately, burnt chocolate is beyond saving. Once the cocoa solids are scorched, the flavor is permanently altered. Discard it and start with fresh chocolate.
3. Lumpy or Undissolved Chocolate
What it is: Pieces of chocolate that haven’t fully melted, resulting in an uneven, unsightly texture in your finished product.
Why it happens: Insufficient heat, uneven stirring, or chocolate pieces that were too large to begin with and didn’t melt at the same rate as smaller pieces.
How to prevent it: Chop chocolate into small, uniform pieces (if using a bar). Stir constantly and thoroughly throughout the melting process. Ensure the heat source is consistent and adequate (e.g., gently simmering water for double boiler, not just warm water). For microwave melting, ensure sufficient stirring between intervals to redistribute heat and identify any stubborn chunks.
Tips for Working with Melted Chocolate
Once you’ve achieved that perfectly smooth, glossy melted chocolate, here are a few additional tips to ensure your final creations are just as perfect:
- Maintain Temperature: If you’re dipping items like fruit or coating confections, you’ll want to keep your chocolate warm and fluid for an extended period. For double boiler methods, you can leave the bowl over the warm (but not simmering) water bath, off the direct heat, for short periods. Alternatively, transfer it to a pre-warmed bowl or use a gentle warming plate on a very low setting.
- Thinning Melted Chocolate: If your melted chocolate is too thick for dipping, drizzling, or creating thin coatings, you can carefully thin it. For vegan chocolate, add a very small amount (start with half a teaspoon at a time) of a neutral, flavorless oil like refined coconut oil, vegetable oil, grapeseed oil, or a touch of plant-based shortening. Stir until fully incorporated and the desired consistency is achieved. Be cautious not to add too much, as excessive oil can affect the setting time and final texture of the chocolate.
- Working Quickly: Melted chocolate cools and sets relatively quickly, especially if your kitchen is cool. Have all your dipping items, molds, or other ingredients ready and organized before you even start melting the chocolate. This minimizes the time the chocolate spends cooling and thickening.
- Storage: While it’s generally best to use melted chocolate immediately, if you have leftovers, allow them to cool completely at room temperature before storing in an airtight container. While you can often re-melt chocolate, successive re-melting can sometimes affect its quality and texture.
Creative Uses for Your Perfectly Melted Chocolate
With your newfound expertise in melting chocolate, the possibilities for creating delectable treats are truly endless! Here are just a few ideas to inspire your next culinary adventure and put your perfectly melted chocolate to good use:
- Dipping Delights: Fresh strawberries, banana slices, pretzel rods, marshmallows, cookies, and even savory snacks like potato chips become irresistible when cloaked in a smooth layer of chocolate.
- Homemade Candies & Bars: Create stunning chocolate bark by spreading melted chocolate and topping with nuts, dried fruit, or sprinkles. Fashion elegant truffles, or mold your own chocolates into fun shapes.
- Decadent Drizzles: Elevate everyday breakfasts like pancakes, waffles, or French toast. Add a beautiful, artistic chocolate drizzle over ice cream, fruit salads, cupcakes, or intricate cakes.
- Rich Sauces & Spreads: Use it as a base for a luxurious chocolate fondue, a velvety ganache for filling cakes or pastries, or a warm, pourable chocolate sauce to accompany any dessert.
- Baking Applications: Fold melted chocolate into batters for moist brownies, chewy cookies, rich muffins, or decadent cakes to add an extra layer of chocolatey goodness and depth of flavor.
We truly hope you find this comprehensive chocolate melting guide useful and empowering! You might find that one method resonates more with you, your kitchen setup, and your lifestyle, so feel free to stick to the one you prefer and practice it to perfection. Remember, practice makes perfect, and melting chocolate can be a wonderfully fun and rewarding experience if you know what you’re doing. Happy melting, and enjoy the delicious results of your culinary mastery!
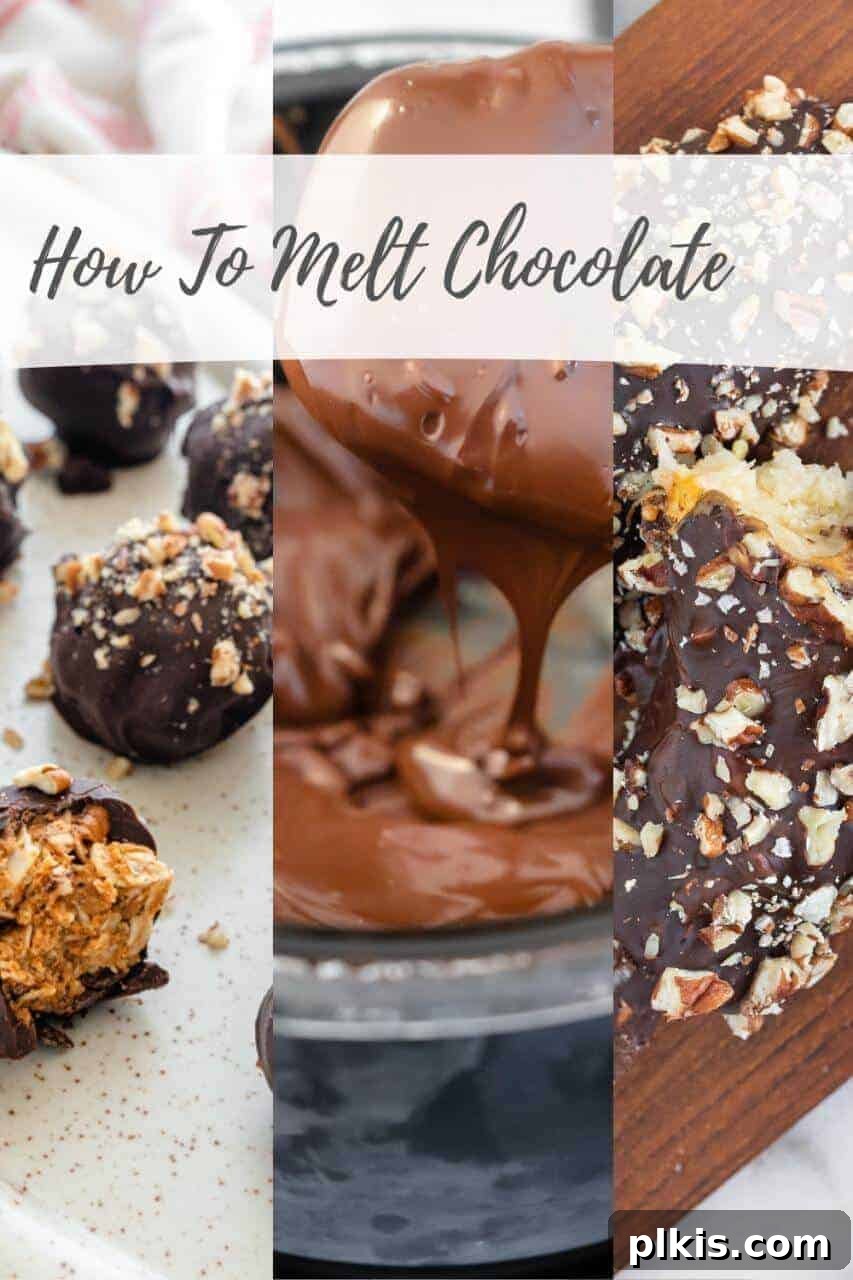
Looking For Some Melted Chocolate Recipe Inspo?
Now that you’re a melting master, put your skills to the test with these delectable plant-based recipes that feature beautifully melted chocolate. Get inspired and create something truly delicious!
- Chocolate Chickpea Bark
- 4-Ingredient Chocolate Pie
- Chocolate Covered Trail Mix Peanut Butter Balls
- Simple Chocolate Covered Strawberries
- Chocolate Peanut Butter Bark
- Peanut Butter Banana Bars
- Cookie Dough Bonbons