
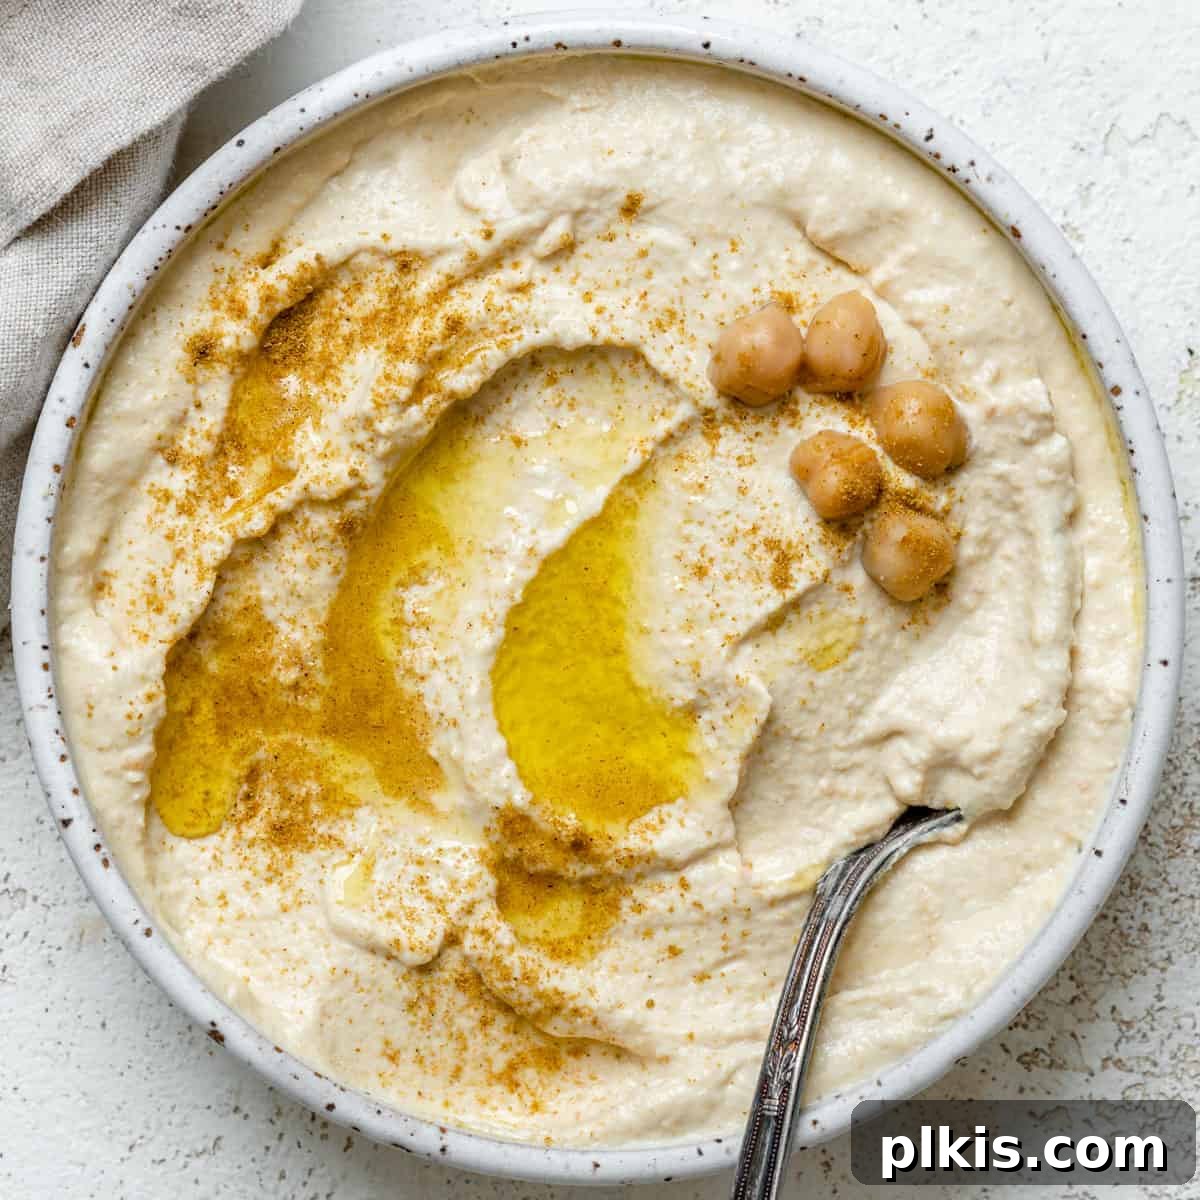
Unlock the secret to an incredibly smooth, ultra-creamy, and utterly delicious homemade hummus that far surpasses any store-bought variety. This super simple recipe, crafted with just 6 essential ingredients and canned chickpeas, eliminates the need for laborious chickpea peeling and is astonishingly quick to prepare. Get ready to experience gourmet hummus in as little as 5 minutes!
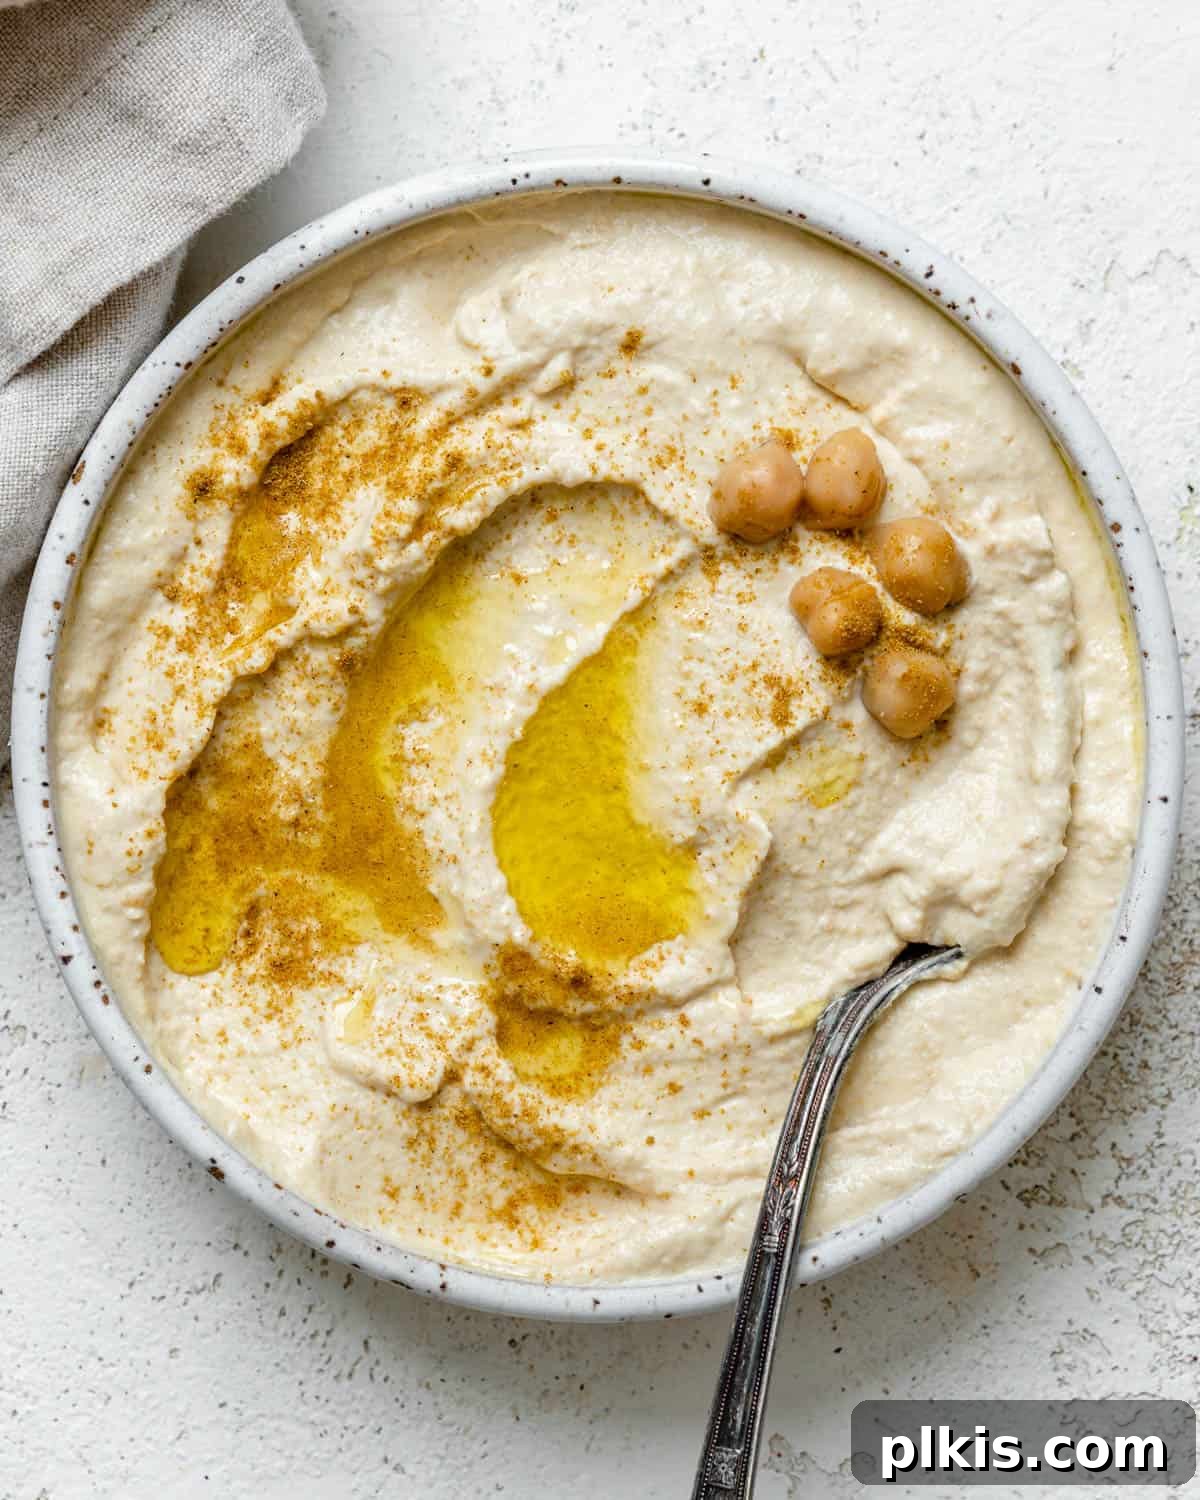
If your hummus experience has been limited to the often bland and overpriced tubs from your local grocery store, prepare for a culinary revelation. Crafting homemade hummus is not only ridiculously easy and incredibly inexpensive, but the taste and texture are simply in a league of their own. Say goodbye to preservatives and hello to fresh, vibrant flavor!
What makes this classic hummus recipe truly exceptional is its versatility in preparation time. Craving a quick snack? Whip up a batch in as little as 5 minutes for a truly satisfying result. Or, if you have a little extra time and aspire to achieve the silkiest, fluffiest, and most restaurant-quality hummus you’ve ever tasted, follow our advanced 30-minute method. Either way, you’re guaranteed an amazing dip that will become a staple in your kitchen.
This effortless hummus recipe, using convenient canned chickpeas, relies on just six core ingredients – many of which are likely already in your pantry. It’s also fantastic for meal prepping and freezer-friendly, ensuring you always have a healthy, protein-packed dip on hand. For those who love to experiment with flavors, be sure to explore our other delightful variations like smoky roasted red pepper hummus, creamy sweet potato hummus, nutritious yellow lentil hummus, or even our unique exotic pistachio hummus.
What Is Hummus? Unveiling the Beloved Middle Eastern Dip
Hummus, sometimes spelled houmous, is a revered and delectable dip or spread with roots deeply embedded in Middle Eastern and Mediterranean cuisine. Its name itself, derived from the Arabic word for chickpeas, reveals its primary ingredient. This iconic dish is traditionally a harmonious blend of cooked, mashed chickpeas, high-quality tahini (sesame seed paste), fresh lemon juice, pungent garlic, and often a touch of earthy cumin. These simple components are meticulously blended or mashed until they achieve a smooth, creamy, and irresistible consistency. The resulting flavor profile is a delightful symphony of bright citrus, garlicky warmth, nutty richness from the tahini, and the subtle, deep notes of cumin, culminating in a truly satisfying and wholesome experience.
Culturally, hummus is a cornerstone of Middle Eastern dining, commonly served alongside warm pita bread and as an integral part of a mezze platter, complementing other favorites like creamy baba ghanoush and crispy baked falafel. However, its popularity has transcended geographical boundaries, making this creamy chickpea dip a global sensation. Today, hummus is cherished not only as a versatile dip but also as a flavorful spread in an array of dishes, including sandwiches, wraps, burgers, and more. Beyond its incredible taste, hummus is also a nutritional powerhouse, offering a significant boost of plant-based protein and dietary fiber, making it an excellent choice for a healthy and fulfilling diet. Best of all, achieving this culinary delight in your own kitchen is surprisingly straightforward and immensely rewarding!
Essential Ingredients for the Perfect Homemade Hummus
Crafting this budget-friendly and supremely delicious hummus requires just 6 core ingredients, along with a pinch of salt. Each component plays a vital role in achieving that coveted creamy texture and vibrant flavor profile:
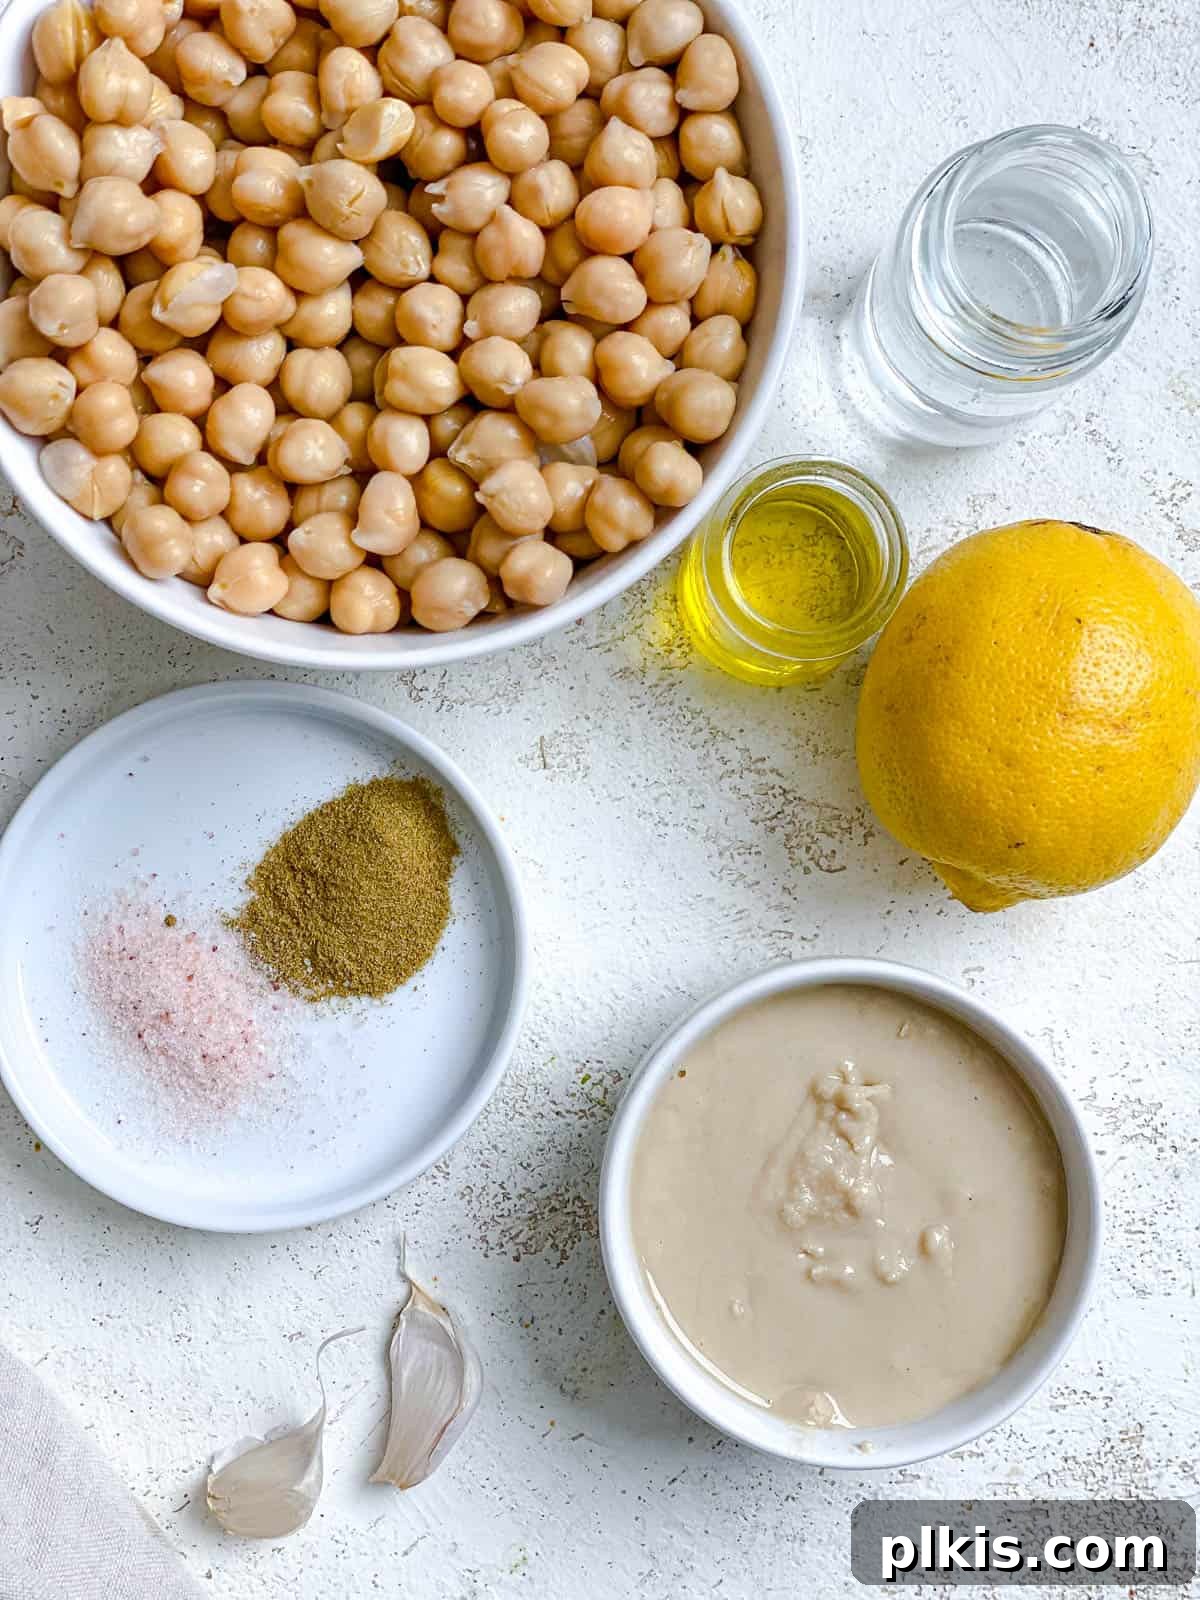
- Chickpeas (Garbanzo Beans): The foundation of our hummus! For the quickest preparation, we highly recommend using canned chickpeas. Ensure you drain and rinse them thoroughly to remove excess sodium and any canning liquid. If you prefer to cook from scratch, ensure they are cooked until very soft.
- Garlic: Fresh garlic is non-negotiable for the best flavor. Start with two cloves and adjust to your personal preference for garlicky intensity. While garlic powder can work in a pinch, fresh cloves offer a much more pungent and authentic taste. For a milder, sweeter garlic note, consider using roasted garlic.
- Lemon Juice: Freshly squeezed lemon juice is crucial for the bright, zesty tang that balances the richness of the tahini. Bottled lemon juice simply doesn’t compare in terms of freshness and acidity. A hint of lemon zest can also elevate the citrus aroma and flavor even further. Lime juice can be a fun alternative for a slightly different citrus profile.
- Tahini: This smooth paste made from ground sesame seeds is the heart of hummus, providing its signature creamy texture, nutty depth, and luxurious richness. The quality of your tahini significantly impacts the final taste. Invest in a good quality, runny tahini; some cheaper brands can be quite bitter. Our top recommendation is Soom tahini for its consistently excellent flavor and texture.
- Salt: Essential for enhancing all the other flavors. Use Kosher salt or sea salt and season gradually, tasting as you go, to achieve perfect balance.
- Cumin: This warm, earthy spice is the traditional aromatic backbone of hummus, pairing beautifully with chickpeas and tahini. It adds a subtle depth that makes the dip truly authentic and irresistible.
- Ice-Cold Water: A small but mighty ingredient! Adding a few tablespoons of ice-cold water during blending is a secret weapon for achieving an exceptionally light, fluffy, and super creamy consistency. As an alternative, you can also use some of the reserved liquid from the chickpea can, known as aquafaba, which also contributes to creaminess.
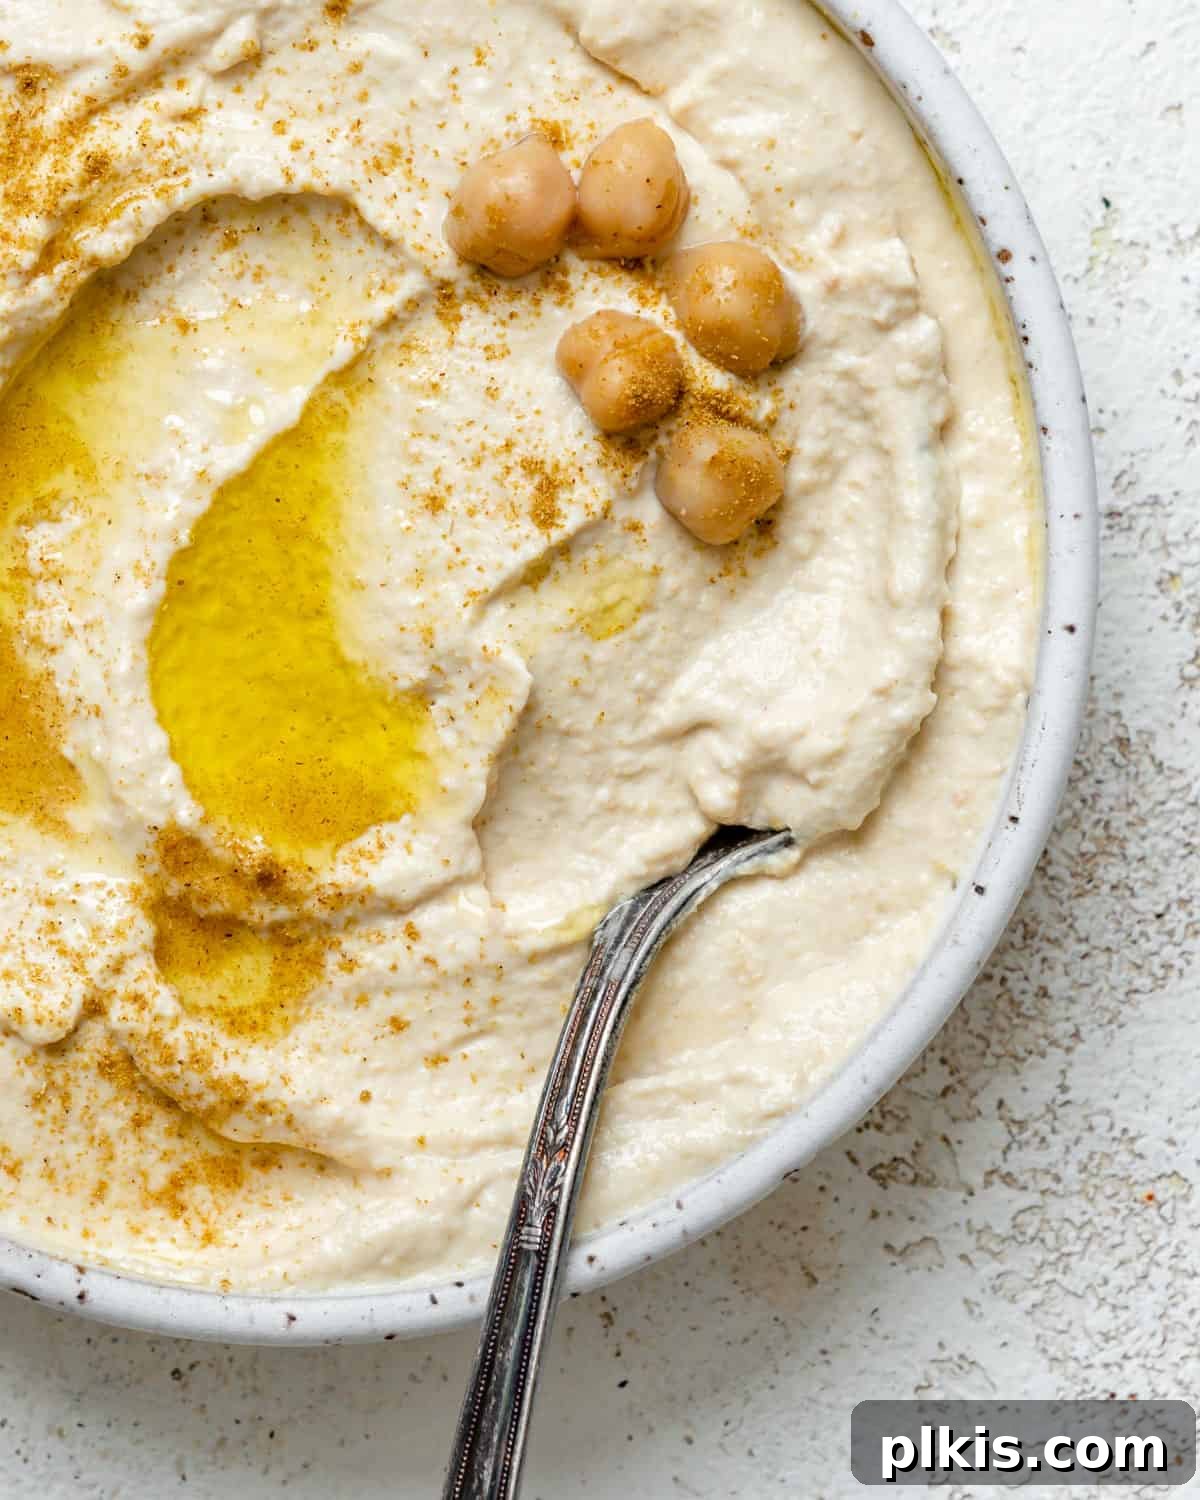
Elevate your homemade hummus with a simple yet elegant garnish. A sprinkle of cumin and a generous drizzle of high-quality olive oil are classic choices. However, don’t hesitate to get creative! Other popular garnishes include: toasted pine nuts or sesame seeds for added crunch, fresh herbs like finely chopped parsley or cilantro for freshness, a dash of smoked paprika for color and a hint of smokiness, a pinch of sumac for a tangy burst, or even a sprinkle of red chili powder for those who enjoy a little heat.
Mastering Homemade Hummus: Two Simple Methods
You have two fantastic options for preparing this incredible homemade hummus recipe, catering to both speed and ultimate texture. Both methods utilize convenient canned chickpeas, making the process accessible and enjoyable for everyone.
The 5-Minute Hummus: Speedy & Satisfying
This method is perfect for those times when cravings strike and you need delicious, fresh hummus in a flash. It delivers excellent results with minimal effort, proving that homemade doesn’t have to mean time-consuming.
- 1) Begin by thoroughly draining and rinsing your canned chickpeas under cold water. This step is crucial for removing excess sodium and improving the overall flavor. Next, juice your lemon to get fresh lemon juice, and peel the garlic cloves.
- 2) Transfer all the prepared ingredients – the rinsed chickpeas, peeled garlic, fresh lemon juice, tahini, salt, cumin, and ice-cold water – into a powerful blender or a food processor. Process the mixture on high speed, continuously scraping down the sides as needed, until it transforms into a wonderfully smooth and creamy dip.
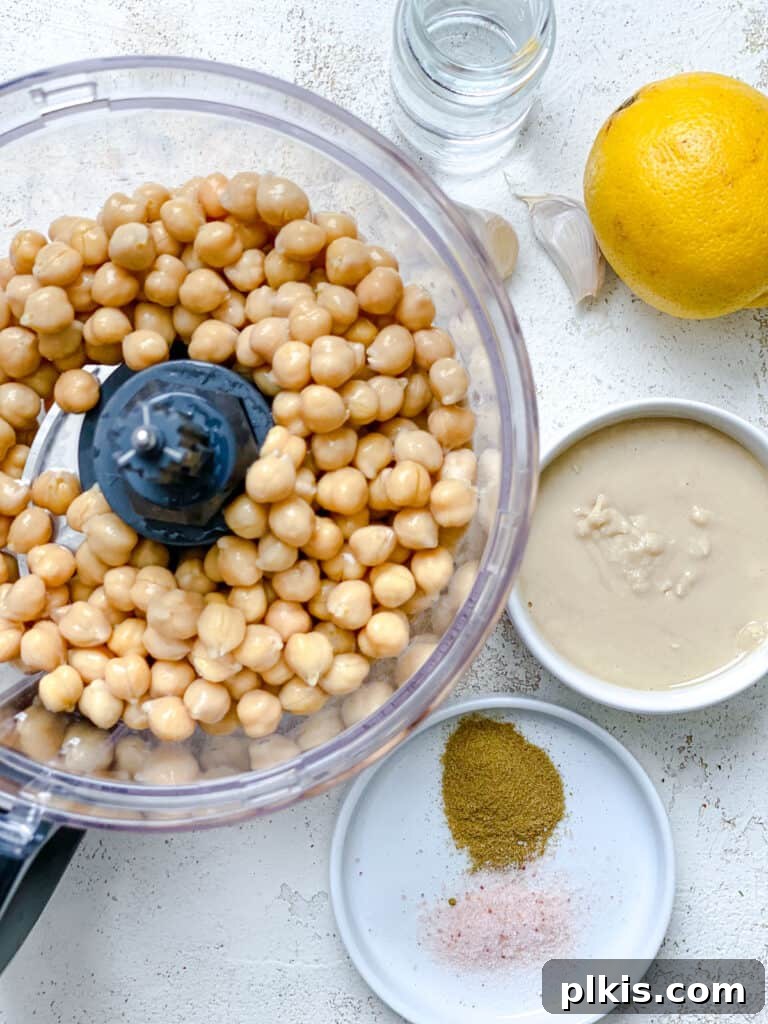
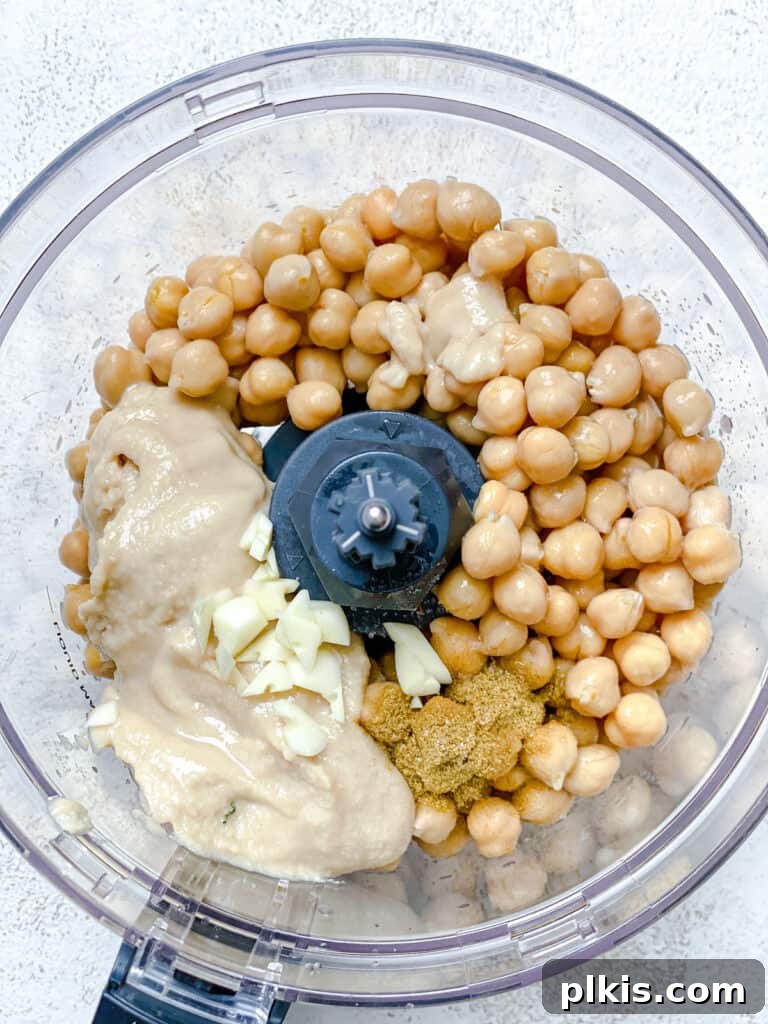
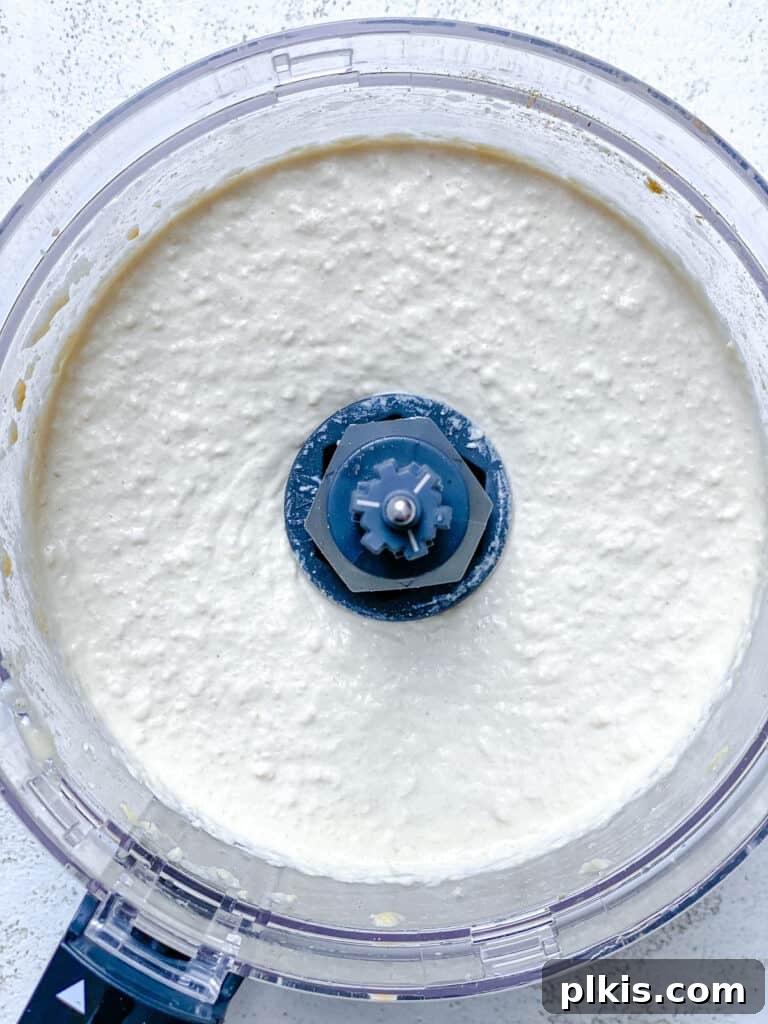
- 3) Once blended to your desired consistency, taste the hummus. This is your chance to personalize the flavor! Adjust the amount of lemon juice for more tang, add extra salt to heighten the flavors, or include more garlic for a bolder taste. Continue to blend briefly after each addition to fully incorporate.
The 30-Minute Hummus: For Unrivaled Smoothness and Fluffiness
If you’re chasing that coveted, ultra-smooth, light, and airy hummus often found in gourmet Middle Eastern restaurants, this slightly more involved method is absolutely worth the extra time. The secret lies in a simple simmering step that softens the chickpea skins without the tedious process of peeling.
- For the ultimate creamy texture, transfer the entire contents of a can of chickpeas (undrained) to a small saucepan. Add ½ teaspoon of baking soda. This magical ingredient helps to break down the chickpea skins. Bring to a gentle simmer and cook for 15-20 minutes, or until the chickpeas are exceptionally soft and mushy. You’ll notice some peels may float to the surface; simply skim and discard these. Drain and thoroughly rinse the softened chickpeas under cold water.
- While the chickpeas are simmering, prepare your fresh ingredients: juice the lemon and peel the garlic cloves.
- A crucial step for fluffy hummus: Add the tahini and fresh lemon juice to your blender or food processor first. Whip them together for 1-2 minutes until the mixture becomes pale, light, and almost fluffy. This aeration process is key to achieving that airy texture.
- Next, add the mushy, rinsed chickpeas, garlic, salt, cumin, and ice-cold water to the tahini-lemon mixture. Blend on high speed for several minutes. Pause the machine frequently to scrape down the sides, ensuring all ingredients are thoroughly incorporated and processed until the hummus is incredibly smooth and creamy.
Achieving your ideal hummus consistency is simple. If your hummus is too thick, gradually add more ice water, one tablespoon at a time, while blending, until it reaches your desired creaminess. Keep in mind that adding more water can slightly reduce the shelf life of your chickpea dip.
Frequently Asked Questions About Homemade Hummus
While peeling chickpeas is a traditional method for achieving super smooth hummus, it is notoriously labor-intensive and fiddly. We offer a brilliant shortcut! Instead of peeling, we recommend simmering canned chickpeas with baking soda (as in our 30-minute recipe). This hands-off technique effectively softens both the chickpeas and their skins, eliminating any grittiness and allowing you to achieve an incredibly creamy, smooth hummus without the tedious peeling process. For the 5-minute recipe, simply rinsing canned chickpeas yields great results without peeling.
Technically, yes, you can create a chickpea dip without tahini, but it won’t be true hummus as tahini is a defining ingredient. Tahini provides hummus with its characteristic nutty flavor, rich texture, and depth. If you need a substitute due to allergy or availability, you could try sunflower seed butter or cashew butter to add richness and a nutty element. Keep in mind that the flavor profile will differ significantly from classic hummus, though it can still be a delicious spread or dip.
Adjusting the consistency of your homemade hummus is easy. To thicken hummus that’s too thin, you can add a few more cooked chickpeas or an extra tablespoon of tahini, then blend until incorporated. To thin out hummus that’s too thick, gradually add a little more water (ice-cold water is best!) or a drizzle of olive oil, one spoonful at a time, blending well after each addition until you reach your desired creamy consistency.
Absolutely! Using home-cooked chickpeas is a fantastic option, especially for the 30-minute method. For the best results, we recommend cooking them until they are slightly over-cooked and very mushy, even more so than you would for other recipes. A good technique is to soak ½ cup of dried chickpeas covered in at least 2 inches of water overnight, then cook them until they are tender and easily mashed – usually between 1.5 to 2 hours. Once cooked to this soft consistency, the method for making hummus remains exactly the same as with canned chickpeas in our 30-minute recipe.
Bitterness in hummus is almost always due to low-quality tahini. Some tahini brands can be quite bitter, especially if they are made from unhulled sesame seeds or roasted too intensely. Investing in a high-quality, light-colored, and runny tahini (like Soom) can make a huge difference. You can also try adding a tiny pinch of sugar or a bit more lemon juice to counteract the bitterness, but the best solution is to use good tahini from the start.
Top Tips For Achieving the Best Homemade Hummus
Transforming simple ingredients into extraordinary hummus is easy with these expert tips:
- Embrace Mushy Chickpeas: This is perhaps the most critical tip for achieving an incredibly smooth, grit-free hummus. If you have the time, simmering your canned chickpeas with baking soda until they are very mushy (as described in our 30-minute recipe) helps to break down their skins, resulting in an exceptionally creamy texture without the need for laborious peeling.
- Invest in High-Quality Tahini: The quality of your tahini makes a monumental difference. Not all brands are created equal, and some can be overly bitter. Experiment to find a brand you love; we highly recommend Soom tahini for its consistently smooth texture and rich, nutty (never bitter) flavor.
- Utilize Ice-Cold Water: While the exact science is debated, incorporating ice-cold water during the blending process helps to create a remarkably light, fluffy, and airy hummus. It emulsifies beautifully with the tahini, resulting in a superior texture.
- Serve at Room Temperature: For the most enjoyable flavor and texture, allow your hummus to come to room temperature before serving. When enjoyed straight from the fridge, hummus can be stiffer and its flavors more muted. Letting it sit out for about 30 minutes before serving will bring out its best qualities.
- Don’t Rush the Blending: Achieving that super-smooth, creamy hummus can take a good few minutes in a food processor or blender. Be patient! Allow the machine to run for longer than you might expect, stopping periodically to scrape down the sides of the bowl. This ensures all ingredients are thoroughly blended and prevents any chunky bits.
- Season to Perfection: After the initial blend, always taste your hummus. This is your opportunity to truly personalize it. Adjust the lemon juice for more zing, add extra salt for overall flavor enhancement, or include more garlic for a bolder kick. Letting the hummus sit and meld for an hour or two (or even overnight) can also significantly deepen and develop the flavors.
- Whip Tahini & Lemon First: For the fluffiest hummus, start by blending the tahini and lemon juice together for a minute or two before adding other ingredients. This creates an emulsion that results in a lighter, creamier base.
Storage Instructions for Fresh & Frozen Hummus
Making a batch of homemade hummus in advance is an excellent idea, as the flavors tend to deepen and meld beautifully overnight. Once blended, your fresh hummus will store perfectly in an airtight container in the refrigerator for 4-5 days. To maximize freshness and prevent the surface from drying out, pour a thin layer of olive oil over the top before sealing the container.
This classic homemade hummus is also remarkably freezer-friendly, making it ideal for meal prep and ensuring you always have a healthy snack readily available. Store it in freezer-safe containers, individual ice-cube trays (for portion control), or sturdy Ziplock/Stasher bags for up to 3 months. When thawing, you might notice a slight change in texture, possibly becoming a little grainy. This is easily remedied! Simply give it a good mix or a quick re-blend in your food processor for a few seconds to restore its creamy consistency before serving.
What to Dip In Hummus? Endless Serving Possibilities!
Hummus is incredibly versatile and pairs well with a vast array of dippers and culinary creations. Here are some of our favorite ways to enjoy this creamy chickpea delight:
- Fresh Crudites: Healthy and refreshing, enjoy hummus with crisp celery sticks, cool cucumber slices, vibrant bell pepper strips (any color!), and crunchy carrot sticks.
- Crispy Crackers: A classic pairing, especially with homemade rosemary crackers for an elevated experience.
- Pita Chips or Tortilla Chips: For a satisfying crunch, both pita chips and tortilla chips are excellent vehicles for scooping up hummus.
- Warm Pita Bread: The traditional and arguably best way to enjoy hummus. Warm pita bread is soft, fluffy, and perfect for soaking up all that creamy goodness.
- Oven-Baked Sweet Potato Fries: The sweet and savory combination of sweet potato fries dipped in tangy hummus is surprisingly delicious.
- In a Salad/Buddha Bowl: Add a generous dollop of hummus to your favorite salad or nourish bowl for extra creaminess, protein, and flavor, perfect for dipping fresh veggies.
- Fresh Bread or Toast: A simple yet satisfying snack or breakfast option.
- As a Dressing: Thin out hummus with a little water or plant-based milk to create a creamy salad dressing.
Beyond dipping, homemade hummus truly shines as a spread or ingredient in various meals. Use it generously over pizza bases for a unique twist, as a flavorful condiment on burgers, in vibrant wraps, and as a healthy spread in sandwiches. You can even thin it with a little plant-based milk to create a creamy and surprisingly delicious pasta sauce! Get creative and let this versatile dip elevate your meals.
Explore More Delicious Vegan Dip Recipes
If you’re a fan of flavorful plant-based dips, you’re in the right place! Here are more fantastic vegan dip recipes from our collection to inspire your next snack or appetizer spread:
- Hearty Vegan Bean Dip
- Quick & Easy Avocado Spread
- Savory Pinto Bean Dip
- Exotic Curry White Bean Dip
- Classic Vegan French Onion Dip
- Creamy Vegan Spinach Dip
- Bold Spicy Lentil Kalamata Spread
Photos by Alfonso Revilla
Easy Homemade Hummus Recipe
5 minutes
0 minutes
5 minutes
6 – 10

Equipment
-
Measuring spoons
-
Measuring Cups
-
Food Processor
Ingredients
- 1 (15-ounce) can of garbanzo beans, drained and rinsed
- 2 garlic cloves, peeled
- ¼ cup of high-quality tahini
- 2 tablespoons of fresh lemon juice
- 3 tablespoons of ice-cold water (adjust for desired consistency)
- 1 teaspoon of ground cumin
- Salt, to taste (Kosher or sea salt recommended)
- Garnish: 1 tsp of Olive oil and ½ tsp of cumin (optional)
Instructions
-
In a food processor or high-speed blender, combine the drained and rinsed garbanzo beans, peeled garlic cloves, tahini, fresh lemon juice, ice-cold water, and ground cumin.
-
Process on high speed for several minutes, stopping occasionally to scrape down the sides of the bowl with a spatula, until the mixture is completely smooth and creamy. If the hummus is too thick, add an extra tablespoon of ice water and blend again until the desired consistency is reached.
-
Taste the hummus and adjust seasonings as needed. Add more salt for flavor, lemon juice for brightness, or garlic for a bolder taste. Blend briefly after each adjustment.
-
Transfer to a serving bowl. To garnish, drizzle with a teaspoon of olive oil and sprinkle with ½ teaspoon of cumin (or other desired garnishes like paprika, fresh parsley, or pine nuts). Serve immediately or chill for flavors to meld further.
Notes
- Use high-quality tahini: Not all brands were created equally. To avoid overly bitter tahini, you may need to experiment. We love Soom tahini.
- Use ice-cold water: While the exact science isn’t fully understood, using ice-cold water helps create a super light and fluffy hummus texture.
- Enjoy it at room temperature: Hummus tastes best when its flavors are fully developed. When enjoying it from the fridge, it’s best to let it sit for at least 30 minutes to reach room temperature for optimal flavor and texture.
- Don’t rush it: Making super-smooth hummus can take a good few minutes of blending. Give the machine breaks to scrape down the sides, ensuring an evenly creamy consistency.
- For ultra-smooth hummus: Consider the 30-minute method detailed in the article, which involves simmering chickpeas with baking soda to soften the skins for a truly restaurant-quality texture.
Nutrition
Carbohydrates: 23g
Protein: 8g
Fat: 7g
Saturated Fat: 1g
Polyunsaturated Fat: 3g
Monounsaturated Fat: 2g
Sodium: 16mg
Potassium: 269mg
Fiber: 6g
Sugar: 4g
Vitamin A: 31IU
Vitamin C: 4mg
Calcium: 55mg
Iron: 3mg
Additional Info
Toni Okamoto
Snack, Appetizer, Dip
Middle Eastern, Mediterranean
Food processor, Blender
Vegan, Plant-Based, Gluten-Free
Tried this recipe?
Please tag us at @PlantBasedOnABudget! 🙂