

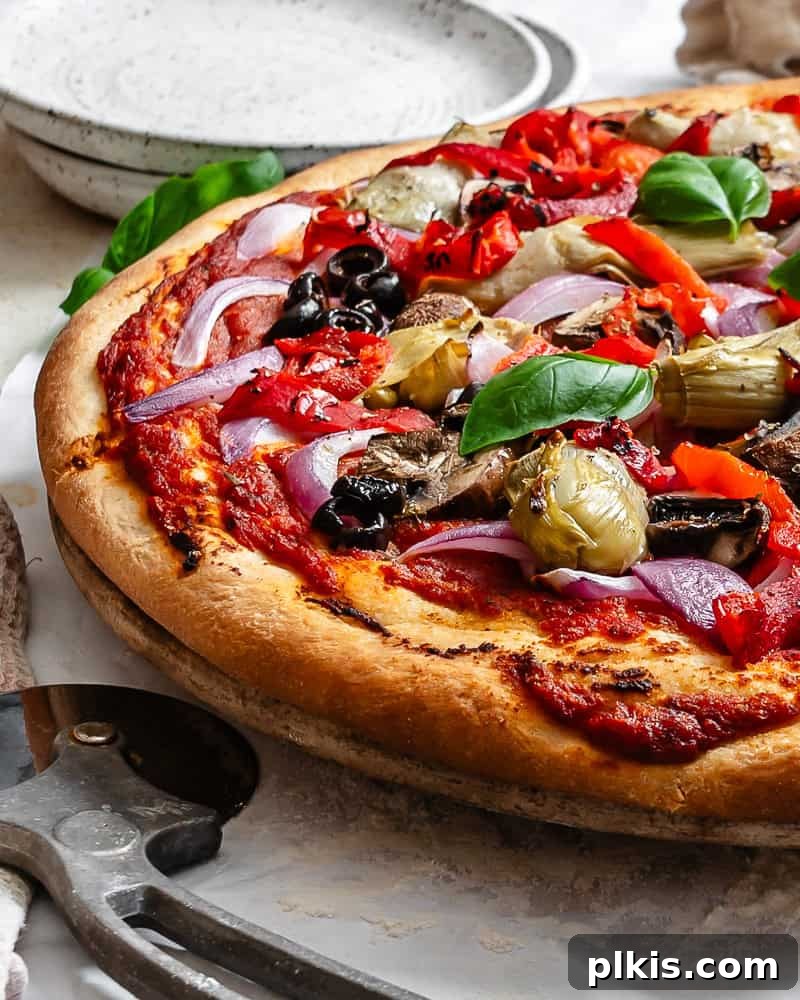
Craving a delicious, restaurant-quality pizza but want to keep it plant-based and budget-friendly? Look no further! This recipe guides you through making incredibly easy vegan pizza dough right at home. Using just 6 simple pantry ingredients, you can whip up a perfectly pliable and flavorful dough in under an hour – whether you prefer to knead by hand or use a stand mixer. This versatile dough is not only ideal for your next pizza night, but it’s also perfect for making ahead and stores beautifully in the freezer, ensuring you’re always ready for a spontaneous pizza party. Get ready to enjoy a crisp, chewy crust loaded with your favorite vegan toppings!
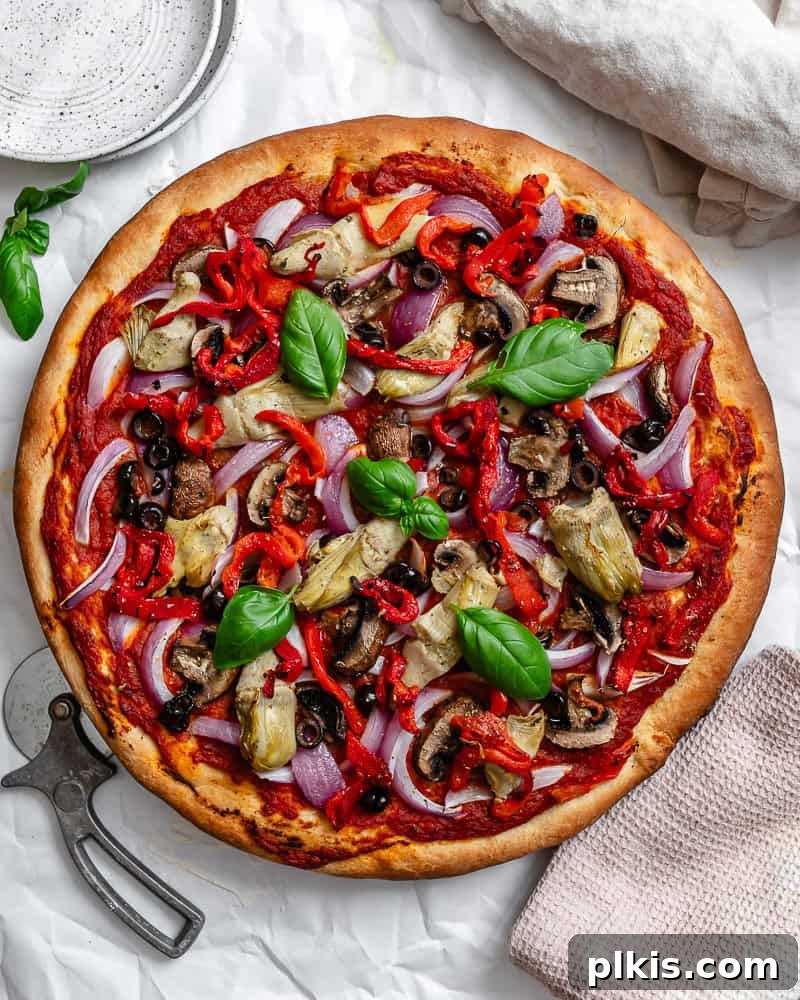
Why You’ll Fall in Love with This Easy Vegan Pizza Dough Recipe
While the convenience of store-bought vegan pizza or a quick takeout order is undeniable, there’s an unparalleled joy and satisfaction in crafting homemade pizza dough from scratch. This recipe elevates your pizza experience, transforming an ordinary meal into a delightful culinary adventure. Here’s why this easy vegan pizza dough will quickly become a staple in your kitchen:
- Unbeatable Flavor and Texture: Forget bland, cardboard-like crusts. Our homemade dough bakes up into a gloriously crisp exterior with a soft, chewy interior, far surpassing anything you can buy ready-made. The fresh ingredients and hands-on process contribute to a depth of flavor that’s truly unmatched, making every bite a delight for your taste buds.
- Remarkably Simple and Quick: Don’t be intimidated by the idea of making dough! This recipe is designed with beginners in mind, requiring minimal fuss and simple techniques. Thanks to rapid-rise yeast, your dough will be ready with significantly less rising time than traditional recipes, meaning you can have fresh, delicious pizza on the table in under an hour, perfect for busy weeknights.
- Budget-Friendly Goodness: Making pizza at home is inherently more economical than frequenting pizzerias or buying expensive gourmet frozen options. This recipe uses basic, inexpensive pantry staples like flour, yeast, sugar, salt, water, and oil, helping you save money without sacrificing quality or incredible taste.
- Naturally Vegan and Wholesome: Crafted entirely from plant-based ingredients, this dough is naturally vegan, making it perfect for those following a plant-based diet or anyone looking to enjoy a lighter, more wholesome meal. There are no tricky or hard-to-find substitutions needed; all ingredients are readily available at any grocery store.
- Incredibly Versatile for Any Topping: This dough serves as the perfect canvas for endless culinary creativity. Whether you’re topping it with classic marinara and melty vegan mozzarella, or exploring adventurous flavors like our spicy vegan BBQ pizza or exotic Thai pizza, this robust and flavorful crust holds up beautifully to all your favorite fixings, ensuring a satisfying meal every time.
- Fun for the Whole Family: Pizza night transforms into an interactive and enjoyable activity when everyone gets involved in making the dough and customizing their own slices. It’s perfect for a cozy date night in, a lively family gathering, or simply a fun and rewarding cooking project for yourself.
Essential Ingredients for Your Perfect Vegan Pizza Dough
Crafting this incredible vegan pizza dough requires just a handful of straightforward, pantry-friendly ingredients. Each component plays a crucial role in achieving the desired texture, flavor, and rise. Below, we delve into the specifics of what you’ll need and why these ingredients are key to a successful homemade crust:
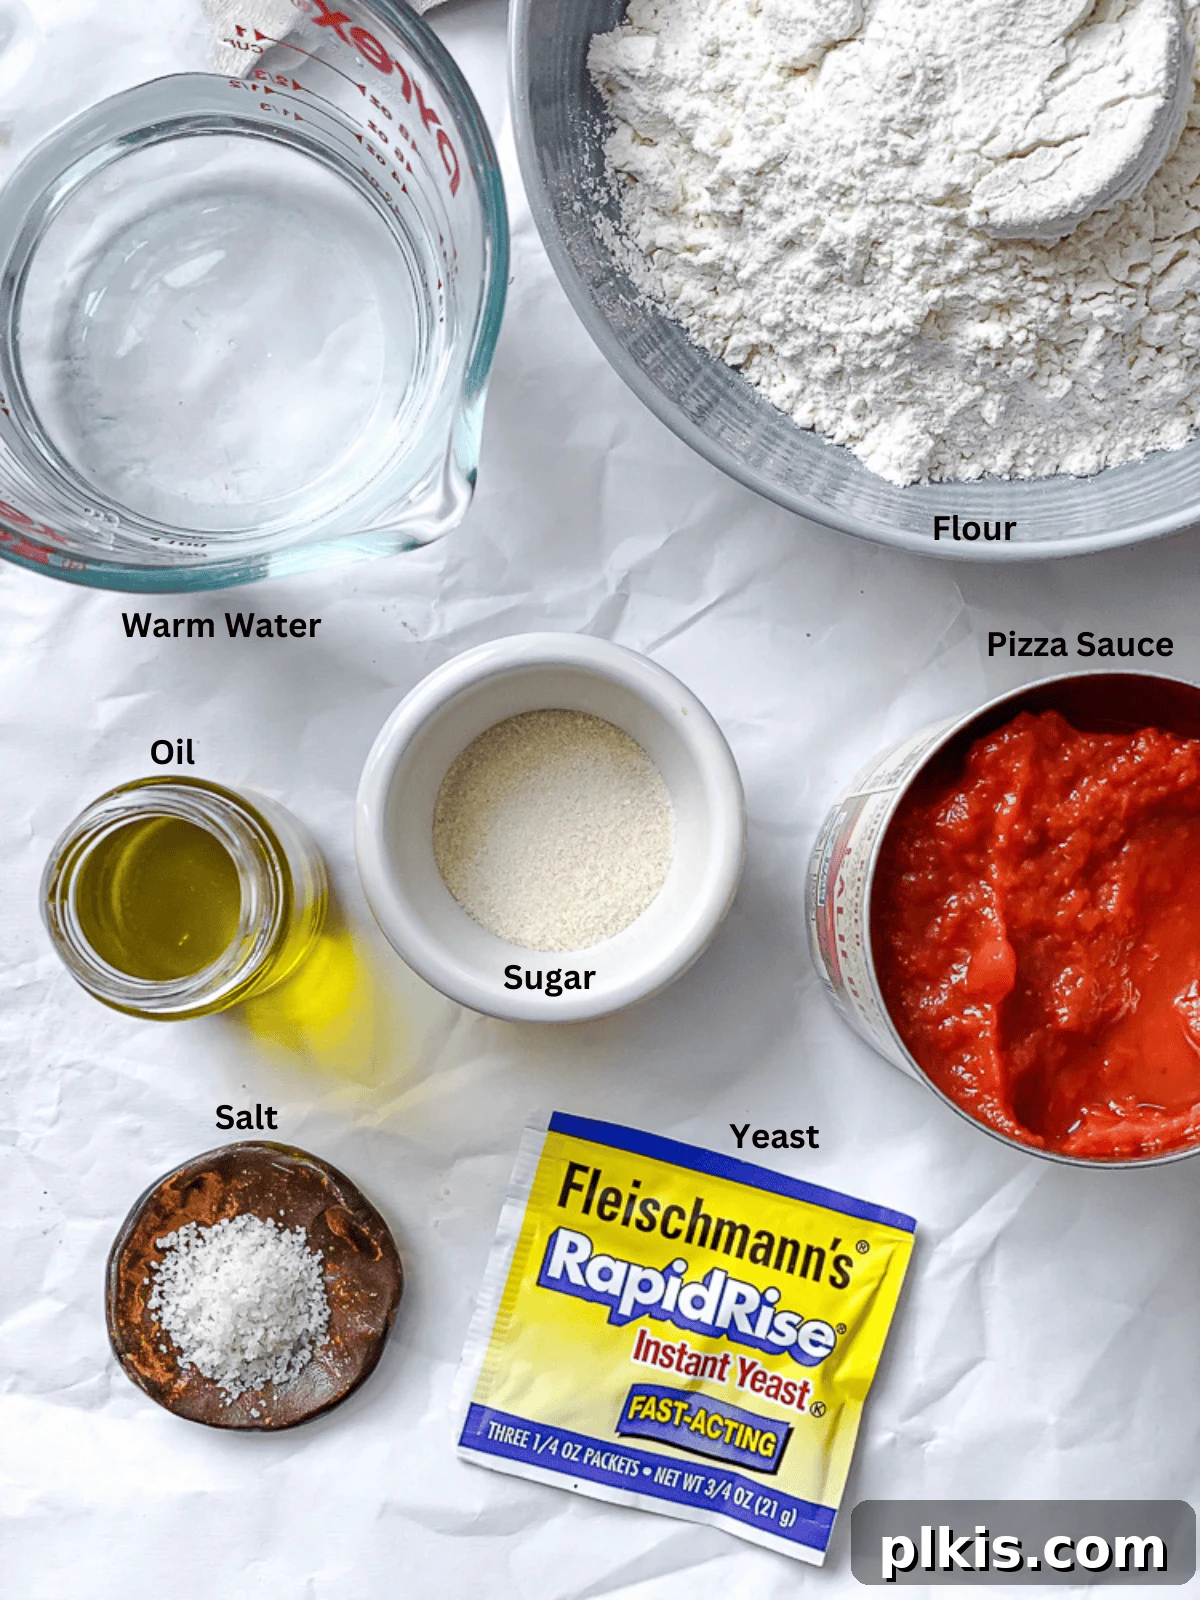
- All-Purpose Flour (1-¾ to 2-¼ cups): This versatile flour forms the structural base of our pizza dough. Its protein content allows for good gluten development, which is essential for that signature chewy yet tender crust. For an even chewier texture, you can experiment with bread flour, which has a higher protein level. If you prefer a more rustic flavor, a small portion of whole wheat flour can be substituted, though it might result in a slightly denser dough. Always start with the lower amount and add more as needed until the dough reaches the right consistency.
- Rapid-Rise Yeast (1 envelope): The secret to our quick, effortless rise! Also known as instant yeast or fast-acting yeast, this variety is designed to be highly active and doesn’t require prior proofing. This means you can mix it directly with your dry ingredients, significantly reducing the overall preparation time and ensuring your dough is ready for baking in under an hour.
- Granulated Sugar (1 ½ teaspoons): Don’t worry, it won’t make your pizza sweet! A small amount of sugar serves as immediate fuel for the yeast, helping it activate quickly and produce the carbon dioxide bubbles that give the dough its airy texture. It also plays a vital role in achieving that beautiful, golden-brown crust during baking.
- Salt (¾ teaspoon): Beyond enhancing flavor, salt is a critical ingredient for balancing the dough’s taste profile and regulating yeast activity. It also helps strengthen the gluten structure, leading to a more elastic dough that’s easier to work with and achieves a better, more consistent rise.
- Very Warm Water (⅔ cup, 120°-130ºF / 49°-54°C): The correct water temperature is paramount for yeast activation. Water that is too cold will hinder or prevent the yeast from becoming active, while water that is too hot can kill the yeast entirely, resulting in a flat, dense dough. Aim for a temperature that feels comfortably warm to the touch, similar to a warm bath, to ensure your yeast thrives.
- Corn or Vegetable Oil (3 tablespoons): Adding oil contributes significantly to the dough’s tenderness, pliability, and subtle richness. It also makes the dough less sticky and easier to handle during kneading and shaping. For an added layer of flavor, especially in Mediterranean-style pizzas, a good quality olive oil can be used as a delicious alternative.
Beyond the dough itself, you’ll want to gather your favorite vegan pizza sauce/marinara, a generous amount of vegan cheese, and an exciting array of fresh, delicious toppings. For a wealth of creative topping ideas and inspiration that pair perfectly with this crust, be sure to explore our comprehensive vegan calzone recipe, which shares many versatile plant-based fixings suitable for any pizza!
Step-by-Step Guide to Crafting Your Perfect Vegan Pizza Dough
Making homemade vegan pizza dough is a surprisingly straightforward process that yields incredibly rewarding results. Follow these detailed steps to create a flexible, flavorful crust that’s ready to support all your favorite toppings, transforming your pizza night into a culinary triumph.
Preparing Your Easy Vegan Pizza Dough
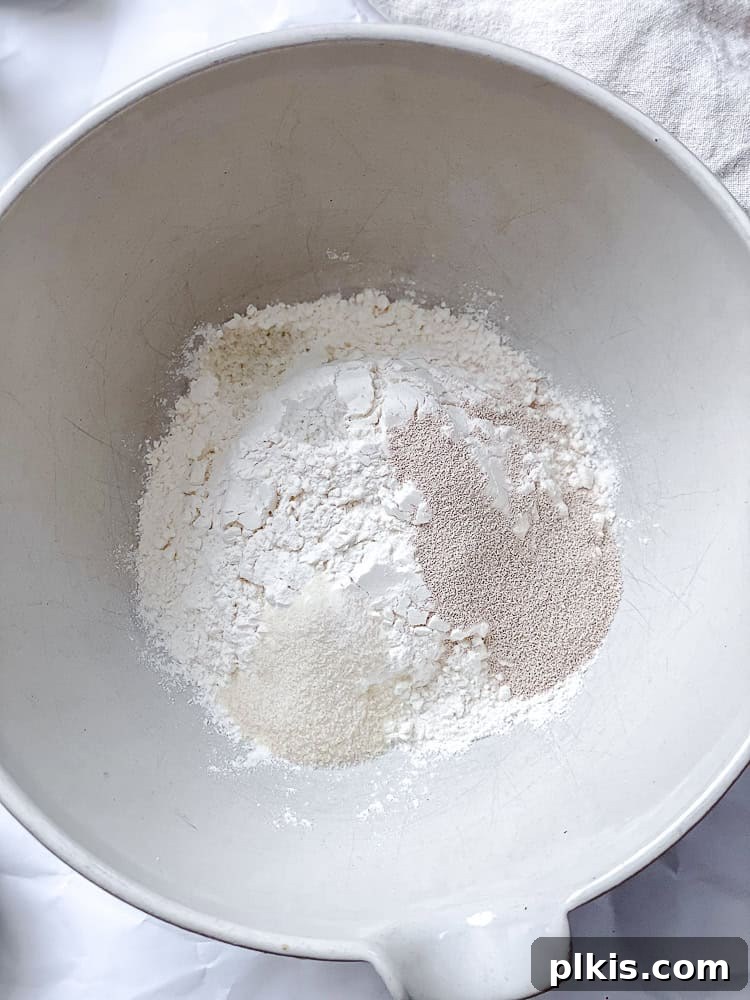
Step 1: Prepare Your Oven and Dry Ingredients. Start by preheating your oven to 425°F (220°C) if you intend to bake your pizzas immediately after preparing the dough. For an exceptionally crisp and golden crust, a valuable tip is to place a pizza stone or a heavy-duty baking pan in the oven as it preheats. This ensures it’s piping hot when the pizza goes in. In a large mixing bowl, combine the initial 1 cup of all-purpose flour, the entire envelope of rapid-rise yeast, the granulated sugar, and the salt. Whisk these dry ingredients together thoroughly for about 30 seconds to ensure they are evenly distributed before introducing any liquids. This helps in uniform yeast activation.
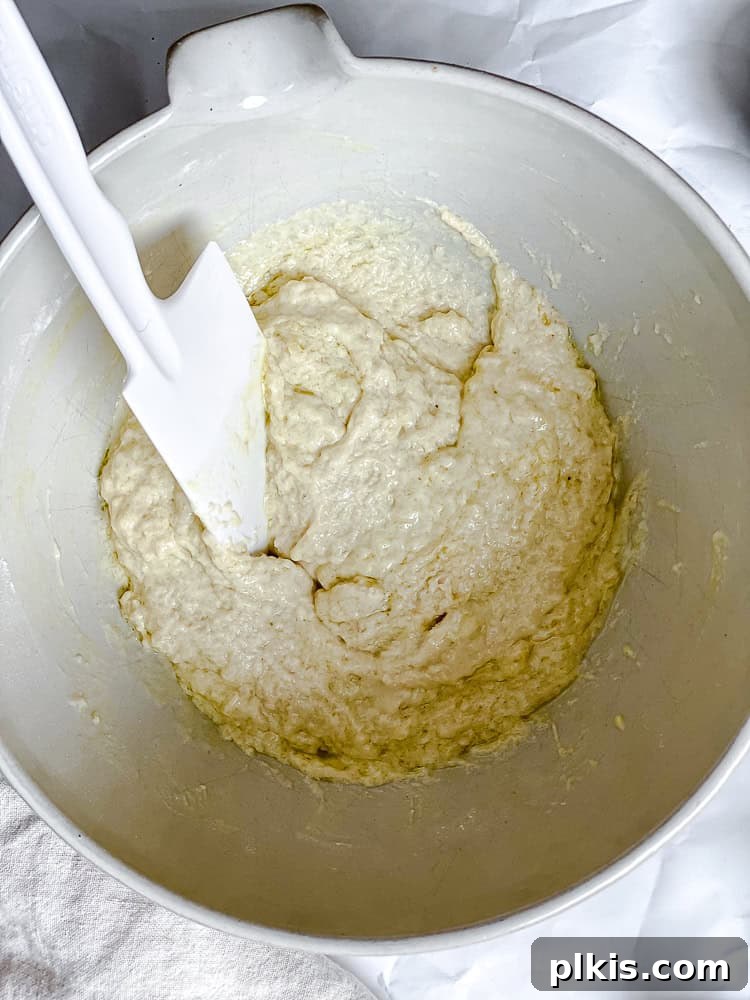
Step 2: Incorporate Wet Ingredients and Form the Dough. Now, carefully add the warm water (ensuring it’s within the ideal temperature range of 120°-130ºF or 49°-54°C to properly activate the yeast without damaging it) and the corn or vegetable oil to the dry mixture. Using a sturdy spoon or a stand mixer with a dough hook, mix vigorously for about one minute. The mixture should become well blended and start to form a shaggy, cohesive dough. Gradually incorporate the remaining flour, adding one to two tablespoons at a time, mixing thoroughly after each addition. Continue this process until the dough comes together, forming a soft, slightly tacky ball that is manageable and pulls away cleanly from the sides of the mixing bowl.
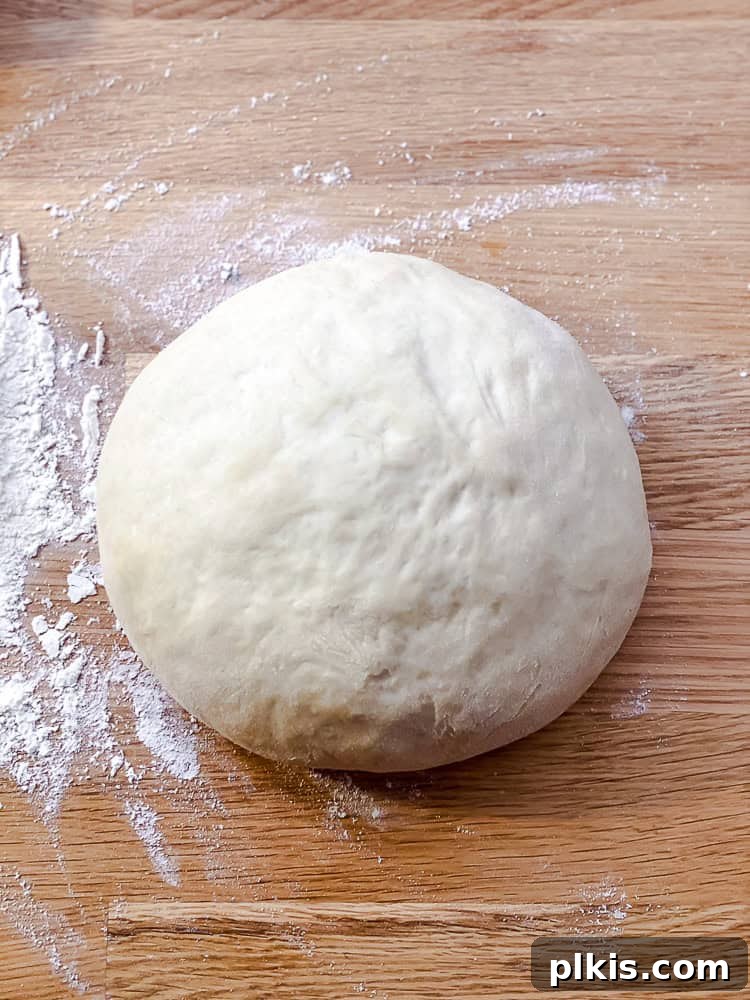
Step 3: Knead and Rest for Optimal Texture. Transfer the newly formed dough onto a clean, lightly floured surface. Begin kneading the dough consistently for 8-10 minutes (or 3-5 minutes if using a stand mixer with a dough hook) until it transforms into a smooth, supple, and elastic ball. This kneading process is absolutely vital for developing the gluten strands, which are responsible for giving your pizza crust its signature chewiness and structure. Once kneaded to perfection, form the dough into a neat ball, place it back into a lightly oiled bowl, cover it with plastic wrap or a clean kitchen towel, and allow it to rest for a brief 10 minutes. This short resting period is crucial as it allows the gluten to relax, making the dough much easier to stretch and shape in the next step. (Note: If you were using traditional instant or active dry yeast, you would typically allow for a longer rise of 30-60 minutes, or until doubled in size, at this stage to achieve a sufficient proof.)
To knead the dough effectively by hand, use the heels of your hands to push the dough away from you in a rolling motion, applying firm pressure. Then, pull the dough back up and towards you, folding it over itself. Repeat this ‘fold and push’ motion rhythmically, rotating the dough a quarter turn after each push, until it transforms into a smooth, non-sticky, and elastic ball. You’ll feel the dough become more pliable and less resistant as the gluten develops. A good indicator is when the dough no longer sticks to your hands or the work surface.
Assembling and Baking Your Perfect Vegan Pizza
With your perfectly prepared dough rested and ready, it’s time for the exciting part: transforming it into a delicious pizza!
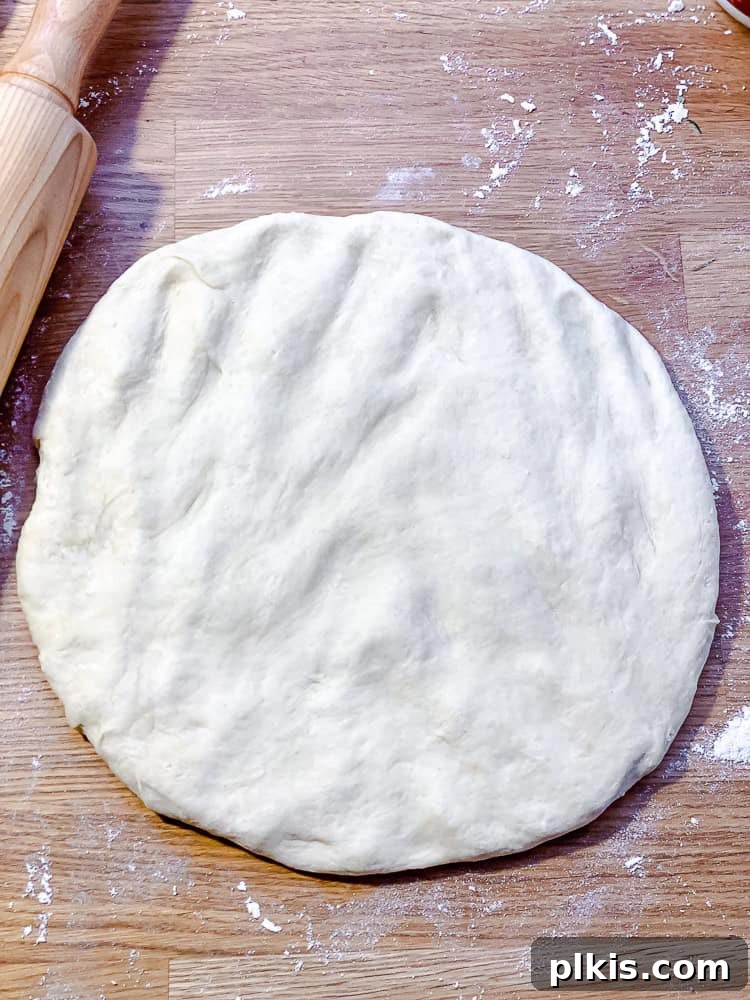
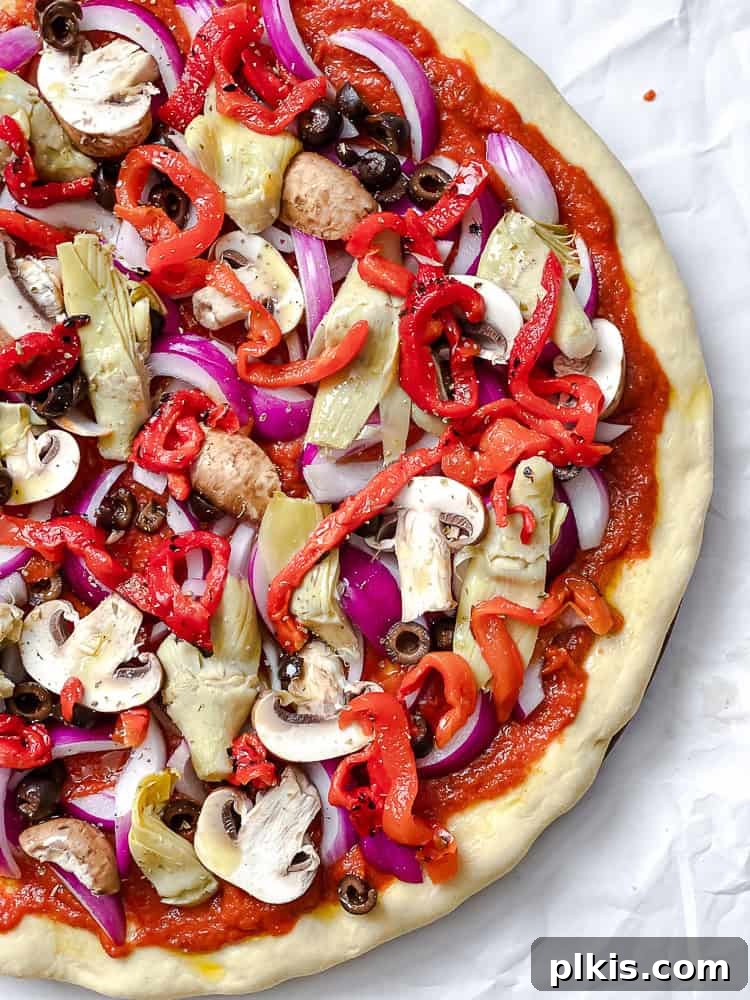
Step 4: Shape Your Dough to Perfection. After its short rest, your dough should be noticeably more relaxed and easier to work with. Lightly flour your hands and your chosen work surface (a clean countertop works best). Gently begin to stretch the dough outwards from the center, using your floured fingertips. Continue stretching and rotating the dough until it fills a lightly greased pizza pan or baking sheet. Alternatively, you can shape it on the counter into a 12-inch circle for a traditional, regular crust, or a 9-inch circle if you prefer a thicker, deep-pan style pizza. Try to avoid using a rolling pin if possible, as hand-stretching helps to preserve the natural air bubbles created during kneading, which contributes to a lighter, airier, and more authentic crust. If the dough resists stretching or shows signs of tearing, simply cover it loosely with a towel and let it rest for another 5-10 minutes; this allows the gluten to further relax, making it more pliable.
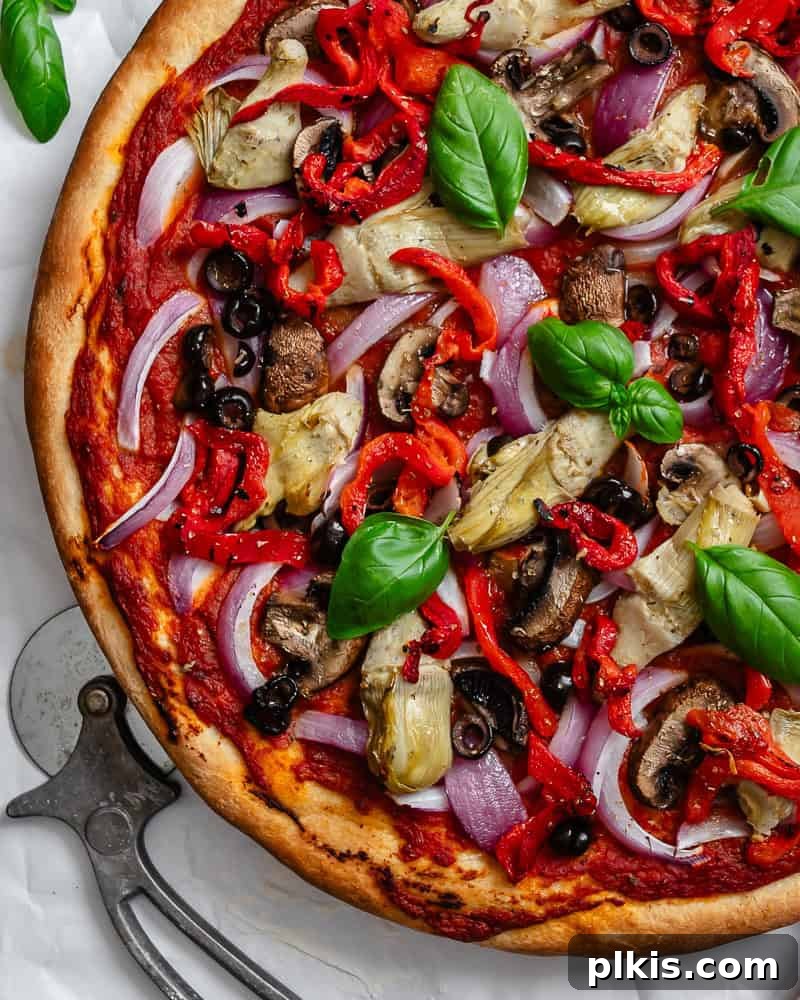
Step 5: Top and Bake to Golden Perfection. Once your dough is perfectly shaped and positioned, it’s time to layer on the flavor! Spread a thin, even layer of your favorite vegan pizza sauce across the dough, leaving a small border for the crust. Remember, less is often more with sauce; too much can make your crust soggy. Next, generously sprinkle your chosen vegan cheese and arrange an abundance of your fresh, delicious toppings. Carefully transfer your topped pizza to the pre-heated pizza stone or baking sheet (if using) on the lowest rack of your preheated oven. Bake for 12-15 minutes for a regular or thin crust, or extend the baking time to 20-23 minutes for a deep-pan pizza. The pizza is ready when the crust is beautifully crisp and golden brown, and the vegan cheese is melted, bubbly, and slightly caramelized. Carefully remove from the oven, allow to cool for a minute or two, then slice, serve, and savor your incredible homemade vegan masterpiece!
Frequently Asked Questions About Homemade Vegan Pizza Dough
For the most part, yes, traditional pizza dough is naturally vegan. The fundamental ingredients—flour, water, yeast, and salt—are all plant-based. Many authentic Italian pizza recipes adhere strictly to these simple components. However, it’s important to exercise caution, particularly with store-bought pizza doughs or when ordering from certain pizzerias. Some commercial dough recipes might include dairy products like milk powder or butter, or even eggs, to alter the texture or enrich the flavor. Therefore, always make it a habit to check ingredient labels carefully if you’re purchasing pre-made dough, or explicitly ask your server or restaurant if their pizza dough contains any animal-derived ingredients to ensure it aligns with a vegan diet.
Absolutely, active dry yeast can be used as a substitute for rapid-rise yeast, but it requires a slightly different approach and an additional step. Firstly, you should use about 25% more active dry yeast than rapid-rise yeast (so if the recipe calls for one packet of rapid-rise, use approximately 1 ¼ packets of active dry). The key difference is that active dry yeast needs to be “proofed” or activated before being mixed with the dry ingredients. To do this, combine the active dry yeast with the warm water (aim for a temperature between 105-115°F or 40-46°C – slightly cooler than for rapid-rise) and a pinch of sugar in a small bowl. Let this mixture sit for 5-10 minutes until it becomes foamy and bubbly, indicating the yeast is active and ready. After proofing, proceed to mix the dough as instructed, but allow for a longer initial rise. The dough will need to rest in a warm place for 30-60 minutes, or until it has clearly doubled in size, before you move on to shaping and baking.
Yes, definitely! A stand mixer equipped with a dough hook attachment is an excellent tool for preparing this vegan pizza dough, making the process even more effortless and efficient, especially if you prefer to avoid manual kneading. After initially combining the dry and wet ingredients in the mixer bowl, attach the dough hook. Start mixing on a low or slow setting, allowing the machine to do the hard work. The mixer will effectively knead the dough, transforming it from a shaggy mixture into a soft, smooth, and elastic ball in approximately 3-5 minutes. This method not only saves your arms but also ensures consistent and thorough kneading for optimal gluten development.
Knowing when your dough is perfectly kneaded is crucial for a great crust, and there are several indicators. After the kneading process (whether by hand or machine), the dough should feel smooth, supple, and elastic to the touch. It should no longer be excessively sticky or lumpy, and when you gently press it with a finger, it should slowly spring back into place. The most reliable test is the “windowpane test”: take a small piece of dough (about the size of a golf ball) and gently stretch it between your fingers. If you can stretch it thin enough to see light passing through it without the dough tearing, it means the gluten has been sufficiently developed, and your dough is ready. If it tears easily, continue kneading for a few more minutes and re-test.
The best and most traditional method for stretching pizza dough is by hand, as this helps to preserve the natural air pockets within the dough, leading to a lighter and more airy crust. Begin by gently pressing the dough with your fingertips from the center outwards, gradually working your way to the edges. Rotate the dough continuously as you stretch it to create an even circle. If you desire a chewier crust, you can leave the edges slightly thicker. While a rolling pin can be used, it tends to force out those beneficial air bubbles, potentially resulting in a denser crust. If you encounter resistance or find the dough tearing while you’re shaping it, this indicates that the gluten is too tight. Simply cover the dough with a clean kitchen towel or plastic wrap and let it rest for another 10-15 minutes. This short rest allows the gluten to relax, making the dough much more pliable and easier to stretch without any tearing.
Expert Tips for Crafting the Best Vegan Pizza Crust Every Time
Transform your homemade vegan pizza from good to extraordinary with these tried-and-true expert tips:
- Master the Knead for Perfect Texture: As emphasized in our instructions, proper kneading is absolutely paramount for a perfectly chewy and airy crust. Aim for a dough that feels smooth, elastic, and slightly tacky. Under-kneading results in a dense, crumbly crust that lacks structure, while over-kneading can lead to a tough, rubbery texture. Use the “windowpane test” as your guide; it’s the most reliable way to know when your gluten development is just right.
- Embrace the Slow Rise for Enhanced Flavor: While rapid-rise yeast gets the job done quickly, a slow, cold fermentation in the refrigerator can significantly deepen the flavor profile and vastly improve the texture of your dough. If using instant or active dry yeast, prepare the dough, form it into a ball, and allow it to slowly rise in the fridge for 24-48 hours. This prolonged fermentation develops complex, nuanced flavors and often creates a more tender crust with larger, more desirable air pockets. Just remember to bring the dough back to room temperature for about an hour before shaping and baking.
- Infuse Flavor Directly into the Dough: Don’t limit the flavor to just your toppings! You can easily boost this basic dough by incorporating dried herbs and spices directly into the dry ingredients. Try adding a teaspoon of garlic powder, onion powder, dried oregano, a blend of Italian seasoning, or a pinch of red pepper flakes for a subtle kick. These additions will create a more aromatic and flavorful crust that complements your toppings beautifully.
- Customize Your Crust Thickness to Your Liking: This versatile dough can be adapted to any preferred crust style. For a thin and exquisitely crispy pizza, stretch the dough as thinly as possible. For a classic, satisfying regular crust, aim for about a 12-inch circle. If you crave a thick, substantial deep-dish style, shape it into a 9-inch circle with higher, robust edges. Always remember to adjust your baking time accordingly – thinner crusts will bake faster, while thicker ones require more time in the oven.
- Utilize a Pizza Stone or Baking Steel for Ultimate Crispness: For the ultimate crispy base that rivals pizzeria quality, a preheated pizza stone or baking steel is an indispensable tool. These specialized surfaces absorb and retain a significant amount of heat, providing a crucial burst of intense heat to the bottom of the dough as soon as it’s placed in the oven, effectively mimicking a professional pizza oven. If you don’t own one, placing an inverted heavy-duty oven tray or a cast-iron pan in the oven while it preheats will yield similar excellent results.
- Avoid Overloading Your Toppings: While it’s incredibly tempting to pile on every single delicious topping you can imagine, resist the urge to overload your pizza. Too many wet or heavy toppings can release excess moisture, leading to a soggy crust that struggles to cook through evenly and can collapse under the weight. Find a balanced ratio of sauce, cheese, and toppings that allows your perfectly crafted crust to truly shine.
- Brush the Crust Edge for Golden Perfection: For a beautifully golden, slightly crisp, and deliciously appealing crust edge, lightly brush the exposed dough rim with a little olive oil (or melted vegan butter) just before baking. This simple step not only adds a lovely sheen but also enhances the texture and flavor of the crust itself.
Make-Ahead and Storage Instructions for Vegan Pizza Dough
One of the many fantastic advantages of this easy vegan pizza dough recipe is its excellent suitability for make-ahead preparation and various convenient storage methods. This impressive flexibility means you can always have delicious, fresh, homemade pizza dough at your fingertips whenever the craving strikes, making spontaneous pizza nights a breeze!
Refrigerator Storage:
After preparing your vegan pizza dough, you have the option to store it in the refrigerator for several days. Simply place the dough in a lightly oiled bowl, ensuring there’s ample room for it to expand slightly as it continues a slow proof. Cover the bowl tightly with plastic wrap or a secure lid. Your dough will remain fresh and viable in the fridge for up to 3 days. During this chilled storage period, the dough will undergo a gentle, slow fermentation process, which actually works to deepen its flavor, creating a more complex and satisfying taste, and often results in a better texture. When you’re ready to transform it into a pizza, remove the dough from the refrigerator about an hour beforehand to allow it to gradually come to room temperature. Gently punch it down to release any accumulated air, then proceed to shape it, add your desired toppings, and bake as usual.
Freezing Pizza Dough:
For even longer-term storage, this homemade vegan pizza dough freezes beautifully, maintaining its stretchiness, strength, and delicious flavor for up to 3 months. To ensure optimal results when freezing the dough:
- Prepare the Dough for Freezing: Once your yeast pizza dough is fully prepared and kneaded, form it into a tight ball. Lightly brush or rub the surface of the dough with a small amount of oil to prevent it from drying out, then wrap it securely in plastic wrap, making sure there are no air pockets. For an extra layer of protection against freezer burn, place the plastic-wrapped dough into a heavy-duty, freezer-safe Ziplock bag, pressing out as much excess air as possible, or transfer it to a lightly oiled, airtight freezer-safe container. Label with the date.
- Optional Cold Fermentation (for Instant/Active Dry Yeast): If you are specifically using instant yeast or active dry yeast (and NOT rapid-rise yeast), you have the option to allow the dough to undergo a beneficial ‘cold ferment’ in the refrigerator for 24 hours *before* freezing. This initial slow rise contributes to an even softer crust, creates bigger, more desirable air pockets, and develops a more profound, nuanced flavor once baked. It’s important to note that this method is generally not recommended for rapid-rise/fast-acting yeast, as its accelerated nature is best suited for same-day baking or short proofing times.
How to Defrost Pizza Dough:
Proper defrosting is a crucial step to ensure your frozen dough maintains its excellent quality and performance. Here are a few reliable methods:
- Overnight in the Refrigerator (Recommended): The most highly recommended method is to transfer the frozen dough from the freezer to the refrigerator overnight (typically 8-12 hours). This slow, gradual thawing process is ideal as it helps to preserve the dough’s delicate structure and flavor. Once thawed, remove it from the fridge and allow it to come to room temperature for approximately an hour before you proceed to shape and bake.
- Room Temperature Thawing: For a slightly quicker thawing option, you can leave the tightly wrapped dough at room temperature for 4-6 hours. Be mindful of particularly warm environments, as excessive heat can cause the dough to over-proof or rise too quickly before you’re ready to use it.
- Quick Water Bath Method: If you find yourself truly short on time, you can employ a quick water bath method. Place the frozen dough, still securely sealed in its Ziplock bag, into a bowl of barely lukewarm water (not hot!) for 2-3 hours. After this, remove the dough from the bag, place it in a dry, lightly oiled bowl, and let it rest at room temperature for an additional 30-45 minutes to finish warming up and become pliable before shaping.
Important Note on Yeast Types for Storage: It’s crucial to reiterate that rapid-rise yeast is specifically formulated for short proofing times and same-day baking. If your intention is to store your dough for longer periods in the refrigerator or to intentionally utilize a long refrigerated proofing method (often called a ‘cold ferment’ for enhanced flavor), it is strongly recommended to use active dry yeast or standard instant yeast. These yeast varieties are better suited and more stable for extended fermentation processes.
Easy Vegan Pizza Dough

Equipment
-
Measuring Cups
-
Measuring spoons
-
Baking sheet
Ingredients
Servings: 1x
- 1-¾ to 2-¼ cups all-purpose flour
- 1 envelope of rapid rise yeast
- 1 ½ teaspoons of granulated sugar
- ¾ teaspoon of salt
- ⅔ cup of very warm water (120°-130ºF / 49°-54°C)
- 3 tablespoons of corn or vegetable oil
- Your favorite vegan pizza sauce
- Your favorite vegan pizza toppings & cheese
Instructions
-
1. Preheat Oven: Preheat your oven to 425°F (220°C). For the crispiest crust, place a pizza stone or heavy baking sheet in the oven while it preheats.
-
2. Mix Ingredients: In a large bowl, combine 1 cup of all-purpose flour, the rapid-rise yeast, granulated sugar, and salt. Whisk well. Add the warm water (120°-130ºF / 49°-54°C) and oil; mix vigorously for about 1 minute until well blended. Gradually add the remaining flour, a tablespoon or two at a time, until a soft, slightly sticky dough forms a ball and pulls away from the sides of the bowl.
-
3. Knead and Rest: Transfer the dough to a lightly floured surface. Knead for 8-10 minutes until smooth and elastic. Place the dough back into a lightly oiled bowl, cover, and let it rest for 10 minutes.
-
4. Shape Dough: With floured hands, gently stretch the dough to fill a lightly greased pizza pan or baking sheet. Alternatively, roll or stretch the dough on a floured counter into a 12-inch circle for a regular crust, or a 9-inch circle for a deep-pan pizza. Pinch the edges to form a slight rim.
-
5. Top and Bake: Spread a thin layer of your chosen vegan pizza sauce and top with your favorite vegan cheese and toppings. Bake on the lowest oven rack (preferably on your preheated stone/sheet) for 12-15 minutes (for regular/thin crust) or 20-23 minutes (for deep-pan), until the crust is golden brown and the cheese is bubbly.
Notes
- Knead Properly: Ensure the dough is smooth & elastic for a perfectly chewy crust.
- For Better Flavor/Texture: For a deeper flavor, consider a slow rise in the fridge for 24-48 hours using instant/active dry yeast.
- Add Flavor to Dough: Incorporate herbs/spices like garlic powder, oregano, or Italian seasoning into the dry ingredients for an aromatic crust.
- Adjust Thickness: Easily make thick, regular, or thin-crust pizza by adjusting dough thickness and baking time accordingly.