
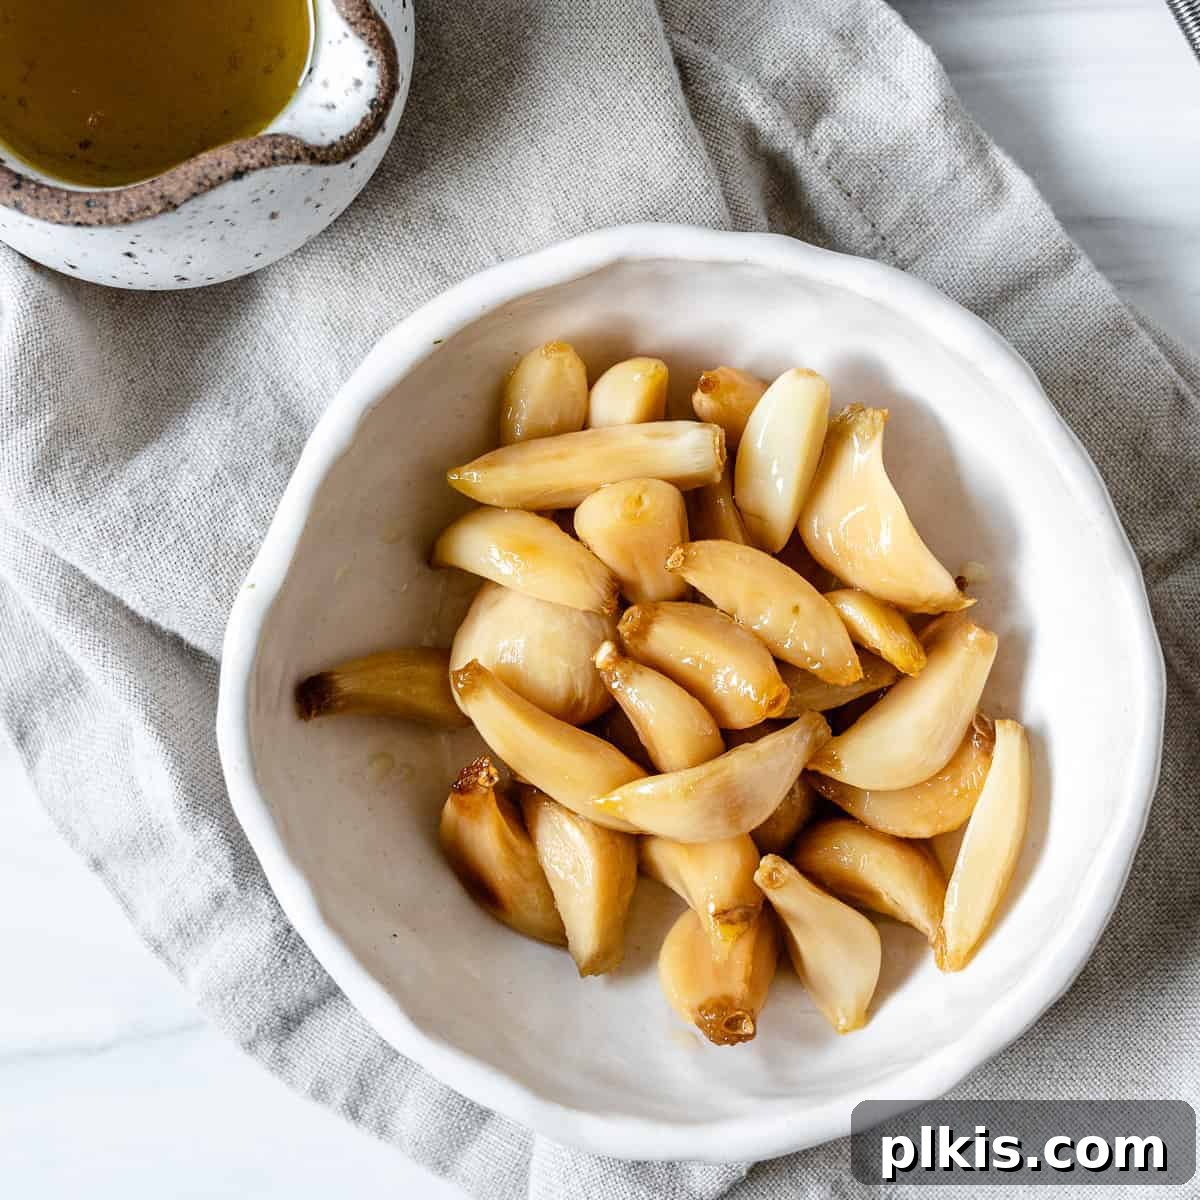
Unlock Mellow Flavor: How to Roast Garlic in a Pan (Quick & Easy!)
Discover the game-changing technique of roasting garlic right on your stovetop in under 20 minutes! This method transforms pungent raw garlic into a luxuriously soft, sweet, and incredibly versatile condiment. Perfect for spreading over crusty bread, enriching roasted vegetables, elevating your favorite pasta dishes, or adding depth to sauces. For the true garlic enthusiast, this quick roasted garlic is an absolute pantry essential. Plus, we’ll share bonus methods for achieving perfect roasted garlic in your oven and even your microwave!
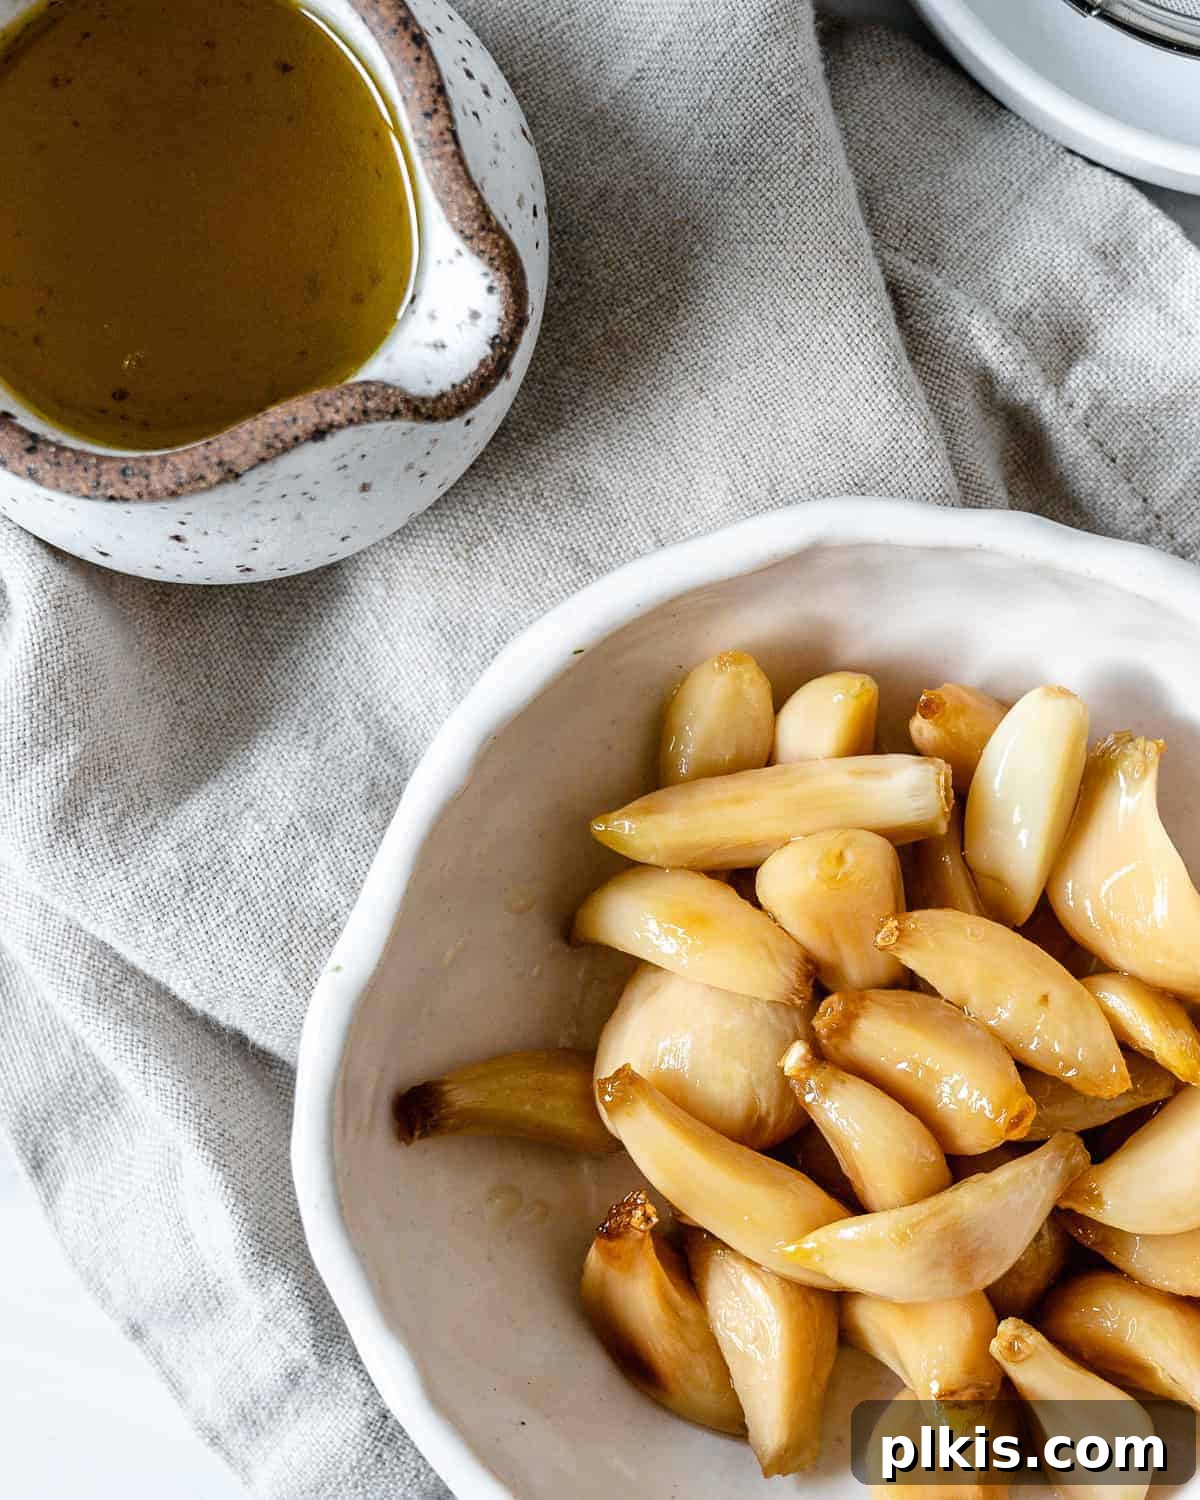
The Irresistible Allure of Pan-Roasted Garlic
If you’re already a devotee of garlic, you’re likely familiar with its transformative power when roasted. The high heat of roasting mellows its sharp edges, bringing out a deep, sweet, and nutty flavor profile. But what if we told you there’s an even faster, more convenient way to achieve this culinary magic? Enter pan-roasted garlic, a stovetop method that not only slashes cooking time but also gifts you with a delightful bonus: aromatic garlic-infused olive oil!
Unlike its raw counterpart, which can sometimes be overwhelmingly pungent and even harsh, pan-roasted garlic offers a wonderfully buttery texture and a smooth, subtly caramelized taste. Cooked gently in oil, it becomes incredibly tender and easy to digest. So smooth, in fact, that after a gentle simmer to perfection, we often find ourselves mashing it with a fork, adding a pinch of flaky salt, and resisting the urge to devour it all in one sitting, spread generously over homemade sandwich bread. It’s truly our favorite way to prepare garlic, unlocking a depth of flavor that complements countless recipes.
This quick and easy stovetop method isn’t just about speed; it’s about culinary versatility. In mere minutes, you’ll have a batch of exquisite roasted garlic cloves (or even a luxurious garlic confit) ready to elevate everything from everyday cooked veggies and pasta to gourmet pizzas, hearty sandwiches, and flavorful wraps. Don’t worry about making too much; leftovers store beautifully in the freezer for several months and can be added directly to dishes from frozen, making meal prep a breeze!
Why Choose the Stovetop for Roasting Garlic?
While oven-roasted garlic has its place, the stovetop method offers several compelling advantages that make it a go-to for many home cooks:
- Speed & Efficiency: Forget preheating a large oven for 45 minutes! Pan-roasting garlic typically takes 15-20 minutes from start to finish, making it perfect for weeknight meals or when you need that roasted garlic goodness in a flash.
- Less Energy Consumption: Using a small saucepan on the stove generally uses less energy than heating a full oven, making it a more environmentally friendly and budget-conscious choice.
- Bonus Garlic-Infused Oil: A significant perk of the stovetop method is the fragrant, savory oil left behind. This “liquid gold” is a flavor powerhouse, ready to be used in dressings, marinades, or simply as a dipping oil.
- Easier to Monitor: With the garlic right in front of you on the stove, it’s easier to keep an eye on its progress, adjust the heat, and prevent burning, ensuring perfect caramelization.
- Consistent Texture: The gentle simmer in oil results in an incredibly consistent, creamy texture throughout the garlic cloves.
Essential Ingredients for Stovetop Roasted Garlic
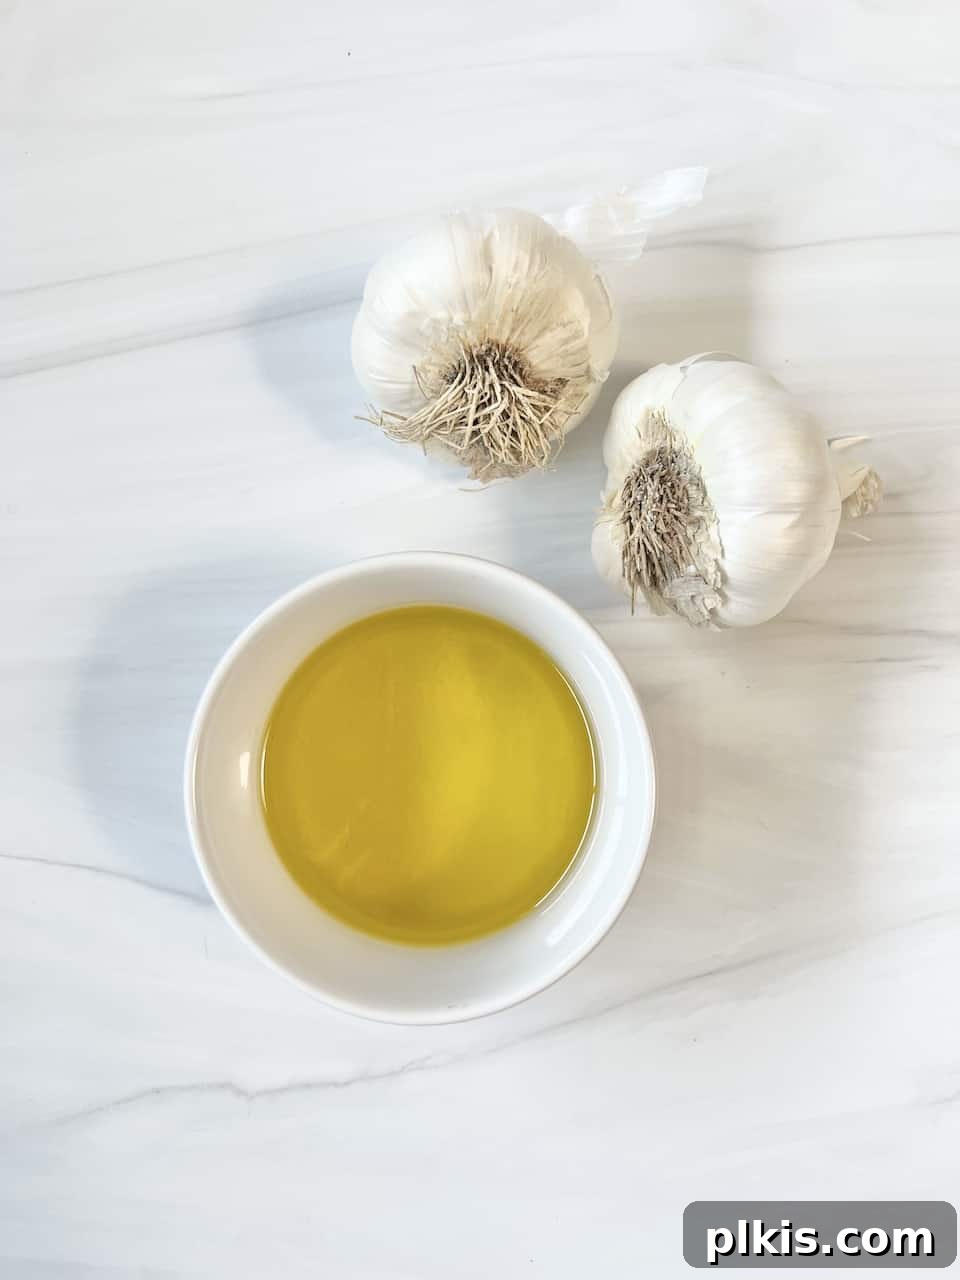
You’ll be delighted to know that transforming garlic into this culinary marvel requires just two fundamental ingredients, along with a dash of patience!
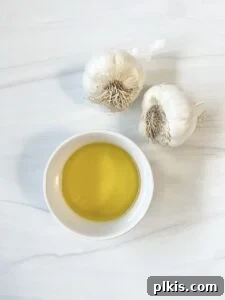
- Garlic: For this recipe, we recommend using about 25 individual cloves, which typically translates to two to three whole heads of garlic. When selecting garlic at the grocery store, look for firm, unblemished heads that feel heavy for their size. Avoid any that show signs of mold, softness, sprouting, or excessive dryness, as these indicate older or compromised quality.
Pro Tip for Prep: To significantly cut down on peeling time, consider purchasing pre-peeled garlic cloves from your local supermarket. While fresh is always best, convenience sometimes wins!
Another clever trick for peeling fresh garlic: place the unpeeled cloves into a lidded container or a mason jar. Shake vigorously for 20-30 seconds. Many of the peels will come right off, and the remaining ones will be much easier to remove.
- Oil: The choice of oil plays a crucial role in both the roasting process and the resulting flavor of your infused oil. We highly recommend using good quality olive oil for its complementary flavor and health benefits. However, neutral cooking oils like avocado oil are also excellent choices, offering a clean backdrop for the garlic’s sweetness to shine. While you can use other oils like canola or vegetable oil, keep in mind that they may not impart as rich or desirable a flavor. For a budget-friendly option, a 50/50 blend of olive oil and a cheaper neutral oil can work well.
Step-by-Step: How to Roast Garlic in a Pan
Pan-roasting garlic is surprisingly straightforward, requiring just a few simple steps to achieve perfect, mellow cloves. Follow these instructions for a quick batch of delicious roasted garlic.
1. Prepare Your Garlic
First and foremost, you’ll need to peel your garlic cloves. Ensure all papery skins are completely removed. A handy trick for easy peeling: place unpeeled garlic cloves into a lidded container or mason jar. Shake vigorously for 20-30 seconds. This action often causes the skins to separate, making the remaining peels incredibly easy to remove by hand.
2. Combine Garlic and Oil
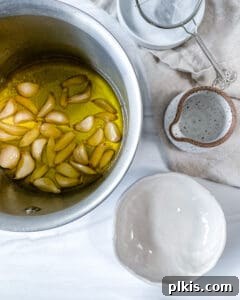
In a small saucepan, combine your peeled garlic cloves with the oil. The oil should generously cover the garlic, but it doesn’t need to completely submerge it unless you are making confit (which we’ll cover next). Place the saucepan over medium heat and bring the oil to a very low simmer. You should see tiny bubbles forming around the garlic, but avoid a rapid boil.
3. Gently Simmer Until Golden and Tender
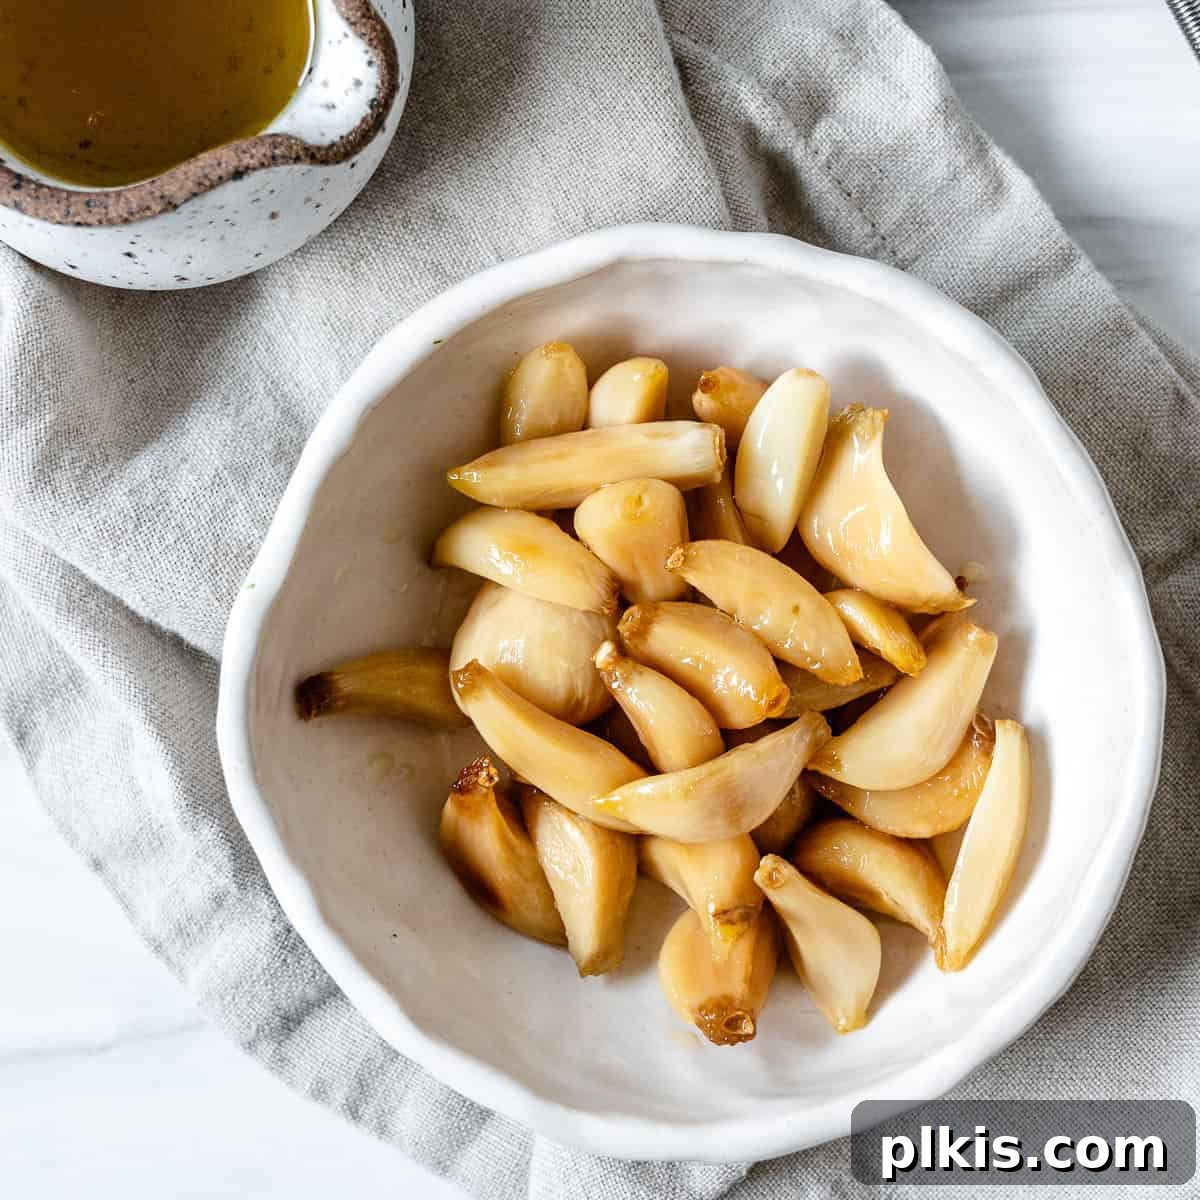
Continue cooking the garlic for approximately 15 minutes. The key is a consistent, low simmer. You’re looking for the cloves to soften completely and take on a beautiful golden color. They should be tender enough to easily pierce with a fork. If you want a deeper caramelization, you can cook for a few more minutes, but always keep the heat low to prevent burning.
4. Cool and Enjoy!
Once the garlic reaches your desired tenderness and color, remove the saucepan from the heat. Allow the garlic to cool slightly in the oil. You can then remove the cloves from the oil to gently smash them with a fork, creating a rustic spread. Alternatively, for an even richer spread, mash the garlic directly into the remaining oil. Your quick roasted garlic is now ready to infuse your meals with incredible flavor!
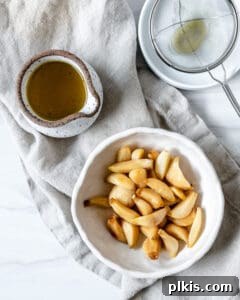
Don’t forget the infused oil! The leftover garlic-infused oil is a culinary treasure. Strain it to remove any small garlic bits, and store it separately. It will provide a wonderfully fragrant and savory flavor to countless dishes.
Elevating Your Garlic: Stovetop Garlic Confit
If you’re looking to take your roasted garlic experience to the next level, transforming this recipe into stovetop garlic confit is incredibly simple and yields even creamier, richer results:
- Select a medium saucepan and add enough oil to completely submerge all the garlic cloves. This is key for confit.
- Heat the oil over medium-low heat until it is hot but not smoking.
- Carefully add the peeled garlic cloves to the warm oil.
- Reduce the heat to its lowest setting, ensuring the oil is barely simmering – just a few tiny bubbles should be visible.
- Cook for an extended period, typically between 35-45 minutes, or until the garlic cloves are incredibly tender, creamy, and almost melt-in-your-mouth soft. They should be a pale golden color, not deeply browned.
This “low and slow” cooking method results in unbelievably creamy, plant-based buttery, mildly sweet garlic that often takes less time than traditional oven confit methods (which can sometimes require two hours or more!). It’s a truly gourmet treat that’s surprisingly easy to make.
Storage Solutions: Keeping Your Roasted Garlic Fresh
Proper storage is crucial to maintain the quality and safety of your homemade roasted garlic and infused oil. Always allow both the garlic cloves and the oil to cool completely before storing.
- Refrigeration:
- Store the roasted garlic cloves in an airtight container in the refrigerator for 3-5 days.
- Store the garlic-infused oil separately in an airtight container in the refrigerator for up to 2 weeks.
- Garlic Stored in Oil (Important Safety Note):
- If you choose to store the roasted garlic cloves submerged in the infused oil, it is absolutely essential to keep this mixture in an airtight container in the refrigerator at all times.
- Due to the risk of botulism, an anaerobic bacteria that can thrive in oil-submerged garlic at room temperature, it is strongly recommended to consume oil-submerged garlic within 7-10 days. While some sources may suggest slightly longer, for maximum safety, we advise caution and recommend consuming or freezing within this shorter timeframe. Always discard if you notice any signs of spoilage, off-odors, or mold.
- Freezing:
- Roasted garlic cloves, whether whole or mashed, freeze exceptionally well. This is an excellent way to extend their shelf life significantly.
- Mashed Method: Transfer mashed roasted garlic to a small freezer-safe Ziplock or Stasher bag. Flatten the bag to remove air, then freeze for up to 3 months. You can then easily break off pieces as needed for recipes.
- Portioning Method: Alternatively, portion the mashed or whole roasted garlic into a small ice-cube tray. Once frozen solid, transfer the cubes to a freezer-safe bag or container.
- Frozen roasted garlic doesn’t require extensive thawing and can often be added directly to hot dishes from frozen. Just be careful when adding directly to hot oil, as it may spit.
Unleash the Flavor: Creative Uses for Roasted Garlic and Infused Oil
Once you’ve tasted the tender, lightly caramelized sweetness of pan-roasted garlic or the creamy richness of garlic confit, you’ll find endless ways to incorporate it into your culinary repertoire. If you’re a garlic enthusiast like us, you’ll never run out of ideas!
Uses for Roasted Garlic Cloves (Whole or Mashed):
- Spreads: Mash and spread generously over any kind of bread – homemade sandwich bread, focaccia, garlic bread, crostini, or warm garlic naan.
- Pizza & Flatbreads: Dollop mashed roasted garlic onto pizzas and flatbreads before or after baking for an extra layer of flavor.
- Sandwiches & Wraps: Incorporate into sandwiches, paninis, vegan grilled cheese, and wraps for a rich, savory boost.
- Burgers: Spread over burgers (veggie or otherwise) for a gourmet touch.
- Garlic Butter: Combine with vegan butter and a pinch of salt for an instant, simple, and incredibly flavorful garlic butter.
- Dips & Spreads: Use in place of raw garlic in hummus, white bean dips, or other creamy spreads for a mellow, caramelized depth.
- Charcuterie Boards: A must-have addition to sharing boards, vegan cheese boards, or charcuterie boards.
- Mashed Potatoes: Mash into creamy mashed potatoes for an unforgettable side dish.
- Sauces: Blend into this 5-minute creamy garlic sauce, or use as a base for other creamy sauces.
- Dressings: Add to dressings (like this lemon dressing) and uncooked sauces for a more subdued, less aggressive garlic flavor than raw garlic.
- Pasta Dishes: Mix into pasta salads or hot pasta dishes. It’s a fantastic addition to any of these 20 vegan pasta dishes.
- Vegetables: Mix into sautéed or roasted vegetable dishes, especially roasted tomatoes, green beans, or asparagus.
Uses for Garlic-Infused Oil:
- Cooking Oil: Use it as your primary cooking oil for sautéing vegetables, frying eggs, or searing tofu.
- Dipping Oil: A fantastic dip for bread, either on its own or with a sprinkle of herbs and red pepper flakes.
- Dressings & Marinades: Whisk into salad dressings, marinades for vegetables or proteins, or vinaigrettes.
- Drizzle: Drizzle over finished soups, salads, grilled veggies, or pasta dishes just before serving for a burst of aromatic flavor.
- Hummus & Dips: Blend into homemade hummus or other dips to add an extra layer of garlicky goodness.
Frequently Asked Questions (FAQs) About Roasted Garlic
- What is the difference between sautéed and pan-roasted garlic?
Sautéed garlic is typically cooked quickly over higher heat for 30-60 seconds, primarily to remove the raw “edge” and slightly mellow its flavor. If sautéed too long or at too high a heat, it can become bitter. Pan-roasted garlic, on the other hand, is cooked slowly and gently in oil over low heat, allowing it to become incredibly tender, creamy, and sweet, completely transforming its flavor and texture into a “vegan buttery” delight.
- How can I utilize the leftover garlic-infused oil?
The infused oil is a true culinary gem! Use it as a fragrant base for cooking, a delicious dipping oil for bread, an aromatic addition to salad dressings and vinaigrettes, or stirred into various sauces and dips like hummus to add a subtle garlic undertone.
- Can I make pan-roasted garlic without oil? (Oil-Free Method)
Yes, an oil-free method exists, though it produces a slightly different result. For this, you would use a small pan with a lid and leave the garlic cloves unpeeled. Heat the pan over medium heat, add the unpeeled garlic cloves, cover with the lid, and cook for about 10-15 minutes, shaking the pan occasionally to ensure even cooking. The peels will likely blacken and appear burnt, but the garlic within should be tender and mellow. It won’t achieve the same creamy, caramelized texture as garlic roasted in oil, but it’s a viable alternative.
- Is it possible to roast minced garlic?
While the goal of roasting is usually whole, tender cloves, you can certainly roast minced garlic. Use a very small amount of oil, just enough to lightly coat the minced garlic in a small saucepan. Cook over very low heat until it turns golden brown and softens, which will take approximately 5-10 minutes. Watch it closely, as minced garlic burns much faster than whole cloves.
- How do I make traditional oven-roasted garlic?
The classic oven method typically uses whole heads of garlic. Begin by slicing off the top inch from a whole head of garlic to expose the cloves. Drizzle the exposed cloves generously with olive oil. Place the garlic bulb in a foil packet (or parchment paper parcel) on a baking sheet. Roast in a preheated oven at 350°F (175°C) for 40-50 minutes. For extra caramelization, you can open the foil packet for the last 10 minutes of roasting. Once cooled, the soft, sweet cloves can be easily squeezed from their skins.
- What’s the quickest way to roast garlic? (Microwave Method)
For the absolute fastest roasted garlic, the microwave is your friend. Slice off the top of a whole garlic head. Place it in a small microwave-safe dish with a few tablespoons of water and a generous drizzle of oil. Cover the dish with plastic wrap or a lid. Microwave at 50% power in 2 ½ minute increments until the garlic is tender. This method yields tender, mellow garlic, though it won’t achieve the same level of caramelization or browning as stovetop or oven roasting.
- Can I roast individual cloves of garlic in the oven?
Yes, you can roast individual peeled garlic cloves in the oven! Toss them with a little oil, salt, and pepper, then wrap them loosely in a small foil or parchment paper parcel. Roast at 375°F (190°C) for about 20-30 minutes, or until tender and golden.
Expert Tips for Roasting Garlic Success
Achieving perfectly roasted garlic, whether on the stovetop or otherwise, comes down to a few key techniques. Keep these tips in mind for consistently delicious results:
- Master the Heat: Avoid Boiling! The most crucial rule for stovetop roasting (and confit) is to maintain a very low simmer. If the oil boils rapidly, the garlic can burn, become tough, or even develop a bitter flavor. Aim for tiny, gentle bubbles around the cloves.
- Prioritize Safe Storage: We cannot stress this enough – proper storage is vital. Always ensure your roasted garlic cloves and infused oil are stored in the refrigerator. If storing garlic submerged in oil, be extra cautious and adhere strictly to the recommended 7-10 day refrigeration limit due to the risk of botulism. When in doubt, freeze it or store garlic and oil separately.
- Trim for Best Flavor: To prevent any potential bitterness and ensure the best texture, always trim off the tough, root end from each garlic clove before roasting.
- Achieve a Super Smooth Purée: For an incredibly smooth, spreadable roasted garlic purée, transfer the cooled quick-roasted garlic cloves (draining excess oil if preferred) to a food processor or blender. Process until completely smooth. You can add a tablespoon or two of the infused oil or a splash of water to help achieve the desired consistency.
- Infuse with Fresh Herbs: The garlic-infused oil is a perfect canvas for additional flavors. While the garlic roasts, consider adding fresh herbs like sprigs of rosemary or thyme, whole oregano leaves, or a pinch of chili flakes to the oil. These will gently infuse their flavors, creating an even more complex and aromatic oil for later use.
- Don’t Rush the Cooling: Allowing the garlic to cool slowly in the oil helps it absorb more flavor and retain its tenderness.
- Season Simply: A pinch of flaky sea salt after roasting is often all that’s needed to enhance the natural sweetness of the roasted garlic.
More Ways to Enjoy Garlic
If this pan-roasted garlic has ignited your love for this incredible ingredient, explore these other delicious garlic-centric recipes:
- Creamy 5-Minute Garlic Sauce
- Easy Golden Garlic Rice
- Refrigerator Garlic Dill Pickles
- Garlic and Thyme Mushrooms
- Garlic Ginger Soup
- Oven-Baked Garlic Parsley Fries
- Lemon Garlic Quinoa with White Beans and Olives
- Garlic, Spinach, and Pepper Polenta Pie
Photos by Alfonso Revilla
How to Roast Garlic In A Pan (+ Stove top Garlic Confit)
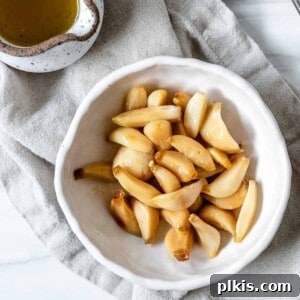
Ever made your own Stovetop Roasted Garlic before? It’s just another method of getting that sweet, mellow, roasted garlic flavor without heating up your whole house. As a bonus, you have flavorful garlic-infused oil left over.
Recipe Details
- Prep Time: 5 minutes
- Cook Time: 15 minutes
- Total Time: 20 minutes
- Yields: 25 cloves
- Course: Spices, Toppings
- Cuisine: American
- Method: Stovetop
- Diet: Vegan
Equipment
- Measuring Cups
- Small Saucepan
Ingredients
- 25 whole cloves garlic, peeled (about 2-3 heads)
- ½ cup olive oil (or other neutral cooking oil)
Instructions
- Prepare the garlic by peeling all cloves.
- Combine the peeled garlic cloves and olive oil in a small saucepan.
- Place the saucepan over medium heat and bring the oil to a very low simmer. Do not allow it to boil vigorously.
- Continue cooking for approximately 15 minutes, or until the garlic cloves have softened significantly and turned a beautiful golden color.
- Remove the saucepan from the heat and allow the garlic to cool slightly in the oil.
- Once cool enough to handle, remove the garlic cloves from the oil to gently mash them with a fork, or mash them directly into the oil for a scrumptious spread.
- Note: Save the leftover garlic-infused oil! It adds a wonderfully fragrant taste to all savory dishes and can be stored separately in the refrigerator.
Nutrition (Per Clove)
- Calories: 43 kcal
- Carbohydrates: 1g
- Protein: 1g
- Fat: 4g
- Saturated Fat: 1g
- Polyunsaturated Fat: 1g
- Monounsaturated Fat: 3g
- Sodium: 1mg
- Potassium: 12mg
- Fiber: 1g
- Sugar: 1g
- Vitamin A: 1 IU
- Vitamin C: 1mg
- Calcium: 5mg
- Iron: 1mg
Tried this recipe? Please tag us at @PlantBasedOnABudget! We love to see your creations! 🙂